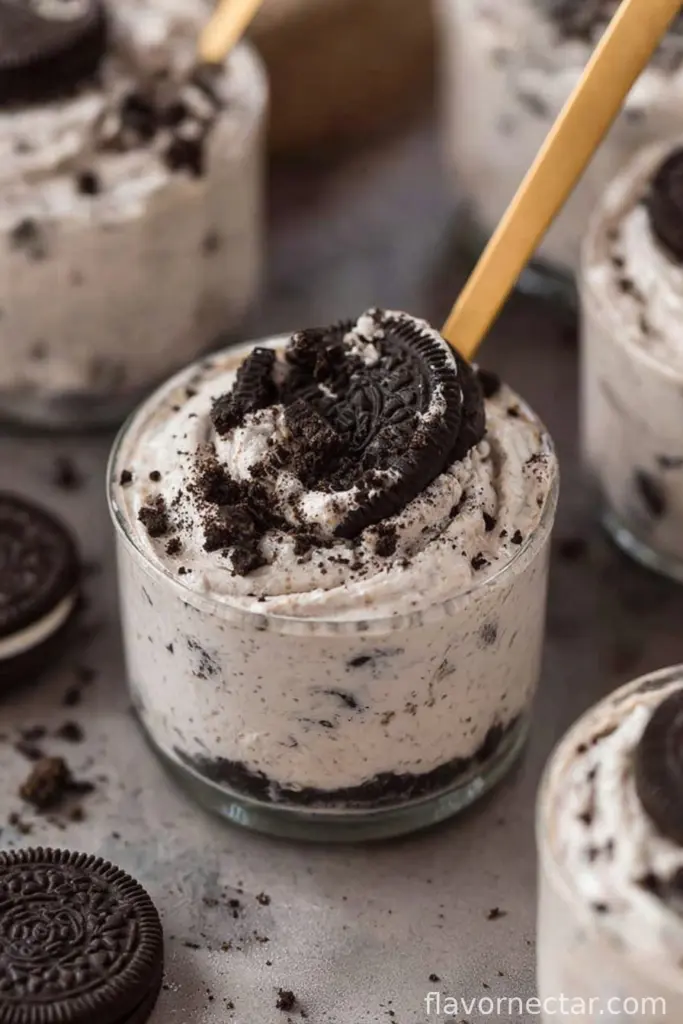
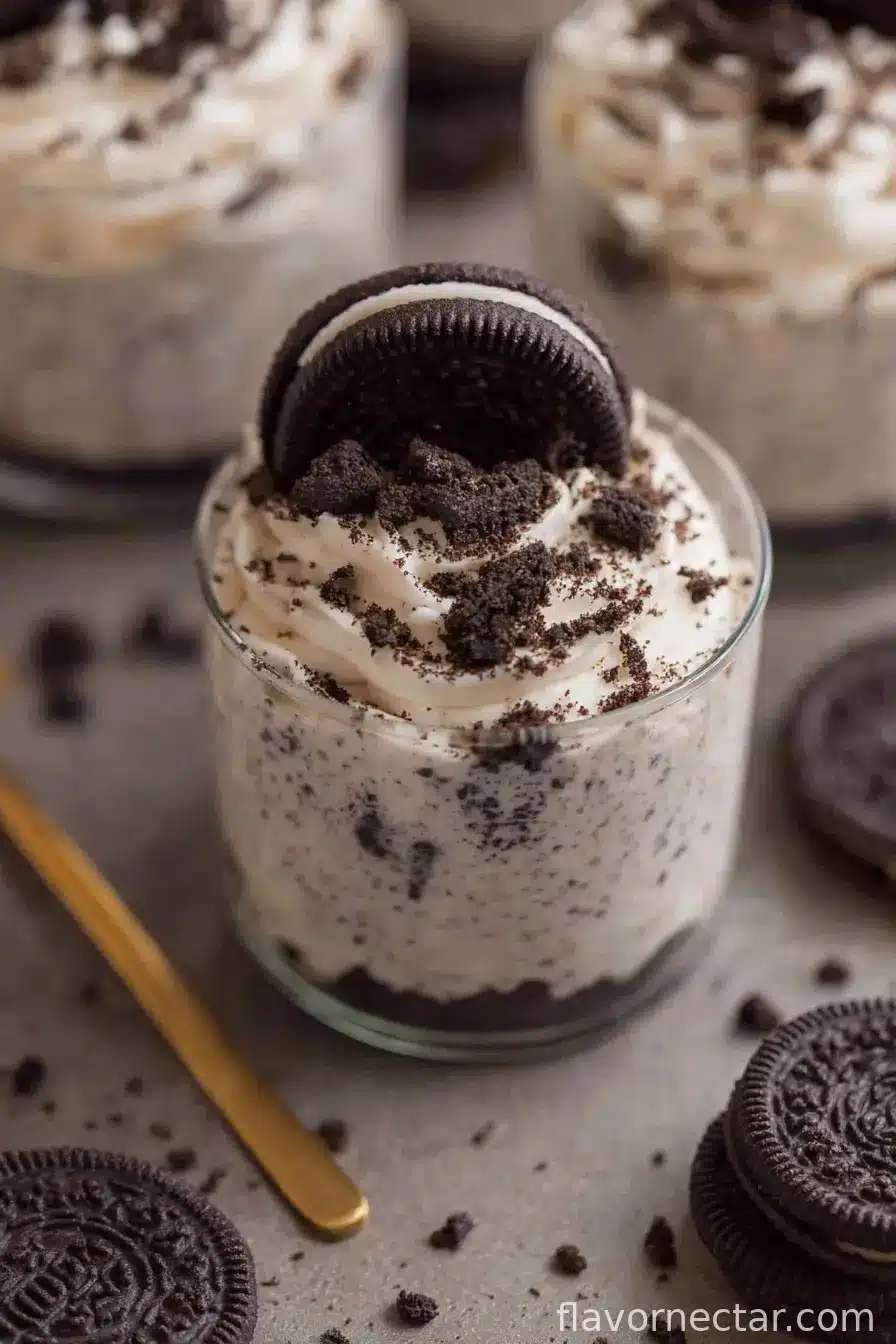
My Ridiculously Easy No-Bake Oreo Cheesecake Cups (A Love Story)
Alright, so you know those weeknights where you want something sweet, but honestly, the idea of even pre-heating the oven makes you sigh? That’s when I reach for this recipe. Look, Oreo Cheesecake has always been my sister’s favorite (I think it’s mostly an excuse for her to eat four at a time, but I’m not judging). I remember once fighting my brother for the last cup, and let’s just say things got heated—luckily, these are so quick to put together, round two was only 30 minutes away! If you’ve ever, I dunno, secretly licked the cheesecake batter off the spoon, then buddy, this one’s for you. And hey, if you’re reading this in your pajamas at ten at night, no judgment. Been there, crumbs and all.

Why You’ll Love This Unfussy Treat
I make these No-Bake Oreo Cheesecake Cups when I either don’t want to turn the oven on (especially in summer) or when the craving hits and I’m honestly feeling impatient—waiting for cheesecake to bake and cool just isn’t going to happen. My family goes crazy for this because it’s creamy, a bit crunchy at the bottom, and it looks super cute in little glasses. (Honestly, you could just eat it out of a bowl if you want. I won’t tell!) Plus, you don’t have to mess with eggs, water baths, or prayers to the baking gods. Actually, the worst that’s ever happened was when I only had off-brand sandwich cookies, but it turns out, nobody noticed.
What You’ll Need (Substitutions & Real Talk)
- 20 Oreo cookies (plus maybe a few extra for, you know, snacking—I sometimes use chocolate digestive biscuits if I’m inexplicably out of Oreos. My grandma always insisted on the classic black-and-white ones, but honestly, any similar cookie is fine.)
- 3 tbsp unsalted butter, melted (Honestly, salted works too if that’s all you’ve got—just skip a pinch of extra salt.)
- 8 oz (225g) cream cheese, full-fat and softened (Low-fat is okay in a pinch, but it’s just not the same—don’t say I didn’t warn you!)
- 1/2 cup (60g) powdered sugar (I eyeball it sometimes, but let’s say half a cup for the record.)
- 1 tsp vanilla extract (or a splash more if you’re feeling wild)
- 1 cup (240ml) heavy whipping cream (Whipping cream gives it the best texture, but I’ve used double cream when I’m in the UK visiting family—works great!)
- Pinch of salt (unless you used salted butter)
How To Make These Little Dreamboats
- Crush 16 of the Oreos into fine crumbs (I just stick them in a zip-top bag and bash them with a rolling pin—good therapy! You can use a food processor, but sometimes it’s just more fun my way.)
- Pour the melted butter over your crushed Oreo crumbs in a bowl and stir till it’s evenly combined. (If it looks a little too sandy, add a tiny hit more butter, no biggie.)
- Scoop heaping spoonfuls of the Oreo mixture into the bottom of 6-8 small cups or jars. No need to be too fussy—just press down gently with the back of a spoon. Set them aside while you make the filling (or stick them in the fridge if your kitchen is roasting, like mine always is in July).
- In a mixing bowl, beat the softened cream cheese with powdered sugar and vanilla till it’s super smooth—this is where I usually sneak a taste (quality control, right?).
- In a separate bowl, whip the cream till you get soft peaks. Then, gently fold the whipped cream into your cream cheese mixture. Don’t whack it all together too hard—light hands will keep it fluffy (I was too aggressive once, and it ended up kinda runny—so go easy!).
- Chop up the remaining 4 Oreos roughly and fold most of them into the cheesecake filling. Save a little for the top, unless you eat them first, which, honestly, I do a lot.
- Spoon the cheesecake filling over the Oreo bases in your cups. Use the back of the spoon to smooth the tops (though perfection is overrated if you ask me).
- Sprinkle the rest of your chopped Oreos on top. Pop the cups in the fridge for 2-4 hours to set up a bit. If you’re impatient—like my youngest—you can eat them straight away; it’ll just be softer and more pudding-like.
Notes I Learned The Hard Way
- If you take the butter straight from the microwave (super hot), let it cool off a sec or your crust might weirdly separate. Or maybe that’s just my luck.
- Don’t skip the chilling step (unless you’re absolutely desperate for dessert right this second). It firms everything up perfectly.
- I think this actually tastes better on day two, when the Oreos have softened up a bit—but it rarely lasts that long, so that’s my little dream.
Variations That Actually (Mostly) Worked
- I swapped in Biscoff cookies and a splash of cinnamon one time—turned out amazing, though my brother complained it “wasn’t Oreo-y enough.”
- A friend threw some mini peanut butter cups into the mix. Pretty ridiculous, but I’m not mad about it.
- I once tried adding lemon zest for some zing, but honestly, lemon + Oreos wasn’t for me. Maybe you’ll love it, though!
Equipment You Actually Need (And What To Do If You Don’t Have It)
- Mixing bowl (or just a big-ish salad bowl, been there)
- Electric mixer or a ton of elbow grease—I’ve whipped cream with a plain old whisk in a pinch, but my arm did threaten to fall off
- Zip-top bag and rolling pin for cookie smashing (a can of beans works too—no shame)
- Cups or small jars—I’ve even used little glasses meant for whiskey and nobody’s complained
How To Store—But Honestly, Good Luck Having Leftovers
Pop these in the fridge covered (plastic wrap over the tops does fine), where they’ll keep for a couple days. In my house, they barely make it through the evening, but if you have iron willpower, you’ll find they taste even better the next day as the flavors meld. I wouldn’t freeze them, though—it sort of ruins the creamy texture. Learned that one the slippery way.
How I Like To Serve These—Your Turn To Get Creative
I usually top each cup with a dollop of whipped cream and one of those mini Oreos (if the kids haven’t eaten them straight out of the bag already). Sometimes I scatter colorful sprinkles if I want to pretend it’s a party (even if it’s just me and a mug of tea). My cousin dunks strawberries in hers—can’t say I get it, but she swears by it.
My Hard-Earned Pro Tips
- I once tried to use chilled cream cheese—it just ended up lumpy and sad. Softening is key. Trust me, waiting a few extra minutes beats battling cold blocks.
- If you rush the whipping step or just dump all the filling into the cups without smoothing, it’ll still taste great but it won’t look half as cute. Consider yourself warned!
FAQ: Real Questions From Real (and one Hungry) Friends
-
Q: Can I make this with gluten-free cookies?
A: Yup! I’ve done it for my mate who’s gluten-free and it turned out just as good. You might need two extra cookies since GF ones are a bit smaller. -
Q: What if I don’t have a mixer?
A: You can totally whip the cream with a hand whisk—just takes a bit more effort. Play your favourite music and consider it arm day. -
Q: Can I make these ahead of time?
A: Yes! Actually, I think they taste better the next day (if you can keep your hands off’em). -
Q: Do I have to use cups?
A: Nope, bowls or jars or even a big trifle dish is fine. Just means the portions’ll be less adorable. -
Q: Will it taste okay with low-fat cream cheese?
A: Look, it’ll work, but it won’t be as rich. Sometimes I use it to lighten things up, but if you’re going for indulgence, full-fat is the answer.
One last thing: don’t be put off if it looks different from mine; half the fun’s in making it your own. Happy no-baking—and don’t forget to sneak a cookie (or three) while you’re at it.
Ingredients
- 20 Oreo cookies (plus maybe a few extra for snacking—I sometimes use chocolate digestive biscuits if I’m out of Oreos)
- 3 tbsp unsalted butter, melted (salted works too—just skip extra salt)
- 8 oz (225g) cream cheese, full-fat and softened
- 1/2 cup (60g) powdered sugar
- 1 tsp vanilla extract
- 1 cup (240ml) heavy whipping cream
- Pinch of salt (unless you used salted butter)
Instructions
-
1Crush 16 of the Oreos into fine crumbs (I just stick them in a zip-top bag and bash them with a rolling pin—good therapy! You can use a food processor, but sometimes it’s just more fun my way.)
-
2Pour the melted butter over your crushed Oreo crumbs in a bowl and stir till it’s evenly combined. (If it looks a little too sandy, add a tiny hit more butter, no biggie.)
-
3Scoop heaping spoonfuls of the Oreo mixture into the bottom of 6-8 small cups or jars. No need to be too fussy—just press down gently with the back of a spoon. Set them aside while you make the filling (or stick them in the fridge if your kitchen is roasting, like mine always is in July).
-
4In a mixing bowl, beat the softened cream cheese with powdered sugar and vanilla till it’s super smooth—this is where I usually sneak a taste (quality control, right?).
-
5In a separate bowl, whip the cream till you get soft peaks. Then, gently fold the whipped cream into your cream cheese mixture. Don’t whack it all together too hard—light hands will keep it fluffy (I was too aggressive once, and it ended up kinda runny—so go easy!).
-
6Chop up the remaining 4 Oreos roughly and fold most of them into the cheesecake filling. Save a little for the top, unless you eat them first, which, honestly, I do a lot.
-
7Spoon the cheesecake filling over the Oreo bases in your cups. Use the back of the spoon to smooth the tops (though perfection is overrated if you ask me).
-
8Sprinkle the rest of your chopped Oreos on top. Pop the cups in the fridge for 2-4 hours to set up a bit. If you’re impatient—like my youngest—you can eat them straight away; it’ll just be softer and more pudding-like.
CLICK FOR NUTRITION INFO
↑
Approximate Information for One Serving
Serving Size:
1 serving
Calories:
420 caloriescal
Protein:
4gg
Fat:
30gg
Saturated Fat:
0g
Trans Fat:
0g
Cholesterol:
0mg
Sodium:
0mg
Potassium:
0mg
Total Carbs:
36gg
Fiber:
0g
Sugar:
0g
Net Carbs:
0g
Vitamin A:
0
Vitamin C:
0mg
Calcium:
0mg
Iron:
0mg
Nutrition Disclaimers
Number of total servings shown is approximate. Actual number of servings will depend on your preferred portion sizes.
Nutritional values shown are general guidelines and reflect information for 1 serving using the ingredients listed, not including any optional ingredients. Actual macros may vary slightly depending on specific brands and types of ingredients used.
To determine the weight of one serving, prepare the recipe as instructed. Weigh the finished recipe, then divide the weight of the finished recipe (not including the weight of the container the food is in) by the desired number of servings. Result will be the weight of one serving.
Did you make this recipe?
Please consider Pinning it!