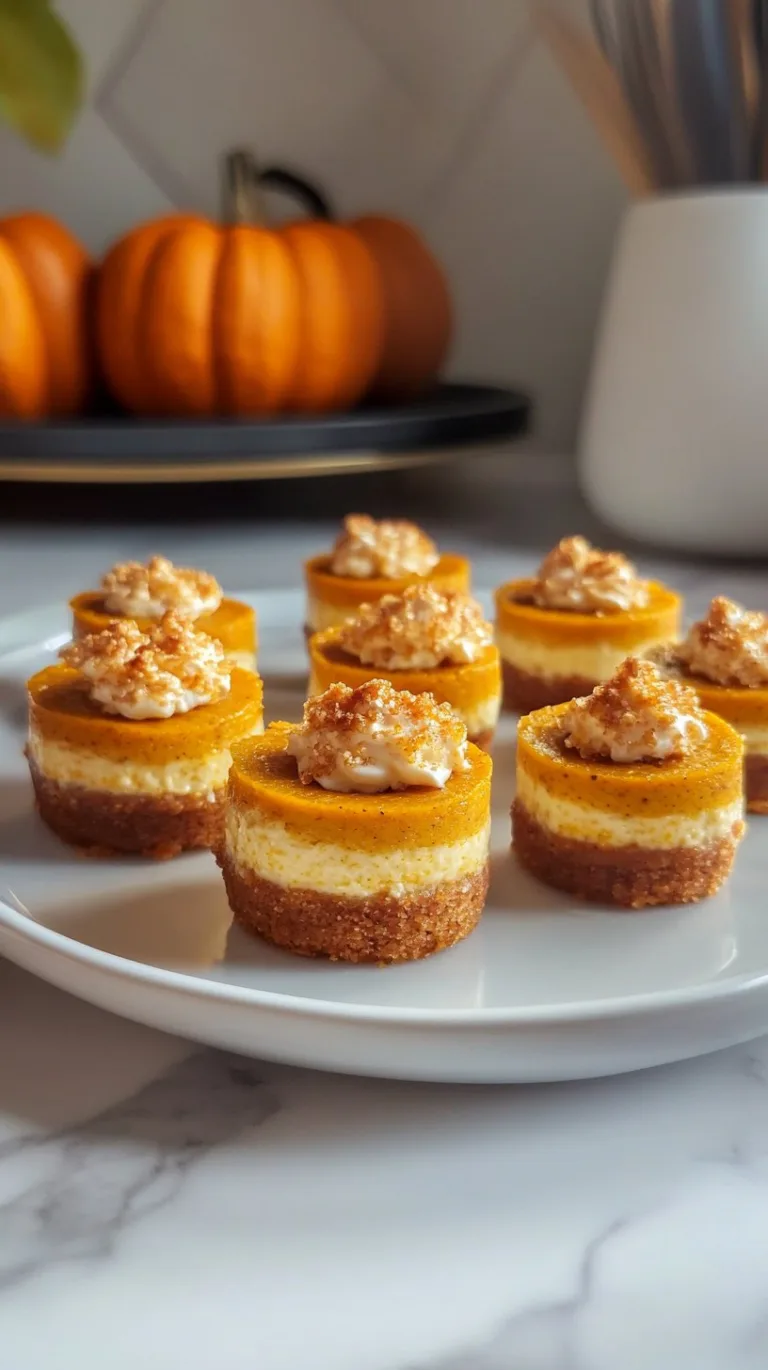
Let Me Tell You About Mini Cheesecake Cups
So, there was this one Tuesday (I think it was raining) when I realized I’d completely forgotten it was my turn to bring dessert to book club. All I had was some cream cheese, a pack of cookies, and—if I’m being honest—a desperate wish for something idiot-proof and impressive. That’s how these Mini cheesecake Cups first happened in my kitchen. Now everyone thinks I’m a cheesecake wizard, but really I just stumbled into genius that day! I’ve tinkered since, and honestly, these li’l nuggets have saved my bacon more times than I can count. (And I’ve eaten, well, a few too many during ‘taste testing.’)
Why You’ll Love Making These
I make these whenever I need dessert in a hurry or just want a treat that disappears fast (but not as fast as my willpower). My family goes bananas for them because they’re just so dinky and cute—plus, you get a whole cheesecake to yourself. Not gonna lie, sometimes I make a batch “by accident” just for late-night snacking and call it recipe research. Oh, and if you’ve ever wrestled with a springform pan and lost, rejoice! No drama, no fuss—just sweet creamy bites.
What You’ll Need (aka Ingredients)
- 12 vanilla wafer cookies (I’ve used graham crackers crumbled up in a pinch – also tasty!)
- 2 (8 oz) blocks cream cheese, softened – I won’t tell if you use the light version
- 1/2 cup white sugar (sometimes I do slightly less if I’m feeling virtuous)
- 2 large eggs (don’t panic if yours are medium-sized, it’s fine)
- 1 teaspoon vanilla extract (my grandmother swears by the fancy stuff, I just use whatever’s on hand)
- Pinch of salt (seriously, just a tiny one – it matters more than you’d think)
- 1/4 cup sour cream (or Greek yogurt if you’re out, trust me, works great)
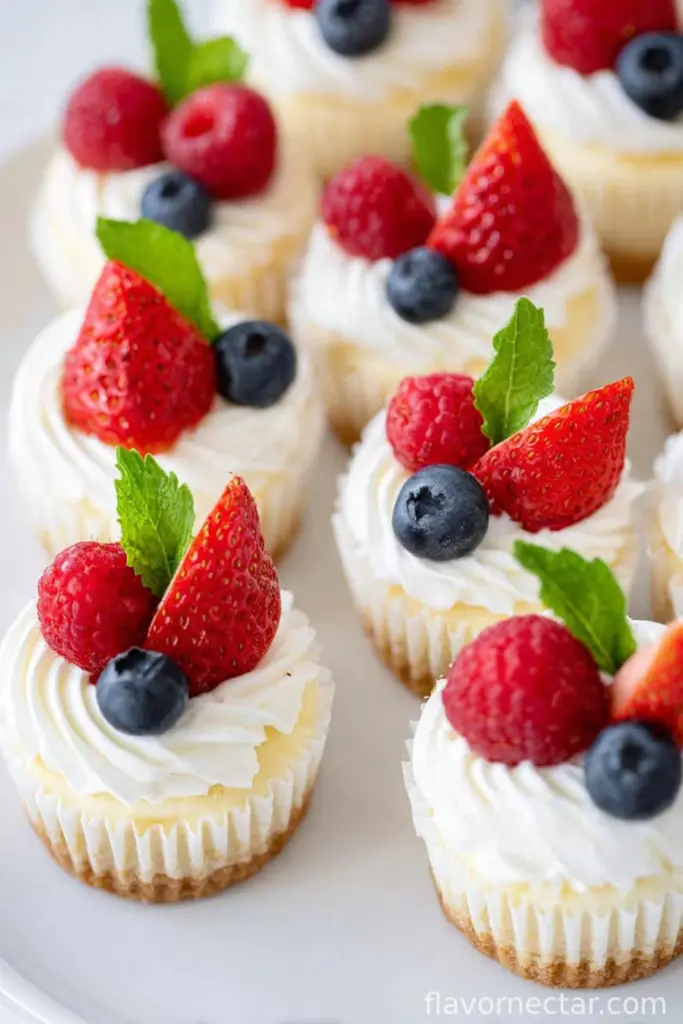
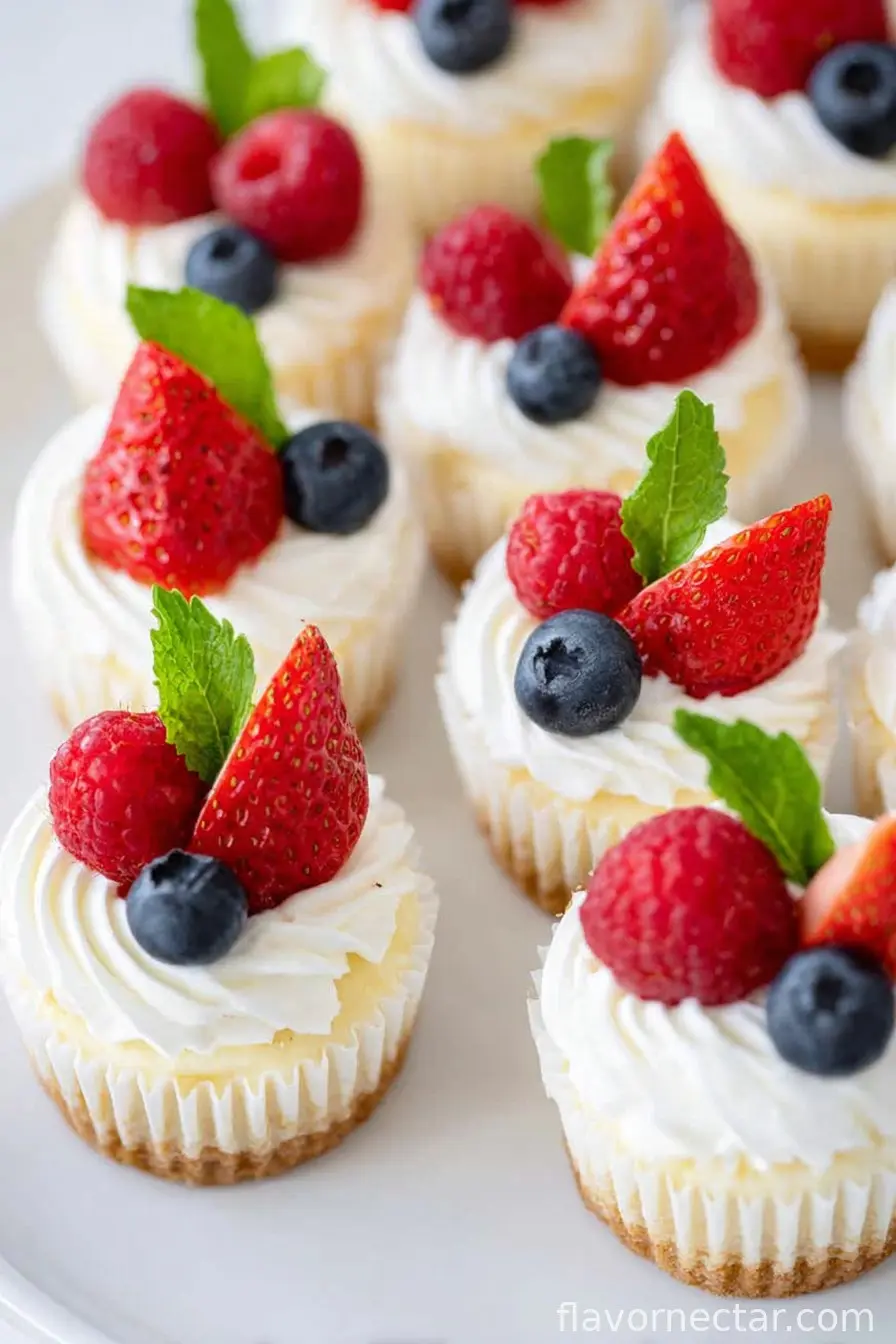
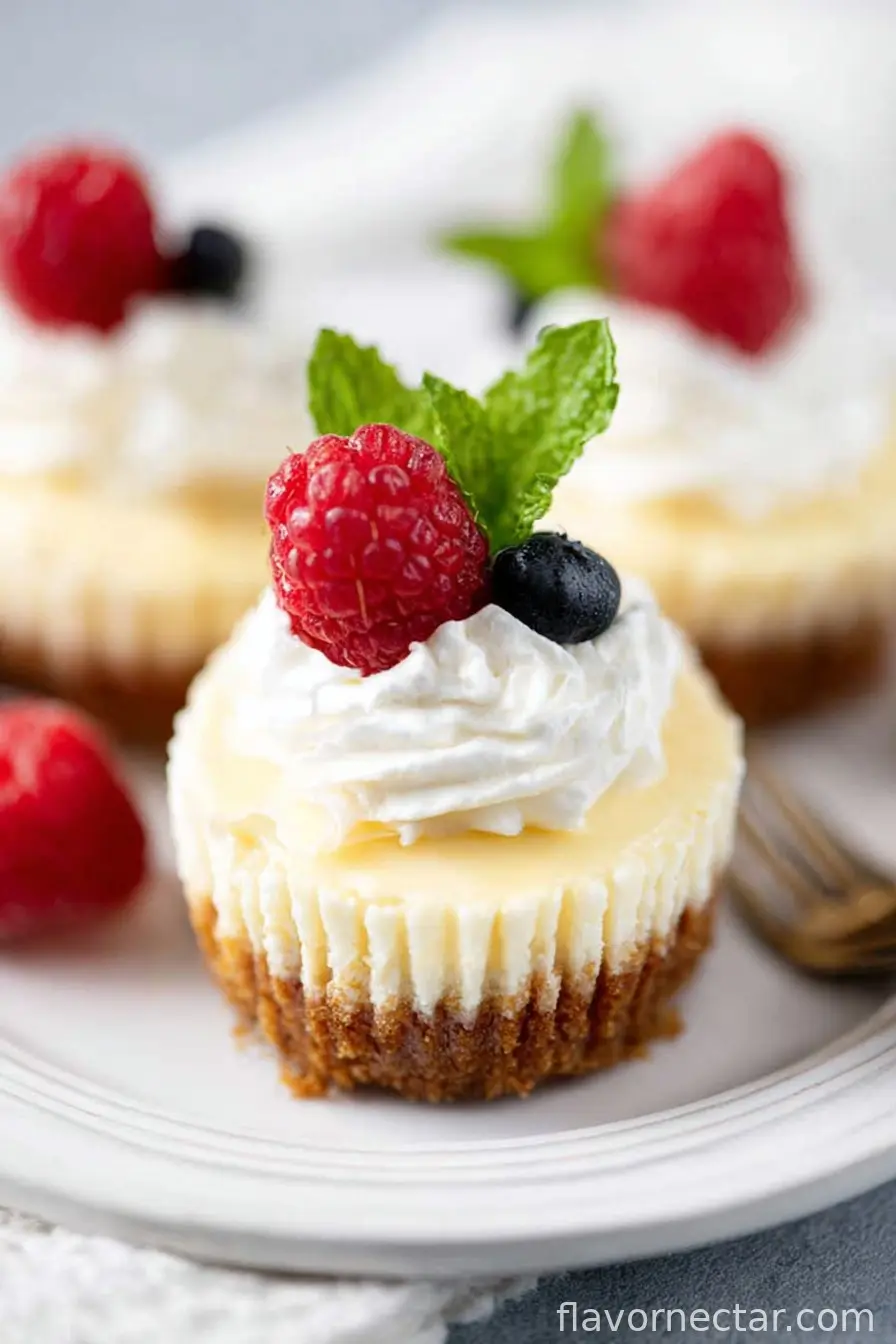
- Fruit or jam for topping – strawberries, blueberries, or honestly, whatever looks good (chocolate shavings if I’m feeling extra)
How to Make Mini Cheesecake Cups (Very Chill Directions)
- Preheat your oven to 325°F (160°C) and line a muffin tin with 12 paper liners. Or skip the liners if you like to live dangerously, but it does make cleanup a hassle. (Guess how I know?)
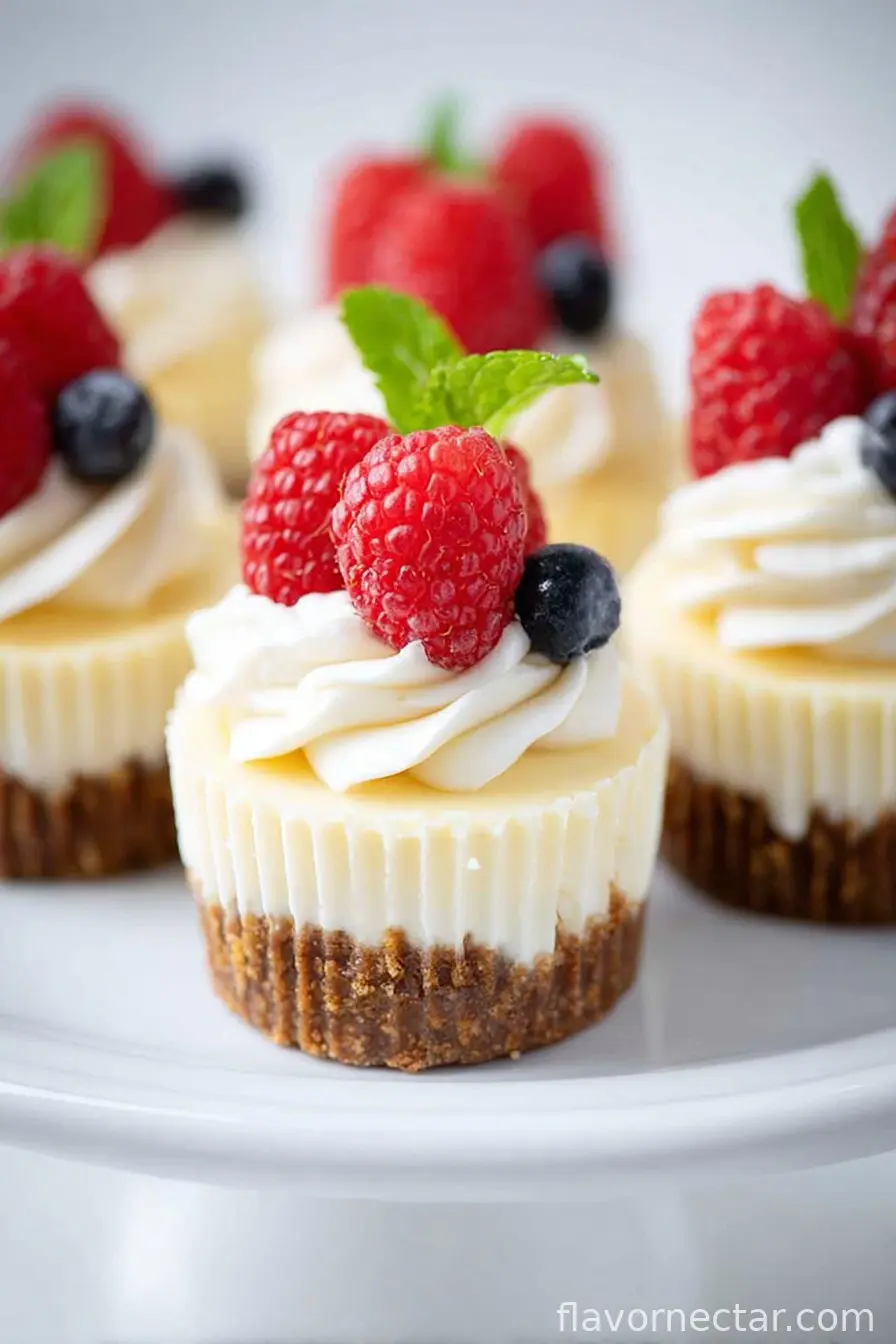
- Drop one vanilla wafer in the bottom of each cup. Some people crush theirs first, but honestly, you don’t need to – the oven works magic.
- In a big-ish bowl, mix the softened cream cheese and sugar together until it’s nice and smooth. I just use a hand mixer, but if you only have a spoon and strong arms, that’ll do the trick, too.
- Add eggs, one at a time, beating gently after each (don’t go wild, just until blended – unless you’re chasing out some stress from your day, in which case, have at it).
- Stir in vanilla, salt, and sour cream. If you’re using Greek yogurt, maybe sneak a taste here just out of curiosity. The batter should look creamy and dreamy, not runny.
- Spoon the mixture evenly over the cookies in your muffin cups. I use a 1/4 cup measure but do whatever works (eyeballing is a legit method).
- Bake for 18-22 minutes until they’re just set in the center. They might wobble a little – that’s fine. Actually, it’s perfect. Don’t overbake or you’ll get little cheesecakes with personality (a.k.a. cracks).
- Let them cool in the pan for about 10 minutes (or however long until you can touch them without saying words your grandma wouldn’t appreciate), then transfer to the fridge to chill at least an hour. Or two, if you can resist.
- Top with fruit, jam, or whatever makes your heart sing. I lean toward messy heaps of berries, but no judgement if you go full chocolate drizzle.
A Few Notes (Lessons from the Trenches)
- If you forget to soften the cream cheese, zap it in the microwave for 10-20 seconds – just don’t melt it into a puddle (don’t ask how I know).
- Greek yogurt really does work in place of sour cream, maybe even better? You can’t mess it up unless you really try.
- Don’t stress about cracks – just pile fruit on top, and nobody’s the wiser.
Fun Variations I’ve Tried (and One That Flopped)
- Swapping vanilla wafers for chocolate cookies turns them into a whole new dessert (my nephew thinks it’s magic).
- Lemon zest in the batter gives it a zingy kick—I’m into it, but my mum isn’t.
- Once, I attempted a peanut butter swirl, but it got weirdly dense. Wouldn’t recommend unless you know something I don’t!
What If I Don’t Have…? (Equipment Chat)
You really just need a muffin tin. If you don’t have one, I’ve done this using little ramekins set on a baking tray—just grease them well. Or borrow form a neighbor; instant small talk starter.
How To Store (If They Last That Long)
Keep them in the fridge, covered, for up to 4 days. But, uh, realistically, they’ll vanish way sooner. I’ve never seen a batch in my house make it past Day 2.
How I Like to Serve (Just an Idea)
Handing everyone their own mini cheesecake is just fun – great for parties, obviously. At family dinners, I serve them with a sprinkle of cinnamon sometimes, but my sister always demands more fruit. Oh! Occasionally we do a cheesecake topping bar; that went over a treat.
Pro Tips (Mostly Learned The Hard Way)
- I once tried to rush the chilling time… do not recommend. You’ll get melty cheesecake goop instead of cute cups.
- Don’t overmix the batter. I used to, thinking smoother = better, but actually, it just makes them dense.
Mini FAQ (Real People, Real Questions)
- Can I freeze these cheesecakes? Sure thing – individually wrap ‘em, then freeze. Thaw in the fridge. (They’re great for emergencies. Or midnight snacks.)
- Help! My cheesecakes sank in the middle. Happens to the best of us. They’ll taste fab, just add more toppings and call it rustic.
- Do I really need liners? Well, life’s easier with them. But if you’re brave, just oil the muffin pan really well. You might need a sharp knife to help them out.
- Can I make these ahead? Absolutely! They’re actually better the second day, kinda like cold pizza (but, you know, cheesecake).
- What if I don’t have sour cream? Use Greek yogurt. Or skip entirely and add a tablespoon of milk. It’ll work, promise!
Quick Detour: My Cat’s Unhelpful Assistance
This is unrelated, but I swear every time I make these, my cat tries to swipe a vanilla wafer. Maybe that’s the real secret topping? Anyway, watch your ingredients if you have a feline sous-chef!
Ingredients
- 12 vanilla wafer cookies (I’ve used graham crackers crumbled up in a pinch – also tasty!)
- 2 (8 oz) blocks cream cheese, softened – I won’t tell if you use the light version
- 1/2 cup white sugar (sometimes I do slightly less if I’m feeling virtuous)
- 2 large eggs (don’t panic if yours are medium-sized, it’s fine)
- 1 teaspoon vanilla extract (my grandmother swears by the fancy stuff, I just use whatever’s on hand)
- Pinch of salt (seriously, just a tiny one – it matters more than you’d think)
- 1/4 cup sour cream (or Greek yogurt if you’re out, trust me, works great)
- Fruit or jam for topping – strawberries, blueberries, or honestly, whatever looks good (chocolate shavings if I’m feeling extra)
Instructions
-
1Preheat your oven to 325°F (160°C) and line a muffin tin with 12 paper liners. Or skip the liners if you like to live dangerously, but it does make cleanup a hassle. (Guess how I know?)
-
2Drop one vanilla wafer in the bottom of each cup. Some people crush theirs first, but honestly, you don’t need to – the oven works magic.
-
3In a big-ish bowl, mix the softened cream cheese and sugar together until it’s nice and smooth. I just use a hand mixer, but if you only have a spoon and strong arms, that’ll do the trick, too.
-
4Add eggs, one at a time, beating gently after each (don’t go wild, just until blended – unless you’re chasing out some stress from your day, in which case, have at it).
-
5Stir in vanilla, salt, and sour cream. If you’re using Greek yogurt, maybe sneak a taste here just out of curiosity. The batter should look creamy and dreamy, not runny.
-
6Spoon the mixture evenly over the cookies in your muffin cups. I use a 1/4 cup measure but do whatever works (eyeballing is a legit method).
-
7Bake for 18-22 minutes until they’re just set in the center. They might wobble a little – that’s fine. Actually, it’s perfect. Don’t overbake or you’ll get little cheesecakes with personality (a.k.a. cracks).
-
8Let them cool in the pan for about 10 minutes (or however long until you can touch them without saying words your grandma wouldn’t appreciate), then transfer to the fridge to chill at least an hour. Or two, if you can resist.
-
9Top with fruit, jam, or whatever makes your heart sing. I lean toward messy heaps of berries, but no judgement if you go full chocolate drizzle.
CLICK FOR NUTRITION INFO
↑
Approximate Information for One Serving
Serving Size:
1 serving
Calories:
185 caloriescal
Protein:
4gg
Fat:
12gg
Saturated Fat:
0g
Trans Fat:
0g
Cholesterol:
0mg
Sodium:
0mg
Potassium:
0mg
Total Carbs:
17gg
Fiber:
0g
Sugar:
0g
Net Carbs:
0g
Vitamin A:
0
Vitamin C:
0mg
Calcium:
0mg
Iron:
0mg
Nutrition Disclaimers
Number of total servings shown is approximate. Actual number of servings will depend on your preferred portion sizes.
Nutritional values shown are general guidelines and reflect information for 1 serving using the ingredients listed, not including any optional ingredients. Actual macros may vary slightly depending on specific brands and types of ingredients used.
To determine the weight of one serving, prepare the recipe as instructed. Weigh the finished recipe, then divide the weight of the finished recipe (not including the weight of the container the food is in) by the desired number of servings. Result will be the weight of one serving.
Did you make this recipe?
Please consider Pinning it!