Let Me Tell You About These Cookies…
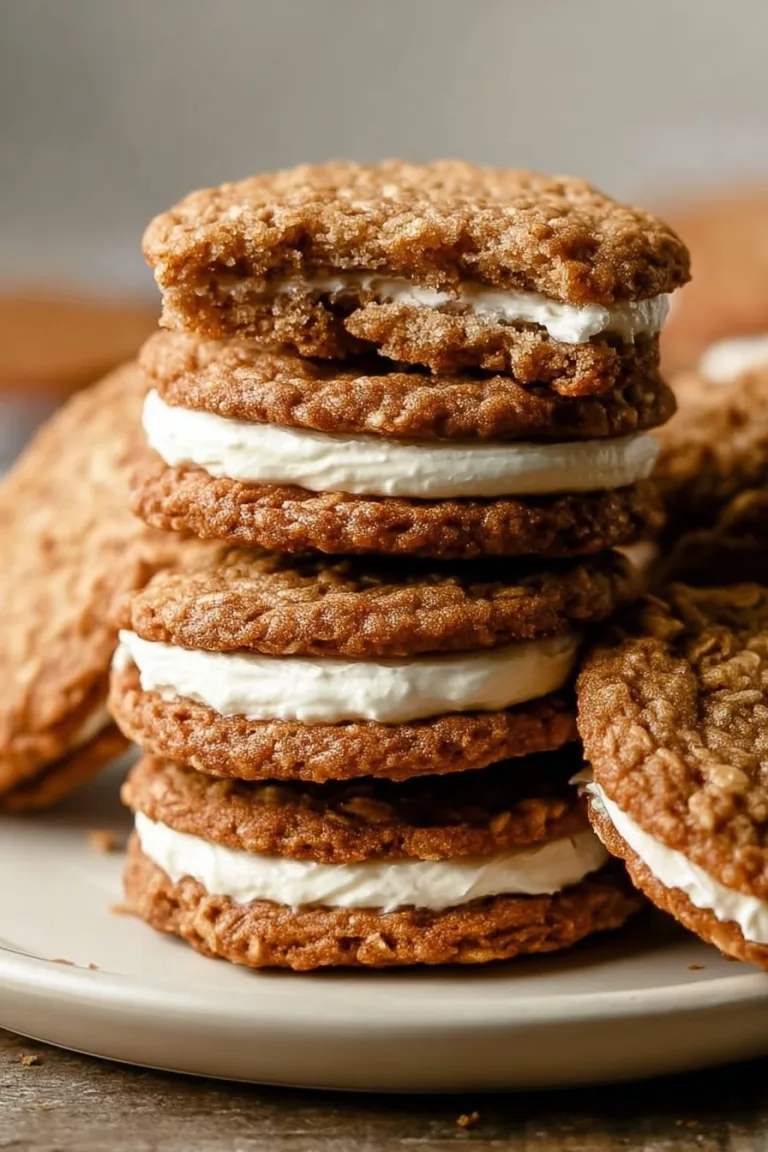
I still remember the first time I made these flourless peanut butter oatmeal chocolate chip cookies for my neighbor’s birthday. I was nervous, mostly because I’d just managed to set off my oven’s smoke alarm over something as innocent as toast. But these cookies—oh man. They came out chewy, gooey, and speckled with melty chocolate. My neighbor took one bite, nodded, and then immediately hid three behind her back while asking if she could take a few more for ‘later.’ So yeah, these are that kind of cookie: the hoarding kind!

Plus, I like that I don’t need to break out my stand mixer (which mostly just collects dust anyway), or hunt through the pantry for fancy flour blends. These have rescued me many a time when folks drop by unannounced, with only a whiff of warning.
Why I Always Come Back to This Recipe
- I reach for this recipe whenever I’ve got one of those “I need a cookie, and I needed it yesterday” moods—so, you know, fairly often.
- My family attacks these straight off the tray (watch your fingers, seriously) because they taste rich and chocolatey but skip the flour, so my gluten-sensitive cousin doesn’t feel left out.
- If I’m being real, I love that there’s nothing fancy in here. Just pantry stuff. Okay, fishing for the chocolate chips always ends up with me eating a handful. Occupational hazard.
- The only thing that sometimes gets me is rolling the sticky dough, though I actually think it makes the cookies more rustic-looking. Or maybe I just tell myself that.
What You’ll Need (And a Few Sub Ideas)
- ¾ cup (71g) rolled oats (definitely opt for gluten-free oats if needed—they behave the same, promise!)
- ½ teaspoon baking soda (I have, embarrassingly, forgotten this before. The cookies were still tasty but flatter. So don’t skip.)
- 1 cup (256g) natural creamy peanut butter (the “just peanuts & salt” kind. Jif’s fine in a pinch, but it’s a bit sweeter and a different vibe.)
- ⅔ cup (142g) packed dark brown sugar (honestly, sometimes I’ve used light brown; it works, though I prefer the flavor here.)
- 1 teaspoon vanilla extract (the real stuff—the fake stuff kinda reminds me of perfume, but use what you’ve got!)
- 2 large eggs (no way around this; I’ve tried with flax eggs, but it wasn’t my favorite.)
- ⅔ cup (120g) chocolate chips (dairy free if you need; when I’m out, I’ll chop up a chocolate bar instead. Chunky cookies, but yum.)
- Flakey sea salt for sprinkling on top (absolutely not optional in my house! But if you hate the stuff, just leave it off.)
How I Make It (With Some Tangents and Tips)
- Start by heating the oven to 350°F (175°C). Find your parchment paper and line a big baking sheet. If I forget parchment, I just grease the pan—works fine, but stickier cleanup.
- Mixing the dry—In a little bowl, stir together the rolled oats and baking soda. That’s it. Sometimes I get distracted here and almost mistake salt for baking soda (once, and never again!)
- Move on to the wet stuff. Grab a big mixing bowl (the biggest one you own, ideally). Scrape in your peanut butter, brown sugar, eggs, and the vanilla. Stir it until everything’s glossy and just looks really inviting. This is the part where I scoop a little taste—no shame.
- Bring it together—Now, gently combine that oat mixture with your peanut butter goop. I use a wooden spoon, but honestly, clean hands work if it comes to it. Once it’s combined (don’t stress over a stray oat), fold in your chocolate chips. The dough’s sticky. Very sticky. If it’s looking weird at this moment, that’s normal—I promise.
- Forming the cookies: Scoop out dough balls about 2 inches round. Place them on the tray, spacing them out by an arm’s length—okay, more like 2 inches, but you get my drift. Lightly flatten each ball with your palm. Or, if you’re not a fan of dough gloves, just use a cookie scoop and plop them right on. They might be a little chunky, but it works.
- Bake for 9–12 minutes. Peek when the edges look barely golden. If the centers look underdone, they’re perfect. Trust the process—they set up as they cool. The one time I overbaked, I got peanut butter rocks. Don’t be me.
- Let ’em cool on the tray about five minutes. They are lava-hot at first (please trust me on this; my tongue paid the price). Then scoot them over to a wire rack; sprinkle that flaky sea salt on top. Repeat with the rest of the dough. You’ll get anywhere from 16 to 20 cookies. Or, if you’re me, 18 because of “quality control.”

Notes I Wish I’d Known Earlier
- The dough is supposed to be sticky. I once tried refrigerating it for easier handling. Didn’t make a huge difference, honestly.
- Use the best peanut butter you can—like, don’t use one with extra sugar or oils unless sweet-milky is your thing.
- If you somehow end up with only one egg, I have managed with it in a pinch, but the cookies spread more.
Variations I’ve Tried (Some Winners, One Loser)
- Half-cup of chopped, toasted nuts for a bit of crunch. Pretty good, actually.
- Chucking in a handful of dried cranberries for a PB&J-vibe—it’s oddly delightful!
- I once tried to swap the peanut butter entirely for almond butter. It was… okay? Not my fave though—texture was off.

Equipment Talk (and a Workaround)
You’ll want a baking sheet. I keep meaning to buy a proper cookie scoop, but I always forget, so I usually roll by hand or use two spoons crossed together. If you’re out of parchment paper, a well-buttered pan has saved my bacon more than once. Wire rack is great, but I’ve also been known to cool cookies on a cutting board when the rack’s MIA.
How to Store ‘Em (If Any Survive to the Next Day)
Seal the cookies up in an airtight container at room temp, and they stay lovely for three days. In theory. No batch has made it past day two at my place. If you want them for lunchboxes, hide a few. Or freeze ’em; they thaw fast and actually, I think they taste even better a day later. Go figure.
Serving Time! (My Favorite Part)
I love these with hot tea or dunked in coffee. My sister likes to sandwich two together with a smear of extra peanut butter (indulgent, yes, but it’s worth it). Sometimes I sneak a cookie into a bowl of ice cream for a late-night treat. Birthday candles not required, but I have stuck one in for fun.
A Few Pro Tips from Messing Up (So You Don’t Have To)
- Don’t rush the cooling step. I know the wait is brutal, but warm cookies are too delicate and will crumble all over your lap (voice of experience).
- If your peanut butter is super oily, just give it a really good stir before measuring—too much oil can make the cookies spread.
- Don’t over-flatten them; a little dome gives a better, fudgy center. Flat pancakes = crunchier cookie. Depends on what you want!
Your (Frequently!) Asked Questions, Answered
- Can I use quick oats instead of rolled oats?
- In a pinch, yeah! The texture will be smoother, maybe a bit less chewy. I’m partial to the chunkiness of rolled, but nobody’s turned one down yet.
- Is there a way to make these vegan?
- Well, about that… I’ve tried flax eggs, as I said, but honestly I found the cookies a bit crumbly. Maybe I did something wrong but it’s not quite the same.
- Can I double the recipe?
- Absolutely—actually, I recommend it. You’ll want more.
- They seem really soft at first—did I mess up?
- Nope, that’s just how they’re meant to be. Give them time to cool and they firm up nicely. Underbaked is actually the goal here!
- Help! My dough is too sticky to roll.
- Honestly? Sometimes I just grab a couple of spoons and drop messy blobs on the tray. They still bake beautifully and no one’s ever complained!
Ingredients
- ¾ cup (71g) rolled oats (gluten-free if desired)
- ½ teaspoon baking soda
- 1 cup (256g) natural creamy peanut butter (just peanuts + salt)
- ⅔ cup (142g) packed dark brown sugar
- 1 teaspoon vanilla extract
- 2 large eggs
- ⅔ cup (120g) chocolate chips, dairy free if desired
- Flakey sea salt for sprinkling on top
Instructions
- 1Start by heating the oven to 350°F (175°C). Find your parchment paper and line a big baking sheet. If I forget parchment, I just grease the pan—works fine, but stickier cleanup.
- 2Mixing the dry—in a little bowl, stir together the rolled oats and baking soda. That’s it. Sometimes I get distracted here and almost mistake salt for baking soda (once, and never again!)
- 3Move on to the wet stuff. Grab a big mixing bowl (the biggest one you own, ideally). Scrape in your peanut butter, brown sugar, eggs, and the vanilla. Stir it until everything’s glossy and just looks really inviting. This is the part where I scoop a little taste—no shame.
- 4Bring it together—now, gently combine that oat mixture with your peanut butter goop. I use a wooden spoon, but honestly, clean hands work if it comes to it. Once it’s combined (don’t stress over a stray oat), fold in your chocolate chips. The dough’s sticky. Very sticky. If it’s looking weird at this moment, that’s normal—I promise.
- 5Forming the cookies: Scoop out dough balls about 2 inches round. Place them on the tray, spacing them out by an arm’s length—okay, more like 2 inches, but you get my drift. Lightly flatten each ball with your palm. Or, if you’re not a fan of dough gloves, just use a cookie scoop and plop them right on. They might be a little chunky, but it works.
- 6Bake for 9–12 minutes. Peek when the edges look barely golden. If the centers look underdone, they’re perfect. Trust the process—they set up as they cool. The one time I overbaked, I got peanut butter rocks. Don’t be me.
- 7Let ’em cool on the tray about five minutes. They are lava-hot at first (please trust me on this; my tongue paid the price). Then scoot them over to a wire rack; sprinkle that flaky sea salt on top. Repeat with the rest of the dough. You’ll get anywhere from 16 to 20 cookies. Or, if you’re me, 18 because of “quality control.”
CLICK FOR NUTRITION INFO
↑
Approximate Information for One Serving
Serving Size:
1 serving
Calories:
185 caloriescal
Protein:
5gg
Fat:
11gg
Saturated Fat:
0g
Trans Fat:
0g
Cholesterol:
0mg
Sodium:
0mg
Potassium:
0mg
Total Carbs:
19gg
Fiber:
0g
Sugar:
0g
Net Carbs:
0g
Vitamin A:
0
Vitamin C:
0mg
Calcium:
0mg
Iron:
0mg
Nutrition Disclaimers
Number of total servings shown is approximate. Actual number of servings will depend on your preferred portion sizes.
Nutritional values shown are general guidelines and reflect information for 1 serving using the ingredients listed, not including any optional ingredients. Actual macros may vary slightly depending on specific brands and types of ingredients used.
To determine the weight of one serving, prepare the recipe as instructed. Weigh the finished recipe, then divide the weight of the finished recipe (not including the weight of the container the food is in) by the desired number of servings. Result will be the weight of one serving.
Did you make this recipe?
Please consider Pinning it!