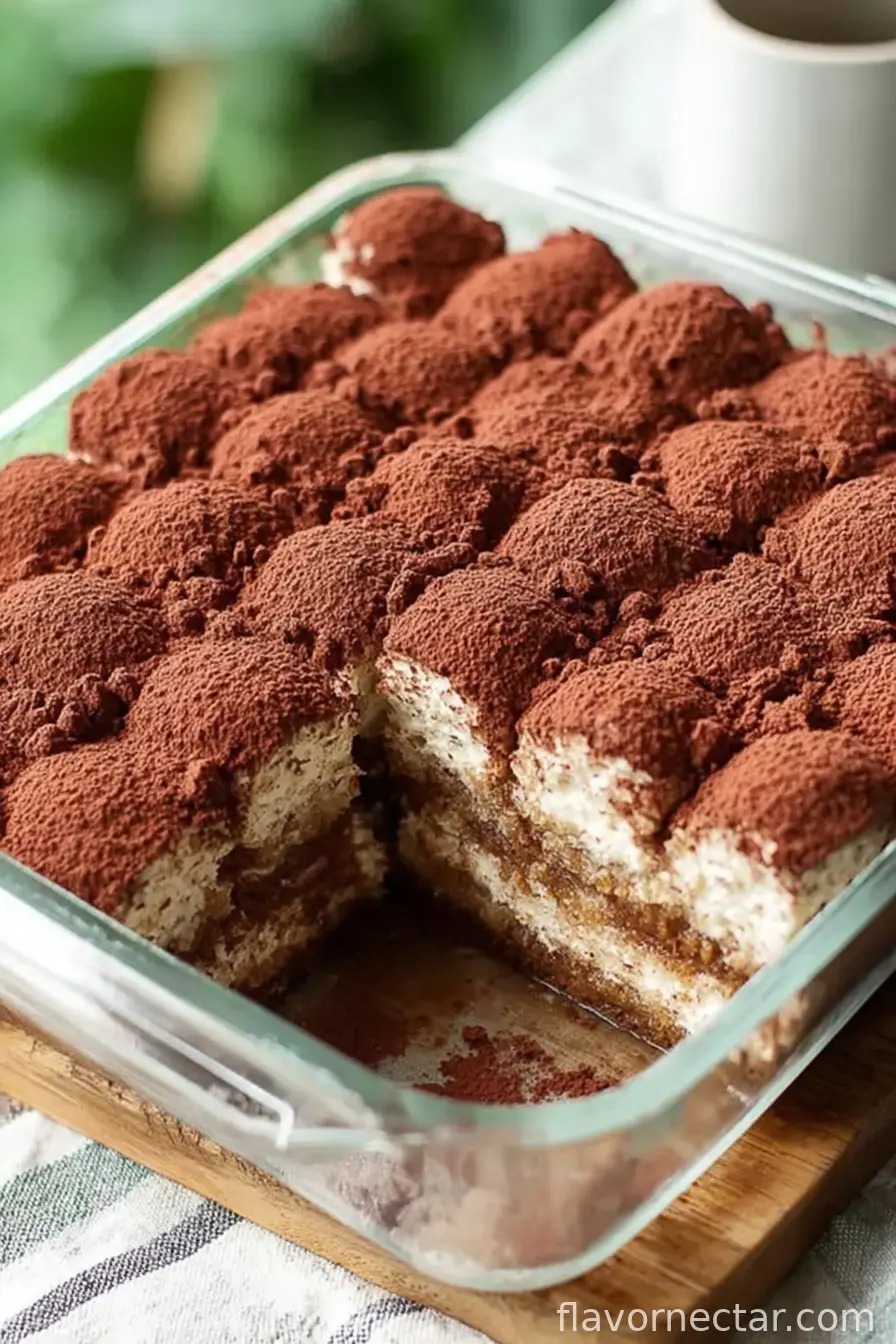
A Tiramisu You Can Throw Together in 10 Minutes (Honestly!)
I have this habit (quirk?) of promising dessert before dinner’s even on the table. So, this 10-minute easy tiramisu has bailed me out more times than I’d like to admit. I first made it for a last-minute dinner with my cousin—she’s a tiramisu snob, soooo, no pressure! Spoiler: she licked the pan. If you’ve ever been put on dessert duty with barely any warning, you’ll love just how achievable this tastes.

Why You’ll Love This Speedy Tiramisu
I make this whenever someone randomly texts “do you have dessert?” (Usually as they’re walking up my path.) My family practically riots if I skip the cocoa dusting—no idea why, but it’s become tradition. Sometimes the only hard thing is waiting for it to chill. Honestly, if your patience is like mine, you’ll just eat it slightly soft and never tell a soul. On a busy day, I’ve even mixed the cream in the bowl I used for the coffee—nobody noticed. (Okay, the coffee purists in my house did, but everyone else was happy as Larry.)
Here’s What You Need To Whip This Up
- 1 1/2 cups (360ml) heavy whipping cream, nice and cold
- 2/3 cup (65g) powdered sugar or 1/3 cup granulated sugar—I’ve tried both, and honestly, whichever’s in the pantry finds its way in
- 1 tsp (5ml) vanilla extract (If I’m feeling wild, I splash in a bit extra—it’s my kitchen!)
- 1 package (8oz) mascarpone, at room temp (though sometimes I cut corners and use it a bit cold; it works but is a bit stubborn)
- 1 cup (237ml) strong brewed coffee or espresso—I’ve used 1-2 tbsp of instant with a cup of water in a pinch, no shame
- 1/2 package ladyfingers (Savoiardi) or more—I buy whatever brand’s on offer, not picky
- 2 tbsp (15g) unsweetened cocoa powder for dusting (my nan said it had to be Dutch-process, but really any cocoa does the trick)
How To Put It All Together (Without Losing Your Mind)
- Get Your Whip On: Grab a big mixing bowl and pour in that chilly whipping cream. Beat it (I use an electric mixer at medium—trust me, a whisk will make you curse) for about a minute. Sift in your sugar and drizzle the vanilla, then whip until it starts to look soft and pillowy. Now, plop in all your room-temp mascarpone and whip again until it gets fairly stiff peaks. (This is usually when I taste it… for “quality control”—right?) Don’t stress if you overwhip a bit; it’ll still be dreamy once layered.
- Bathe the Biscuits: Pour your coffee or espresso into a shallow dish. One by one, quickly give the ladyfingers a little swim—a dunk, not a deep sea expedition—or they’ll collapse. Line ’em up in a single layer on the bottom of your 8×8 pan. They might look a bit wonky, but no one’s peeking.
- Creamy Layers: Dollop half your luscious mascarpone mixture over the ladyfingers and use a spatula (or even the back of a spoon, we’re not fancy here) to spread it out. Add another round of coffee-dunked ladyfingers on top, trying to patch gaps if there are any. Finish strong with the rest of the mascarpone cream, smoothing it out as much or as little as you feel like. Cover and pop it in the fridge for at least 3-4 hours (or, let’s be real, overnight if you have the discipline I don’t).
- The Final Flourish: When it’s firmed up, grab a fine mesh sieve and shake a pretty layer of cocoa powder over the top. Slice it up and serve—messy cuts just mean bigger pieces for you.
Little Notes I’ve Picked Up
- If your mascarpone seems grainy, it might be a bit too cold—let it hang out on the counter for half an hour first. Or just mix longer, it’s surprisingly forgiving.
- Don’t drench the ladyfingers—soggy bottoms are only acceptable in a humorous baking show, not in your dessert tray.
Things I’ve Tried (Some Good, Some Not)
- Instead of coffee, I once used a mix of hot chocolate and espresso. It was sweeter, almost like a mocha… but the original is honestly better.
- I swapped half the cream for Greek yogurt once. That got some raised eyebrows at the table. Edible, but a bit too tangy for me.

Do You Really Need Special Equipment?
An electric hand mixer makes this about a million times easier, but if yours died (or you can’t find the beaters, like me last Christmas), a big balloon whisk and elbow grease will do… you’ll just get a workout. For dusting cocoa, I’ve even used a tea strainer—the one that never actually gets used for tea. Who needs a fancy sifter?
How to Store This (If You Have Any Left)
Stick it in the fridge, covered, and it’ll keep for about 2 days. Though honestly, in my house, it’s lucky to survive until breakfast. Best eaten the day after it’s made, if you can resist!
How We Serve It (Or: Let’s Be Fancy-ish)
I love cutting big rustic squares and piling a little extra cocoa powder on top right at the table. My daughter swears by a sprinkle of chocolate shavings too, especially if we’re having guests. Honestly, it pairs just as well with a thimble of amaretto or a mug of tea (who am I to judge?)
Real Life Pro Tips (Learned the Hard Way)
- Once, I rushed the chilling step—don’t bother. It’ll just ooze everywhere. Actually, I find the flavors get better if you leave it in overnight; it’s tough, but worth it.
- Don’t be shy with the cocoa powder on top. Not for looks… it helps with the whole not-sticking-to-the-saran-wrap thing.
FAQ (No Such Thing As Silly Questions!)
- Can I freeze tiramisu? Sort of. But the texture’s better fresh, honestly. It gets a wee bit icy when frozen, so I don’t bother.
- Do I have to use mascarpone? Well, technically yes if you want that classic taste. But I’ve been desperate and subbed in whipped cream cheese—works in a pinch, but it’s not quite as posh.
- What if I don’t have ladyfingers? Geez, use pound cake or any plain, not-too-sweet cookie. Not traditional, but hey, you do you.
Anyway, now you’ve got my (somewhat rambling) guide to 10-minute, crowd-pleasing tiramisu. Go spoil yourself—and if anyone asks, tell them it took you hours. It’ll be our secret 😉
Ingredients
- 1 1/2 cups (360ml) heavy whipping cream cold
- 2/3 cup (65g) powdered sugar or 1/3 cup granulated sugar
- 1 tsp (5ml) vanilla extract or to taste
- 1 package (8oz) mascarpone at room temperature
- 1 cup (237ml) strongly brewed coffee (or espresso) 1-2 tbsp of instant coffee mixed in with 1 cup of room temperature water
- 1/2 package ladyfingers (Savoiardi) or more
- 2 tbsp (15g) unsweetened cocoa powder for dusting
Instructions
-
1Get a large mixing bowl and add the cold whipping cream. Using an electric mixer (or a strong whisk and determination), beat on medium for about a minute. Sift in the powdered or granulated sugar and pour in the vanilla. Mix until the cream begins to look soft and fluffy, then add all the mascarpone. Continue whipping until stiff peaks form—don’t stress if you whip just a tad too long; it still tastes dreamy.
-
2Pour the brewed coffee or espresso into a shallow dish. Take your ladyfingers and quickly dip them in the coffee—just a brief dip so they don’t get too soggy—then line them up in a single layer at the bottom of an 8×8 pan. They don’t need to look perfect.
-
3Spoon half the mascarpone mixture over the ladyfingers and spread it gently with a spatula or the back of a big spoon. Add another layer of coffee-dipped ladyfingers on top, then cover with the rest of the creamy goodness. Spread it over as neatly as you can. Cover and pop in the fridge for at least 3-4 hours, or overnight if you want the best flavor (but waiting is the hard part).
-
4When you’re ready to serve, dust the top generously with cocoa powder using a fine mesh strainer or even a tea infuser. Slice it up and dig in!
CLICK FOR NUTRITION INFO
↑
Approximate Information for One Serving
Serving Size:
1 serving
Calories:
370cal
Protein:
5 gg
Fat:
27 gg
Saturated Fat:
0g
Trans Fat:
0g
Cholesterol:
0mg
Sodium:
0mg
Potassium:
0mg
Total Carbs:
27 gg
Fiber:
0g
Sugar:
0g
Net Carbs:
0g
Vitamin A:
0
Vitamin C:
0mg
Calcium:
0mg
Iron:
0mg
Nutrition Disclaimers
Number of total servings shown is approximate. Actual number of servings will depend on your preferred portion sizes.
Nutritional values shown are general guidelines and reflect information for 1 serving using the ingredients listed, not including any optional ingredients. Actual macros may vary slightly depending on specific brands and types of ingredients used.
To determine the weight of one serving, prepare the recipe as instructed. Weigh the finished recipe, then divide the weight of the finished recipe (not including the weight of the container the food is in) by the desired number of servings. Result will be the weight of one serving.
Did you make this recipe?
Please consider Pinning it!