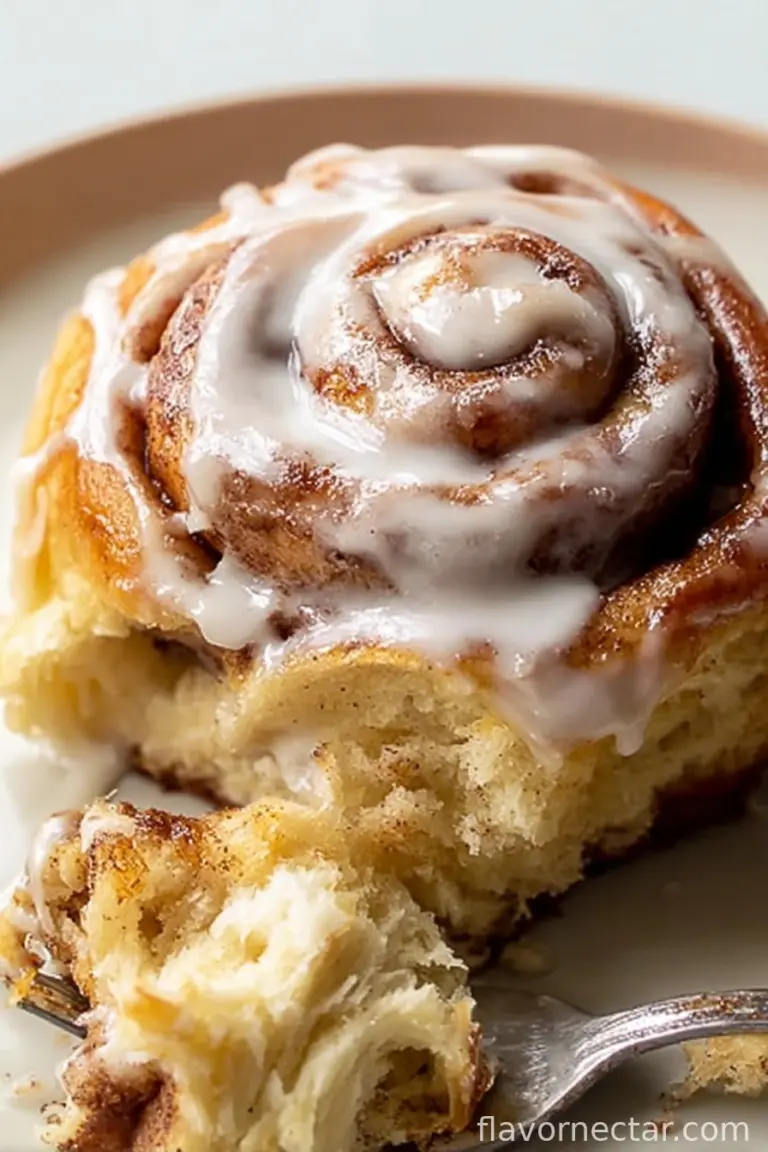
Let Me Tell You About These Cookies…
So here’s a funny thing: I first tried making these Salted Caramel White Chocolate Cookies after a spur-of-the-moment argument in the baking aisle with my partner. He insisted that dark chocolate was the peak of cookie add-ins—I mean, he’s got a point, but white chocolate and caramel together? That’s like the sauce and chips combo that shouldn’t work…but absolutely does! Anyway, fast forward to now and these cookies are a regular weekend project in our house, especially when I’ve forgotten to buy fresh breakfast stuff (whoops). They aren’t fussy, but they sure make people think you’ve got your act together. Spoiler: I don’t. (Also, if you’re the kind who always ends up with half a bag of half-melted caramels stuck together, you’re my kind of people.)

Why You’ll Want to Make These—Even On a Tuesday
I bake these when I’m trying to bribe my teenage niece to mow the lawn, or if we have The Gathering of Coffee Snobs at ours. My family goes a bit bonkers for that combo of golden edges (seriously, don’t skip the browning step), gooey middles, and the cheeky pop of salt on top. Sometimes the caramel goes rogue and leaks out but honestly, the little toffee puddles at the bottom? Pure magic, don’t let anyone tell you otherwise. And, listen, I’ll admit I’ve thrown store-bought caramel bits in and called it a day when pressed for time. No shame—whatever it takes for cookie therapy, right?
Here’s What You’ll Need (and What You Can Wing)
- 1 cup (225g) unsalted butter, softened (skip the fancy stuff; cheap works fine honestly)
- 1 cup light brown sugar, packed (granulated works in a pinch but brown’s better for chewiness)
- 1/2 cup white sugar
- 2 large eggs (I once used one extra-large, didn’t ruin it)
- 2 teaspoons vanilla extract (my grandmother would only use real vanilla, but the bottle-from-the-corner-shop does okay)
- 2 and 2/3 cups (330g) all-purpose flour
- 1 teaspoon baking soda
- 3/4 teaspoon salt
- 1 1/4 cups (200g) white chocolate chips (chopped bar is fine, or that off-brand baking chocolate)
- 1 cup soft caramel candies, chopped (Werther’s, Kraft—any soft ones; in a scramble, thick store-bought caramel sauce spoon-dolloped on top before baking is “interesting”—see notes later!)
- Fleur de sel or flaky sea salt, for sprinkling (Maldon for the win, but regular sea salt flakes will do)
Let’s Make Some Cookie Chaos (Step by Step)
- First, preheat your oven to 350°F (175°C). Line a couple of baking trays with baking parchment or whatever nonstick trick you’ve got—I sometimes use that silicone mat my friend swears by.
- Beat the softened butter, brown sugar, and white sugar together in a big bowl. Get it all light and fluffy (I usually forget to let the butter soften and end up hacking at it—microwaving a few seconds is totally fine, just don’t melt it all the way!).
- Add the eggs, one at a time—it always looks a bit lumpy at this stage, but that’s normal. Pour in the vanilla too.
- In a second bowl, whisk your flour, baking soda, and salt. No need for military precision but give it a good swirl, to stop pesky clumps.
- Tip your dry mix into the wet mixture and stir just till it’s all combined; over-mixing turns cookies tough and nobody needs that in their life.
- Add the white chocolate chips and caramel chunks. This is where I usually sneak a taste (hygiene police, look away). The dough might be sticky—sometimes I chill it for 15-20 minutes if it’s a warm day, but often I just plow ahead.
- Scoop heaped tablespoons onto your prepped trays, leaving a good bit of space—these spread. I use a cookie scoop when I remember I own one. Top each dollop with a few extra chocolate chips and caramel bits if you’re feeling extra.
- Bake for 10-12 minutes until the edges are golden and the middles are puffy but still look soft. If some caramel escapes and crisps up, that’s a bonus! Don’t panic if the centers look undercooked—they’ll finish setting once out of the oven.
- Right after taking them out, sprinkle with flaky sea salt; trust me, it matters. Let cookies sit on the tray for 5-10 minutes before transferring (with a spatula—unless you like the rustic falling-apart look) to a rack to cool. Or eat them warm, that’s what we do most times.

A Few Notes That Might Save Your Sanity
- Once, I skipped chilling the dough on a super hot day—they still tasted great but merged into a sort of mega-cookie. Not the worst outcome.
- If your caramels are super sticky, toss the chopped pieces with a bit of flour before mixing in. Learned that the hard (and sticky) way.
- Baking time’s a bit fickle; ovens are quirky. Start with less, rather than more, and check by eye, not just the timer.
Cookie Curveballs: Variations and Experiments
- Once swapped the white chocolate for dark—was fine, but the salt didn’t pop the same.
- Added chopped pecans for my uncle, who believes cookies are salad if there’s a nut in it. Not mad at it.
- Tried swirling store-bought caramel sauce on top before baking…let’s just say they were better eaten with a spoon. Stick to the soft caramels, trust me.

If You Don’t Have All The Equipment—Don’t Stress
All you really need is a bowl, spoon, and baking tray. Electric mixer is cushy but elbow grease works; rolling pin? For what, exactly? If your rack is missing, a clean chopping board works for cooling. Cup measures—use a teacup, in a pinch.
Keeping Cookies Fresh (If Yours Last That Long)
Technically, keep them in an airtight tin at room temp for two or three days. But honestly, in my house, it never lasts more than a day! If you somehow end up with leftovers, pop one in the microwave for 10 seconds to relive that fresh-baked gooey gooeyness.
Serving ‘Em Up—How We Do It at Ours
We usually go rogue and eat them still warm, with mugs of milky tea. Once tried sandwiching two around vanilla ice cream—that got messy, but wow.
Some Hard-Won Pro Tips
- I once tried putting trays on different oven shelves to bake them all at once—bad move: the bottoms got crisped and the tops were pale. Now I just do batches.
- Don’t walk away! Cookies go from perfect to regret-in-the-form-of-smoke in a matter of minutes. (Ask me how I know…)
- Actually, I find it works better if the dough chills at least 10 minutes; but honestly, sometimes I just can’t wait.
FAQ—Answering Your Real (and Not-So-Real) Questions
- Can I freeze the dough? You bet! I do this every third batch or so… Just scoop it in blobs, flash freeze, then bag up. Add a minute extra to bake from frozen.
- What’s the deal if my caramels explode? Pretty normal! Scrape the caramel puddles off the tray and pop them back onto the cookies, or just snack on ’em (no shame).
- Gluten free? Swap in your fave blend but watch out—texture will shift a bit, sometimes the cookies are a little more crumbly. Still tasty though.
- Can I halve the recipe? Absolutely, but why?! Half a bowl doesn’t last beyond an hour in my house (unless you have more willpower than me).
- Any trick to getting perfectly round cookies? Ha! I’ve tried swirling the hot cookies with a glass—they look all Instagram-y, but taste the same. Rustic is good enough for us most days.
Oh, small detour: recently found myself debating the right tea-to-cookie ratio while making these—and after much “research” (read: eating), you can’t go wrong with a two-cookie minimum. Go on, make a batch. You’ll see exactly why these Salted Caramel White Chocolate Cookies are now a household legend (even if we’re mostly legends in our own lunchbox).
Ingredients
- 1 cup (225g) unsalted butter, softened (skip the fancy stuff; cheap works fine honestly)
- 1 cup light brown sugar, packed (granulated works in a pinch but brown’s better for chewiness)
- 1/2 cup white sugar
- 2 large eggs (I once used one extra-large, didn’t ruin it)
- 2 teaspoons vanilla extract (my grandmother would only use real vanilla, but the bottle-from-the-corner-shop does okay)
- 2 and 2/3 cups (330g) all-purpose flour
- 1 teaspoon baking soda
- 3/4 teaspoon salt
- 1 1/4 cups (200g) white chocolate chips (chopped bar is fine, or that off-brand baking chocolate)
- 1 cup soft caramel candies, chopped (Werther’s, Kraft—any soft ones; in a scramble, thick store-bought caramel sauce spoon-dolloped on top before baking is “interesting”—see notes later!)
- Fleur de sel or flaky sea salt, for sprinkling (Maldon for the win, but regular sea salt flakes will do)
Instructions
-
1First, preheat your oven to 350°F (175°C). Line a couple of baking trays with baking parchment or whatever nonstick trick you’ve got—I sometimes use that silicone mat my friend swears by.
-
2Beat the softened butter, brown sugar, and white sugar together in a big bowl. Get it all light and fluffy (I usually forget to let the butter soften and end up hacking at it—microwaving a few seconds is totally fine, just don’t melt it all the way!).
-
3Add the eggs, one at a time—it always looks a bit lumpy at this stage, but that’s normal. Pour in the vanilla too.
-
4In a second bowl, whisk your flour, baking soda, and salt. No need for military precision but give it a good swirl, to stop pesky clumps.
-
5Tip your dry mix into the wet mixture and stir just till it’s all combined; over-mixing turns cookies tough and nobody needs that in their life.
-
6Add the white chocolate chips and caramel chunks. This is where I usually sneak a taste (hygiene police, look away). The dough might be sticky—sometimes I chill it for 15-20 minutes if it’s a warm day, but often I just plow ahead.
-
7Scoop heaped tablespoons onto your prepped trays, leaving a good bit of space—these spread. I use a cookie scoop when I remember I own one. Top each dollop with a few extra chocolate chips and caramel bits if you’re feeling extra.
-
8Bake for 10-12 minutes until the edges are golden and the middles are puffy but still look soft. If some caramel escapes and crisps up, that’s a bonus! Don’t panic if the centers look undercooked—they’ll finish setting once out of the oven.
-
9Right after taking them out, sprinkle with flaky sea salt; trust me, it matters. Let cookies sit on the tray for 5-10 minutes before transferring (with a spatula—unless you like the rustic falling-apart look) to a rack to cool. Or eat them warm, that’s what we do most times.
CLICK FOR NUTRITION INFO
↑
Approximate Information for One Serving
Serving Size:
1 serving
Calories:
200 caloriescal
Protein:
2 gg
Fat:
10 gg
Saturated Fat:
0g
Trans Fat:
0g
Cholesterol:
0mg
Sodium:
0mg
Potassium:
0mg
Total Carbs:
28 gg
Fiber:
0g
Sugar:
0g
Net Carbs:
0g
Vitamin A:
0
Vitamin C:
0mg
Calcium:
0mg
Iron:
0mg
Nutrition Disclaimers
Number of total servings shown is approximate. Actual number of servings will depend on your preferred portion sizes.
Nutritional values shown are general guidelines and reflect information for 1 serving using the ingredients listed, not including any optional ingredients. Actual macros may vary slightly depending on specific brands and types of ingredients used.
To determine the weight of one serving, prepare the recipe as instructed. Weigh the finished recipe, then divide the weight of the finished recipe (not including the weight of the container the food is in) by the desired number of servings. Result will be the weight of one serving.
Did you make this recipe?
Please consider Pinning it!