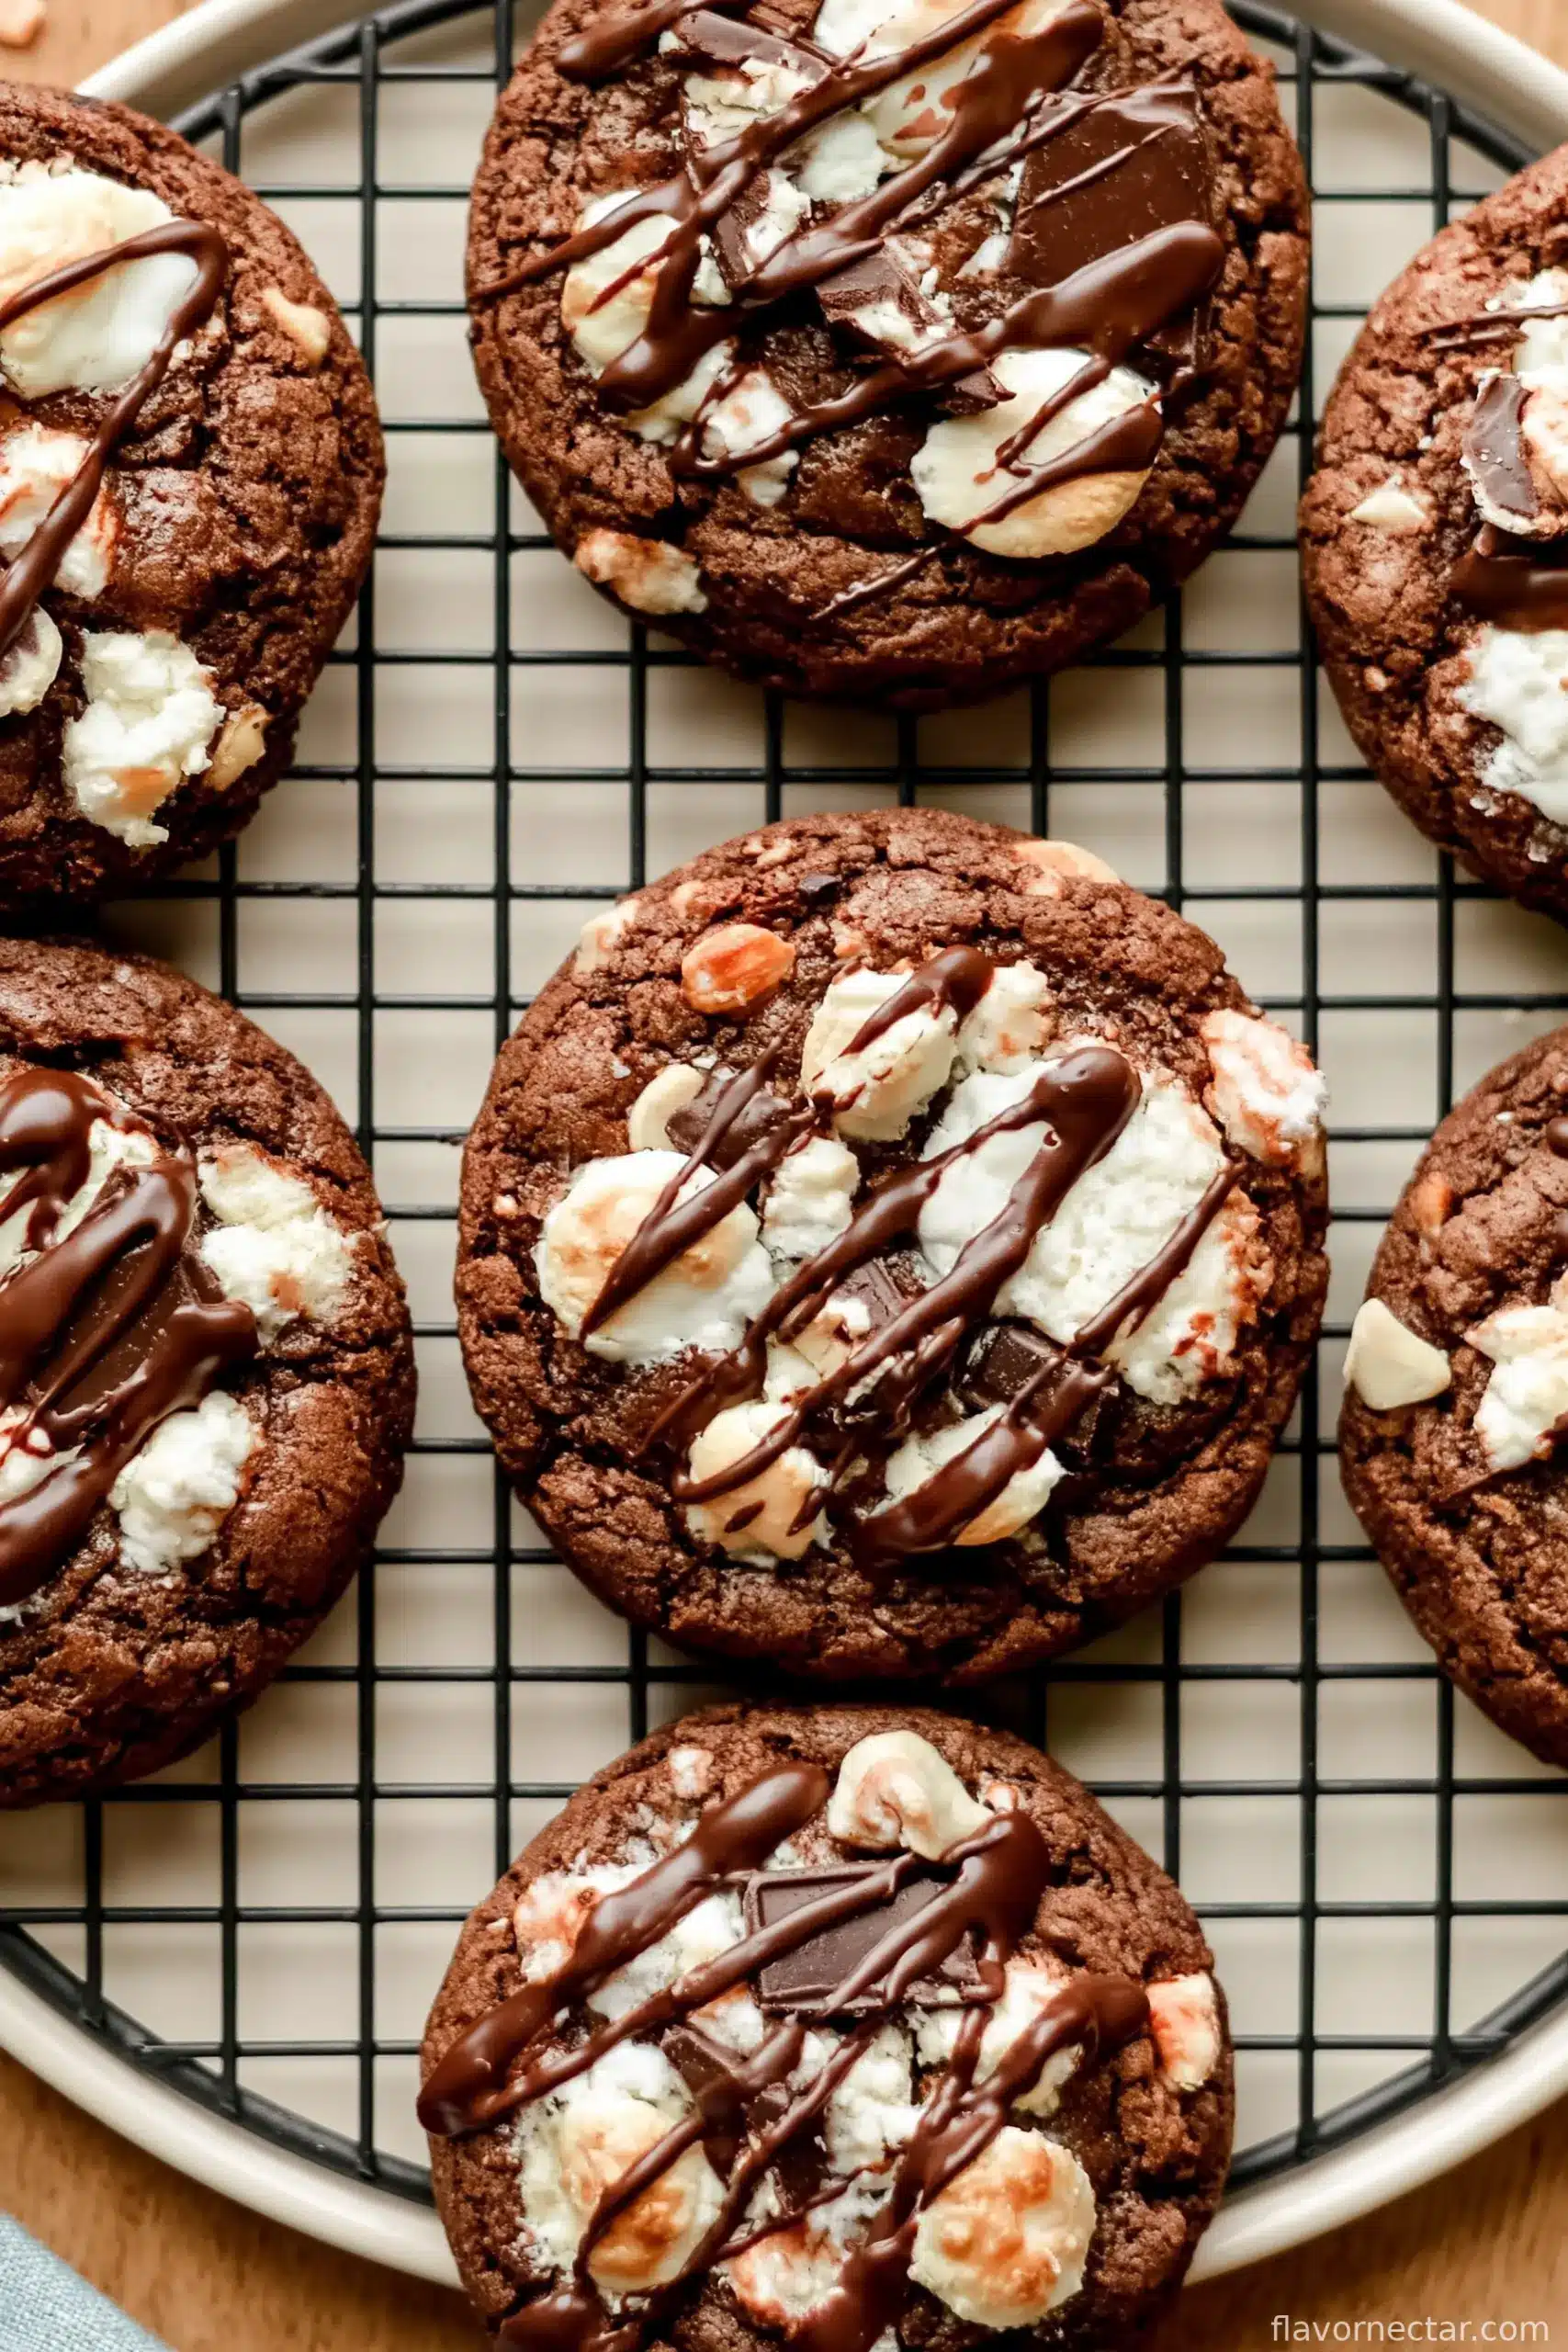
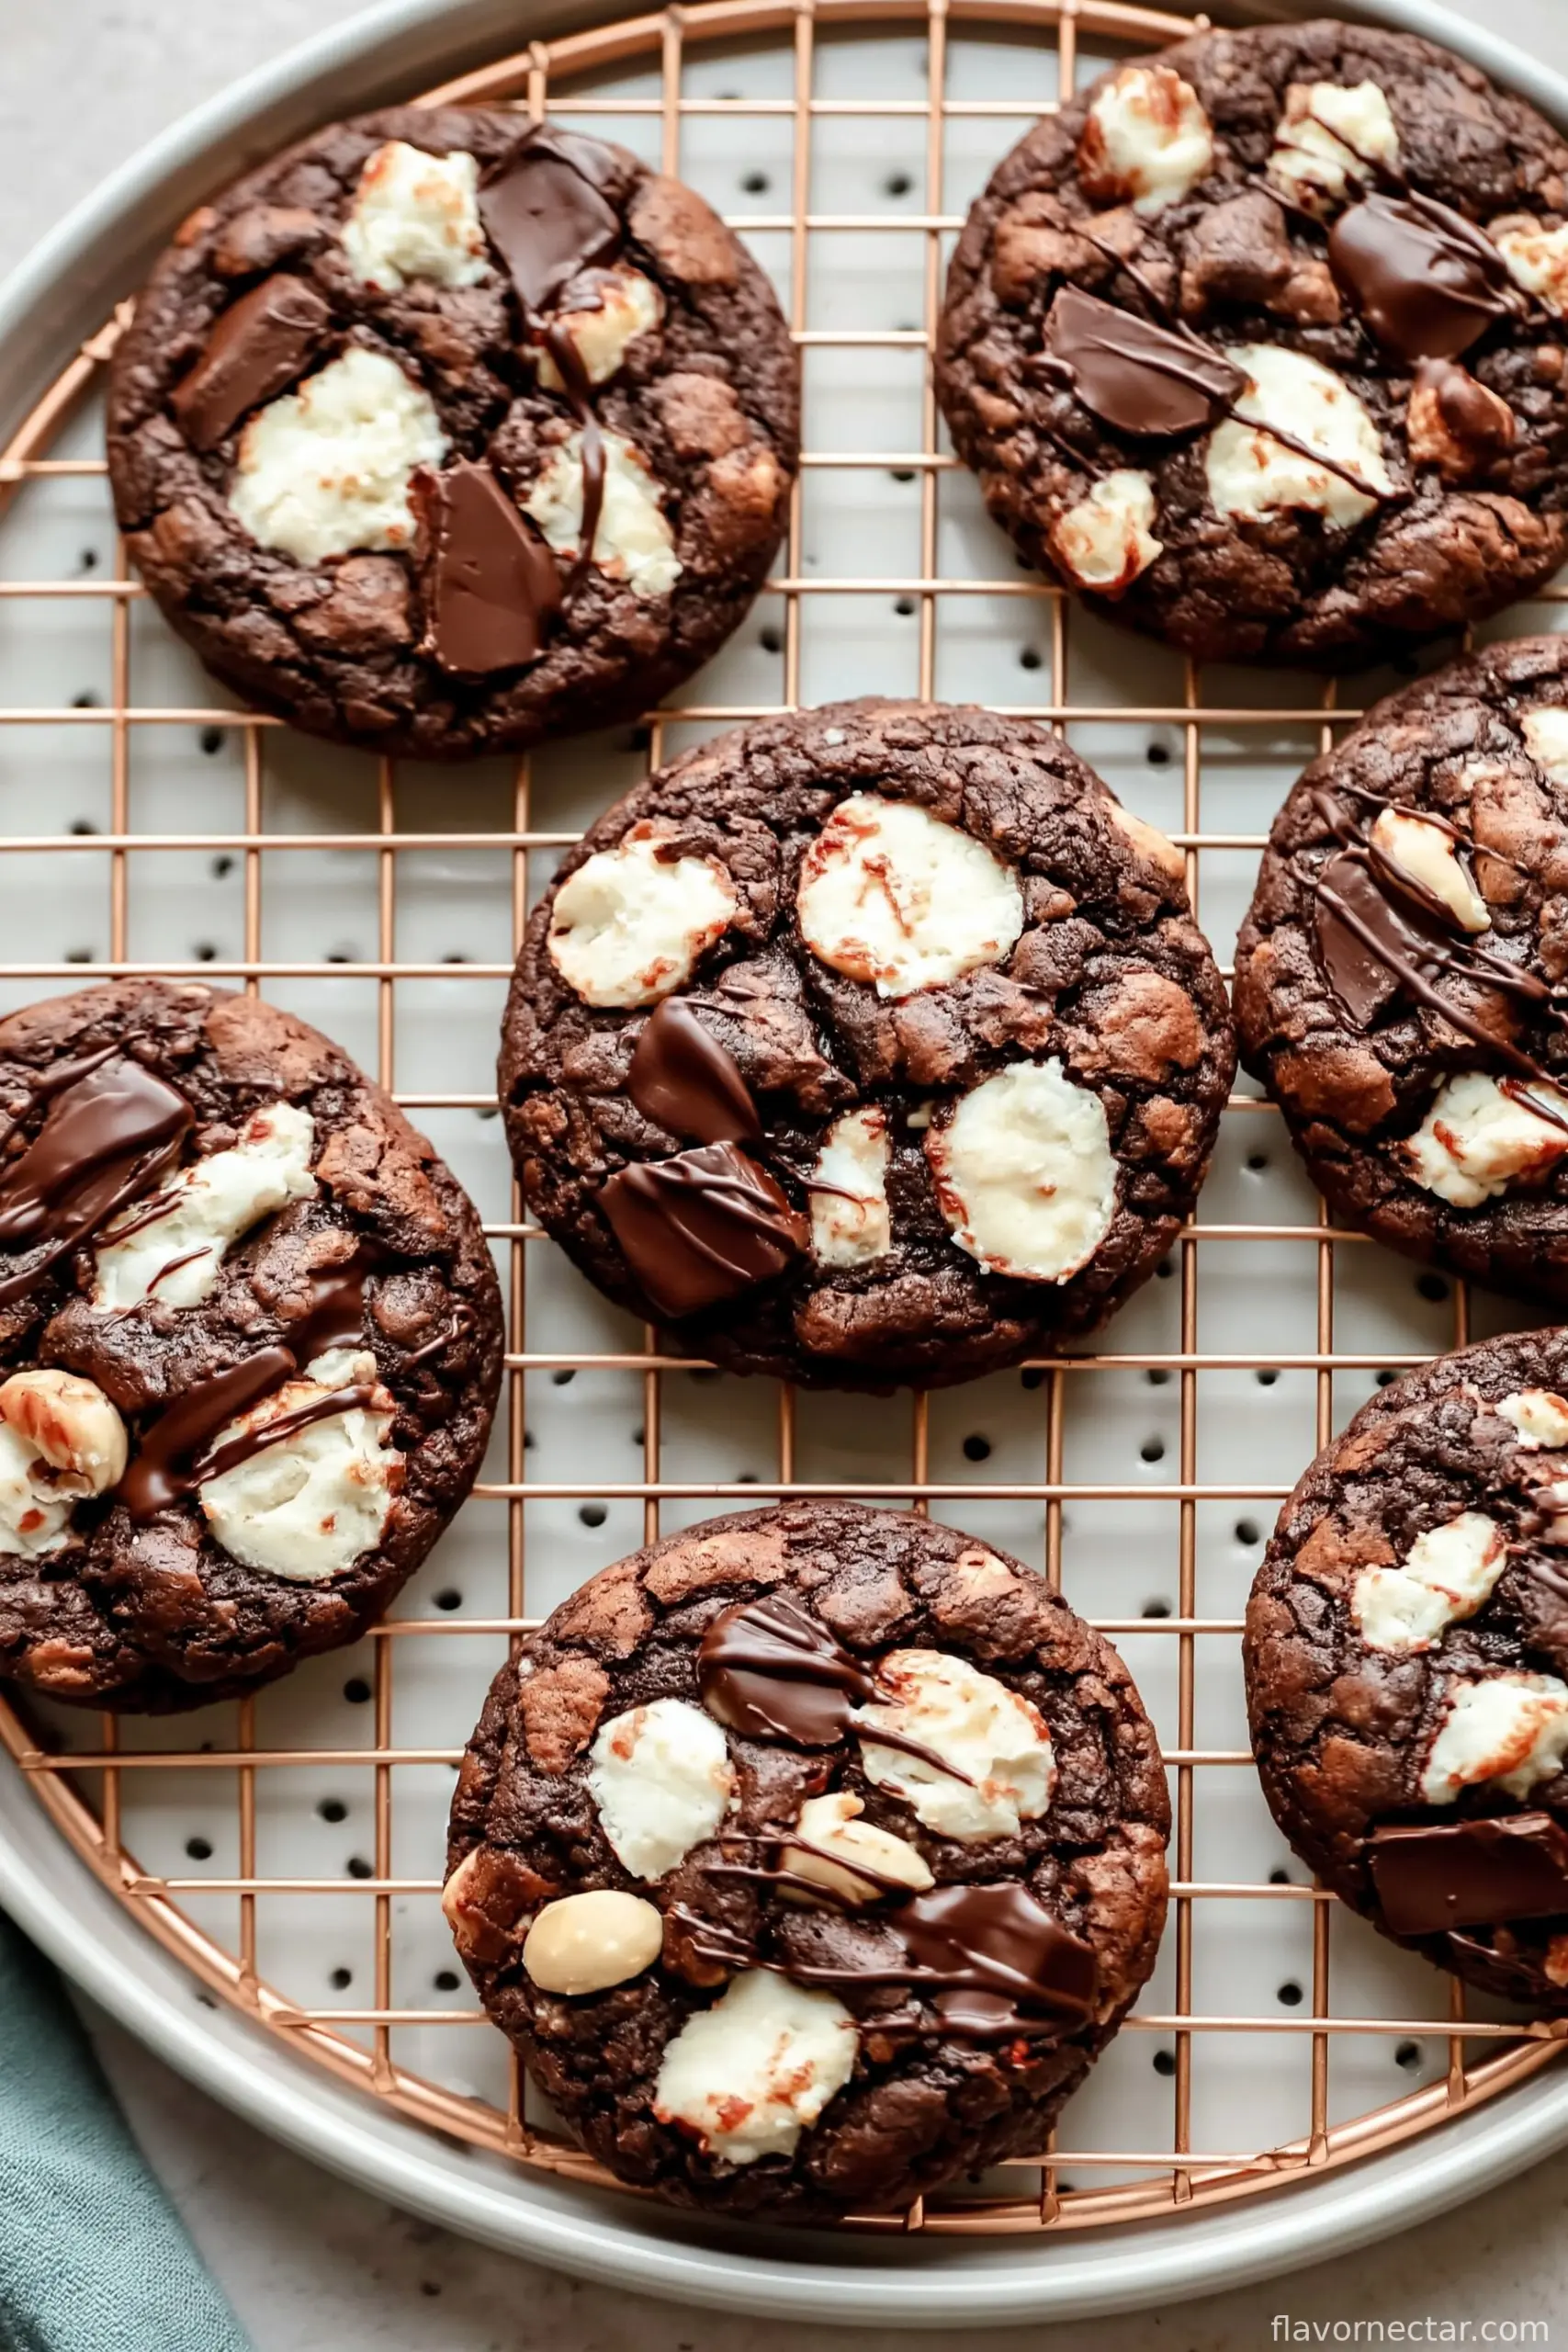
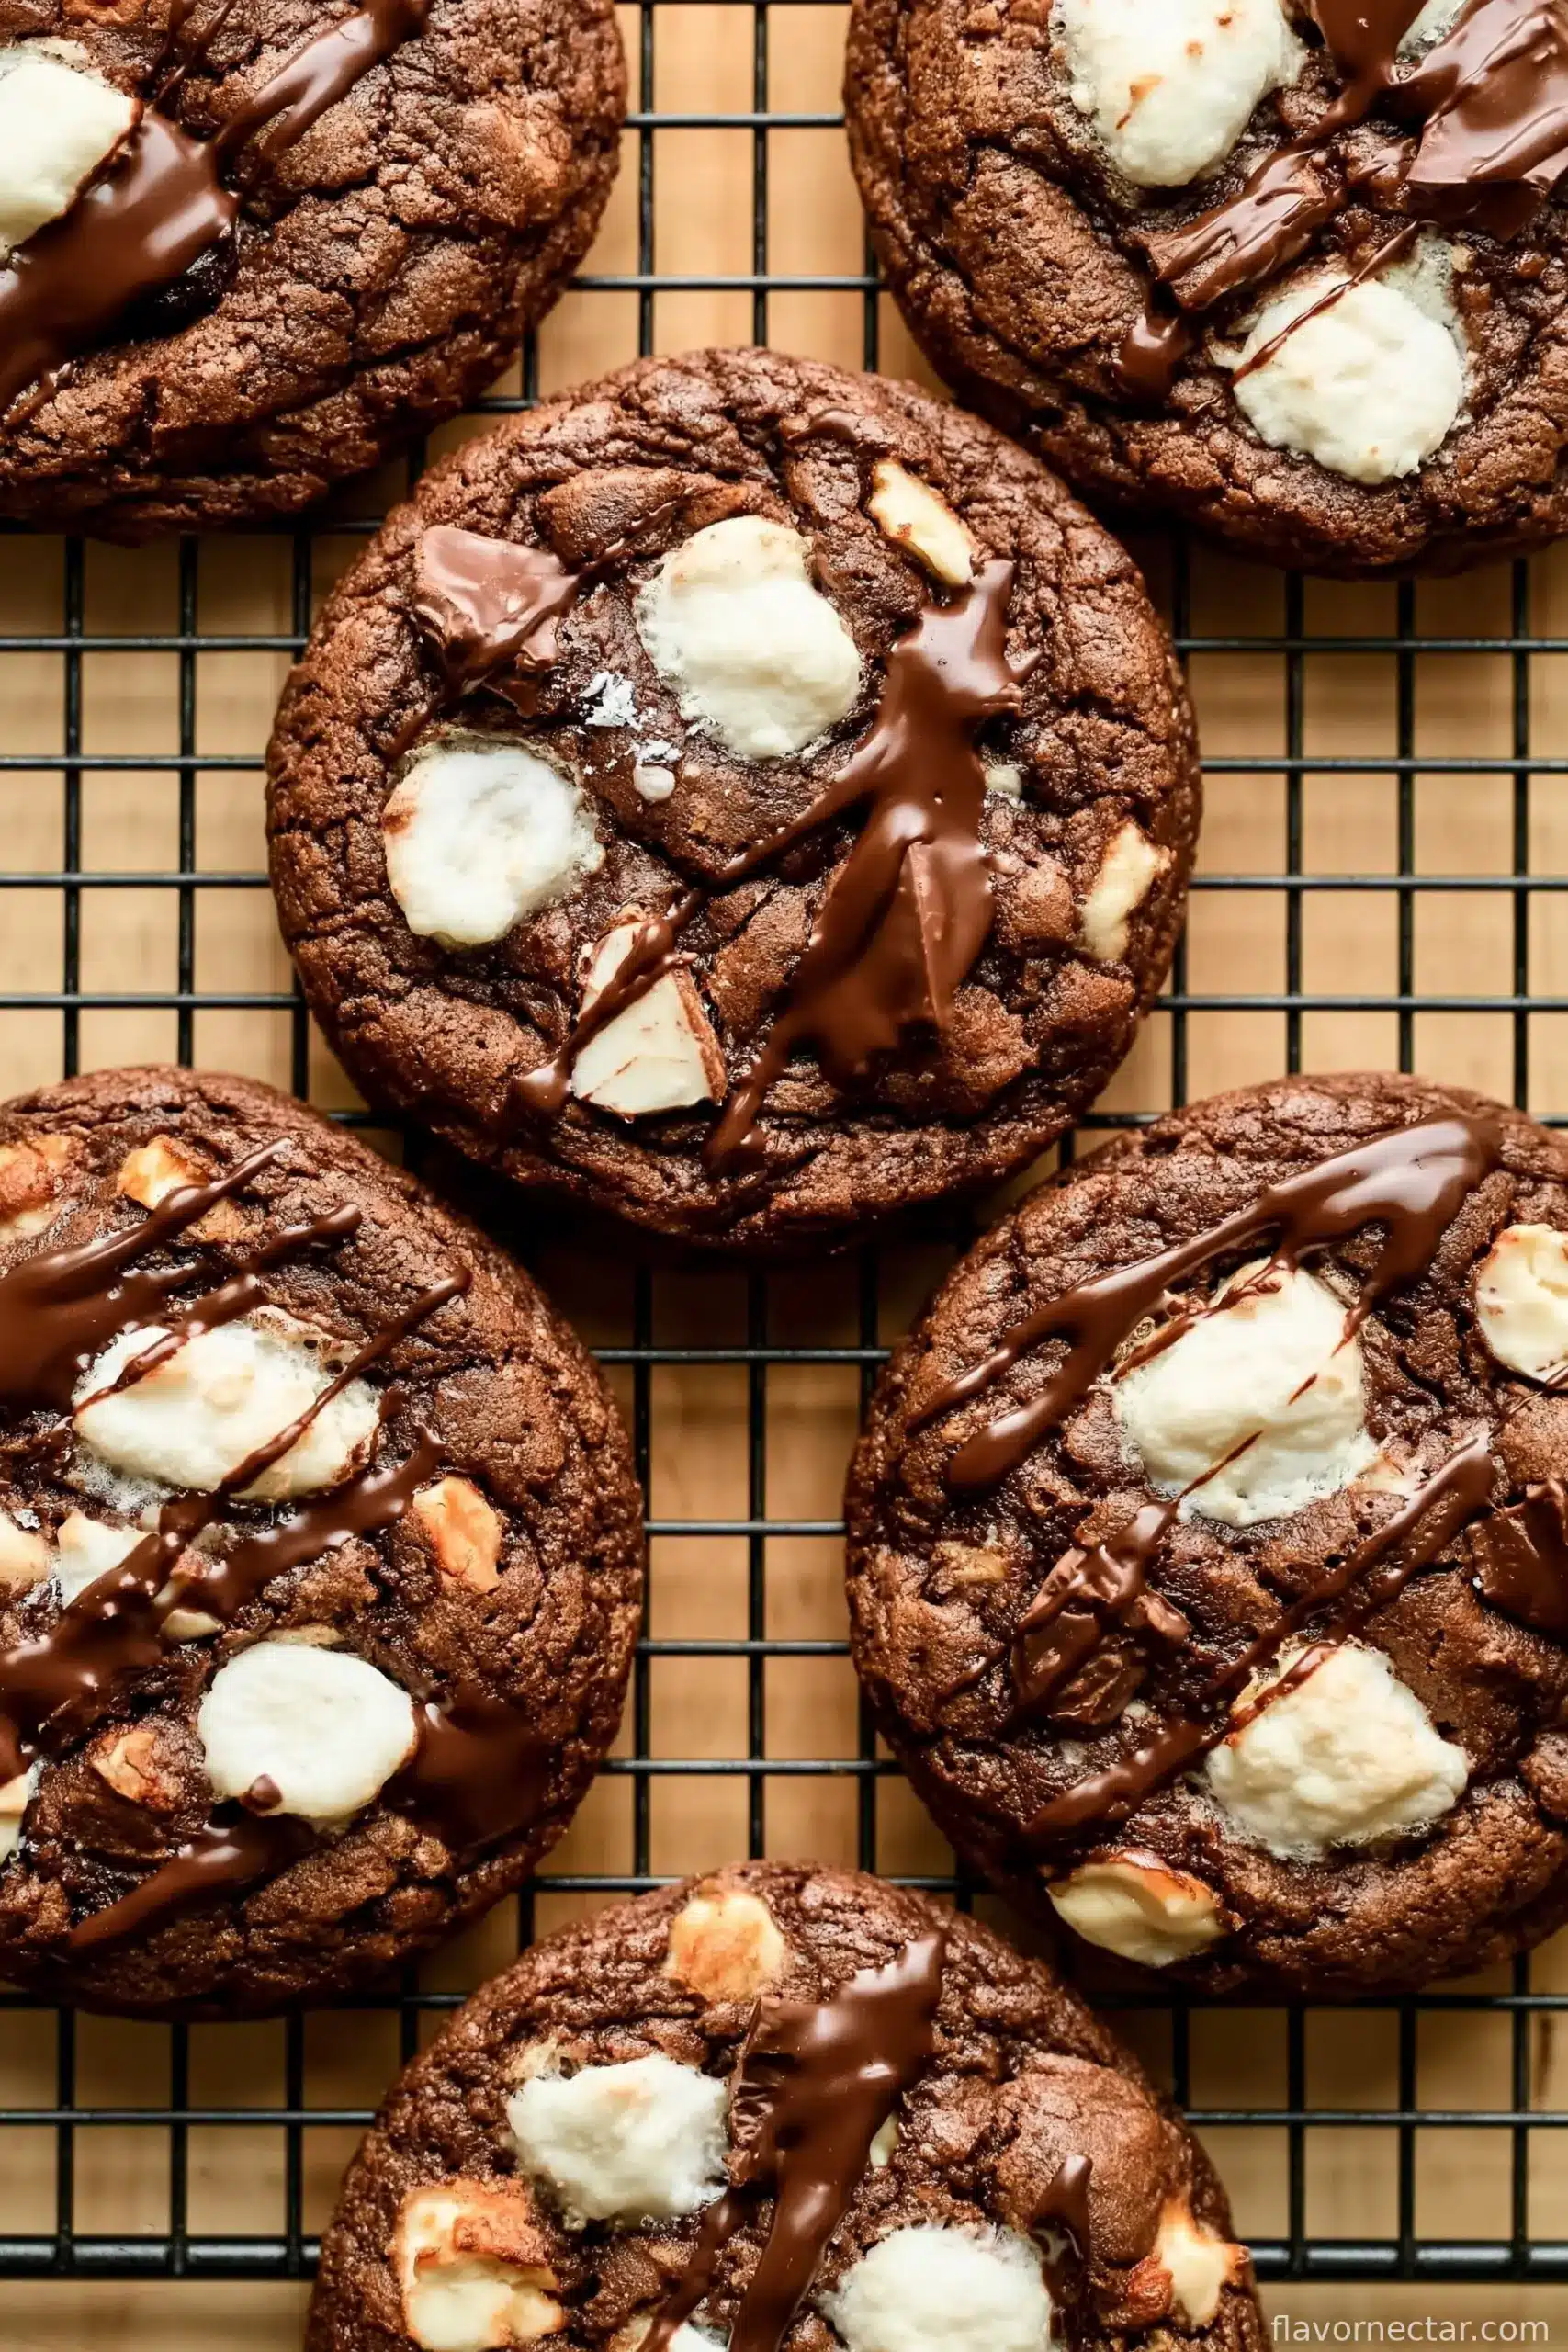
If You Love Rocky Road, You’ll Absolutely Flip for These Cookies
Alright, so here’s how this usually goes at my house: I start making these Rocky Road cookies with the best intentions of sharing, but before I know it, half the batch has mysteriously vanished (the kids and my husband blame “the dog” but let’s just say the math doesn’t add up). Honestly, I make these whenever I want to re-live those weirdly satisfying childhood movie nights where you’d try and grab all the marshmallow bits before anyone noticed! Trust me, these cookies are a total crowd-pleaser—gooey, crunchy, and a little messy in the very best way.
Why You’ll Probably Want To Make These, Like, All the Time
I bring these out when someone’s had a rough day, or when I just need a chocolate fix faster than you can say “store-bought.” My family doesn’t just like them, either—they riot if there aren’t enough. Sometimes the marshmallows explode weirdly in the oven (in a good way, unless you’re a neat freak). Honestly, if you’re after cookies loaded with chocolate, little gooey pockets, and some nutty crunch, this is your jam.
Here’s What You Need (and What I Sometimes Swap)
- ½ cup butter (I usually grab salted, but unsalted & a pinch more salt is fine)
- ¾ cup brown sugar, packed (sometimes I use light, sometimes dark—depends what’s loitering in the pantry)
- ¼ cup granulated sugar
- 1 teaspoon vanilla extract (real vanilla’s best, but honestly, the fake stuff will get the job done!)
- 1 large egg
- 1 ⅓ cups all-purpose flour (no joke, I once grabbed cake flour by mistake—not a disaster but the texture was… different)
- ⅓ cup unsweetened cocoa powder (Dutch-process? Natural? Either. Grandma swore by Hershey’s, but whatever’s on sale works too)
- ½ teaspoon baking soda
- ¼ teaspoon salt
- ½ cup semisweet chocolate chips (Milk or dark have subbed in during emergencies—kids didn’t notice!)
- 1 cup halved mini marshmallows (I cut the jumbo ones once. Too sticky, wouldn’t recommend.)
- ¼ cup sliced almonds (You could try pecans or peanuts if that’s more your thing)
How to Make the Gooey Magic Happen
- Crank your oven to 350°F (that’s 175°C for my international friends). Line two baking sheets with parchment or those nifty silicone mats. If you forget and just butter the tray, it still mostly works, but they’ll spread more.
- Grab a big-ish microwave-safe bowl and pop your butter in. Nuke it for 40 seconds or so; you want it pretty melty, not totally sizzling. If you forget and blast it to liquid—don’t stress, just let it cool a bit so you don’t scramble the egg later.
- Give that melted butter a good whisk so it’s all smooth and buttery. Honestly, this is a good moment for an impromptu dance break (but maybe not with the bowl in hand!).
- Dump in both sugars and stir until it’s kind of caramelly and all mixed up. It won’t look fancy yet—that’s fine.
- Add your vanilla and the egg. Beat again just until it’s mixed; don’t overthink it. Sometimes I get bored and just use a fork at this point. Works fine.
- Toss in the flour, cocoa powder, baking soda, and salt. I usually just sprinkle them right on top. If you haven’t measured the flour right, dough can get weird—actually, it’s better to fluff your flour before you scoop it (I learned this the hard way).
- Mix it all together until you’ve got a soft, slightly sticky dough. If it sticks to your spoon a lot, add a tablespoon of flour—on second thought, maybe two if it’s still gluey. This is where I usually sneak a taste. Who’s judging?
- Fold in the chocolate chips, halfed marshmallows, and sliced almonds. Get them as evenly spread through the dough as you can. If a marshmallow tries escaping, just smoosh it back in, no worries.
- Scoop out balls of dough, about 1.5 tablespoons each (medium cookie scoop or eyeball it—it’s not rocket science). Space them a couple of inches apart so they don’t fuse into one big cookie blob… unless that’s your plan, in which case, I love your style.
- Bake for 7 to 10 minutes—check them at 8 mins; you want them puffed up and a bit underbaked in the middle. (Don’t wait til they’re “done” looking; they’ll dry out, and who wants that?)
Random Notes Form My Kitchen
- The cookies will look a little undercooked straight out of the oven but set up nicely as they cool. Seriously, don’t overbake or you lose the goo factor.
- If your marshmallows mostly disappear while baking, try tucking them inside the dough next time. I figured this out after way too many “marshmallow puddles.”
- Brown sugar clumpy? Microwave it with a damp paper towel for 10 seconds. Game changer.
My Experiments (Some Winners, Some Flops)
- I’ve tossed coconut flakes in—good, but a touch chewy. Raisins? Not my jam, though maybe you’ll love ’em.
- Once tried doubling the marshmallows… everything melted into sugar lava. Fun for kids, not so fun for scrubbing pans.
- If you swap almonds for walnuts or pecans, let me know how it turns out! My kids stage a protest if I go too nutty, though.
Equipment? Use What You’ve Got
- I lean on my trusty hand mixer but you can wield a wooden spoon, no problem.
- Cookie scoops are handy but two spoons work fine. (So does your clean hand, if you’re not squeamish!)
- No parchment? Grease the pan well, and check ’em a minute early.
Storing (Or, How Long They Actually Last)
Store these guys in an airtight container on the counter. They’re best in the first two days, but, honestly, they rarely survive more than a day at my place. For longer keeping, you can freeze the dough balls and bake ’em straight from the freezer (maybe add 2-3 minutes).
Serving Tricks and Traditions
I love piling these warm with a scoop of vanilla ice cream—my daughter actually crumbles them over cereal (don’t ask). Sometimes I just eat them with coffee at breakfast and call it a power move.
Real-Life Pro Tips (Learned the Hard Way)
- If you rush the melting butter step and dump everything in hot, you’ll end up with weird scrambled-egg cookies. Not great.
- Let them cool a bit before moving—otherwise, marshmallows stick to everything (lesson learned… my counter still has the evidence).
FAQ: Stuff People Actually Ask Me
- Can I make them without nuts? Absolutely, just leave them out. No fuss.
- What if I only have big marshmallows? Chop them up smallish. Warning: it’s sticky and kind of messy, but still works!
- Can I use all dark chocolate chips? Yep! Just makes them more decadent. Might want to add a smidge more sugar if you’ve got a real sweet tooth.
- They seem underdone—should I bake longer? Resisting the urge to overbake is a battle I know well! They set up more as they cool, promise.
Ingredients
- ½ cup butter
- ¾ cup brown sugar packed
- ¼ cup granulated sugar
- 1 teaspoon vanilla extract
- 1 large egg
- 1 ⅓ cups all-purpose flour
- ⅓ cup unsweetened cocoa powder
- ½ teaspoon baking soda
- ¼ teaspoon salt
- ½ cup semisweet chocolate chips
- 1 cup halved mini marshmallows
- ¼ cup sliced almonds
Instructions
-
1Crank your oven to 350°F (that’s 175°C for my international friends). Line two baking sheets with parchment or those nifty silicone mats. If you forget and just butter the tray, it still mostly works, but they’ll spread more.
-
2Grab a big-ish microwave-safe bowl and pop your butter in. Nuke it for 40 seconds or so; you want it pretty melty, not totally sizzling. If you forget and blast it to liquid—don’t stress, just let it cool a bit so you don’t scramble the egg later.
-
3Give that melted butter a good whisk so it’s all smooth and buttery. Honestly, this is a good moment for an impromptu dance break (but maybe not with the bowl in hand!).
-
4Dump in both sugars and stir until it’s kind of caramelly and all mixed up. It won’t look fancy yet—that’s fine.
-
5Add your vanilla and the egg. Beat again just until it’s mixed; don’t overthink it. Sometimes I get bored and just use a fork at this point. Works fine.
-
6Toss in the flour, cocoa powder, baking soda, and salt. I usually just sprinkle them right on top. If you haven’t measured the flour right, dough can get weird—actually, it’s better to fluff your flour before you scoop it (I learned this the hard way).
-
7Mix it all together until you’ve got a soft, slightly sticky dough. If it sticks to your spoon a lot, add a tablespoon of flour—on second thought, maybe two if it’s still gluey. This is where I usually sneak a taste. Who’s judging?
-
8Fold in the chocolate chips, halfed marshmallows, and sliced almonds. Get them as evenly spread through the dough as you can. If a marshmallow tries escaping, just smoosh it back in, no worries.
-
9Scoop out balls of dough, about 1.5 tablespoons each (medium cookie scoop or eyeball it—it’s not rocket science). Space them a couple of inches apart so they don’t fuse into one big cookie blob… unless that’s your plan, in which case, I love your style.
-
10Bake for 7 to 10 minutes—check them at 8 mins; you want them puffed up and a bit underbaked in the middle. (Don’t wait til they’re “done” looking; they’ll dry out, and who wants that?)
CLICK FOR NUTRITION INFO
↑
Approximate Information for One Serving
Serving Size:
1 serving
Calories:
145 caloriescal
Protein:
2gg
Fat:
7gg
Saturated Fat:
0g
Trans Fat:
0g
Cholesterol:
0mg
Sodium:
0mg
Potassium:
0mg
Total Carbs:
20gg
Fiber:
0g
Sugar:
0g
Net Carbs:
0g
Vitamin A:
0
Vitamin C:
0mg
Calcium:
0mg
Iron:
0mg
Nutrition Disclaimers
Number of total servings shown is approximate. Actual number of servings will depend on your preferred portion sizes.
Nutritional values shown are general guidelines and reflect information for 1 serving using the ingredients listed, not including any optional ingredients. Actual macros may vary slightly depending on specific brands and types of ingredients used.
To determine the weight of one serving, prepare the recipe as instructed. Weigh the finished recipe, then divide the weight of the finished recipe (not including the weight of the container the food is in) by the desired number of servings. Result will be the weight of one serving.
Did you make this recipe?
Please consider Pinning it!