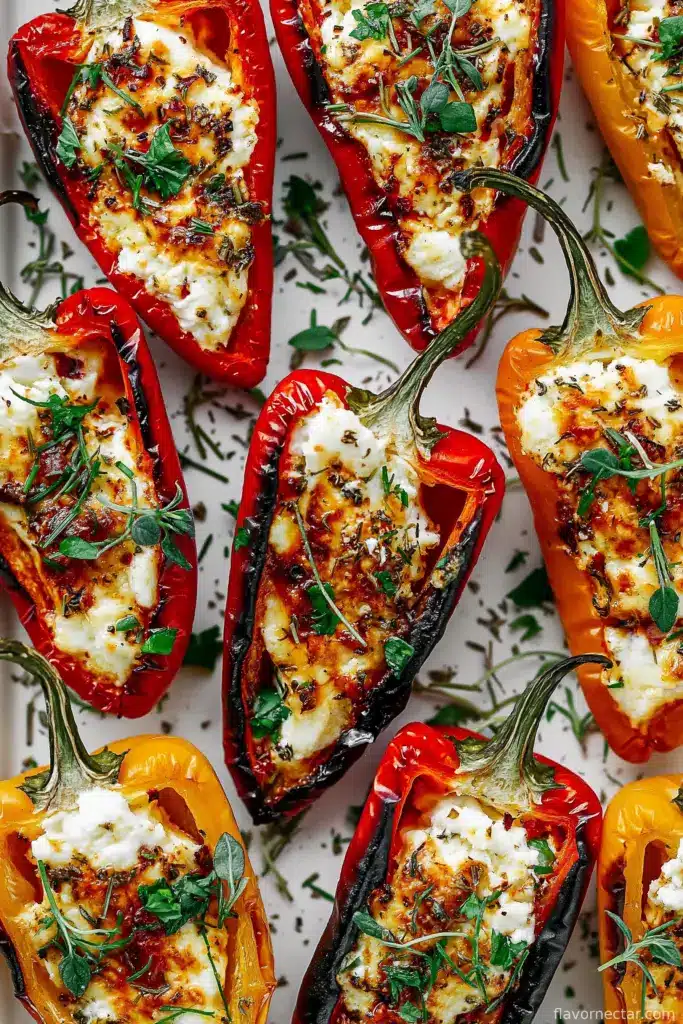
If You Haven’t Roasted Goat Cheese Stuffed Mini Peppers, You’re Missing Out
So, there’s this dish I whipped up for a last-minute game night a couple years ago (totally forgot to pick up chips—classic move). These roasted goat cheese stuffed mini peppers ended up stealing the show. My mate Dave still talks about them. He messaged me once midweek just to ask if I had any leftovers, which—let’s be real—never happens around here. Something about the warm tangy cheese inside those sweet, wrinkly little peppers just makes people grin. I end up munching half the tray before guests even ring the doorbell. Oops.
Why You’ll Love Making These (Even When You’re in a Hurry)
I usually make this when I’ve got people swinging by on short notice because—I mean, who wants to faff about with complicated appetizers? Plus, my family goes a bit mad for them since you can eat three in a row and pretend you’re being healthy (mini veggies absolutely count as health food, right?). Ah, and at least half the fun is seeing how gooey you can make that goat cheese filling without it completely oozing out. Somewhere between almost-perfect and deliciously messy is where the magic happens.
What You’ll Need (And Some Cheeky Substitutions)
- 20 mini sweet peppers (those rainbow bags—they’re cheerful!)
- 200g soft goat cheese (sometimes I use herbed goat cheese for an extra punch)
- 2 tbsp cream cheese (or Greek yogurt if I realize I’m out—both work, to be honest)
- 1 tbsp olive oil (use whatever you’ve got, even a knob of butter works in a pinch)
- 1 small garlic clove, finely minced (my grandmother used dried garlic powder and was convinced it was fancy—whatever floats your boat)
- 1 tsp lemon zest (I once used orange zest by accident, not my best experiment)
- 1 tbsp fresh parsley, chopped (honestly, I skip this sometimes and nobody fusses)
- 1/4 tsp salt (give or take, I don’t always measure…)
- Black pepper to taste
How I Throw These Together
- Preheat your oven to 400°F (or about 200°C if you’re not using my oven, which never really matches the dial anyway).
- Slice your mini peppers in half lengthwise and yank out the seeds. Don’t stress if they’re not perfectly hollow – a few stray seeds never hurt anyone.
- Toss the peppers with olive oil directly on a big baking tray (saves on washing up later—thank me now).
- Mix goat cheese, cream cheese, garlic, zest, parsley, salt, and pepper in a bowl. This is where I usually sneak a taste… for, uh, quality control.
- Using a spoon (or piping bag if you’re feeling all posh), fill each pepper half with the cheese mixture. You want them full but not bursting at the seams. Although… the crispy overflows are kind of the best part.
- Arrange all the stuffed peppers back on the tray. They look better when they’re a bit crowded, don’t panic. Half the time mine end up leaning sideways and it’s fine.
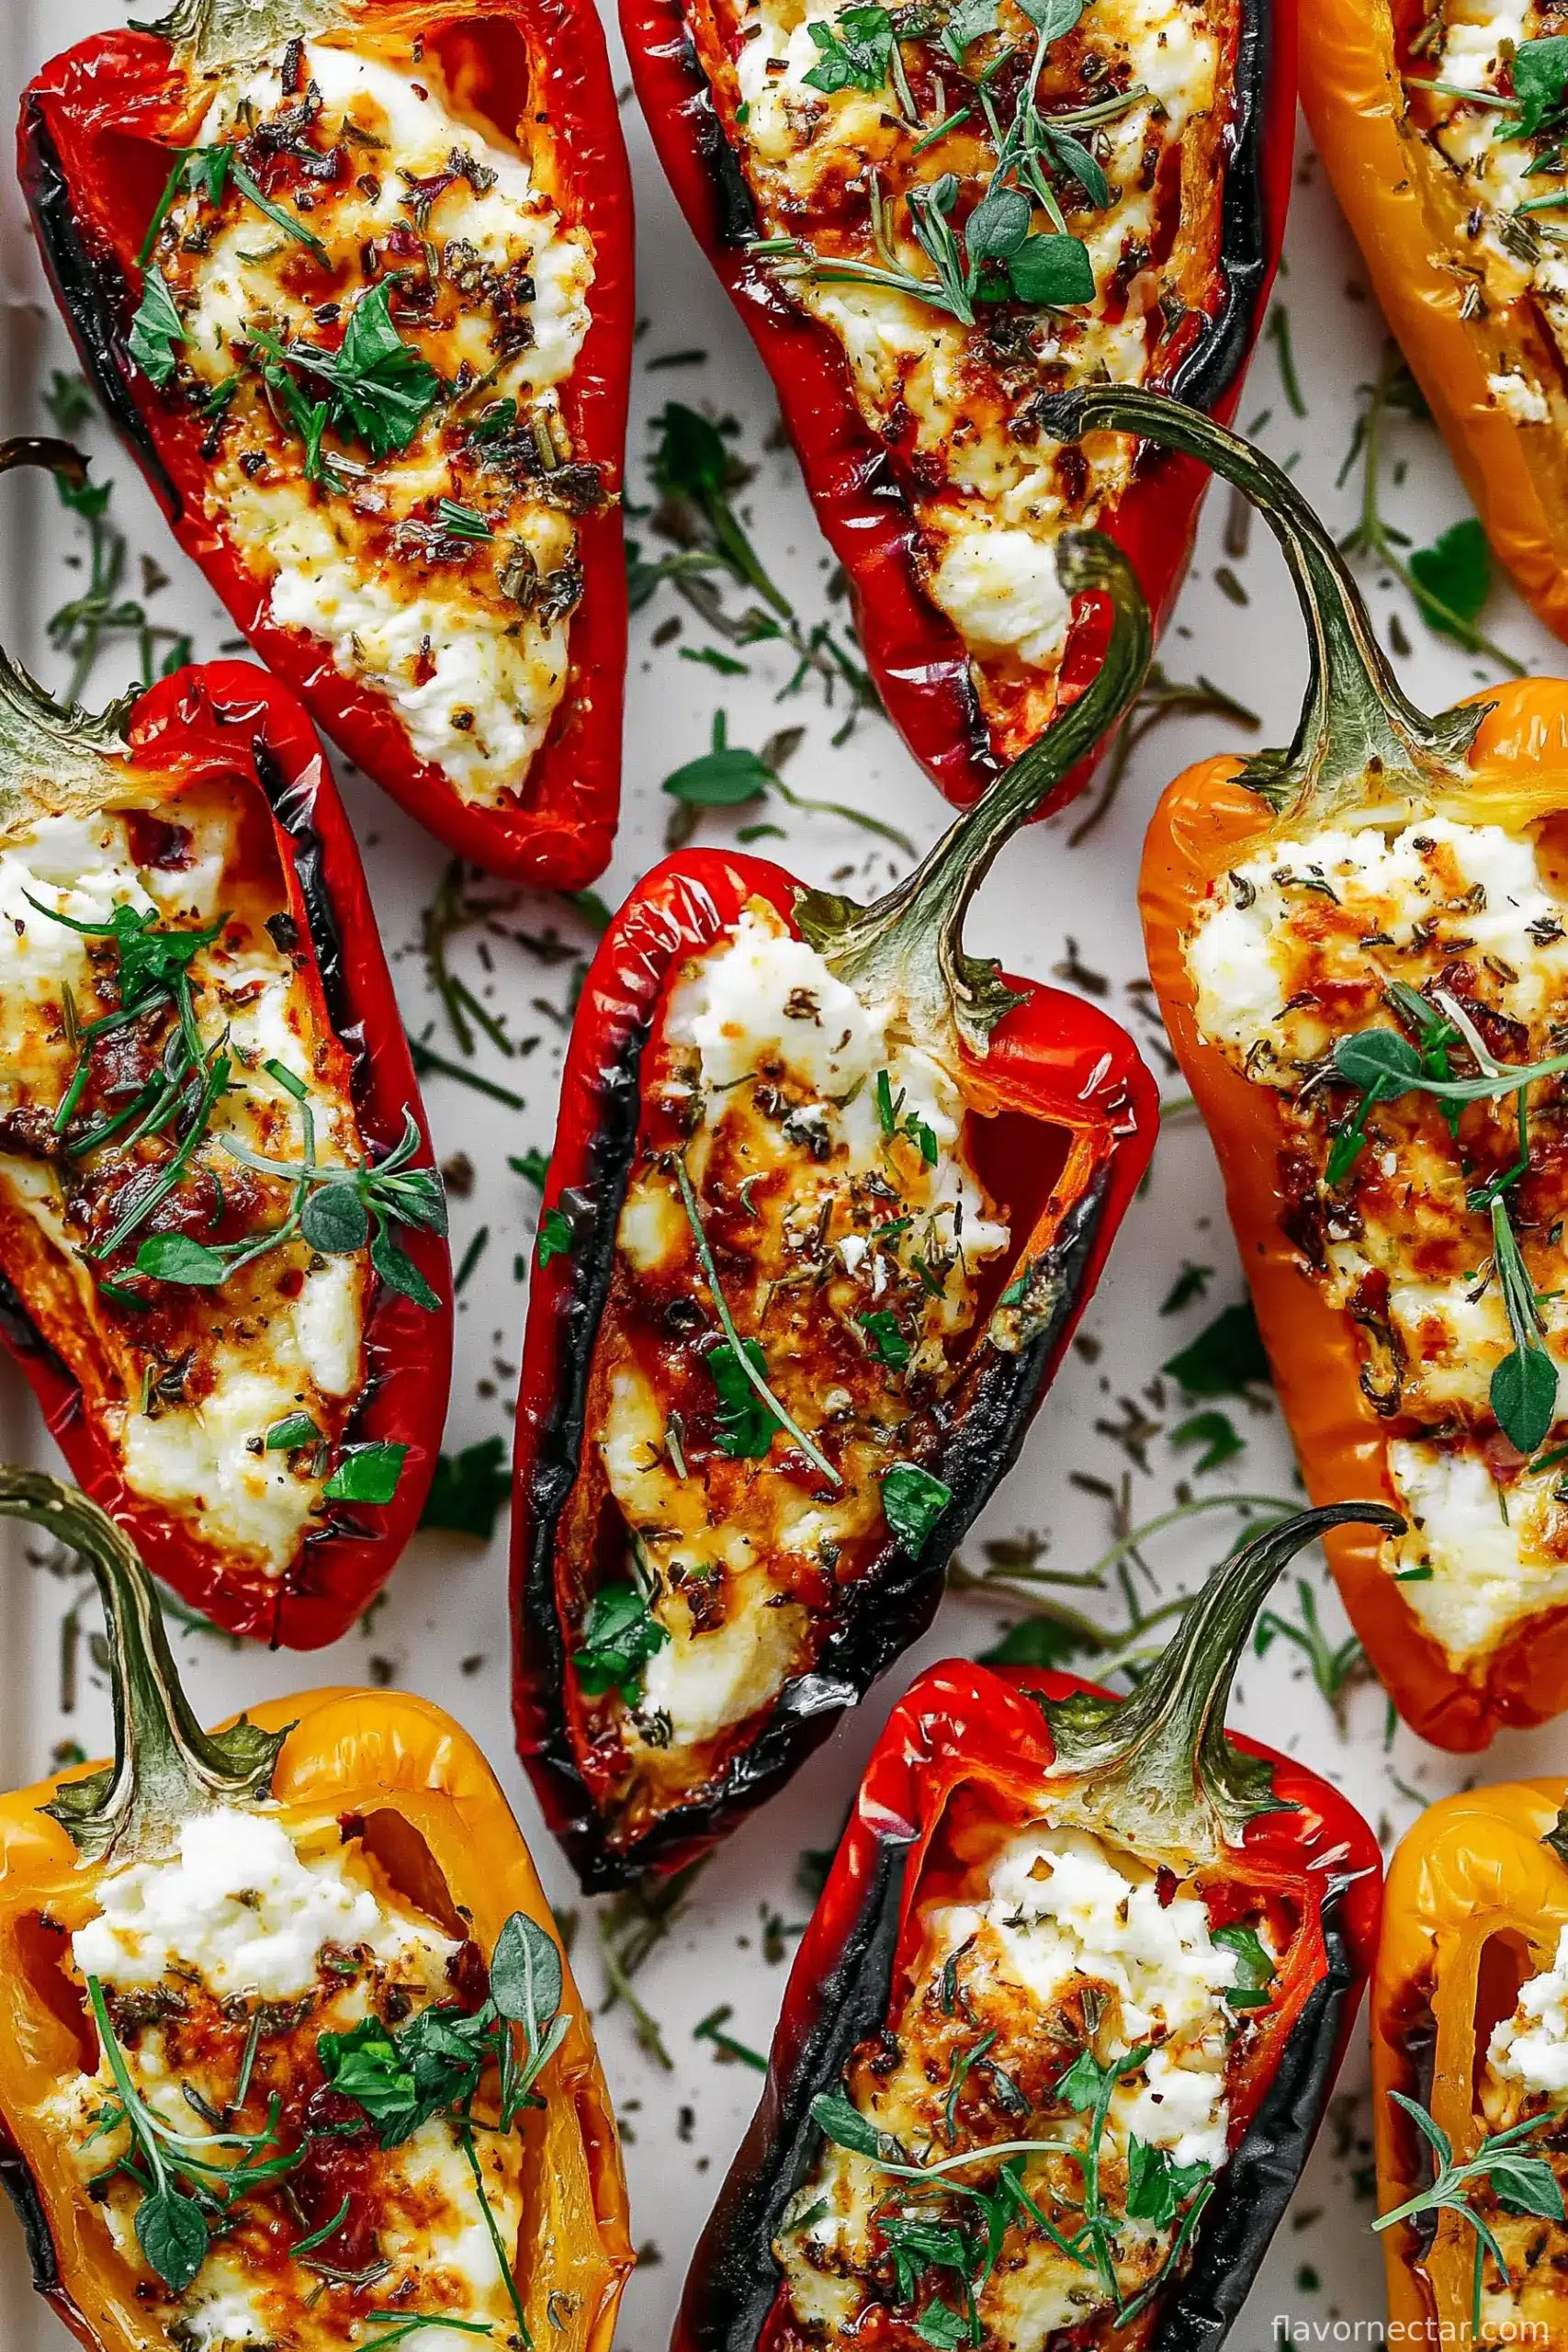
- Bake in the oven for 15-18 minutes, until the cheese is starting to brown and the peppers are a little wrinkly. If you forget and they get super brown, call it “extra caramelized flavor.”
- Let them cool for a couple of minutes, or don’t. Hot cheese burns are basically a rite of passage.
Notes (A Few Hard-Earned Lessons)
- If your goat cheese is too hard, just leave it out on the counter for a bit—it’ll soften up. Learned that the sticky way once.
- If you go heavy on the garlic, it’ll taste a bit like a pizzeria (not terrible, but you’ve been warned).
- Tiny peppers mean more filling per bite, but honestly, any size works. Once I used bell peppers and just chopped them after baking—still worked out.
Variations I’ve Tried (And One I Regret…)
- Swapping in feta for the goat cheese—it’s saltier, a bit firmer, but I liked the punch.
- Adding a bit of finely chopped sun-dried tomato to the filling for color and bite.
- I once attempted to wrap these with prosciutto. Tasty, but they sort of unravelled in the oven and looked like little pepper mummies. Not my finest aesthetic moment, but people ate them anyway.
Don’t Have the Right Stuff? Improv Time!
No piping bag? Use a sandwich bag with a corner snipped off. No mini peppers? Regular bell peppers, cut up, totally pass muster. I’ve even (don’t tell anyone) microwaved them before when I was too impatient for the oven, and while it’s… definitely not as good, it does melt the cheese quickly. Needs must.
Storage—But Will You Even Need This?
If you do, for some reason, have leftovers, toss them in an airtight container. They’ll keep for up to three days in the fridge—though honestly, in my house, it never lasts more than a day! I swear they’re even better cold from the fridge, though my kids would probably argue with me on that.
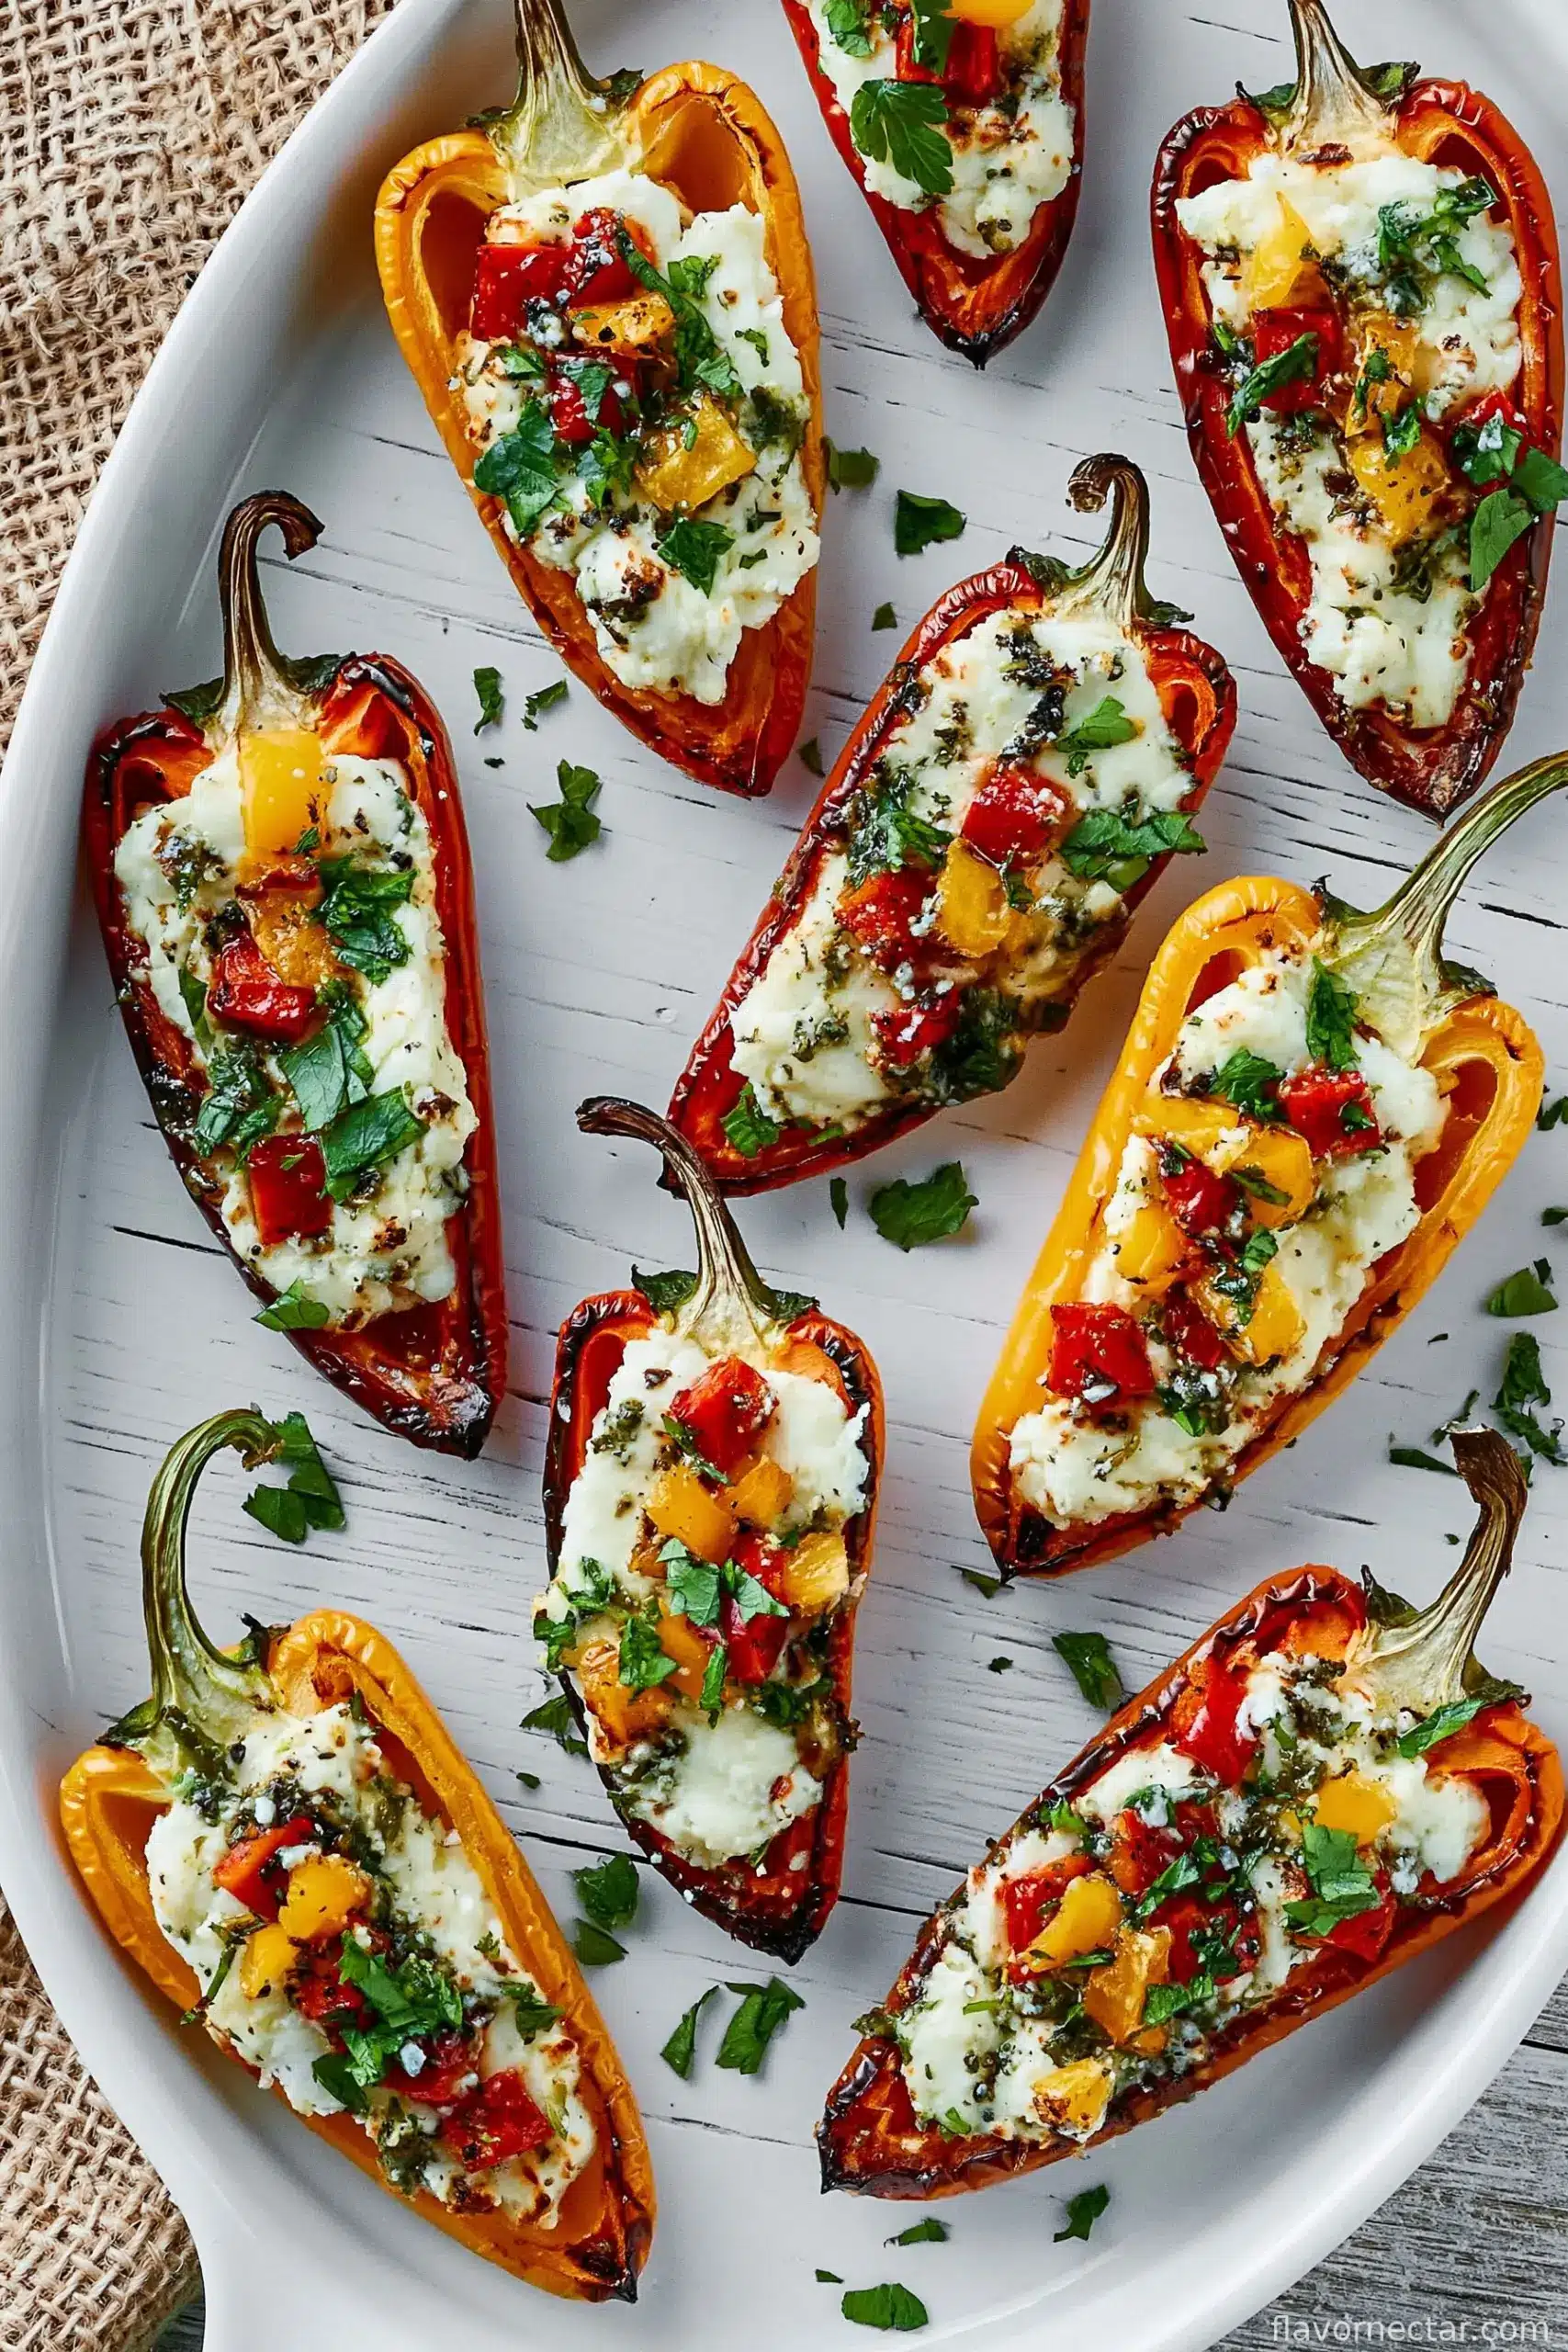
How I Like to Serve These (Personal Preference, No Judgment)
Honestly, I plop them onto a big plate, sprinkle with a smidge more fresh parsley, and let people have at it. If I’m feeling proper, I’ll add a squeeze of lemon. And on birthdays? I’ve been known to put a little flag toothpick in each. Bit silly, but gets a laugh.
Things I’ve Learned the Hard Way (Pro Tips-ish)
- I once tried to speed up the roasting by cranking the oven. Nope. Ended up with peppers so shriveled they looked haunted. Stick to the suggested temp!
- Don’t overstuff or you’ll end up with cheese lava. Still tastes great. Just not as photogenic.
- You can prep these a few hours ahead and keep them chilled till baking – just don’t forget about them, like I may or may not have once…
FAQs From Real Friends (Or Maybe Just Imagined Ones)
-
Can I make these ahead?
Yep! Stuff the peppers and stash them, unbaked, in the fridge. Just roast when you need them. Actually, I find it works better if the filling gets a bit time to settle. -
Is goat cheese too strong?
Not at all—it’s pretty mild, especially with the cream cheese mixed in. But hey, if it’s not your thing, feta’s a worthy sub. -
Help! I only have bell peppers—what now?
Go for it. Just cut them into thick strips, stuff, and roast away. They’re a bit less dainty but no one will mind. -
How do you make them less messy?
Use less filling or line your tray with parchment. Or, just embrace the mess like I do. It’s all part of the fun! -
Can I freeze them?
Technically yes, but they go a bit mushy defrosted. So I probably wouldn’t bother, unless you’re desperate to clear space in the fridge.
And you know, sometimes the best bits of cooking come form the little mishaps and moments—like when the dog nabs a pepper off the counter or someone mistakes the lemon zest for confetti. Honestly, half the joy’s the journey, not the perfectly cooked pepper.
Ingredients
- 20 mini sweet peppers
- 200g soft goat cheese
- 2 tbsp cream cheese
- 1 tbsp olive oil
- 1 small garlic clove, finely minced
- 1 tsp lemon zest
- 1 tbsp fresh parsley, chopped
- 1/4 tsp salt
- Black pepper to taste
Instructions
-
1Preheat your oven to 400°F (or about 200°C if you’re not using my oven, which never really matches the dial anyway).
-
2Slice your mini peppers in half lengthwise and yank out the seeds. Don’t stress if they’re not perfectly hollow – a few stray seeds never hurt anyone.
-
3Toss the peppers with olive oil directly on a big baking tray (saves on washing up later—thank me now).
-
4Mix goat cheese, cream cheese, garlic, zest, parsley, salt, and pepper in a bowl. This is where I usually sneak a taste… for, uh, quality control.
-
5Using a spoon (or piping bag if you’re feeling all posh), fill each pepper half with the cheese mixture. You want them full but not bursting at the seams. Although… the crispy overflows are kind of the best part.
-
6Arrange all the stuffed peppers back on the tray. They look better when they’re a bit crowded, don’t panic. Half the time mine end up leaning sideways and it’s fine.
-
7Bake in the oven for 15-18 minutes, until the cheese is starting to brown and the peppers are a little wrinkly. If you forget and they get super brown, call it “extra caramelized flavor.”
-
8Let them cool for a couple of minutes, or don’t. Hot cheese burns are basically a rite of passage.
CLICK FOR NUTRITION INFO
↑
Approximate Information for One Serving
Serving Size:
1 serving
Calories:
120cal
Protein:
5gg
Fat:
7gg
Saturated Fat:
0g
Trans Fat:
0g
Cholesterol:
0mg
Sodium:
0mg
Potassium:
0mg
Total Carbs:
8gg
Fiber:
0g
Sugar:
0g
Net Carbs:
0g
Vitamin A:
0
Vitamin C:
0mg
Calcium:
0mg
Iron:
0mg
Nutrition Disclaimers
Number of total servings shown is approximate. Actual number of servings will depend on your preferred portion sizes.
Nutritional values shown are general guidelines and reflect information for 1 serving using the ingredients listed, not including any optional ingredients. Actual macros may vary slightly depending on specific brands and types of ingredients used.
To determine the weight of one serving, prepare the recipe as instructed. Weigh the finished recipe, then divide the weight of the finished recipe (not including the weight of the container the food is in) by the desired number of servings. Result will be the weight of one serving.
Did you make this recipe?
Please consider Pinning it!