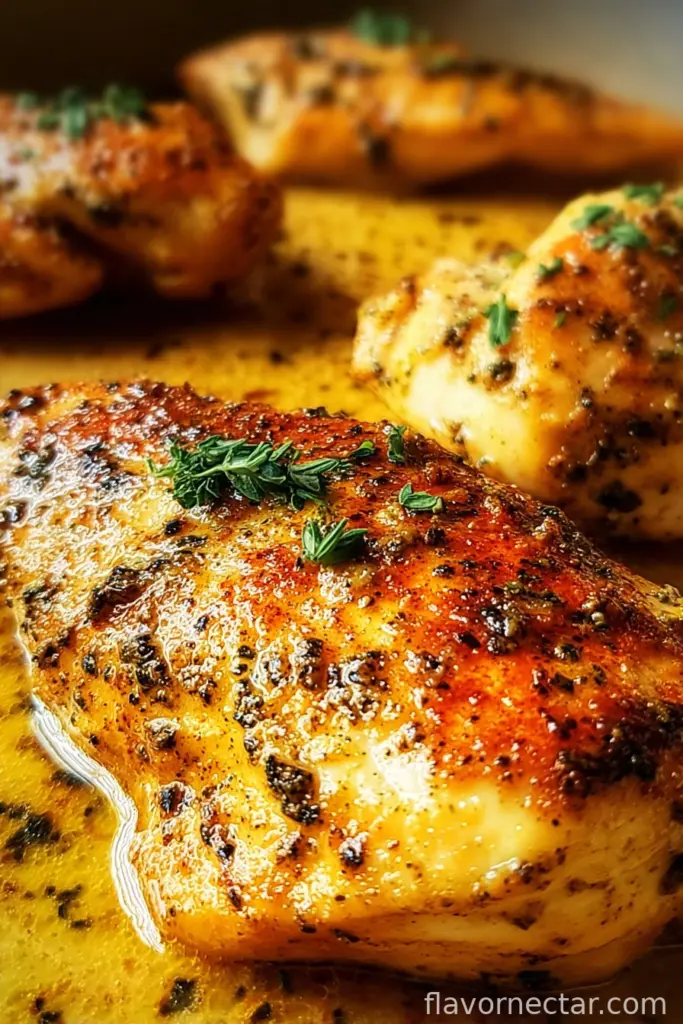
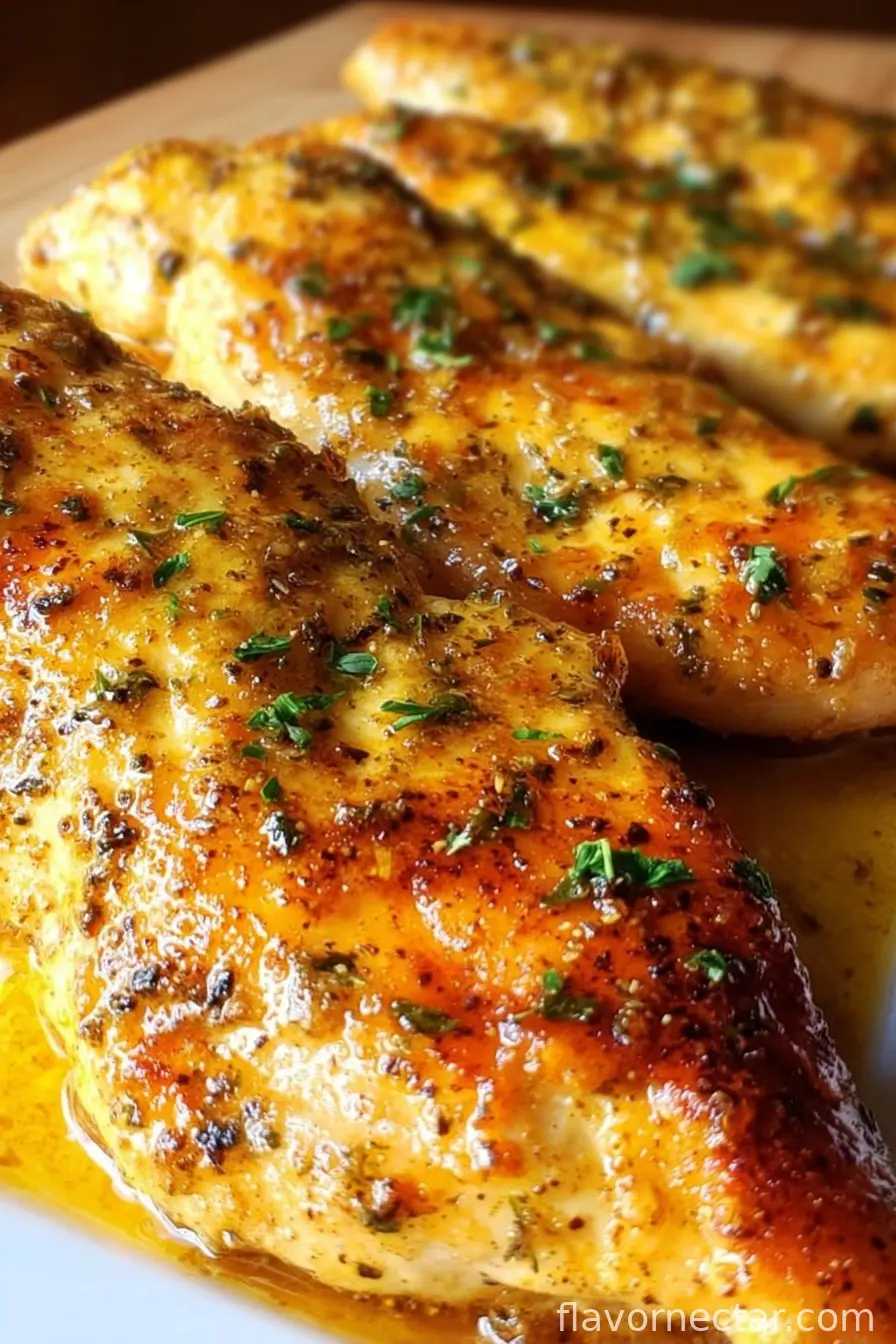
Let Me Tell You About Baking Chicken Breast…
I’ve probably made oven baked chicken breast more times than I’d care to admit. I can’t tell you how many Tuesday nights this recipe has swooped in to save dinner (or maybe I just blocked out the ones where I overcooked it into boot leather—oops). The first time I tried baking Chicken breasts, half the family was quietly poking at their plates, so dry you needed a glass of water for every bite. But honestly, by about my fifth try, people were asking for seconds! Now it’s one of those reliable meals I can finish even if the dog steals a sock in the middle of prep… again.
Why I Keep Coming Back To This (And Maybe You Will Too)
I make this dish when I just don’t have the energy for fussy cooking (and that’s, like, three times a week). My family goes bananas for it because it’s straightforward but super juicy—once you figure out not to cook it to oblivion. I mean, we’ve all been there—pulling out dry, sad chicken breast and wondering what went wrong. I still remember thinking, “Do people really enjoy baked chicken?” Turns out, when you get the hang of it, yeah, they do. And the best part? If there’s leftovers (which, full disclosure, is rare at my place), it’s even better in sandwiches for lunch. Oh, and when I’m feeling extra fancy, I dress it up with different spices, but honestly? Sometimes just garlic powder and salt does the trick.
Stuff You’ll Need (But Feel Free to Wing It)
- 2-4 boneless chicken breasts (skinless, but if you’re a rebel, skin on can be tasty too)
- 1-2 tablespoons olive oil (I swap in melted butter if I’m feeling indulgent—umm, not exactly health food, but so good)
- 1 teaspoon salt (I use flaky sea salt, but really, whatever’s in the cupboard works)
- 1/2 teaspoon black pepper (fresh ground if I’m not rushing)
- 1 teaspoon garlic powder (or crush a clove if you want to mess up more dishes)
- 1/2 teaspoon paprika (smoked paprika gives it a bit of swagger, but sweet paprika is fine!)
- Optional: Italian seasoning, lemon zest, chili flakes, or, if you’re living dangerously, a splash of soy sauce. My grandmother always swore by Lawry’s seasoning salt, but honestly, it’s all just chicken at the end of the day.
How I (Usually) Throw This Together
- Start by heating your oven to 220°C (about 425°F). Pro tip: I always forget to preheat at least once a month, so, give it 10 minutes after you remember.
- Pat chicken breasts dry with paper towels. (This helps with the browning, and let’s be honest, nobody likes a soggy bottom.)
- Grab a baking dish or a sheet pan. I usually smear a little oil on the bottom so the chicken doesn’t cling on for dear life.
- In a bowl (or just on a plate when I’m in a hurry), mix the oil, salt, pepper, garlic powder, and paprika. Toss the chicken in this muddle so it’s nicely coated. If you want, throw the seasoning right onto the meat on the tray — less washing up!
- Place the chicken breasts spaced apart on the pan. Don’t stress if they look a bit uneven; the oven figures it out. Sometimes I sneak a taste of the marinade here (shh), but raw chicken warning!
- Bake in the preheated oven for 18 to 22 minutes, depending on how big ‘em are. Basically, until the juices run clear and the internal temp hits 74°C (165°F). If I’m ever unsure, I just give one a slice—nobody ever notices.
- Let the chicken rest for 5-10 minutes after baking—yes, really, it keeps it juicier. (I used to skip this and kept wondering why all the goodness ran out.)
Notes from My Own Kitchen Experiments
- Sometimes I pound the chicken breasts to the same thickness with a rolling pin. It cooks more evenly, but honestly, most nights I don’t bother.
- If you forget the oil, don’t panic—just toss a pat of butter on top.
- I’ve read you can brine the chicken beforehand, but… who’s got time on a weeknight?
All The Weird Stuff I’ve Tried (AKA Variations & Experiments)
- I’ve swapped olive oil for Greek yogurt once—gave it a tangy kick, but my son said it tasted “funny”.
- Adding a squeeze of lemon juice after baking—makes it extra fresh. Sometimes I dump on a spoon of pesto just before serving; no complaints so far.
- Tried a honey mustard glaze one time… but it burnt in the oven, so maybe add glazes only for the last 5 minutes!
Got the Right Gear? Don’t Worry If Not
If you have a meat thermometer, awesome—makes it foolproof. But if you don’t, honestly just cut the thickest part and check for pinkness. I used a fork and a lot of hope for years before I gave in and got a cheap thermometer (like Bon Appetit recommends—genuinely helpful!). If you’re desperate, even a toaster oven worked for me during a kitchen reno… just watch the timing.
Where Does the Leftovers Go?
Supposedly you can keep this chicken in the fridge for 3-4 days in a sealed container. In my house? It rarely makes it through the next lunch. (But if you’re organized, check out these reheating tricks; honestly, saves a lot of microwave sadness.)
How I Like To Serve It Up
I love slicing this up for salads, especially when I’m pretending I’m a health nut. Sometimes we slap it between ciabatta with some cheese and leftover roasted veg from the night before. If it’s Sunday, I think about doing gravy, but more often, it’s just straight up alongside potatoes—mashed or roasted, can’t go wrong. My sister actually insists on ketchup which, well, each to their own I guess.
Lessons Learned the Hard Way (Pro Tips from My Flubs)
- I once tried rushing the rest step and regretted it—chicken everywhere, not a drop of juice left!
- Don’t crank up the oven higher to “save time”—you’ll only cook the outside and the middle will still say nope.
- Actually, I find it works better if you use a bigger pan; the chicken roasts instead of steams.
So, Questions Folks Ask Me (Fair Warning: Real Answers)
-
Q: Can I use frozen chicken breasts?
Sure can—just defrost them first, or they’ll end up rubbery as a tire. Learnt that one the hard way! -
Q: What if my chicken is thicker than usual?
No biggie, just add 3-5 minutes bake time; start checking with a thermometer, or, if you’re old school, slice it and peek inside. -
Q: Do I need to cover the chicken when baking?
Nah, I never bother, unless I messed up and it’s getting dark on top (foil can buy you time). -
Q: Is it really juicy? Or is this like some dry diet meal?
Skepticism is healthy! I promise, if you rest it and don’t overdo the baking, it’s the juiciest baked chicken I know outside of a rotisserie. -
Q: What if I don’t have an oven?
I once borrowed a friend’s air fryer for this—worked surprisingly well. Or pan-fry if you want crispy bits, skip the oven altogether!
And now, if you’ll excuse a slight tangent: every time I bake chicken, my neighbor pops in and asks, “smells good—got enough for one more?” Honestly, he’s got the timing of a Swiss watch. Anyway, hope you give this a try—let me know if it passes your family’s picky test!
PS: If you love experimenting, I’ve also found some great ideas for next-level chicken seasoning at Simply Recipes. Just in case you feel adventurous…

Ingredients
- 4 boneless, skinless chicken breasts (about 6 oz each)
- 2 tablespoons olive oil
- 1 teaspoon kosher salt
- 1/2 teaspoon freshly ground black pepper
- 1 teaspoon garlic powder
- 1 teaspoon paprika
- 1/2 teaspoon dried thyme
- 1/2 teaspoon onion powder
Instructions
-
1Preheat your oven to 425°F (220°C). Line a baking sheet with parchment paper or lightly grease it.
-
2Pat the chicken breasts dry with paper towels. Place them on the prepared baking sheet.
-
3Brush both sides of each chicken breast with olive oil.
-
4In a small bowl, mix together salt, black pepper, garlic powder, paprika, dried thyme, and onion powder. Sprinkle the seasoning evenly over both sides of the chicken breasts.
-
5Bake in the preheated oven for 20-22 minutes, or until the chicken is cooked through and reaches an internal temperature of 165°F (74°C).
-
6Remove from the oven and let the chicken rest for 5 minutes before slicing and serving.
CLICK FOR NUTRITION INFO
↑
Approximate Information for One Serving
Serving Size:
1 serving
Calories:
220cal
Protein:
37 gg
Fat:
8 gg
Saturated Fat:
0g
Trans Fat:
0g
Cholesterol:
0mg
Sodium:
0mg
Potassium:
0mg
Total Carbs:
2 gg
Fiber:
0g
Sugar:
0g
Net Carbs:
0g
Vitamin A:
0
Vitamin C:
0mg
Calcium:
0mg
Iron:
0mg
Nutrition Disclaimers
Number of total servings shown is approximate. Actual number of servings will depend on your preferred portion sizes.
Nutritional values shown are general guidelines and reflect information for 1 serving using the ingredients listed, not including any optional ingredients. Actual macros may vary slightly depending on specific brands and types of ingredients used.
To determine the weight of one serving, prepare the recipe as instructed. Weigh the finished recipe, then divide the weight of the finished recipe (not including the weight of the container the food is in) by the desired number of servings. Result will be the weight of one serving.
Did you make this recipe?
Please consider Pinning it!!