Alright, let me tell you—this is the chocolate chip cookie recipe I come crawling back to every single time. I’ve tried fancier ones with browned butter, or those recipes that need you to chill the dough for eleventy hours (who can actually wait for that?), but honestly, this quick little number never lets me down. They remind me of baking with my mum after school—me, covered in flour, and her pretending not to notice the huge finger swipe that kept appearing in the bowl. If you catch me making these late on a Tuesday just because it’s raining out, don’t judge. Everyone’s got their rituals.
Why I Keep Making These Cookies Again and Again
I make these whenever I just can’t think about anything serious, or honestly, when I need a break form life stuff. My family—especially Aunt Jo—goes a bit bonkers for them. (She swears they’re magic, but really, it’s just butter and sugar, you know?) Plus, no fancy tricks here. No chilling overnight, no stand mixer drama (though it’s handy if you’ve got one), and no obscure ingredients like that weird ‘vanilla paste’ I once splurged on and then promptly lost to the pantry black hole. Look, even if you muck up and forget the salt once (been there, tasted the regret), they’re still edible cookies. That’s comforting.
What You’ll Need (Ingredients… Plus My Two Cents)
- 1 cup (225g) unsalted butter, softened (hey, if you’re in a rush, I’ve been known to zap it in the microwave—just don’t let it melt completely)
- 1 cup (200g) granulated sugar (sometimes I’ll swap in half brown sugar instead for a bit of extra ‘chewiness’)
- 1/2 cup (100g) packed light brown sugar (grandma said dark brown was classier, but honestly, use whatever’s on hand)
- 2 large eggs (room temp is best, but fridge-cold works too if that’s what you’ve got)
- 2 teaspoons vanilla extract (I’ve tried the cheap stuff; the real deal’s slightly better, but not worth a meltdown if you run out)
- 2 1/4 cups (280g) all-purpose flour (I’ve cut it with whole wheat flour, but it does make them a bit denser)
- 1 teaspoon baking soda
- 1/2 teaspoon salt (I, uh, once doubled this accidentally—do not recommend!)
- 2 cups (about 340g) chocolate chips or chunks (milk, dark, or a mix, honestly whatever’s living in your pantry)
- Optional: A handful of chopped walnuts or pecans (about 1/2 cup, only if you’re feeling nutty)
How To Make ‘Em (Directions Only as Fussy as Needed)
- Preheat your oven to 350°F (175°C). I always forget and then have to wait, so just do it now.
- Cream together the butter and both sugars in a largeish bowl. You can use a stand mixer, hand mixer, or some elbow grease with a wooden spoon if you fancy a workout. Mix until it looks fluffy. (This is where I usually sneak a little lick, don’t judge).
- Crack in the eggs, one at a time, giving it a good mix after each one; then pour in the vanilla. It’ll probably look a bit gloopy—don’t overthink it.
- In a separate bowl (or, honestly, just dump on top if you hate extra washing up), whisk the flour, baking soda, and salt together. Then, slowly mix the dry into the wet ingredients. Go easy or you’ll end up in a cloud of flour.
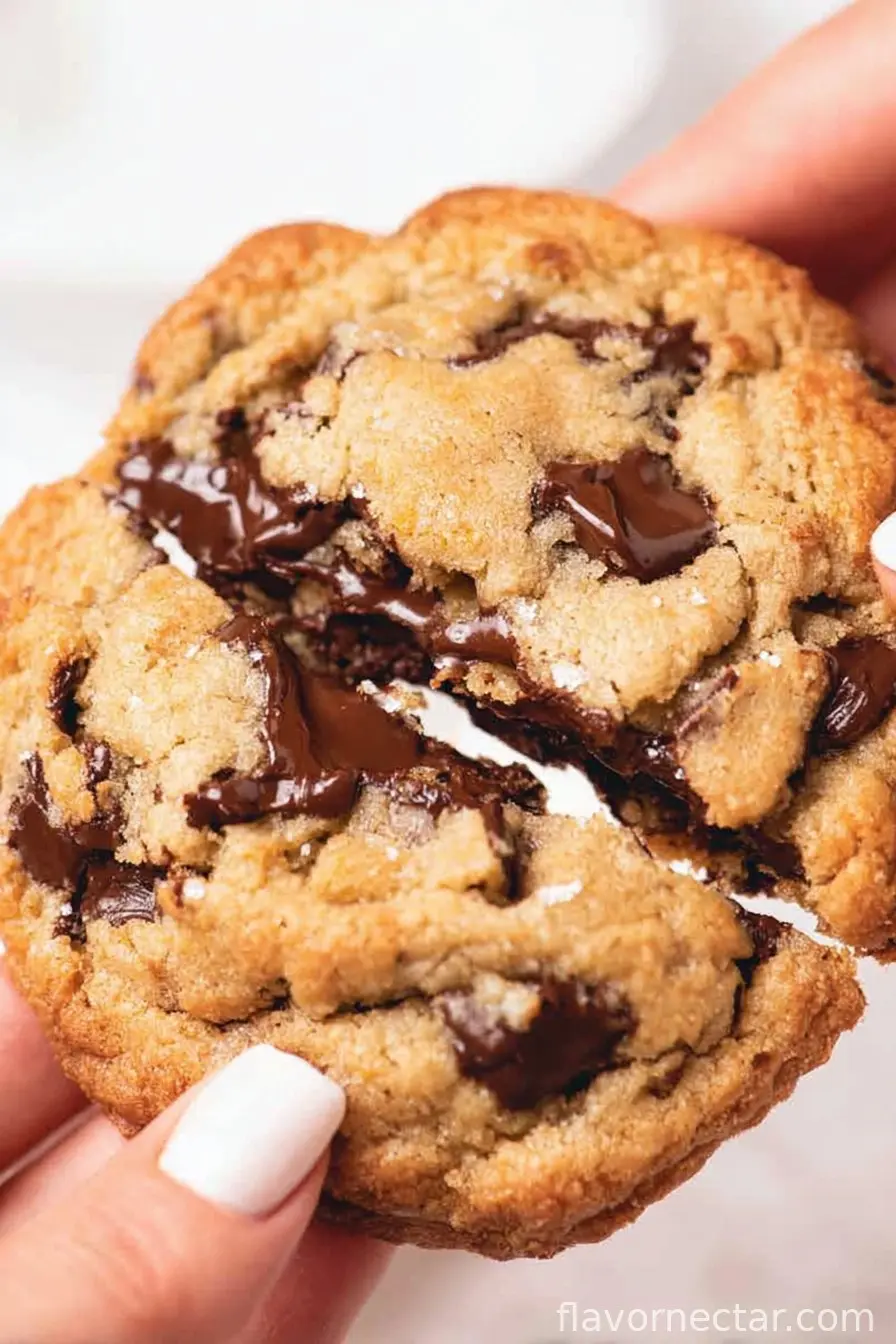
- Fold in the chocolate chips and nuts if you’re using ’em. The dough’ll look thick—almost like it’s too much, but it isn’t. Trust the process.
- Scoop out heaped tablespoons of dough and plop them (that’s a technical term) onto a lined baking sheet. Give them a little room—these guys like to spread out a bit.
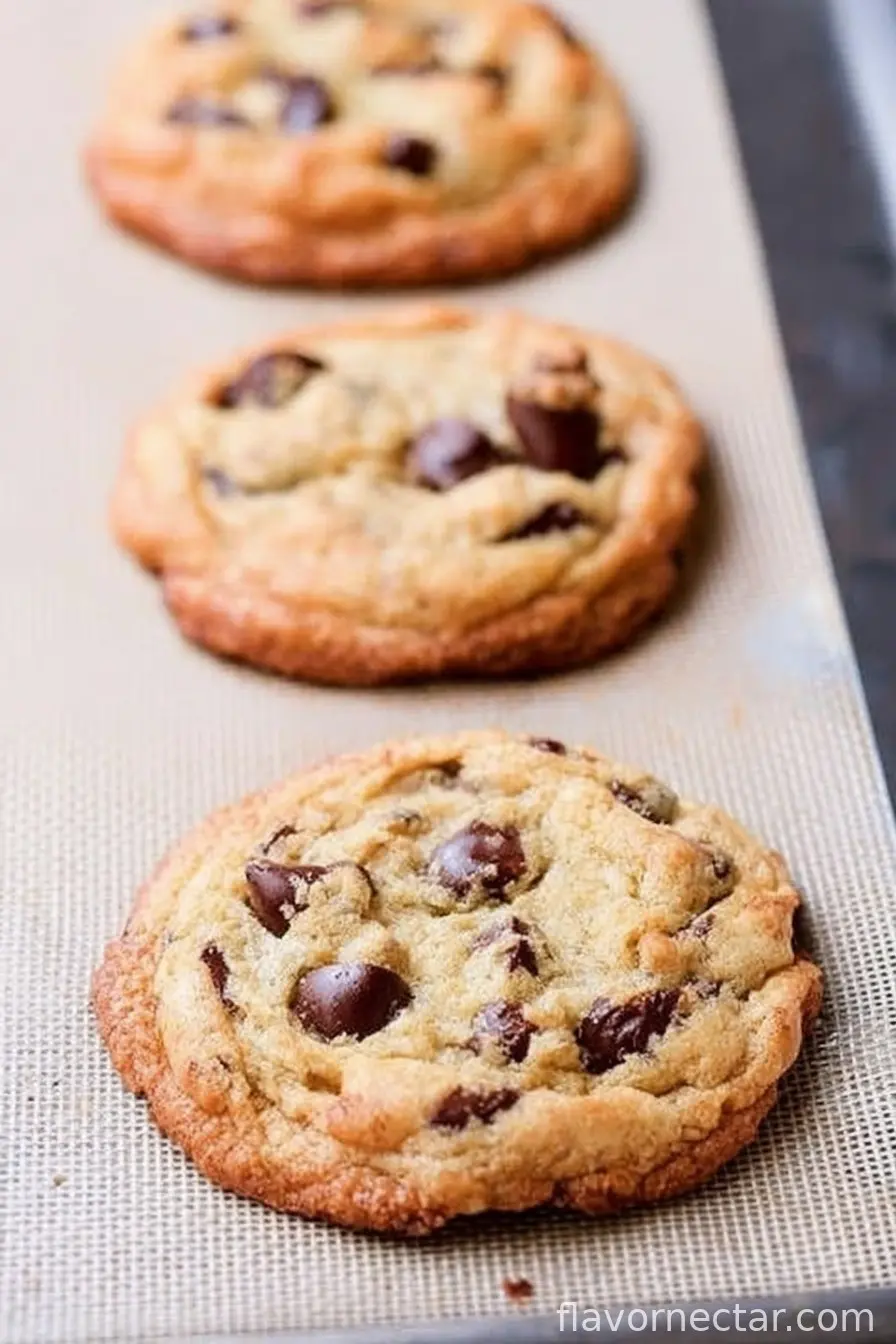
- Bake in the preheated oven for 10–12 minutes. Keep an eye—their edges should just start to turn golden, but the centers will look a tad undercooked. That’s the magic.
- Let them sit on the tray for 5 minutes; they finish cooking as they cool. Then move them to a rack—if you can wait that long.

What I’ve Learned (Notes from Too Many Cookie Batches)
- If you slightly underbake them, they stay soft and chewy for longer.
- Browning the butter first does make them a bit richer, but nine times out of ten, I can’t be faffed.
- Chilling the dough overnight tastes great, but my willpower fails by hour two. So fresh dough wins most weeks!
Cookie Twists I’ve Tried (and at Least One Fail!)
- Peanut butter chips instead of some of the chocolate? Sublime. Big yes from everyone but the dog.
- Threw in a tablespoon of instant coffee once—made the kitchen smell like a café, but I think it made the flavor a bit muddy. Didn’t hate it, but didn’t repeat it either.
- Oatmeal added a chewy bite (use about 1/2 cup)—not bad with raisins, too, but then is it really a chocolate chip cookie at that point?
Equipment Stuff (and How I Improvise When I Can’t Find Mine)
- Baking sheet – or honestly any tray that fits in your oven
- Parchment paper or a silicone mat, but if you’re desperate, just butter the pan—worked well enough for my mum
- A bowl or two, but I’ve been known to use a big salad bowl in a pinch
- Mixing spoon, or a hand mixer if you’re feeling posh
- I do use a cookie scoop when I remember, but two spoons work just as well (if messier)
Where Do The Leftovers Go? (Storage—If There Are Any!)
Technically, you could store these in an airtight tin for 3–4 days. Realistically, though, ours vanish by the second night. If you somehow don’t inhale them all, I reckon they keep nicely in a ziplock bag in the freezer for a couple months—just rewarm in the oven for a few minutes.
The Most Important Bit (Serving Suggestions)
These cookies are good with cold milk, obviously, but my weird midwestern quirk is dunking them into coffee for breakfast. Or make ice cream sandwiches if you’re feeling like a big kid. At Christmas, we stick a few in the post to friends (yes, they arrive as a crumbly mess, but it’s the thought, right?).
A Few Cookie Pro Tips (Learned the Hard Way, Promise)
- I tried doubling the recipe in one bowl once. Do not recommend—my arm still aches thinking about it. Split it if you make a huge batch.
- Don’t rush the creaming step! The one time I blitzed through it, the cookies turned out oddly flat. Trust me, a few extra minutes makes a difference.
- If you bake them too long, they go from chewy to biscuit-lightning quick, so, like, hover nearby.
Some Questions People Actually Asked Me (FAQ)
Can I use margarine instead of butter?
You can, though I find they taste a bit “off”—not terrible, just, you know, a bit 1980s school cafeteria. Butter is better, but you do you.
Can I freeze the dough?
Absolutely! I just roll it into balls first, freeze on a tray, then chuck ’em in a bag. You can bake straight from the freezer (add a minute or two though).
Do I have to use chocolate chips?
Not really—sometimes I just chop up a bar of chocolate (the cheap supermarket kind even, it’s fine by me). Chunks melt a bit wilder and I kinda love it.
What if I don’t have brown sugar?
You can use all white sugar, but they turn out crunchier—less chewy. Actually, a spoonful of honey mixed in can fake it a bit.
Help! My cookies turned out flat?
Likely the butter was too soft or melted. Try chilling the dough next time, or just eat them with a spoon. No judgment here.
One last thing—not really about cookies, but, does anyone really like washing up cookie dough bowls? I’m convinced the leftover batter is a reward for doing the dishes. Anyway, have fun baking!
Ingredients
- 1 cup (225g) unsalted butter, softened (hey, if you’re in a rush, I’ve been known to zap it in the microwave—just don’t let it melt completely)
- 1 cup (200g) granulated sugar (sometimes I’ll swap in half brown sugar instead for a bit of extra ‘chewiness’)
- 1/2 cup (100g) packed light brown sugar (grandma said dark brown was classier, but honestly, use whatever’s on hand)
- 2 large eggs (room temp is best, but fridge-cold works too if that’s what you’ve got)
- 2 teaspoons vanilla extract (I’ve tried the cheap stuff; the real deal’s slightly better, but not worth a meltdown if you run out)
- 2 1/4 cups (280g) all-purpose flour (I’ve cut it with whole wheat flour, but it does make them a bit denser)
- 1 teaspoon baking soda
- 1/2 teaspoon salt (I, uh, once doubled this accidentally—do not recommend!)
- 2 cups (about 340g) chocolate chips or chunks (milk, dark, or a mix, honestly whatever’s living in your pantry)
- Optional: A handful of chopped walnuts or pecans (about 1/2 cup, only if you’re feeling nutty)
Instructions
-
1Preheat your oven to 350°F (175°C). I always forget and then have to wait, so just do it now.
-
2Cream together the butter and both sugars in a largeish bowl. You can use a stand mixer, hand mixer, or some elbow grease with a wooden spoon if you fancy a workout. Mix until it looks fluffy. (This is where I usually sneak a little lick, don’t judge).
-
3Crack in the eggs, one at a time, giving it a good mix after each one; then pour in the vanilla. It’ll probably look a bit gloopy—don’t overthink it.
-
4In a separate bowl (or, honestly, just dump on top if you hate extra washing up), whisk the flour, baking soda, and salt together. Then, slowly mix the dry into the wet ingredients. Go easy or you’ll end up in a cloud of flour.
-
5Fold in the chocolate chips and nuts if you’re using ’em. The dough’ll look thick—almost like it’s too much, but it isn’t. Trust the process.
-
6Scoop out heaped tablespoons of dough and plop them (that’s a technical term) onto a lined baking sheet. Give them a little room—these guys like to spread out a bit.
-
7Bake in the preheated oven for 10–12 minutes. Keep an eye—their edges should just start to turn golden, but the centers will look a tad undercooked. That’s the magic.
-
8Let them sit on the tray for 5 minutes; they finish cooking as they cool. Then move them to a rack—if you can wait that long.
CLICK FOR NUTRITION INFO
↑
Approximate Information for One Serving
Serving Size:
1 serving
Calories:
180 caloriescal
Protein:
2gg
Fat:
9gg
Saturated Fat:
0g
Trans Fat:
0g
Cholesterol:
0mg
Sodium:
0mg
Potassium:
0mg
Total Carbs:
25gg
Fiber:
0g
Sugar:
0g
Net Carbs:
0g
Vitamin A:
0
Vitamin C:
0mg
Calcium:
0mg
Iron:
0mg
Nutrition Disclaimers
Number of total servings shown is approximate. Actual number of servings will depend on your preferred portion sizes.
Nutritional values shown are general guidelines and reflect information for 1 serving using the ingredients listed, not including any optional ingredients. Actual macros may vary slightly depending on specific brands and types of ingredients used.
To determine the weight of one serving, prepare the recipe as instructed. Weigh the finished recipe, then divide the weight of the finished recipe (not including the weight of the container the food is in) by the desired number of servings. Result will be the weight of one serving.
Did you make this recipe?
Please consider Pinning it!