Alright, so I have to tell you—Stained Glass Cookies might look like something you’d only see at those fancy bakery counters or lurking at a school bake sale, but trust me, they’re not that precious (well, except mine, ha). First time I tried these, my kitchen looked exploded, and I kinda regretted wearing my favorite shirt, but the smell and the sparkly colors totally made up for it. Now, it’s basically my go-to when I’m roped into last-minute cookie swaps or when I want my niece to think I’m the fun aunt. Or honestly, just when I feel like bashing some hard candy with a rolling pin for stress relief.
Why I’ll Bet You’ll Love Them
I usually make these around the holidays—or whenever I have leftover hard candy rattling around (you know how it is after Halloween, right?). My family goes nuts for these, especially the part where I let them choose which color Jolly Ranchers we smash up. Personally, I love the crunch of the “glass” part, and it photographs way better than those weird thumbprint Cookies that always spread into blobs for me. Plus, if your piping skills are as shaky as mine, these still end up looking impressive. You are kinda guaranteed oohs and ahhs, unless you burn the bottoms—I’ve definitely done that a time or two, but no one’s perfect. (If you’re on TikTok or Instagram, these things are made for showing off. Just don’t mention how many candies you actually ate during the process…)
What You’ll Need (and What You Can Swap)
- 2 1/2 cups all-purpose flour (sometimes I barely level my cups and it’s fine, but if you want to be precise, go ahead)
- 1/2 teaspoon baking powder. I’ve skipped this in a pinch—still tasty.
- 1/2 teaspoon salt (sea salt if I’m feeling posh; table salt is fine too)
- 3/4 cup (170g) unsalted butter, room temp. (My gran insisted on Kerrygold, but store-brand works. Margarine in an emergency, but the flavor isn’t quite the same)
- 1 cup sugar (I once used light brown sugar by mistake, and it was oddly good—caramely!)
- 1 large egg
- 1 teaspoon vanilla extract (sometimes I do half vanilla, half almond extract. So good.)
- Assorted hard candies—Jolly Ranchers, Lifesavers, Fox’s, or, really, any see-through hard candy. Don’t stress the brand, unless it’s something weirdly spicy. That was not a hit.
Let’s Get This Party Started (How to Make These)
- Candy prep: First, take your hard candies—about a handful per color works—and pop them in little zip-top bags (double-bagged, really, if you’re as vigorous as me with the rolling pin). Bash ‘em till they’re like coarse sand. Not dust, not boulders. It’s weirdly satisfying—I let my kiddo do it and it keeps him busy.
- Whip up the dough: Preheat your oven to 350°F (or 175°C if you’re outside the States; I always have to double-check that chart from BBC Good Food). Beat together your softened butter and sugar until they’re pale and fluffy. Then beat in the egg and vanilla. Don’t worry if it’s a bit lumpy at this stage—it comes together.
- Dry meets wet: In a separate bowl, whisk your flour, baking powder, and salt. Gradually add this dry mix to the wet, mixing till it’s just combined. It might look crumbly; just squish it a few times with your hands. If it still won’t hold together, add a spoonful of milk.
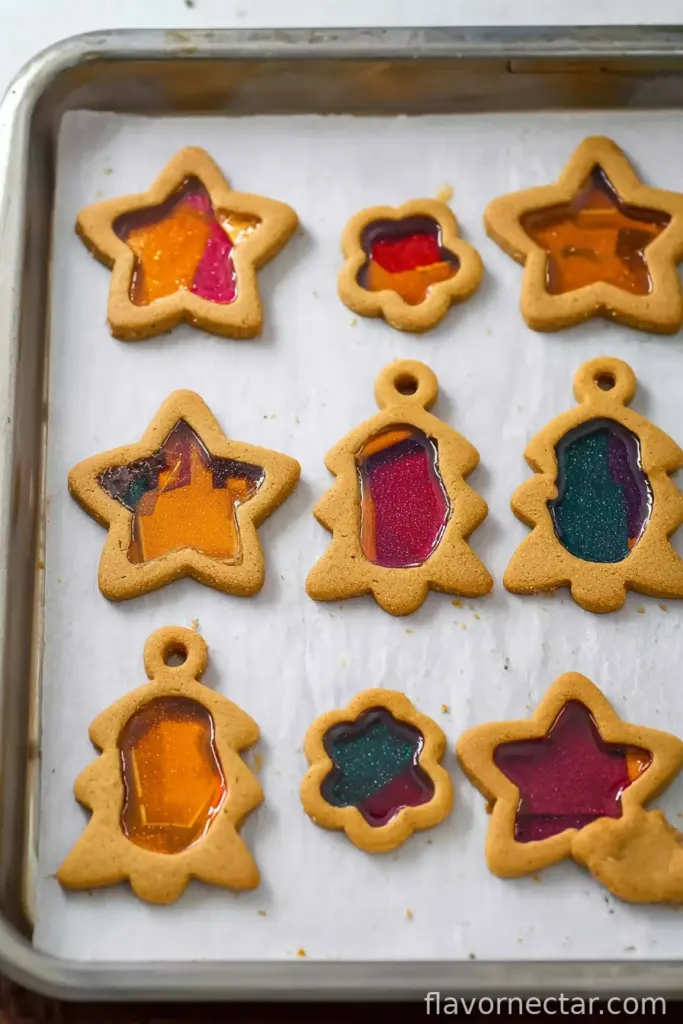
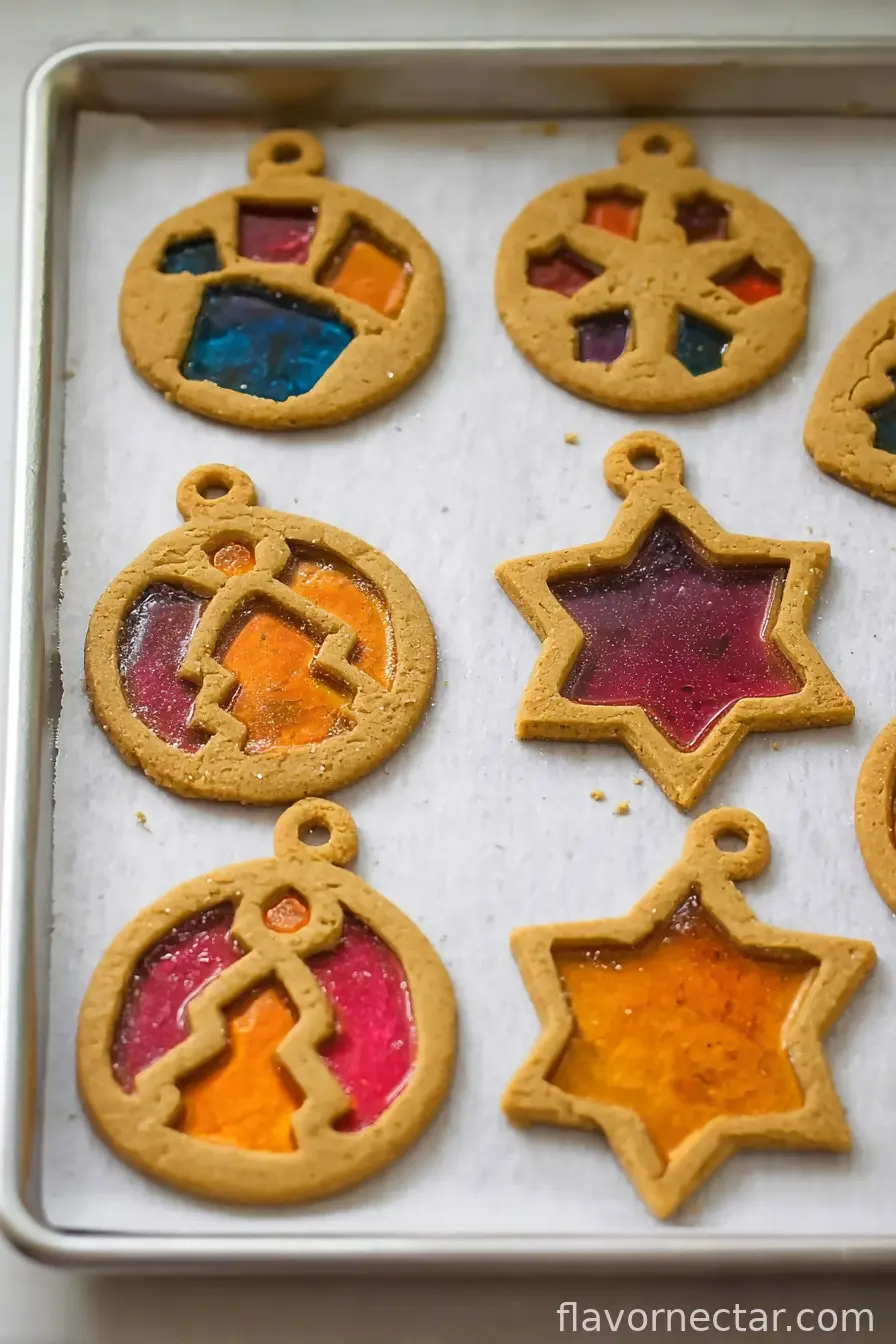
- Roll time: Dust your counter with flour. Roll the dough to about 1/4 inch thick (sometimes I eyeball it, which is never perfectly even, but, eh, homemade charm!). Cut out cookie shapes with bigger cutters—hearts, stars, dinosaurs—whatever you’ve got. Then, using a smaller cutter or even the lid of a bottle, cut out the centers.
- Fill ‘em up: Lay Cookies on a parchment-lined sheet. Spoon crushed candy into the holes—try to keep it inside the lines, but if some spills under the cookie, it’ll bubble up like stained glass lava around the edges. That’s ok! Heck, I like the crispy bits.
- Bake: 8–10 mins or until the edges just start to brown and the candy is melted and shiny. Let them cool on the baking tray, or the candy can stick and you’ll lose half your Cookies lifting them up too soon (yeah, I learned that).
Stuff I’ve Learned (the Hard Way)
- Don’t use wax paper instead of baking/parchment. The candy fuses to it like cement. Trust me, I tried.
- If your candy isn’t melting smoothly, give it a minute; opening the oven actually doesn’t help (I’ve panicked and done it—just prolongs the torture).
- Don’t stress if your shapes puff up and distort a bit. Weird angles just give them character. Like people, honestly.
Variations and Experiments (A Few Wild Rides)
- Try citrus zest in the dough. Actually, orange works best, but lemon wasn’t bad either (lime felt too strong—I wouldn’t bother).
- Chocolate dough? I thought it would look dramatic, but the candies kinda lost their sparkle. My neighbor liked it though!
- Switching the extract: almond, orange, or even a drop of peppermint if you’re living dangerously, haha.
- If you’re curious (like me), I tried using soft caramels once… total disaster. So sticky it nearly took out my dental work.
Do You Really Need Special Tools?
Well, fancy cutters make things easier (I use this Wilton cookie cutter set). Honestly, a drinking glass and a bottle cap do the trick if that’s what you’ve got. For crushing candy? Rolling pins are classic, but the back of a heavy skillet works in a pinch. Just maybe wrap it in a towel.
How Long Do They Last? (Says Me, An Optimist)
Officially—up to a week in an airtight tin. But we all know they’ll start disappearing as soon as you turn your back (seriously, I once had a whole batch gone before dinner). The candy center will get a bit sticky if it’s humid out, so, you know, maybe hide a few in a secret spot. I definitely don’t have a cookie stash in my sock drawer. Nope.
How to Serve ‘Em?
I love these with a mug of something hot—tea or cocoa works—because dunking is oddly satisfying (grandma used to swear by it). For Christmas, I tie a few with ribbon and hang them on the tree. Or I pop them in cellophane bags for neighbor gifts. Kids somehow find a way to get them stuck on their noses. Family tradition, maybe?
Lessons Learned the Hard Way (So You Don’t Have To…)
- Don’t rush rolling the dough—it cracks, and then you get pieced-together Cookies (patchwork charm, but still…)
- Bake one tray at a time. I tried doubling up and swapped shelves halfway through, and the bottom batch burned. Ugh—still ate ‘em, though.
- Let them cool fully on the tray, like I mentioned. Honestly, impatience will just get you sugar-welded to your spatula. Not ideal.
Some Questions I Get (And My Real-Life Answers)
- Can I use gluten-free flour? Yep, I’ve swapped in a couple different 1:1 blends and it works. The dough’s sometimes trickier to roll, but nothing a quick chill doesn’t fix.
- Do you have to smash the candy yourself? Well, you could probably buy pre-crushed, but honestly, where’s the fun in that? Plus, it’s therapeutic after a long workday.
- Why did my candy bubble up everywhere? Happens if you use too much—less is more! Or your oven’s running a little hot. Been there.
- Can I freeze these? Technically yes, but they get weepy as they thaw. I don’t bother anymore.
- Are these super sweet? Oh, absolutely. If ‘subtle’ is your thing, maybe try these butter cookies instead—they’re classic and less sweet.
- Do I really have to chill the dough? I don’t always and it’s fine, especially if your kitchen isn’t hot. On second thought, if it’s summer, just pop the dough in the fridge for 20 mins so it’s easier to handle.
Anyway, hope you give these a shot—even if just for the smashing part! And if all else fails, remember: sprinkles cover a multitude of sins. For more baking nerdiness or solid step-by-steps, I honestly do like King Arthur Baking—good troubleshooting there. Happy baking, pal!

Ingredients
- 2 1/2 cups all-purpose flour
- 1 cup unsalted butter, softened
- 1 cup granulated sugar
- 1 large egg
- 1 teaspoon vanilla extract
- 1/2 teaspoon almond extract
- 1/2 teaspoon baking powder
- 1/4 teaspoon salt
- 24 assorted hard candies (such as Jolly Ranchers or Life Savers), crushed
Instructions
-
1Preheat oven to 350°F (175°C). Line baking sheets with parchment paper.
-
2In a large bowl, cream together the softened butter and granulated sugar until light and fluffy.
-
3Beat in the egg, vanilla extract, and almond extract until well combined.
-
4Whisk together flour, baking powder, and salt in a separate bowl, then gradually mix into the butter mixture until a dough forms.
-
5Roll out the dough to about 1/4-inch thickness. Cut out shapes with cookie cutters, then cut out smaller shapes from the centers. Transfer cookies to prepared baking sheets.
-
6Fill the center cutouts with crushed hard candies. Bake for 8-10 minutes or until the edges are lightly golden and the candy centers have melted.
-
7Cool cookies completely on the baking sheets before removing to allow the candy centers to set.
CLICK FOR NUTRITION INFO
↑
Approximate Information for One Serving
Serving Size:
1 serving
Calories:
120cal
Protein:
1 gg
Fat:
5 gg
Saturated Fat:
0g
Trans Fat:
0g
Cholesterol:
0mg
Sodium:
0mg
Potassium:
0mg
Total Carbs:
17 gg
Fiber:
0g
Sugar:
0g
Net Carbs:
0g
Vitamin A:
0
Vitamin C:
0mg
Calcium:
0mg
Iron:
0mg
Nutrition Disclaimers
Number of total servings shown is approximate. Actual number of servings will depend on your preferred portion sizes.
Nutritional values shown are general guidelines and reflect information for 1 serving using the ingredients listed, not including any optional ingredients. Actual macros may vary slightly depending on specific brands and types of ingredients used.
To determine the weight of one serving, prepare the recipe as instructed. Weigh the finished recipe, then divide the weight of the finished recipe (not including the weight of the container the food is in) by the desired number of servings. Result will be the weight of one serving.
Did you make this recipe?
Please consider Pinning it!!