Sweet Potato Waffles with Only Two Ingredients? Trust Me, It Works
Alright, let me tell you—I stumbled onto this recipe one Sunday morning when the fridge looked emptier than my motivation for doing dishes. Then, with a bag of sweet potatoes and some eggs (literally nothing else on hand but questionable hot sauce packets), I decided to get a little creative. Honestly, these 2 ingredient Sweet Potato waffles have now become my secret weapon. My brother calls them “breakfast magic”—although I think he just likes the fact it only takes me ten minutes to whip ’em up. I do remember one time I almost forgot to peel the sweet potato and, well… let’s just say it was extra rustic that day!
Why You’ll Love Making These Waffles
I make these when I’m craving something warm and filling but kinda cannot with a pile of dirty bowls. My family goes bonkers for these because they’re soft on the inside, slightly crisp outside—especially if you let them rest in the waffle maker a tad longer (or get distracted by a text like I do). Honestly, I won’t lie; sometimes the batter feels a bit odd, and I’ve wondered if it’s even going to work, but it always comes through. Also, if you’ve ever cursed at a giant stack of ingredients just for breakfast—these are a breath of fresh air.
What You’ll Need
- 1 medium sweet potato (you can use yams, though I think the flavor’s mellower. My gran swore by a specific local variety but, between you and me, any bog-standard supermarket tuber works fine!)
- 2 large eggs (sometimes I use 3 small ones if that’s all I’ve got)
If you’re feeling frisky, you can toss in a pinch of cinnamon, a tiny bit of salt, or even a handful of shredded cheese. But that’s strictly optional—don’t let the food police catch you experimenting.
Let’s Get Cooking (And Possibly Make a Mess)
- Prep the sweet potato: Peel it! (Don’t skip unless you fancy surprise chewiness.) Chop into cubes and either microwave for about 6 minutes in a covered bowl with a bit of water, or boil for 10-12 min. You want it mashable but not soggy.
- Mash and mix: Mash the sweet potato in a big bowl—it won’t be totally smooth, that’s fine. Add in the eggs. Stir like mad until it comes together (looks a bit questionable here, but trust the process).
- Make the waffles: Warm up your waffle maker and grease it a bit (I just use the corner of a butter wrapper; so professional, right?). Scoop some batter in—enough for one waffle, not too thick else it’ll spill. Close the lid. Let it cook for about 4 minutes, or until it stops hissing and smells amazing.
- This is when I sneak a little corner—shh, quality control!
- Repeat with the rest of the batter. Should make 2 to 3 smallish waffles depending on how generous you’re feeling.
Lil’ Notes (Things I Wish I’d Known)
- If the mixture seems too runny, actually, I find it works better if you let it sit two minutes or so—eggs thicken up the party.
- Once, I tried to flip one before it was ready and, well, it looked a bit tragic but still tasted great.
- If you want chewier waffles, don’t mash the sweet potato all the way—I kinda like ’em that way sometimes.
Variations That (Sometimes) Work
I tried tossing a handful of sharp cheddar in once and, actually, it hit the spot—it got all melty and golden. Swapped in a leftover baked potato one time—honestly, not as good, kind of bland. Once I grated in some apple for a sweet touch (my niece loved it), but my mate thought it was “weirdly healthy.” You do you!
Equipment: Don’t Stress
You’ll obviously need a waffle iron (mine’s ancient and missing a foot—it still works, so there’s hope if yours is battered). But if you don’t have one, you can actually make these as thick little pancakes on a nonstick skillet. They won’t have the fancy grid, but still tasty! Check out this review of waffle makers if you want to nerd out on gadgets.

How to Store These (If There Are Any Left)
Honestly, in my house these waffles never last more than a day—someone always nabs the last one from the fridge. But you can refrigerate leftovers in a sealed container for up to 2 days. I sometimes toss ’em in the toaster the next morning (but don’t do this if you like them squishy). You can also freeze for later, just separate with a bit of parchment. For reheat, I zap mine in the microwave or pop back in the waffle iron for a crispier vibe. Love and Lemons has more freezer tips if you’re curious.
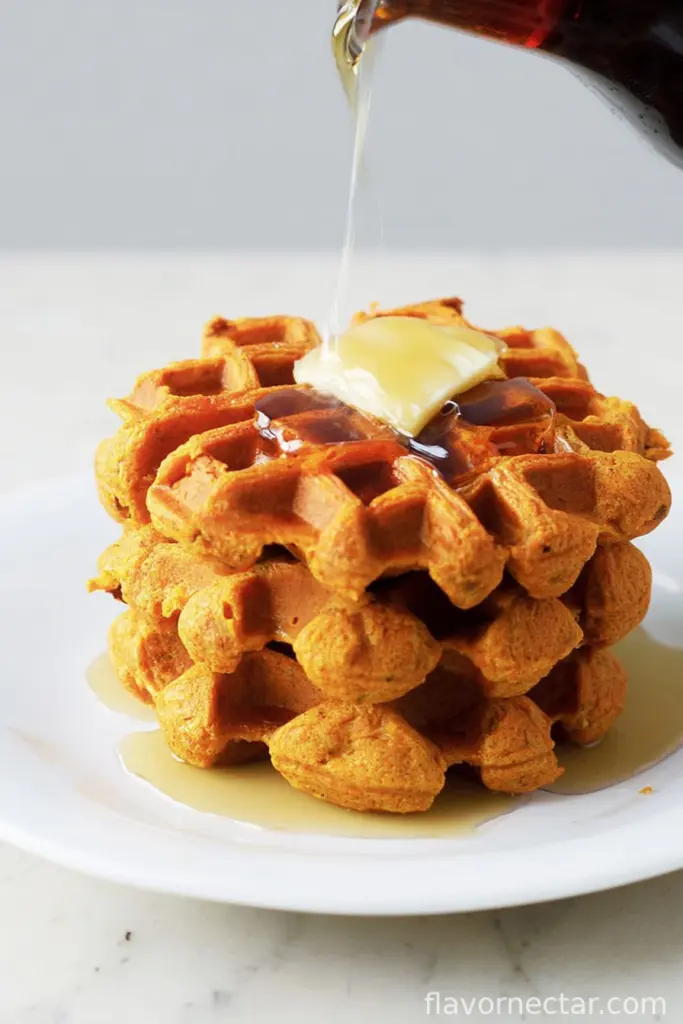
How I Serve It (Okay, Maybe a Bit Odd)
We usually serve these with a hefty splash of maple syrup and a dusting of cinnamon, but my little brother swears by sour cream and chives. Sometimes I go savory—top with an over-easy egg and hot sauce; that’s basically brunch on a plate. In summer, I pair it with sliced fresh peaches, kind of like a dessert for brekkie. I once tried peanut butter and, hmm, mixed feelings.
Pro Tips (Learned It the Hard Way)
- I once tried to rush the cooking step (so hungry!) and these came out all gooey inside. Don’t. Just wait for the edges to crisp—trust.
- Letting the batter sit a bit makes the texture better. No clue why but science is wild, right?
- Grease your waffle iron every time—the batter is sticky as heck.
FAQ (Stuff I Actually Get Asked)
- Can I use canned sweet potato?
- Yep, I’ve done it. Just drain/mash—texture’s softer and a tad wetter. Add an extra tablespoon flour if ya need.
- What about adding protein powder?
- I’ve tossed in a scoop before; it kinda works, but makes them a bit dry. Maybe add a splash of milk to loosen.
- Can I double or triple the recipe?
- Absolutely. I doubled this for my mate’s lunch crowd once, just have a second bowl ready (trust me—otherwise it gets messy quick).
- No waffle maker. Any hope?
- Sure thing—fry as thick pancakes. Not quite as pretty (no squares!), but it still tastes like sweet potato happiness. Oh, by the way, Sally’s Baking Addiction shares great waffle basics you might like.
- Best toppings?
- Sky’s the limit! Syrup, yogurt, nuts, cheese, or even grilled bacon if you’re that way inclined. I once drizzled tahini and it was… a choice.
So, there you have it—a wildly simple, truly cozy breakfast or snack option that I keep coming back to. If you get creative and come up with an epic combination, please let me know. On second thought, don’t—I’ll probably get hungry just reading about it.

Ingredients
- 2 medium sweet potatoes, peeled and grated
- 2 large eggs
- 1/4 teaspoon salt
- 1/4 teaspoon ground cinnamon
- 1/2 teaspoon vanilla extract
- Non-stick cooking spray or oil for waffle iron
- Optional: 2 teaspoons maple syrup for serving
- Optional: fresh berries or yogurt for topping
Instructions
-
1Preheat your waffle iron according to the manufacturer’s instructions and lightly grease with non-stick spray or oil.
-
2In a large bowl, mix together the grated sweet potatoes, eggs, salt, cinnamon, and vanilla extract until fully combined.
-
3Scoop about 1/2 cup of the mixture into the center of the hot waffle iron and spread slightly to cover the surface.
-
4Close the waffle iron and cook for 5 minutes, or until the waffles are golden brown and cooked through.
-
5Carefully remove the waffle and repeat with the remaining mixture.
-
6Serve warm, topped with maple syrup, berries, or yogurt if desired.
CLICK FOR NUTRITION INFO
↑
Approximate Information for One Serving
Serving Size:
1 serving
Calories:
140 caloriescal
Protein:
5gg
Fat:
3gg
Saturated Fat:
0g
Trans Fat:
0g
Cholesterol:
0mg
Sodium:
0mg
Potassium:
0mg
Total Carbs:
25gg
Fiber:
0g
Sugar:
0g
Net Carbs:
0g
Vitamin A:
0
Vitamin C:
0mg
Calcium:
0mg
Iron:
0mg
Nutrition Disclaimers
Number of total servings shown is approximate. Actual number of servings will depend on your preferred portion sizes.
Nutritional values shown are general guidelines and reflect information for 1 serving using the ingredients listed, not including any optional ingredients. Actual macros may vary slightly depending on specific brands and types of ingredients used.
To determine the weight of one serving, prepare the recipe as instructed. Weigh the finished recipe, then divide the weight of the finished recipe (not including the weight of the container the food is in) by the desired number of servings. Result will be the weight of one serving.
Did you make this recipe?
Please consider Pinning it!!