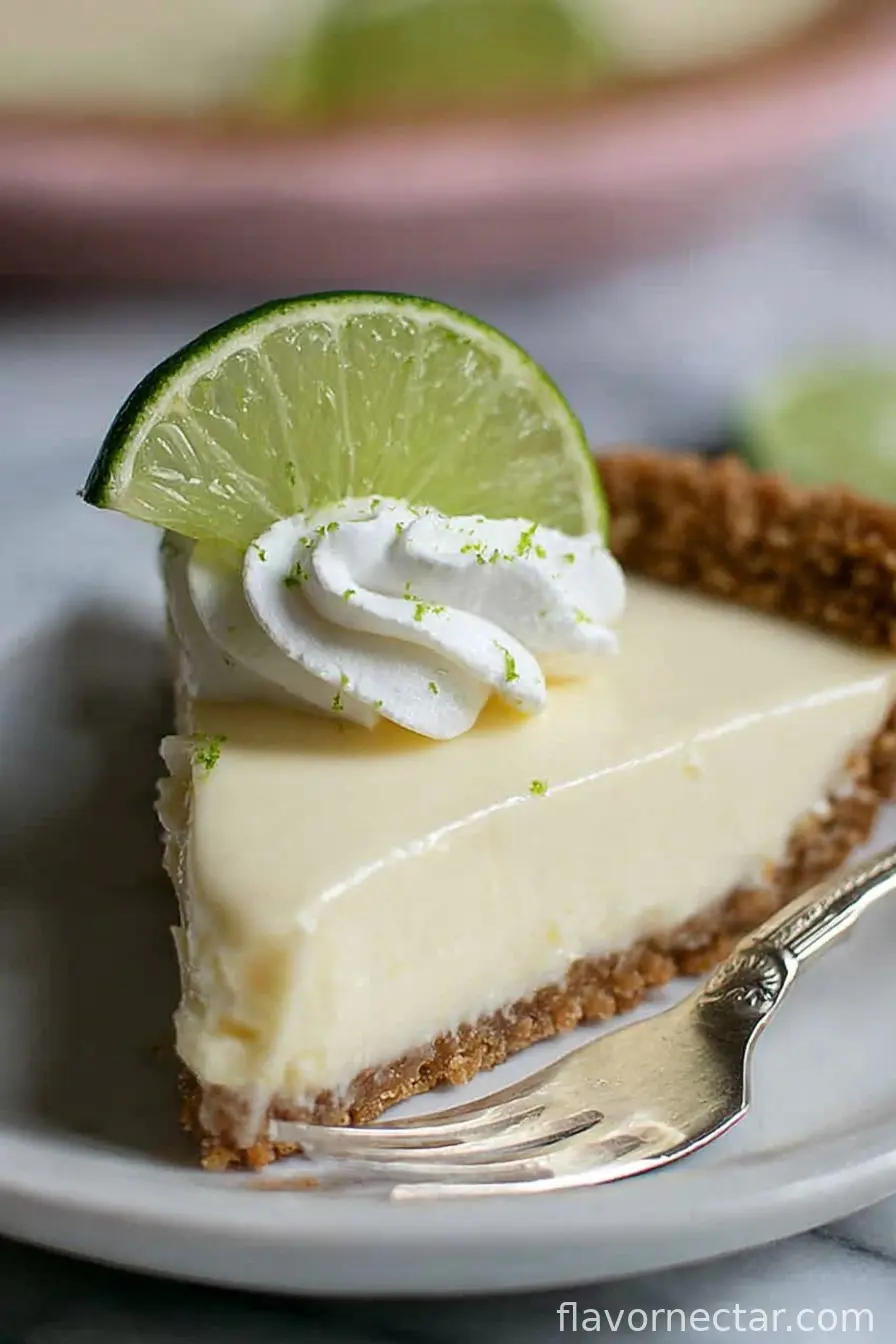
Let Me Tell You About a Pie That’ll Make You Smile
I’ve got to be honest, nothing takes me right back to summers in my aunt’s creaky old Florida kitchen quite like a slice of Key Lime Pie. The crust was a little too brown sometimes, someone always forgot to buy enough eggs, and yet—you’d still catch every cousin in the fridge with a fork and a guilty grin. I think this pie is what turned my cousin Lisa off lemon bars for life. Not that I’m complaining (more pie for me). Anyway, whether you’re evoking tropical breezes or just want something zesty to jolt your Tuesday, give this traditional Key Lime Pie a shot. You might even eat it straight from the pan—I won’t judge.
Why You’ll Love This Pie (or, Why My Family Demands It Every Holiday)
I make this whenever we need a sweet hit for a birthday, or when everyone’s cranky and needs cheering up (pie is better than yelling). My partner is obsessed—he claims it makes him forget Monday even exists. And y’know, when I tried making it with regular limes once because I was too lazy to go to the fancy store, everyone groaned but still ate nearly all of it. Honestly, I had to hide one slice behind the pickles just so I could eat it for breakfast the next day (which I totally recommend, by the way). Oh, and no standing mixer required—thank the dessert gods for that.
Gathering Your Ingredients (Substitutions Welcome!)
- 1 and 1/2 cups graham cracker crumbs (I use the store brand but have smashed up digestive biscuits when desperate—not traditional but tasty!)
- 1/3 cup sugar (white, but I’ve mixed in brown sugar before for a nuttier crust—don’t tell my grandma)
- 6 tablespoons unsalted butter, melted (if salted butter is all you have, it’s fine—just skip the pinch of salt)
- A pinch of salt (really, you could leave it out if your butter’s already salted)
- 4 large egg yolks (save the whites if you want to make a meringue… which I never do, but you could!)
- 1 can (14 ounces) sweetened condensed milk (honestly, all brands taste sweet—use whatever your store has)
- 1/2 cup fresh Key lime juice (about 20 Key limes—yes, it’s a lot—or 1/3 cup regular lime juice in a pinch, but the tartness hits different)
- 1 tablespoon finely grated Key lime zest (don’t skip! It’s where the zing lives)
- 1 cup heavy whipping cream (though sometimes, I just use that canned stuff if it’s late and I’m tired)
- 2 tablespoons powdered sugar (but regular sugar is fine if sifted. I’ve accidentally used granulated—it works… mostly)
- 1/2 teaspoon vanilla extract (optional, but I add it because, well, habit)
Your Marching Orders: How To Make Key Lime Pie
- Preheat your oven to 350°F (175°C). This is the moment I realize I forgot to take out the random cookies baking tray still in there—don’t be like me. Grab your 9-inch pie dish (I’ve used a square pan in a pinch, it works!).
- Combine graham cracker crumbs, sugar, melted butter, and that pinch of salt in a bowl. Mix it all with a fork or your hands—I do both—until it looks like damp sand. It should clump together when you squeeze it (not dust, not soup—just in-between).
- Press the mixture into the bottom and sides of your pie dish, forming a crust. Use a measuring cup to smoosh it flat. Don’t fuss if it’s not even; it’ll taste the same. Pop in the oven and bake for 10 minutes. Let cool a bit while you do the filling (good time for a kitchen dance break).
- Whisk the egg yolks in a bowl until they lighten—the color gets kind of happy and pale. Add the sweetened condensed milk and keep mixing (I just use a regular whisk, but a fork works if that’s what you’ve got). Stir in the lime juice and zest; do it slowly so it doesn’t spatter all over your favorite T-shirt. It’ll thicken almost magically. I usually lick the whisk right here—no shame.
- Pour that beautiful, sunshine-yellow filling into the cooled crust. Smooth it out with a spatula or the back of a spoon (don’t worry about it being picture perfect). Bake for about 15 minutes, until tiny bubbles appear at the edges. It’s okay if it still jiggles a bit—the fridge will finish the job.
- Cool the pie on the counter for an hour or so. Then (and I always forget this step!) slide it into the fridge for at least three hours, but overnight is even better. I think it tastes miles better the next day—maybe that’s just me?
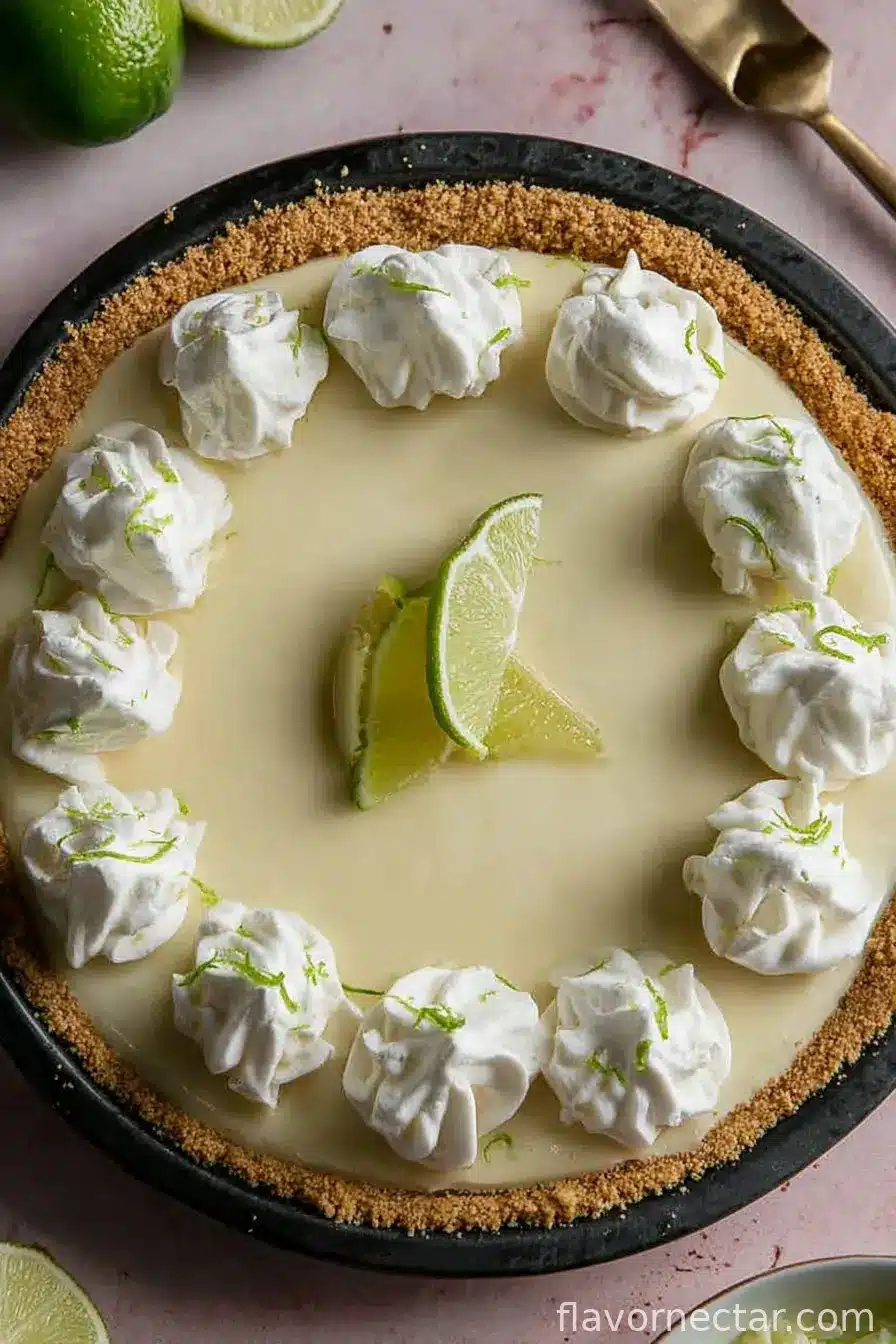
- Whip the cream with the powdered sugar and vanilla until soft peaks form. Don’t overdo it; you want it soft and like a cloud, not butter. Or use canned whipped cream if you’re feeling lazy and your family isn’t snobby about it.
- Spread or dollop the whipped cream over the chilled pie, then garnish with extra lime zest if you’re feeling fancy. (Sometimes, I skip the zest if I’m running late, and no one’s noticed.)
- Slice and serve…but fair warning, the first slice always looks a hot mess when you try to get it out. Tastes the same though!
Notes from My Kitchen Disasters and Successes
- If you use regular limes, add a bit more zest for punch. It’s not the same as Key limes but it works in a pinch. I’ve made it with bottled juice once, and…well, let’s just say my dog was interested.
- Overbake it and it goes rubbery. I did that once while binging a TV show and had to serve it with extra whipped cream to hide the texture. Foolproof? Not quite.
- If your crust crumbles a bit, scoop it up and sprinkle it on top as some kind of “rustic pie crumble”. People eat it anyway.
Adventures in Variations
- Swapped the graham crackers for ginger snaps once—spicier, a little weird. My dad loved it, but my brother wouldn’t even try a bite.
- Lemon juice in place of lime works… but then it’s a lemon pie, isn’t it?
- Tried it with coconut whipped cream—actually, I liked it! Still, classic heavy cream is where it’s at for me.
What You Need (And Some Workarounds)
- 9-inch pie dish (seriously though, a cake pan or even a square Pyrex will do fine)
- A whisk (or fork—who owns three whisks anyway?)
- Mixing bowls (I use whatever’s clean, really)
- Zester or grater (if you don’t have one, peel thin strips and mince the peels tiny—fiddly but it works!)
Storing Leftovers (Hah, Good Luck)
Keep it in the fridge, loosely covered, for up to three days. In practice, it’s usually gone the next morning in my place. If you actually have extra, it freezes okay but the whipped cream gets a bit odd, so freeze it without topping if you’re going that route.
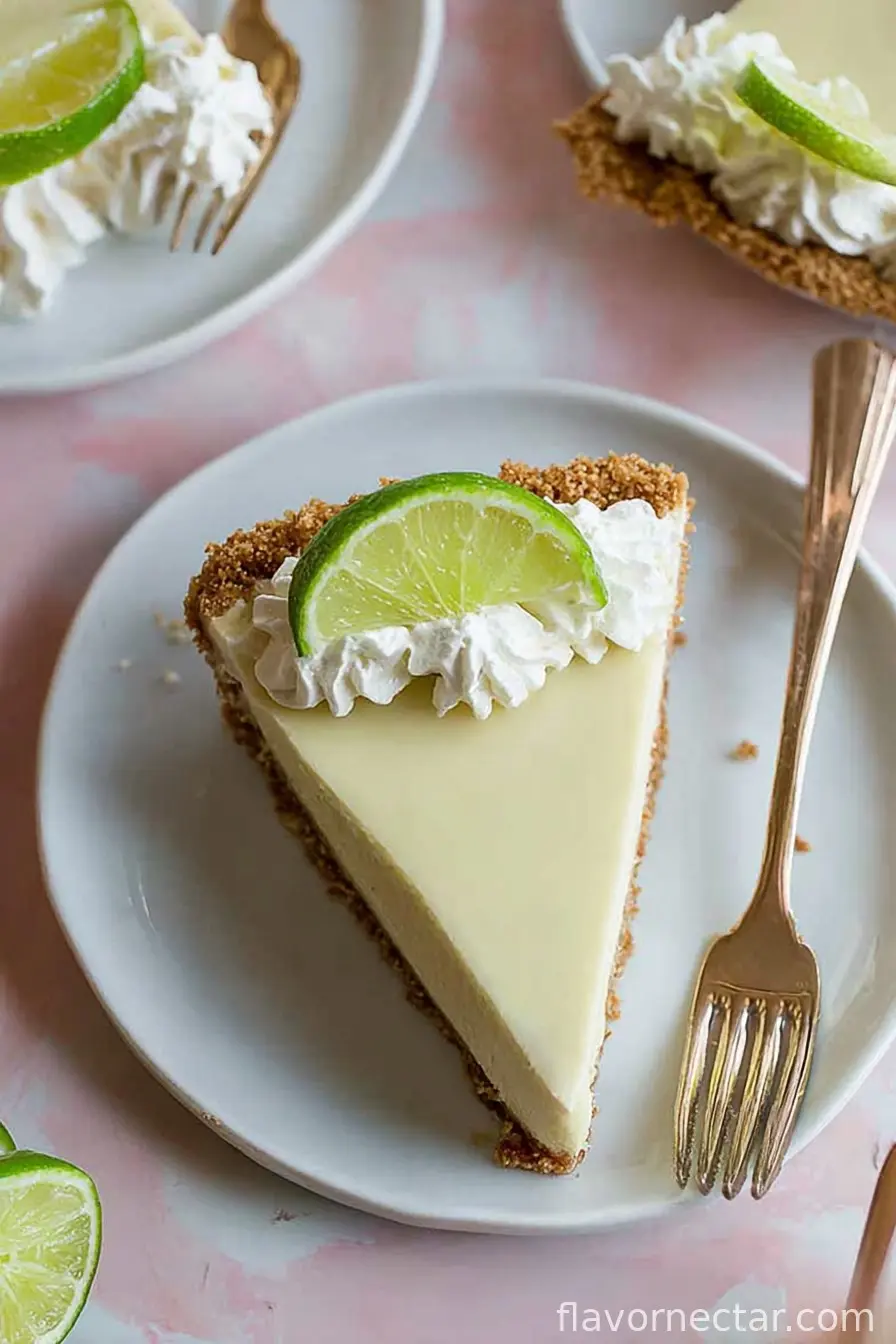
How We Serve It At My House
I like big wedges with extra whipped cream and a mug of strong coffee (or, if it’s evening, a splash of rum in the coffee—don’t tell anyone). My nephew insists on a maraschino cherry on top, and, y’know, it’s not bad.
If You Want Pro Tips (Or, Things I Messed Up So You Don’t Have To)
- If you rush chilling, it’ll ooze everywhere—it tastes good, but looks like a mess. I’ve tried to speed it up in the freezer, and…just, no.
- Don’t over-zest! Once I got carried away and it turned out so bitter, that even my citrus-obsessed aunt squinted. Less is more, here.
Real Questions, Real Answers (Pie Therapy Session)
- Do I really need Key limes? Short answer: You don’t, but it’s way zestier and a smidge more floral if you find them. Sometimes I can’t—life goes on.
- Can I make it ahead? Absolutely. Actually, I think it’s tastier after sitting overnight (but, again, good luck keeping people away).
- My crust broke—what now? Just patch it up. Cracks give character (and more places for filling to sneak in).
- Is this super sweet? It’s sweet, but tart too. If you’re sweet-sensitive, cut back a touch on the sugar in the crust. I rarely do, but you could.
- Can I use pre-made crust? Sure, but the effort for homemade is minimal and honestly I think it tastes fresher. Still, if you’re knackered, do what you gotta do!
- Wait, what if I’m out of limes? Seriously, this is the time to raid a neighbor’s tree or just try the lemon version (see above). Desperation pie is still pie.
Ingredients
- 1 and 1/2 cups graham cracker crumbs (I use the store brand but have smashed up digestive biscuits when desperate—not traditional but tasty!)
- 1/3 cup sugar (white, but I’ve mixed in brown sugar before for a nuttier crust—don’t tell my grandma)
- 6 tablespoons unsalted butter, melted (if salted butter is all you have, it’s fine—just skip the pinch of salt)
- A pinch of salt (really, you could leave it out if your butter’s already salted)
- 4 large egg yolks (save the whites if you want to make a meringue… which I never do, but you could!)
- 1 can (14 ounces) sweetened condensed milk (honestly, all brands taste sweet—use whatever your store has)
- 1/2 cup fresh Key lime juice (about 20 Key limes—yes, it’s a lot—or 1/3 cup regular lime juice in a pinch, but the tartness hits different)
- 1 tablespoon finely grated Key lime zest (don’t skip! It’s where the zing lives)
- 1 cup heavy whipping cream (though sometimes, I just use that canned stuff if it’s late and I’m tired)
- 2 tablespoons powdered sugar (but regular sugar is fine if sifted. I’ve accidentally used granulated—it works… mostly)
- 1/2 teaspoon vanilla extract (optional, but I add it because, well, habit)
Instructions
-
1Preheat your oven to 350°F (175°C). This is the moment I realize I forgot to take out the random cookies baking tray still in there—don’t be like me. Grab your 9-inch pie dish (I’ve used a square pan in a pinch, it works!).
-
2Combine graham cracker crumbs, sugar, melted butter, and that pinch of salt in a bowl. Mix it all with a fork or your hands—I do both—until it looks like damp sand. It should clump together when you squeeze it (not dust, not soup—just in-between).
-
3Press the mixture into the bottom and sides of your pie dish, forming a crust. Use a measuring cup to smoosh it flat. Don’t fuss if it’s not even; it’ll taste the same. Pop in the oven and bake for 10 minutes. Let cool a bit while you do the filling (good time for a kitchen dance break).
-
4Whisk the egg yolks in a bowl until they lighten—the color gets kind of happy and pale. Add the sweetened condensed milk and keep mixing (I just use a regular whisk, but a fork works if that’s what you’ve got). Stir in the lime juice and zest; do it slowly so it doesn’t spatter all over your favorite T-shirt. It’ll thicken almost magically. I usually lick the whisk right here—no shame.
-
5Pour that beautiful, sunshine-yellow filling into the cooled crust. Smooth it out with a spatula or the back of a spoon (don’t worry about it being picture perfect). Bake for about 15 minutes, until tiny bubbles appear at the edges. It’s okay if it still jiggles a bit—the fridge will finish the job.
-
6Cool the pie on the counter for an hour or so. Then (and I always forget this step!) slide it into the fridge for at least three hours, but overnight is even better. I think it tastes miles better the next day—maybe that’s just me?
-
7Whip the cream with the powdered sugar and vanilla until soft peaks form. Don’t overdo it; you want it soft and like a cloud, not butter. Or use canned whipped cream if you’re feeling lazy and your family isn’t snobby about it.
-
8Spread or dollop the whipped cream over the chilled pie, then garnish with extra lime zest if you’re feeling fancy. (Sometimes, I skip the zest if I’m running late, and no one’s noticed.)
-
9Slice and serve…but fair warning, the first slice always looks a hot mess when you try to get it out. Tastes the same though!
CLICK FOR NUTRITION INFO
↑
Approximate Information for One Serving
Serving Size:
1 serving
Calories:
430 caloriescal
Protein:
6 gg
Fat:
22 gg
Saturated Fat:
0g
Trans Fat:
0g
Cholesterol:
0mg
Sodium:
0mg
Potassium:
0mg
Total Carbs:
54 gg
Fiber:
0g
Sugar:
0g
Net Carbs:
0g
Vitamin A:
0
Vitamin C:
0mg
Calcium:
0mg
Iron:
0mg
Nutrition Disclaimers
Number of total servings shown is approximate. Actual number of servings will depend on your preferred portion sizes.
Nutritional values shown are general guidelines and reflect information for 1 serving using the ingredients listed, not including any optional ingredients. Actual macros may vary slightly depending on specific brands and types of ingredients used.
To determine the weight of one serving, prepare the recipe as instructed. Weigh the finished recipe, then divide the weight of the finished recipe (not including the weight of the container the food is in) by the desired number of servings. Result will be the weight of one serving.
Did you make this recipe?
Please consider Pinning it!