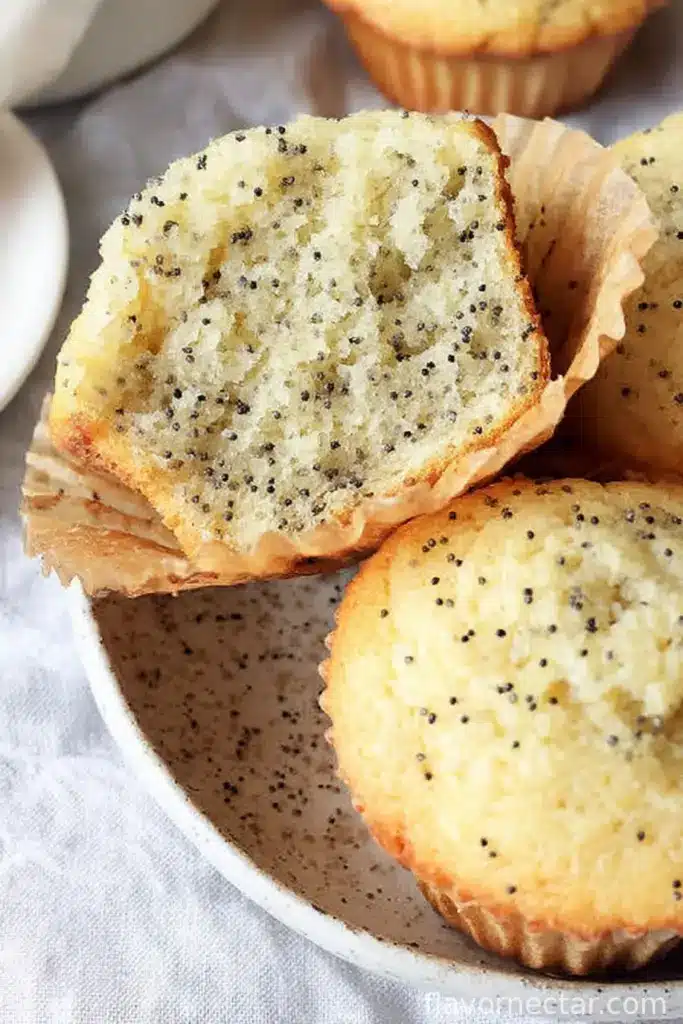
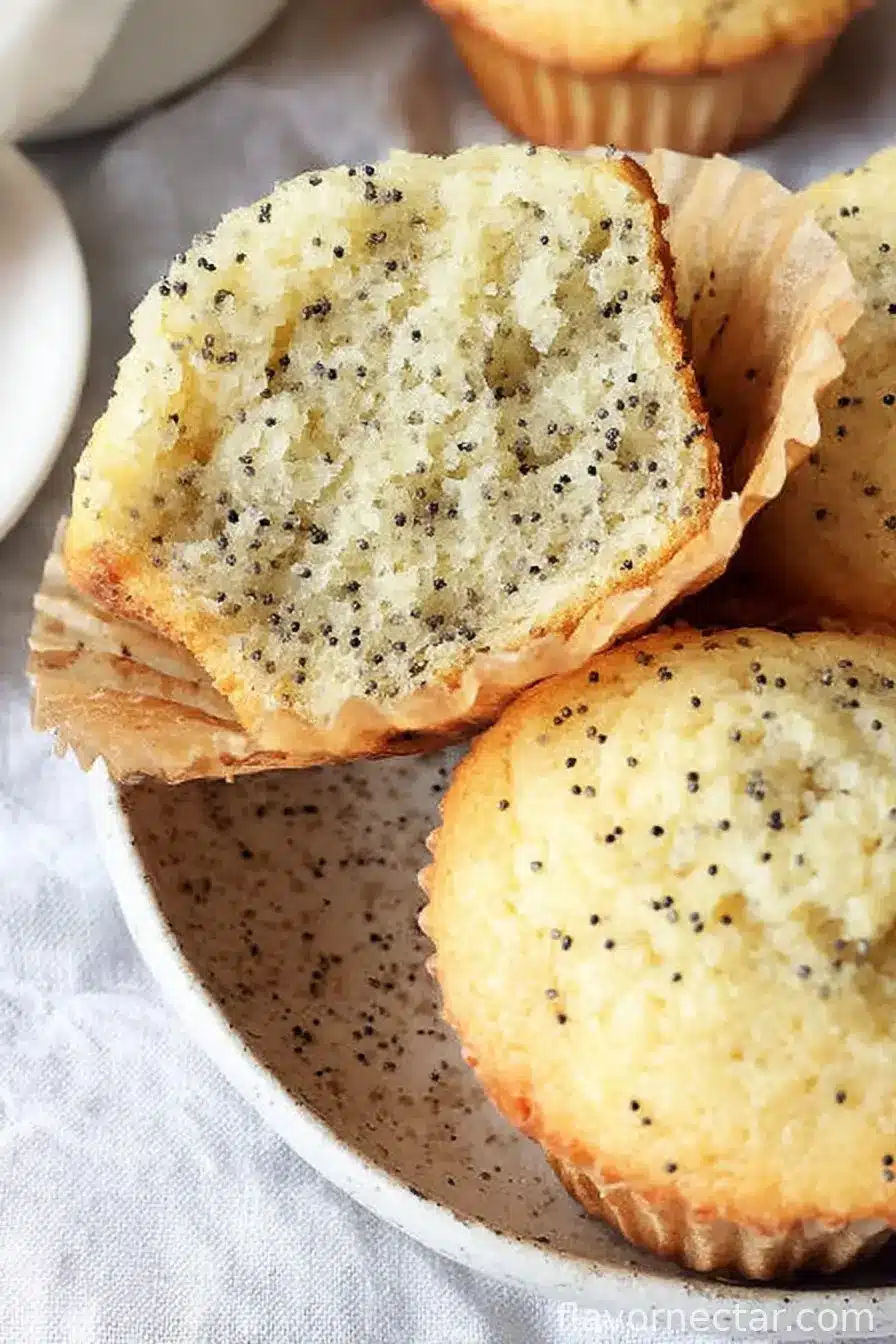
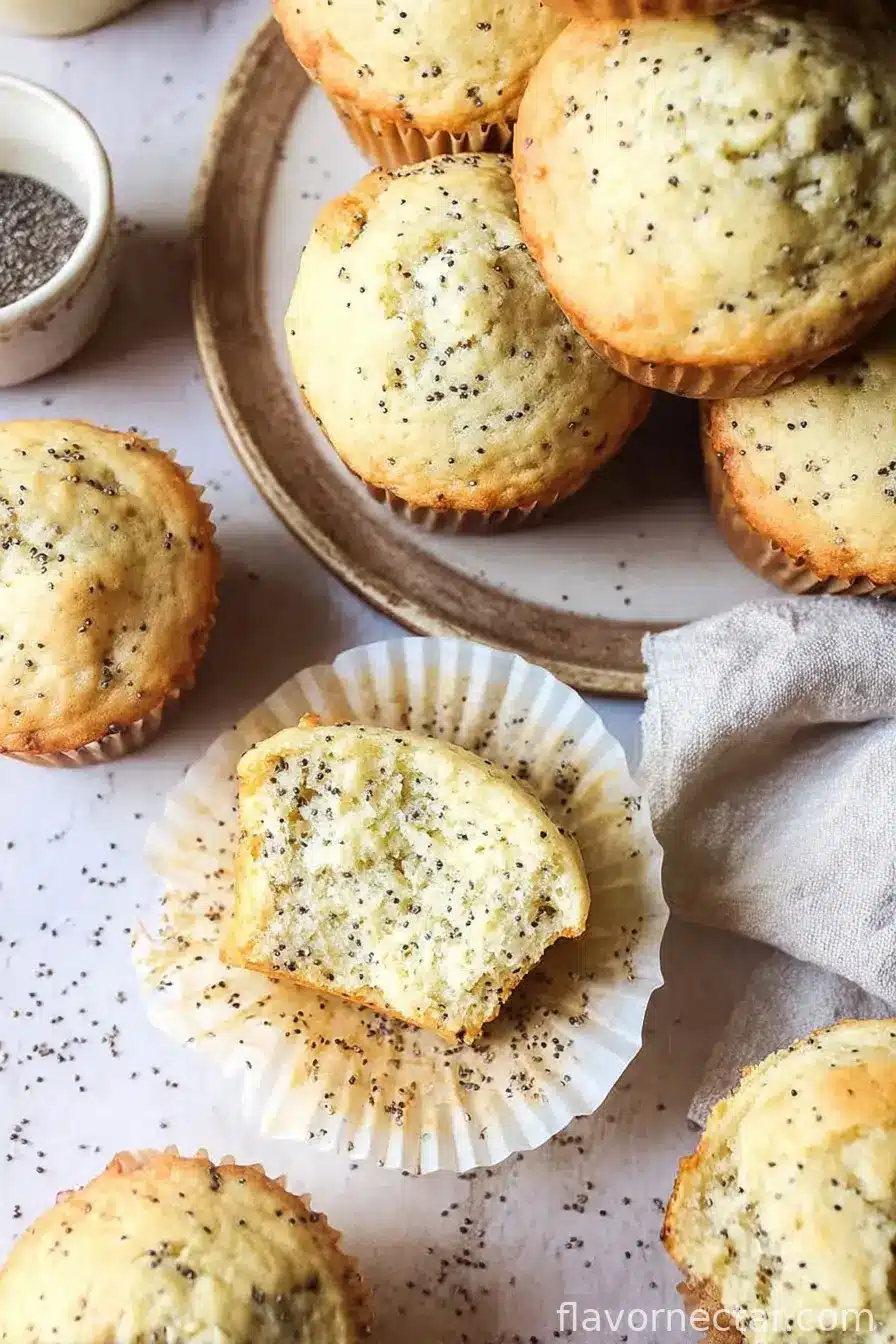
If someone had told younger me that the simple act of adding poppy seeds to a basic muffin batter would turn a ho-hum breakfast into something I crave, well… I probably wouldn’t have believed it. But here we are. There’s something about poppy seed muffins—maybe it’s the gentle crunch, or maybe it’s the memory of my aunt bringing warm ones to family brunches—that feels both familiar and like a mini celebration. I still remember the first time I tried baking these; managed to confuse baking powder for bicarb (whoops), but hey, nobody complained after their third muffin. Life lessons in the kitchen, right?
Why You’ll Want to Bake These Again (and Again)
I sit down with a coffee and one of these when it’s raining outside, or honestly just when I want a break from adulting. My family pretty much descends like a flock of seagulls as soon as the scent escapes the oven. They’re not showy, but they’re always finished. At first, I thought the poppy seeds would be fussy or get stuck in teeth (which, sometimes they do, but nothing disastrous). But, these days, I make big batches and never regret it—plus, the leftovers are pretty ace the next morning, if you’re into that sort of slightly-less-fresh-but-still-good situation.
Gather Your Ingredients… and a Few Backup Plans
- 2 cups all-purpose flour (but I’ve swapped out half for whole wheat when I’m feeling virtuous—no harm done)
- 1 cup granulated sugar (brown sugar works too for a hint of caramel-ish flavor)
- 1 tablespoon poppy seeds (my grandma swears by double, but that’s pretty intense)
- 1 teaspoon baking powder
- 1/2 teaspoon baking soda
- 1/4 teaspoon salt
- 2 large eggs (room temp is better, but I sometimes forget and use cold ones and, honestly, nothing goes terribly wrong)
- 1 cup plain Greek yogurt (regular yogurt’s fine, or sour cream if that’s what’s lurking in your fridge)
- 1/2 cup unsalted butter, melted (margarine if you must, olive oil for a twist—done it all)
- Zest of 1 lemon (if you have it—totally skip if citrus isn’t your vibe)
- 1 teaspoon vanilla extract (I eyeball it, sometimes two splashes if I’m daydreaming)
Let’s Make These muffins (My Way)
- Preheat your oven to 180°C (350°F) and line a regular muffin tin with papers—unless you fancy scraping them out later. I’ve done that, and it’s honestly not fun.
- In a biggish bowl, chuck in your flour, sugar, poppy seeds, baking powder, baking soda, and salt. Give it all a good whisk or stir—no need to overthink it.
- In a different (hopefully not too small) bowl, mix the eggs, yogurt, cooled melted butter, lemon zest, and vanilla. This is where the kitchen smells start getting real nice.
- Pour the wet stuff into the dry stuff. Now, gently fold things together. Don’t beat the life out of it—just a few stirs until you don’t see any big streaks of flour. It might look a bit lumpy or weird at this stage, but trust me, it works out in the end.
- Scoop the batter into your muffin liners, filling each about 3/4 full. This is usually where I sneak a little taste off the spoon (no judgment, right?)
- Bake for 18-22 minutes. Mine are usually done at 20. They’ll look golden, and a skewer in the middle should come out with only a few moist crumbs. If they seem a bit pale, give them another couple of minutes, but keep an eye on them—burnt muffin bottoms are a genuine heartbreak.
- Let the muffins cool in the pan for about 5 minutes—otherwise, you’ll probably burn a finger like I have more times than I’d care to admit. Then, get them onto a wire rack, or just a clean tea towel if you, like me some days, can’t be bothered to wash another thing.
Real-Life Notes (Learned the Hard Way)
- If you don’t have Greek yogurt, regular yogurt or sour cream work pretty well, just a smidge different in taste.
- The lemon zest really does make a difference, but I’ve forgotten it before and nobody threw a fit.
- If your butter is hot, don’t add it straight to the eggs unless you’re aiming for accidental scrambled eggs (don’t).
Variations: Some Winners, One Dud
- Add a handful of blueberries—sometimes they burst and you get a lovely little pocket of sweet and tart.
- I tried orange zest once, and while not bad, the flavor was kind of lost next to the poppy. Maybe a combo next time?
- Subbing almond extract for vanilla gives it a nutty twist, which I personally love, though not everyone in my family agrees.
- One time I went rogue and tried adding chia seeds alongside poppy—don’t recommend, unless you like a mouthful of seeds.

Don’t Have the Right Gear? No Biggie
If you’re missing a muffin tin, actually, you can just use mini loaf pans or even ramekins. Or a cake pan and slice it up—rustic style. I’ve also baked these as a sheet cake when I couldn’t find the muffin liners. You do you!
How to Store (But You Probably Won’t Need To)
In theory, you can keep these in an airtight container at room temp for up to 3 days. But, in my house, they rarely survive till the morning. If you do manage it, they’re pretty good with a zap in the microwave and a dab of butter.
How I Actually Serve These
I like mine with a bit of soft butter and raspberry jam (don’t tell my sister, she’s a purist). My son dunks his in hot chocolate—no idea where he picked that up.
Pro Tips (As Taught By My Bad Habits)
- Don’t rush the cooling. Seriously, I know it’s tempting, but hot muffins just stick to the paper. Learned that the sticky-finger way.
- Don’t overmix. If the batter is smoother than a jazz playlist, you’ve probably mixed too much. Lumpy is lovely.
- Actually, I find that if I let the batter rest for 5 minutes before scooping, the muffins rise a tad taller.
FAQ (People Actually Ask Me These!)
- Can I freeze these muffins? Yep! Put them in a ziploc bag once cool and freeze for up to a month. Let’s be honest, mine never make it that far.
- Do I need to toast the poppy seeds? Never have, never will. Maybe it makes a difference, but who’s got the time?
- Can I skip the lemon? Totally your call. I like the brightness, but it’s not a dealbreaker. Sometimes I make them plain, sometimes not.
- Why are my muffins tough? Probably overmixed the batter—happened to me more than once. Next time, stir just until combined.
- Is there a way to make them dairy-free? Haven’t tested every combo, but using plant yogurt and oil instead of butter kinda works. Texture is a bit different, but still edible!
And if you’re still reading, thanks for sticking around. I promise these poppy seed muffins are worth turning on the oven, no matter how distracted you feel. Happy baking—and may your muffins never stick!
Ingredients
- 2 cups all-purpose flour (but I’ve swapped out half for whole wheat when I’m feeling virtuous—no harm done)
- 1 cup granulated sugar (brown sugar works too for a hint of caramel-ish flavor)
- 1 tablespoon poppy seeds (my grandma swears by double, but that’s pretty intense)
- 1 teaspoon baking powder
- 1/2 teaspoon baking soda
- 1/4 teaspoon salt
- 2 large eggs (room temp is better, but I sometimes forget and use cold ones and, honestly, nothing goes terribly wrong)
- 1 cup plain Greek yogurt (regular yogurt’s fine, or sour cream if that’s what’s lurking in your fridge)
- 1/2 cup unsalted butter, melted (margarine if you must, olive oil for a twist—done it all)
- Zest of 1 lemon (if you have it—totally skip if citrus isn’t your vibe)
- 1 teaspoon vanilla extract (I eyeball it, sometimes two splashes if I’m daydreaming)
Instructions
-
1Preheat your oven to 180°C (350°F) and line a regular muffin tin with papers—unless you fancy scraping them out later. I’ve done that, and it’s honestly not fun.
-
2In a biggish bowl, chuck in your flour, sugar, poppy seeds, baking powder, baking soda, and salt. Give it all a good whisk or stir—no need to overthink it.
-
3In a different (hopefully not too small) bowl, mix the eggs, yogurt, cooled melted butter, lemon zest, and vanilla. This is where the kitchen smells start getting real nice.
-
4Pour the wet stuff into the dry stuff. Now, gently fold things together. Don’t beat the life out of it—just a few stirs until you don’t see any big streaks of flour. It might look a bit lumpy or weird at this stage, but trust me, it works out in the end.
-
5Scoop the batter into your muffin liners, filling each about 3/4 full. This is usually where I sneak a little taste off the spoon (no judgment, right?)
-
6Bake for 18-22 minutes. Mine are usually done at 20. They’ll look golden, and a skewer in the middle should come out with only a few moist crumbs. If they seem a bit pale, give them another couple of minutes, but keep an eye on them—burnt muffin bottoms are a genuine heartbreak.
-
7Let the muffins cool in the pan for about 5 minutes—otherwise, you’ll probably burn a finger like I have more times than I’d care to admit. Then, get them onto a wire rack, or just a clean tea towel if you, like me some days, can’t be bothered to wash another thing.
CLICK FOR NUTRITION INFO
↑
Approximate Information for One Serving
Serving Size:
1 serving
Calories:
245 caloriescal
Protein:
5gg
Fat:
10gg
Saturated Fat:
0g
Trans Fat:
0g
Cholesterol:
0mg
Sodium:
0mg
Potassium:
0mg
Total Carbs:
34gg
Fiber:
0g
Sugar:
0g
Net Carbs:
0g
Vitamin A:
0
Vitamin C:
0mg
Calcium:
0mg
Iron:
0mg
Nutrition Disclaimers
Number of total servings shown is approximate. Actual number of servings will depend on your preferred portion sizes.
Nutritional values shown are general guidelines and reflect information for 1 serving using the ingredients listed, not including any optional ingredients. Actual macros may vary slightly depending on specific brands and types of ingredients used.
To determine the weight of one serving, prepare the recipe as instructed. Weigh the finished recipe, then divide the weight of the finished recipe (not including the weight of the container the food is in) by the desired number of servings. Result will be the weight of one serving.
Did you make this recipe?
Please consider Pinning it!