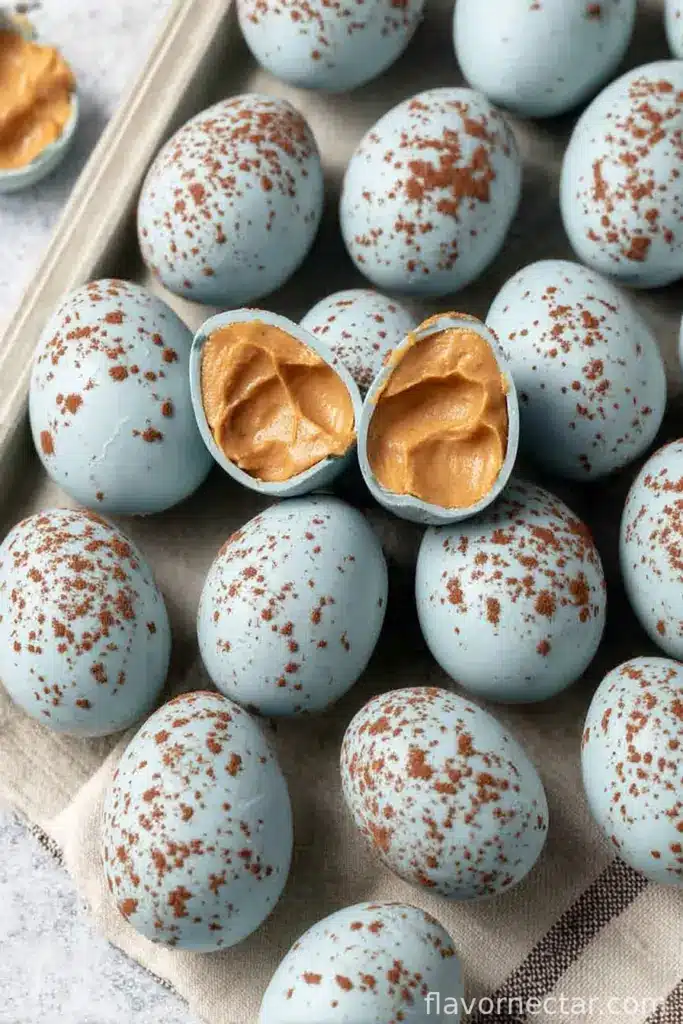
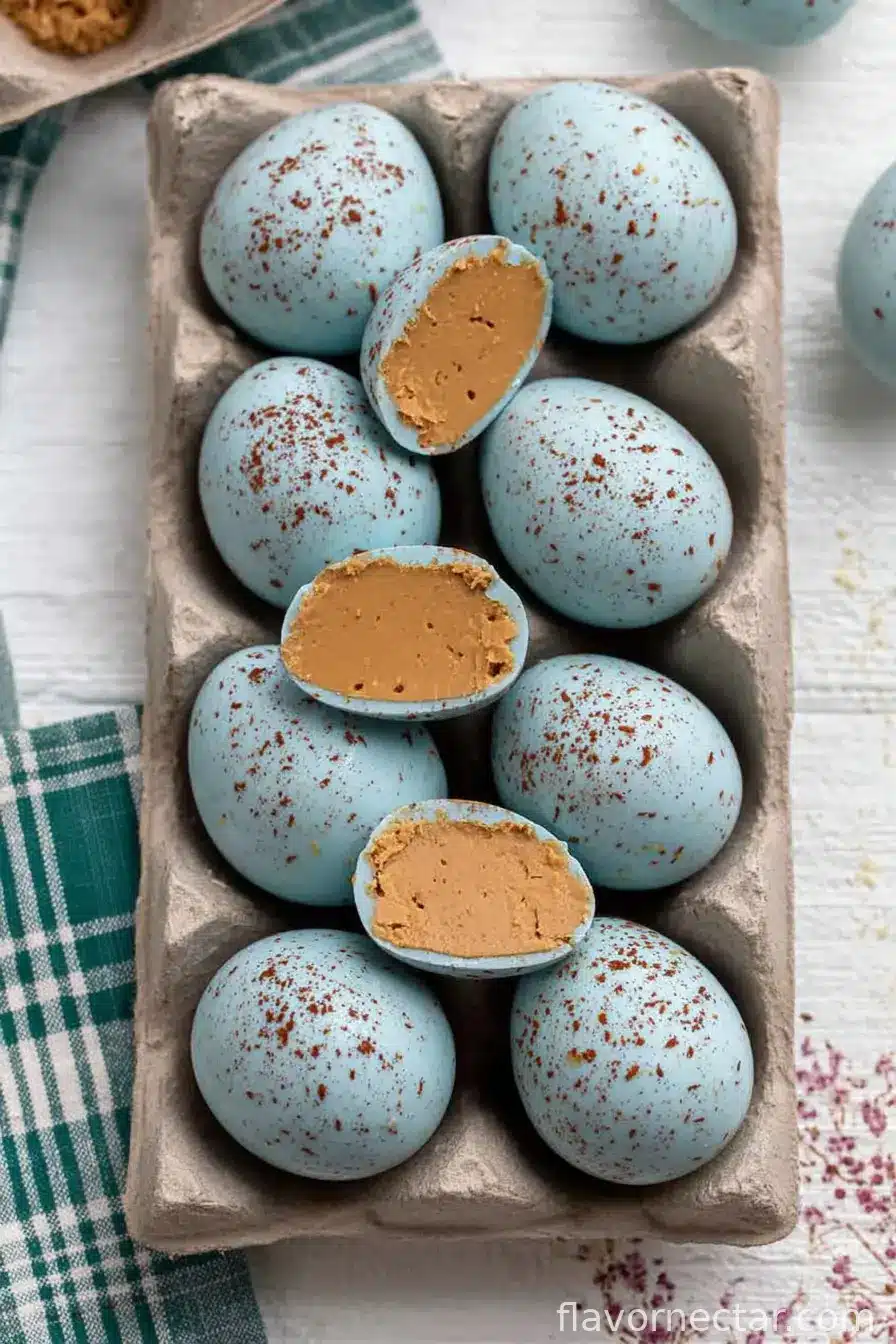
If I had a dollar for every time someone in my house “sneaks” a homemade Peanut Butter Easter Egg before Easter, I’d have—well, a slightly less empty tray, that’s for sure. These are such a family tradition around spring that I basically have to make a double batch unless I want to fend off complaints (and let’s be honest, the dog is the only one not eyeing the mixing bowl). I started making these after my aunt gave me a handwritten recipe on an index card, all smudged with chocolate fingerprints—so you know this is the real deal! And don’t let the fancy coating fool you, some years my eggs come out more… let’s call it “rustic.” But hey, homemade’s supposed to be a little wobbly, right?

Why You’ll Love This
- I make these when I need a break from store-bought chocolate (which my kids can identify by crinkle sound alone, so sneaky treats are a must!).
- My friends are convinced I’m a genius baker, but honestly, this is just creamy Peanut Butter and a bit of magic.
- There’s something old-school-fun about getting a bit of chocolate all over your fingers. Plus, no oven drama.
- I used to dread tempering chocolate—these melting wafers just work, and nobody’s been the wiser.
What You’ll Need (Ingredients & a Few Swaps)
- 1 ¼ cup natural, runny Peanut Butter (no sugar added) – I stick with the natural stuff, but on a pinch, I’ve used the regular kind and nobody complained.
- ¼ cup maple syrup – If you’re out, honey has worked for me. Aunt Marsha swears by agave (I’m less convinced, but you do you!).
- ¼ cup powdered sugar – Sneak a taste; just me? Oh, okay.
- ⅓ cup almond flour – Sometimes I swap with cashew flour, but almond is my go-to for texture.
- ½ teaspoon vanilla extract – The good stuff, if you have it.
- Pinch of salt – Don’t skip it! Makes the Peanut Butter pop.
- 8 ounces white chocolate melting wafers (I use Ghirardelli, but use whatever doesn’t seize)
- 2 teaspoons coconut oil – This keeps the coating smooth; I’ve tried skipping it and, well, learn from my mistakes.
- ½ teaspoon blue spirulina + ¼ teaspoon matcha powder (or your own mix of blue/green food dye) – The coloring is totally up to you. Kids get a kick out of wild combos.
- For the speckles: 1 teaspoon cocoa powder + 1 tablespoon water – Looks fancy, very minimal effort.
How To Make These Peanut Butter Easter Eggs (With Real-World Advice)
- Whip Up The Filling: In a decent-sized mixing bowl, stir (or use an electric mixer if your arm’s feeling lazy like mine) together the peanut butter, maple syrup, powdered sugar, almond flour, vanilla, and salt. Keep going until you get a thick but still pliable mixture—think play doh if it was delicious. Sometimes it sticks, but that’s just a heads up that you’re doing it right.
- Mold Into Egg Shapes: Scoop out about 2 tablespoons of peanut butter mixture for each egg. Roll each into a ball with your hands (they’ll get messy; I tell myself it’s hand facemask time). Next, press and shape it into a squished oval so it kind of looks like an egg. This is where my versions always come out a bit lopsided—adds character!
- Freeze For Later: Place your peanut butter eggs on a parchment-lined baking sheet and stick it all in the freezer while you prep the white chocolate. Freezing keeps them from falling apart later, trust me.
- Mix the Speckle Paint: While eggs freeze, whisk cocoa powder and water in a small bowl. This will get you that fancy-fancy speckled look later. Set it somewhere you won’t tip it over (I, uh, always forget).
- Melt & Color White Chocolate: Toss the white chocolate wafers and coconut oil into a microwave-safe bowl. Zap in short ~15 second bursts, stirring between each, so you don’t end up with a weird, overcooked blob (been there). Once melted and smooth, stir in your colorings. Pour chocolate into a glass—it’s so much easier to dip this way.
- Time To Coat: Grab your semi-frozen eggs (they should feel chilled but not rock solid). Stick a toothpick into the bottom of each; then dip the whole thing into the melted white chocolate. Let the extra chocolate drip back into the glass—no one likes puddles! Let it start to set, then slide the egg back onto parchment and pull out the toothpick right away. If you wait too long (as I have, repeatedly), the shell cracks. There’s probably some science to it, but I just call it luck.
- Add The Speckles: Take a pastry brush, dip the tip into your cocoa mix, and flick little chocolate spots over the candies. I do this from about a hand’s width above—the higher, the messier (and honestly, it’s kind of fun watching speckles land everywhere I just cleaned!). Pop the tray into the fridge for about 10 minutes, or until everything’s set and ready. Try not to eat them all before sharing, but hey, you’re the boss.
Notes From Experience
- Colder eggs = easier coating. If they’re too soft, they break apart and I end up eating the scraps. Bummer. Or not?
- If the white chocolate’s too thick, add a drop of coconut oil until it loosens—over-microwaving just makes things weird.
- My first dozen tries, my speckles looked like polka dots gone rogue. Tastes the same!
Things I’ve Tried (and Whether They Worked)
- One time I swapped almond flour for ground oats—honestly, not my favorite, but my toddler didn’t mind. Go figure.
- Colored the chocolate with beet powder for pink eggs. Pretty, but the flavor was… earthy (hard pass).
- I skipped the speckles once when rushed—nobody noticed but me, so if in a hurry, just dip and chill.
Equipment & Hacks
- I use a mixer, but a big spoon (and elbow grease) works just fine. It’s a good arm workout.
- No pastry brush for the speckles? Try flicking the cocoa mix off the tines of a fork. Not elegant, but hey, sometimes I’ve used my kid’s paint brush (clean, I hope!).
- Toothpicks are helpful for dipping, but forks or skewers do in a pinch. I once used chopsticks and it was… entertaining.
Storing Your Easter Eggs
Technically, these will keep for about a week in an airtight container in the fridge, but honestly, they never hang around more than a day or two around here (I suspect sabotage by my partner in the night). Freezing? Yup, you can freeze them for emergency snacking. Just give them a few minutes on the counter before biting down, unless you like a jaw workout.
How I Like To Serve ‘Em
I serve these on a big platter with a scatter of real dyed eggs for maximum spring vibes. Sometimes I go all out with edible flowers or sparkly sprinkles. My little cousin dips hers in Nutella—no idea where she picked that up, but it’s oddly delicious.
What I’ve Learned (A.K.A. Pro Tips)
- Don’t try to coat too many eggs at once—the chocolate sets quick. I once got distracted and ended up with a tray of half-dressed eggs (still tasty, but weirdly chewy).
- Actually, I think they taste even better the next day, once the flavors settle. If you can resist, let them chill overnight. Just sayin’.
- Let the color in the chocolate be a little uneven—it kind of looks like real robin’s eggs then!
More Of Those “You Asked, I Answered” Qs
- Can I make these nut-free?
- Well, you’d have to swap both the peanut butter and almond flour. Sunflower seed butter and oat flour work—but expect slightly different texture, not bad though!
- Do I have to use white chocolate?
- Nah! Milk or dark chocolate is just as good. Actually, my dad swears dark chocolate is the best—but he’s biased.
- Why blue spirulina and matcha?
- The color, honestly! You can use regular food coloring. Or skip it. Sometimes I just leave them plain and call it a minimalist vibe.
- Allergic to coconut oil?
- Use a tiny splash of canola or melted cocoa butter. Margarine didn’t work for me, so… wouldn’t bother.
- Can kids help?
- YES, though see: messy kitchen and possible chocolate handprints on the dog. Worth it for the memories though.
Ingredients
- 1 ¼ cup natural, runny peanut butter (no sugar added)
- ¼ cup maple syrup
- ¼ cup powdered sugar
- ⅓ cup almond flour
- ½ teaspoon vanilla extract
- Pinch of salt
- 8 ounces white chocolate melting wafers (we use Ghirardelli brand)
- 2 teaspoons coconut oil
- ½ teaspoon blue spirulina + ¼ teaspoon matcha powder (or use a 2:1 ratio of any blue and green food dye)
- For the speckles: 1 teaspoon cocoa powder + 1 tablespoon water
Instructions
-
1In a decent-sized mixing bowl, stir (or use an electric mixer if your arm’s feeling lazy like mine) together the peanut butter, maple syrup, powdered sugar, almond flour, vanilla, and salt. Keep going until you get a thick but still pliable mixture—think play doh if it was delicious. Sometimes it sticks, but that’s just a heads up that you’re doing it right.
-
2Scoop out about 2 tablespoons of peanut butter mixture for each egg. Roll each into a ball with your hands (they’ll get messy; I tell myself it’s hand facemask time). Next, press and shape it into a squished oval so it kind of looks like an egg. This is where my versions always come out a bit lopsided—adds character!
-
3Place your peanut butter eggs on a parchment-lined baking sheet and stick it all in the freezer while you prep the white chocolate. Freezing keeps them from falling apart later, trust me.
-
4While eggs freeze, whisk cocoa powder and water in a small bowl. This will get you that fancy-fancy speckled look later. Set it somewhere you won’t tip it over (I, uh, always forget).
-
5Toss the white chocolate wafers and coconut oil into a microwave-safe bowl. Zap in short ~15 second bursts, stirring between each, so you don’t end up with a weird, overcooked blob (been there). Once melted and smooth, stir in your colorings. Pour chocolate into a glass—it’s so much easier to dip this way.
-
6Grab your semi-frozen eggs (they should feel chilled but not rock solid). Stick a toothpick into the bottom of each; then dip the whole thing into the melted white chocolate. Let the extra chocolate drip back into the glass—no one likes puddles! Let it start to set, then slide the egg back onto parchment and pull out the toothpick right away. If you wait too long (as I have, repeatedly), the shell cracks. There’s probably some science to it, but I just call it luck.
-
7Take a pastry brush, dip the tip into your cocoa mix, and flick little chocolate spots over the candies. I do this from about a hand’s width above—the higher, the messier (and honestly, it’s kind of fun watching speckles land everywhere I just cleaned!). Pop the tray into the fridge for about 10 minutes, or until everything’s set and ready. Try not to eat them all before sharing, but hey, you’re the boss.
CLICK FOR NUTRITION INFO
↑
Approximate Information for One Serving
Serving Size:
1 serving
Calories:
240 caloriescal
Protein:
5gg
Fat:
16gg
Saturated Fat:
0g
Trans Fat:
0g
Cholesterol:
0mg
Sodium:
0mg
Potassium:
0mg
Total Carbs:
22gg
Fiber:
0g
Sugar:
0g
Net Carbs:
0g
Vitamin A:
0
Vitamin C:
0mg
Calcium:
0mg
Iron:
0mg
Nutrition Disclaimers
Number of total servings shown is approximate. Actual number of servings will depend on your preferred portion sizes.
Nutritional values shown are general guidelines and reflect information for 1 serving using the ingredients listed, not including any optional ingredients. Actual macros may vary slightly depending on specific brands and types of ingredients used.
To determine the weight of one serving, prepare the recipe as instructed. Weigh the finished recipe, then divide the weight of the finished recipe (not including the weight of the container the food is in) by the desired number of servings. Result will be the weight of one serving.
Did you make this recipe?
Please consider Pinning it!