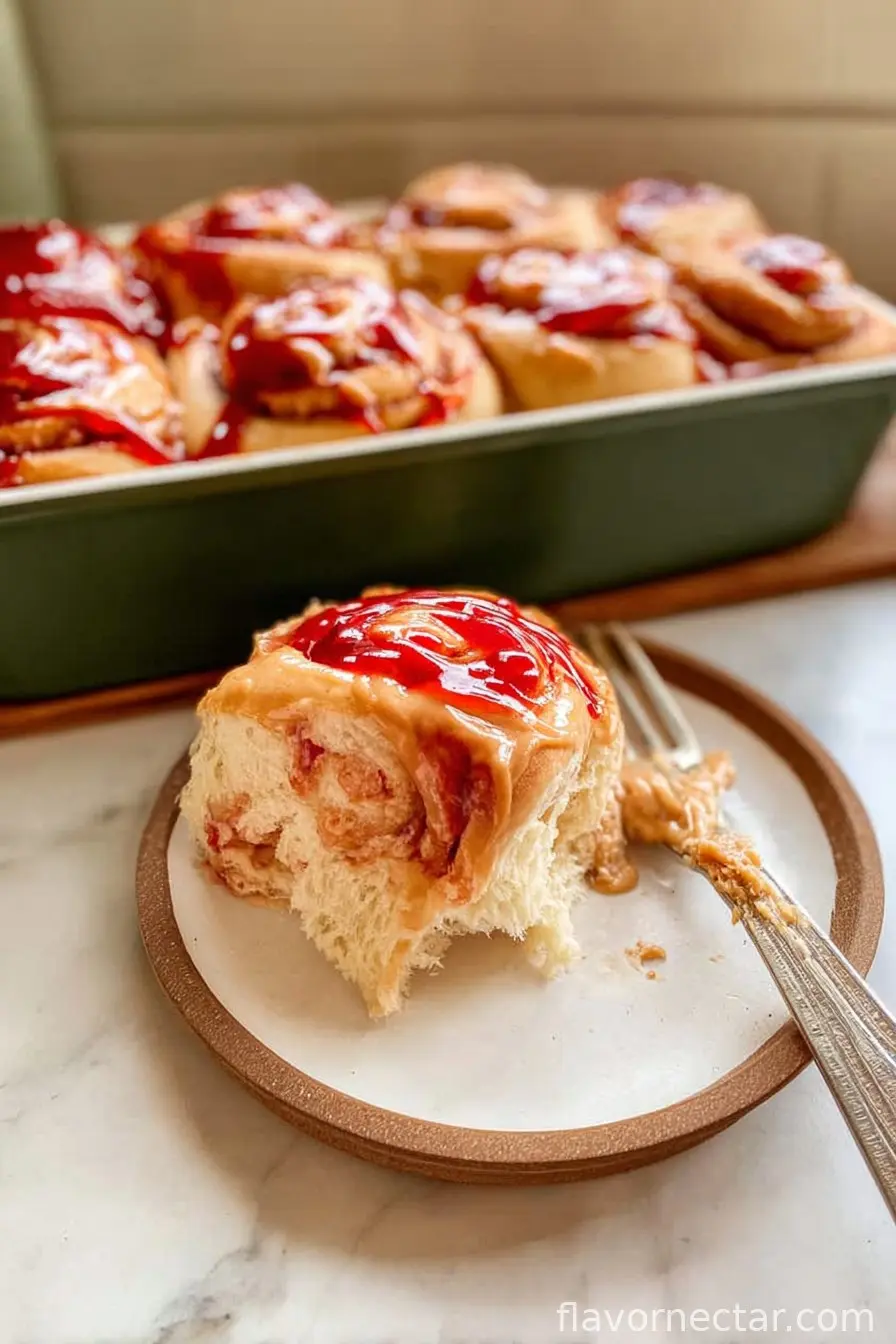
Okay, so here’s the deal—some afternoons, especially when it rains and the dog refuses to go anywhere near the yard, I get this massive craving for something sweet but not fancy. Enter: Peanut Butter and Jelly Rolls! The first time I made these, my nephew Max (he’s seven, finicky as a squirrel) took one bite and immediately requested them for every sleepover—let’s just say, that was both flattering and a little daunting.
Why You’ll Love This (or at least, why I do!)
I make these whenever someone in the house needs a mood boost. Seriously, it’s like culinary happiness therapy. My family goes bananas over them because they’re soft, just the right amount of sticky, and honestly, a bit messy in the best way—napkins advised! Plus, if you mess it up, it still tastes great. (I once overbaked them a bit and just called them ‘crunchy rolls’… Nobody complained.)
What You’ll Need
- 2 cups all-purpose flour (I’ve subbed in whole wheat flour when feeling marginally healthy, works okay but a bit denser)
- 2 tablespoons sugar (brown or white, whatever you grab first)
- 1 tablespoon baking powder
- 1/2 teaspoon salt
- 3/4 cup milk (I use whole, but almond milk didn’t make anyone cry the one time I ran out)
- 1/4 cup unsalted butter, melted (my gran swore by salted, so…you pick!)
- 1/2 cup creamy Peanut Butter (chunky if you’re wild; also, store brand is just fine—no one notices at snack time)
- 1/3 cup jelly or jam of your choice (grape is classic but raspberry feels a bit grown-up)
- Optional: a handful of chopped peanuts for crunch, or honestly, chocolate chips if your soul demands it
How To Make These Little Beauties
- Preheat your oven to 375°F (190°C). Grease an 8-inch square pan—I just smear it with butter and call it even.
- Mix flour, sugar, baking powder, and salt in a big bowl. Whisk, fork, or even just mix with your fingers (clean, hopefully).
- Pour in the milk and melted butter. Stir until a dough forms. Don’t overthink it—it might look shaggy.
- Lightly flour the counter and roll the dough into a rectangle. About 1/4 inch thick, but you do you. Perfection is boring.
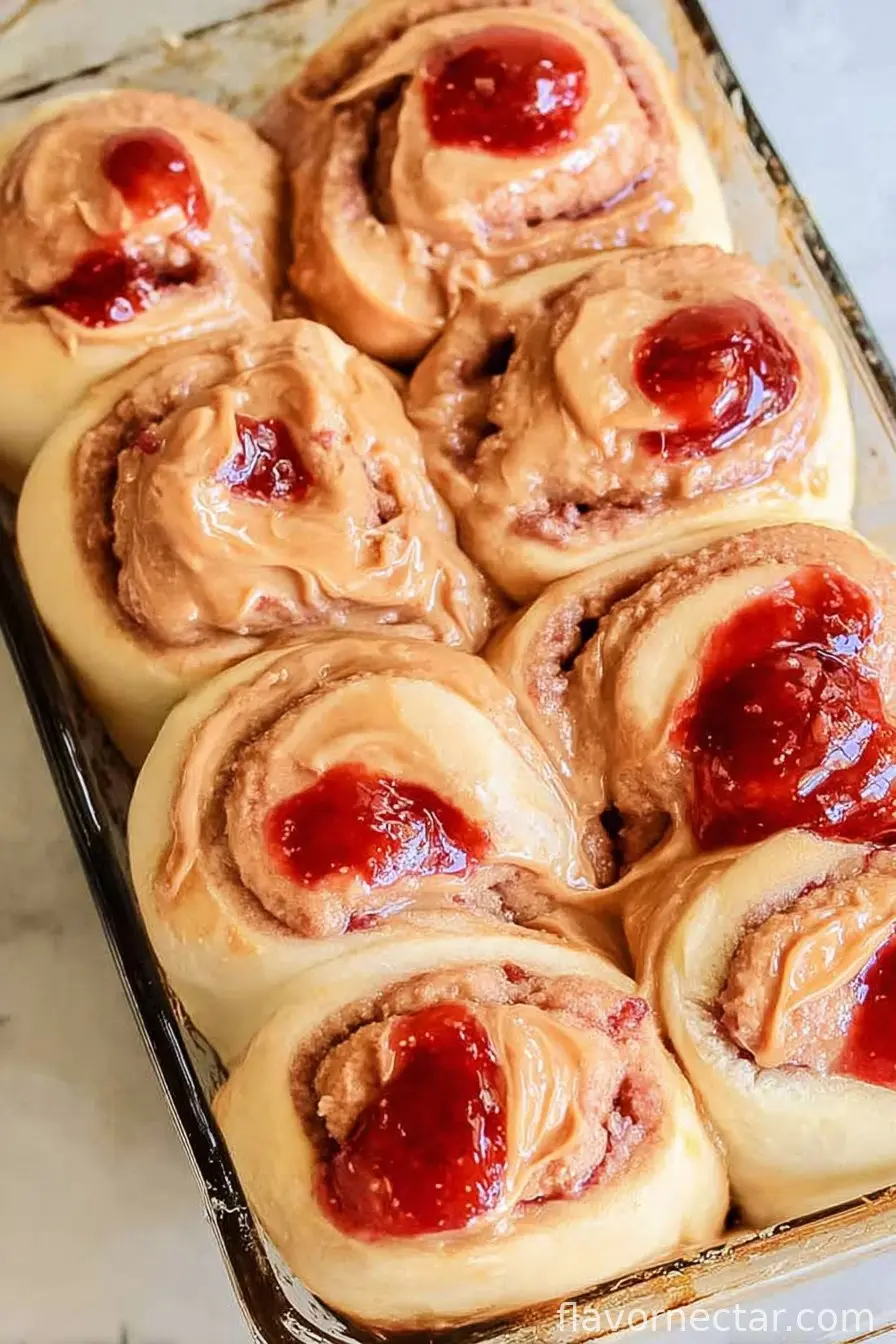
- Spread Peanut Butter across the dough—you can microwave it for 10 seconds if it’s a brick. Then dot or swirl the jelly on top however you want. I go heavy in the corners; personal quirk.
- Scatter chopped peanuts or choc chips on if you’re feeling fancy. Not required but fun. (Here’s where I usually sneak a taste, oops.)
- Roll up the whole rectangle, longer side first, into a log shape. This bit is messy, but life is messy, right?
- Slice into 8-10 rolls, plop them in the pan—no need for perfect spacing. They snuggle up as they bake.
- Bake for about 20 minutes, or until they’re turning golden and smelling like childhood. I usually check at 18 because my oven runs hot.
- Let them cool a tad. I burned my tongue once diving in too soon—worth it? Maybe. But try to wait five minutes.
A Few Notes From Many Trials
- If the dough feels sticky, just dust hands with more flour. I always need more than I think.
- Once I tried swirling the jelly before the Peanut Butter—not the best idea, trust me, it ripped the dough. Classic rookie move.
- They freeze decently, but honestly, mine rarely make it past breakfast the next day. They disappear like socks in the dryer.
Variation Adventures (Some worked, some… meh)
- Swapping almond butter for PB: Good, but a bit too fancy for the kids. I still loved it.
- Tried with Nutella instead of jam: Sweet, sloppy, but not half bad. Might call it a different recipe though.
- One time, tried adding sliced bananas inside—don’t recommend. Gets mushy, barely sliceable. Maybe skip that one.
Equipment (That I Actually Use… Most of the Time)
You’ll want a rolling pin, but you can use a wine bottle (been there, done that, twice). An 8″ square pan works, but honestly any baking dish close in size is fine. I never owned a pastry brush, just fingers or a spoon.
Storing These Rolls (But they’ll probably vanish)
Keep them in an airtight container at room temp for up to 2 days. Fridge makes them firmer, but not in a bad way. That said—I’ve never seen them stick around past the first day around here, unless I hide them behind the broccoli.
Best Ways to Serve
Warm with cold milk is top notch. Sometimes we dust a little powdered sugar if we’re feeling boujee. If it’s a Saturday, my crew likes them with extra jam spooned on top. Or ice cream, but don’t tell anybody I said that.
Pro Tips (Learned the Hard Way)
- Give the dough time to rest 1-2 min before rolling, otherwise it fights you. (One time I tried to rush this and the dough tore in about five places!)
- Don’t pour hot butter onto the flour, let it cool a bit or it gets weirdly sticky.
- If you put too much filling, you get lava-leakage all over the pan—delicious, but sticky cleanup.
Your Most-Asked Questions (and a couple extra I made up)
- Can I make these vegan? – Absolutely, just use plant-based milk and vegan butter. I’ve also tried using a flax egg in a real pinch, but didn’t notice a huge difference so just skip the egg part anyway.
- Do I have to use creamy Peanut Butter? – Nah, chunky is fine, go wild. The texture is kinda fun, too.
- What if my dough’s too sticky? – Dust the counter, dust your hands, dust your face if necessary (not really), just add more flour little by little.
- Can I use pre-made pizza dough? – In a word: yes, but… the flavor’s much different. Less ‘school lunch nostalgia,’ more pizza party vibe.
- Do these work as breakfast? – I sure think so! Especially if you call them a PBJ breakfast roll. Works like a charm on slow Sunday mornings.
- Ever tried freezing them? – Yup. They come out a little drier but still tasty. Microwaving for 10 seconds freshens ’em up just fine.
And random aside: Did you know peanut butter was originally considered a luxury food? Hard to imagine when you see my pantry—three giant jars, two almost empty. Anyway, hope you love these rolls as much as my family does, or at least have fun eating the drippy first one!
Ingredients
- 2 cups all-purpose flour (I’ve subbed in whole wheat flour when feeling marginally healthy, works okay but a bit denser)
- 2 tablespoons sugar (brown or white, whatever you grab first)
- 1 tablespoon baking powder
- 1/2 teaspoon salt
- 3/4 cup milk (I use whole, but almond milk didn’t make anyone cry the one time I ran out)
- 1/4 cup unsalted butter, melted (my gran swore by salted, so…you pick!)
- 1/2 cup creamy peanut butter (chunky if you’re wild; also, store brand is just fine—no one notices at snack time)
- 1/3 cup jelly or jam of your choice (grape is classic but raspberry feels a bit grown-up)
- Optional: a handful of chopped peanuts for crunch, or honestly, chocolate chips if your soul demands it
Instructions
-
1Preheat your oven to 375°F (190°C). Grease an 8-inch square pan—I just smear it with butter and call it even.
-
2Mix flour, sugar, baking powder, and salt in a big bowl. Whisk, fork, or even just mix with your fingers (clean, hopefully).
-
3Pour in the milk and melted butter. Stir until a dough forms. Don’t overthink it—it might look shaggy.
-
4Lightly flour the counter and roll the dough into a rectangle. About 1/4 inch thick, but you do you. Perfection is boring.
-
5Spread peanut butter across the dough—you can microwave it for 10 seconds if it’s a brick. Then dot or swirl the jelly on top however you want. I go heavy in the corners; personal quirk.
-
6Scatter chopped peanuts or choc chips on if you’re feeling fancy. Not required but fun. (Here’s where I usually sneak a taste, oops.)
-
7Roll up the whole rectangle, longer side first, into a log shape. This bit is messy, but life is messy, right?
-
8Slice into 8-10 rolls, plop them in the pan—no need for perfect spacing. They snuggle up as they bake.
-
9Bake for about 20 minutes, or until they’re turning golden and smelling like childhood. I usually check at 18 because my oven runs hot.
-
10Let them cool a tad. I burned my tongue once diving in too soon—worth it? Maybe. But try to wait five minutes.
CLICK FOR NUTRITION INFO
↑
Approximate Information for One Serving
Serving Size:
1 serving
Calories:
270 caloriescal
Protein:
7gg
Fat:
12gg
Saturated Fat:
0g
Trans Fat:
0g
Cholesterol:
0mg
Sodium:
0mg
Potassium:
0mg
Total Carbs:
34gg
Fiber:
0g
Sugar:
0g
Net Carbs:
0g
Vitamin A:
0
Vitamin C:
0mg
Calcium:
0mg
Iron:
0mg
Nutrition Disclaimers
Number of total servings shown is approximate. Actual number of servings will depend on your preferred portion sizes.
Nutritional values shown are general guidelines and reflect information for 1 serving using the ingredients listed, not including any optional ingredients. Actual macros may vary slightly depending on specific brands and types of ingredients used.
To determine the weight of one serving, prepare the recipe as instructed. Weigh the finished recipe, then divide the weight of the finished recipe (not including the weight of the container the food is in) by the desired number of servings. Result will be the weight of one serving.
Did you make this recipe?
Please consider Pinning it!