One Pot Mexican Beef and Rice Casserole—My Go-To Comfort Food
Alright, you know those evenings when you’re absolutely tuckered out, the kitchen looks like a tornado passed through, and you’re one questionable snack away from calling it dinner? That’s when I reach for my old reliable: this one pot Mexican beef and Rice Casserole. I’ve made it more times than I’d care to admit (and, okay—sometimes that means more than once in a week) because it barely takes any brainpower, my family wipes the pot clean every time, and the leftovers—if there even are any—taste even better straight form the fridge the next day. Once, my cousin Ben insisted his salsa was the secret add-in, but honestly, this recipe doesn’t need much fiddling to win hearts.
Why I Keep Coming Back to This (And Probably Will Forever)
I make this when I just don’t want to fuss—like, who has energy for all the pots and pans on a Wednesday, really? My partner actually requests it when he’s had one of “those days” (you know the type). Plus, all the flavors meld together so nicely that even those who claim they “don’t like rice dishes” usually sneak second helpings. Sure, the rice sometimes sticks a bit if I get distracted watching the telly. But, honestly, that’s the crunchy part everyone fights over! Oh, and it’s a real crowd-pleaser at little get-togethers—one pot parks right on the table and everyone just digs in. Occasionally I grumble about chopping onions, but there’s always someone around who’ll do it for me if I look especially pitiful.
What You’ll Need—And What You Can Get Away With Swapping
- 1 lb (about 450g) ground beef (sometimes I use ground turkey if beef’s on the pricier side—it works!)
- 1 medium yellow onion, diced (red onion is fine; sometimes I just grab what’s closest)
- 3 cloves garlic, minced (but, you know, I’ve used garlic powder in a pinch and nobody noticed)
- 1 bell pepper, diced (any color, though green keeps it classic)
- 1 cup long-grain white rice, rinsed (jasmine or basmati works, but Uncle Ben’s was Grandma’s go-to—don’t tell her I sometimes use store-brand)
- 1 can (14.5oz/410g) diced tomatoes with juices
- 1 can (15oz/425g) black beans, drained and rinsed (sometimes I use pinto beans or just leave them out, depending what’s lurking in the pantry)
- 1 cup frozen corn (or canned, but I think frozen is sweeter)
- 2 1/4 cups chicken broth (beef broth or even veggie broth works—once I even used half water and it still turned out edible!)
- 2-3 tablespoons taco seasoning (store-bought or homemade if you’re feeling fancy)
- 1 cup shredded cheddar cheese (Monterey Jack is lovely, or that orange-y Mexican blend bag)
- Salt & pepper, to taste (if needed; sometimes it’s plenty salty from the broth)
- Chopped cilantro, for serving (definitely optional, but it does look pretty…unless you think it tastes like soap, in which case, skip it!)
Here’s How It All Comes Together
- Grab your biggest, heaviest lidded skillet or Dutch oven and heat it up over medium heat. Add the ground beef and cook, breaking it up with a spoon as you go, until no longer pink. If there’s more grease than you care for, drain some off, but I usually just let it ride (extra flavor!).
- Toss in the diced onion and bell pepper. Stir them around and let them soften, about 3-4 minutes. Add the minced garlic and cook it about 30 seconds, until it smells amazing (don’t let the garlic burn, I always say—unless, whoops, you do; I’ve been there too!).
- Pour in the rice, stirring to get everything coated well and the grains kind of glossy. This is where I usually sneak a taste of beef to “check seasoning”—highly recommended.
- Add the diced tomatoes (juice and all), black beans, corn, chicken broth, and sprinkle in your taco seasoning. Stir it all together (it’ll look a bit soupy at this stage—don’t worry, the rice will soak up the liquid like magic).
- Bring it all to a gentle simmer—then slap the lid on, reduce heat to low, and let it go for about 18-20 minutes. Don’t be tempted to peek too often, though I know it’s hard. If your rice seems a hair crunchy at the end, just let it sit a few extra minutes with the lid on; usually sorts itself out.
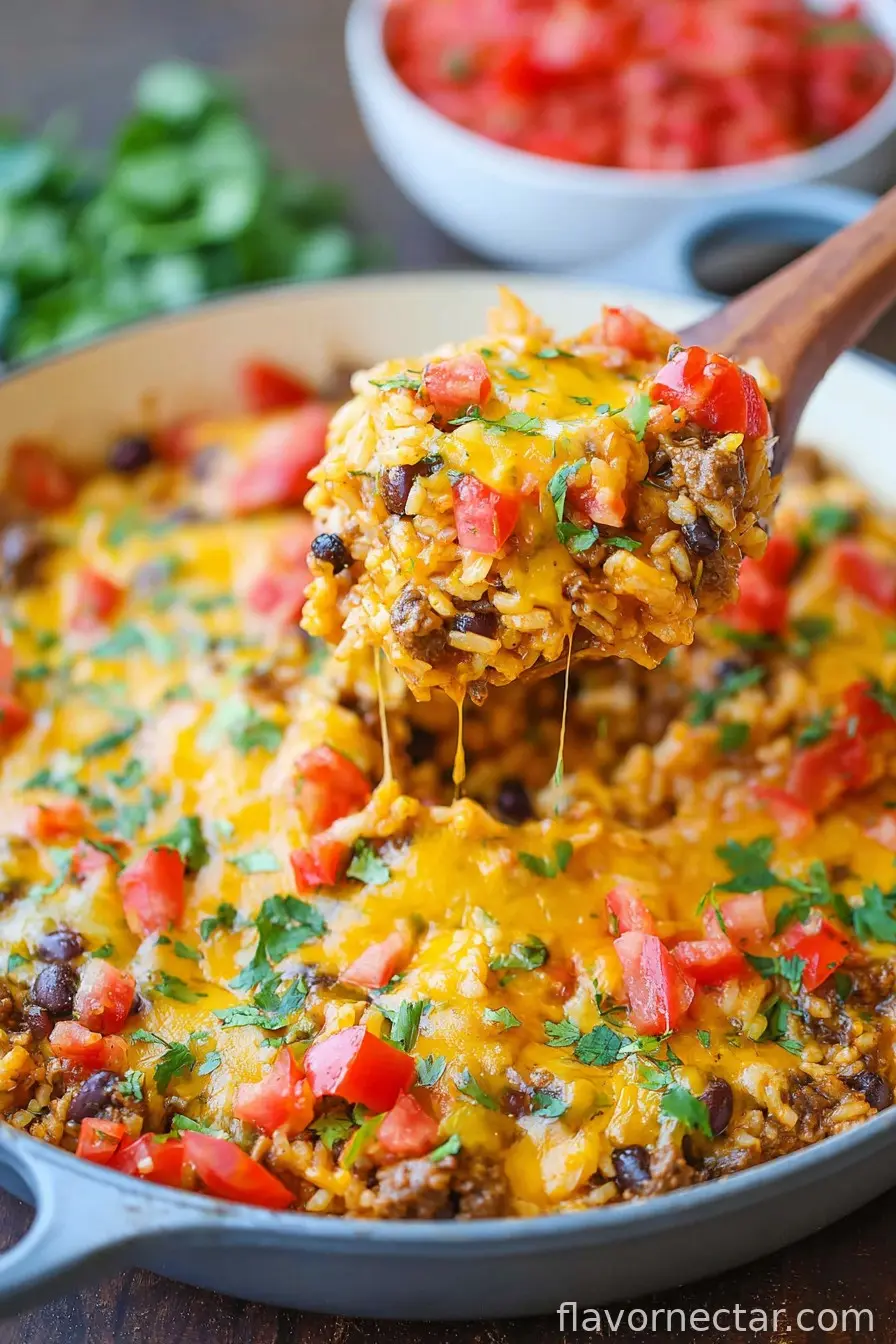
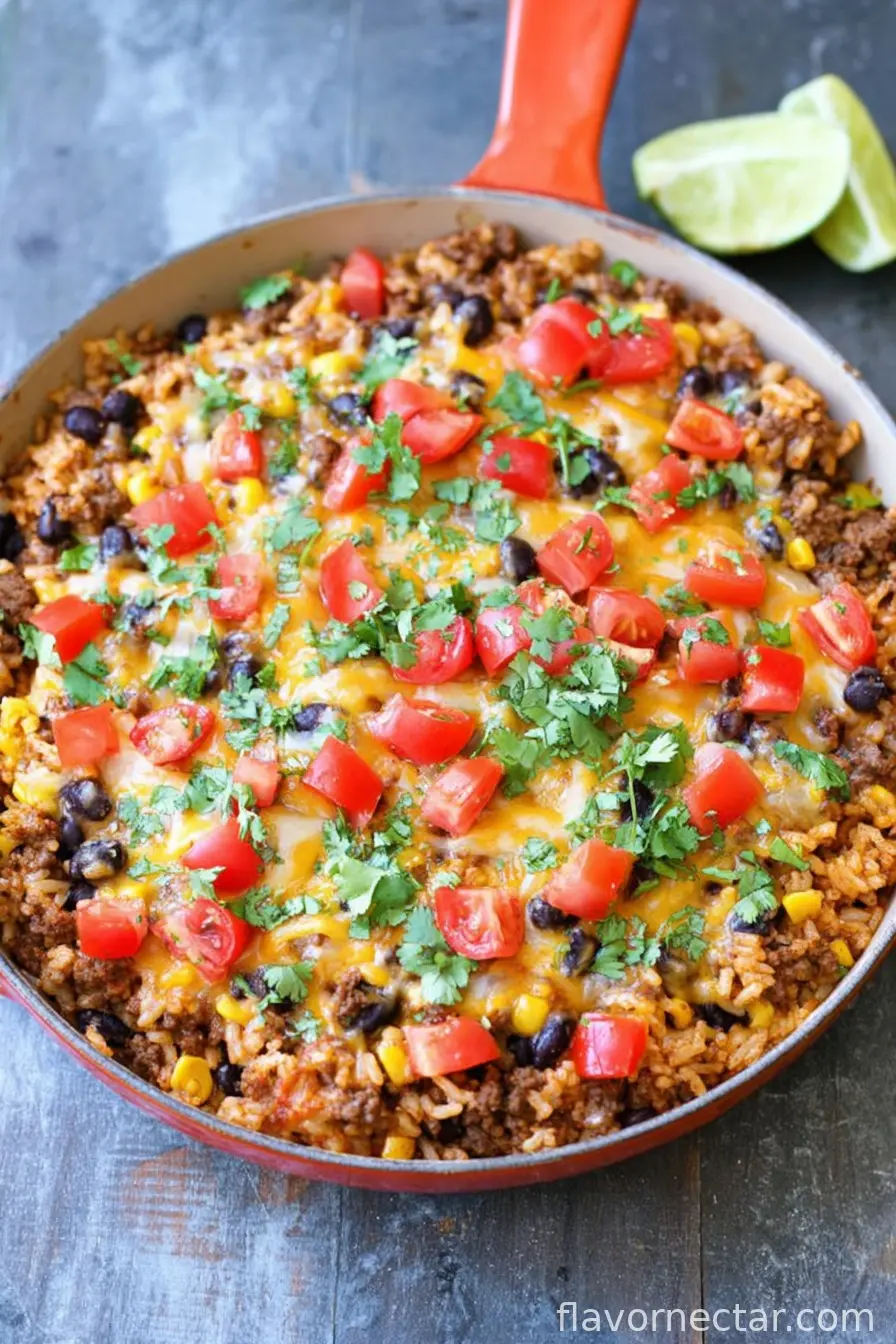
- Once the rice is tender and the liquid’s mostly absorbed, give everything a big stir. Sprinkle the cheese over the top, pop the lid back on, and turn off the heat. The cheese will get fabulously melty in about 2-3 minutes. (I’ve been known to add a little extra cheese on top just for luck.)
- Taste for salt and pepper, then serve right from the pot, maybe with chopped cilantro if you’re on Team Cilantro. Or just dollop sour cream on top—up to you.
Notes From My (Occasionally Clueless) Kitchen
- If the rice feels a tad underdone, don’t panic—it’s rare, but I just pour in a splash of broth, cover, and cook for another 5 mins.
- Sometimes I get wild and add a spoonful of chipotle in adobo for extra oomph, but fair warning: it packs a punch.
- I once used leftover rotisserie chicken instead of beef. Actually, that’s not a bad swap if you chop it small! Ground pork works too.
Variations from My Kitchen Experiments (Some Hits, Some Misses)
- I once tried using brown rice and, wow, it took ages to cook. If you must, add extra broth and plan to wait.
- Swapped cheese for dairy-free mozzarella for a vegan pal—tasted good but didn’t melt right (still totally edible, just different).
- You don’t have to use beans; skip ‘em if they upset your stomach. No crime in a bean-free casserole.
What You’ll Need—But Don’t Stress If You Don’t Have Everything
- Big, heavy skillet (or Dutch oven is fantastic; but, I’ve been known to use just a regular old soup pot when I can’t find my usual one)
- Sharp knife and cutting board (but honestly, I sometimes just break veggies up with my hands if I’m feeling lazy)
- Wooden spoon or spatula
- Lid for the pot (in a pinch, I’ve used a baking sheet—works surprisingly well!)
Storing the Leftovers (If There Are Any)
This keeps in the fridge for up to 3 days, but, truth be told, it’s rarely lasted that long in my place. Just scoop leftovers into a container. Microwave is easiest for reheating, though the rice gets a little softer. I once stashed a serving in the freezer and, on second thought, it wasn’t as tasty reheated (bit watery), so I’d say fridge is your best bet.
How I Like to Serve It (And That One Silly Family Tradition)
Just dollop with sour cream and sprinkle with green onions if I have ‘em. Sometimes I throw on sliced avocado or hot sauce. My kids like crushed tortilla chips on top—or, honestly, straight from the pan with spoons while arguing over the crispy bits.
Hard-Learned Lessons (Aka Pro Tips You Won’t See on a Food Show)
- Don’t try to rush the simmering, or the rice turns crunchy and sad. I did that once, and people were politely chewing for ages (awkward).
- Actually, don’t skip rinsing the rice—it gets way less gummy when you do. I forget sometimes and regret it.
- Season at the end if you’re using store-bought broth; it can be salty and a tad unpredictable. Ask me how I know.
Questions I’ve Actually Gotten (And My Real Answers)
- Can I use brown rice? You can, but—add about 15 more minutes and extra broth. Brown rice is a whole different animal, honestly.
- What about ground chicken? Works just as well as beef! Sometimes I even like the lighter flavor (less greasy, too).
- Do I need to pre-cook the rice? Nope, just toss it in raw. It cooks with everything and soaks up all that lovely flavor.
- Can I add more veggies? Yup. Zucchini, mushrooms, whatever’s wilting in the fridge…it all works.
- What if I don’t have taco seasoning? Eh, mix together some cumin, paprika, a bit of chili powder, and garlic powder. Or just go rogue and add what you like—nobody’s judging. (Except maybe my Aunt Joan, but she judges everything!)
So there it is—my weeknight hero, perfect for when you want something cozy, easy, and guaranteed to bring everyone running to the kitchen. If you try it with your own twist, I’d love to know; I’m always game for more one-pot adventures!
Ingredients
- 1 lb (about 450g) ground beef (sometimes I use ground turkey if beef’s on the pricier side—it works!)
- 1 medium yellow onion, diced (red onion is fine; sometimes I just grab what’s closest)
- 3 cloves garlic, minced (but, you know, I’ve used garlic powder in a pinch and nobody noticed)
- 1 bell pepper, diced (any color, though green keeps it classic)
- 1 cup long-grain white rice, rinsed (jasmine or basmati works, but Uncle Ben’s was Grandma’s go-to—don’t tell her I sometimes use store-brand)
- 1 can (14.5oz/410g) diced tomatoes with juices
- 1 can (15oz/425g) black beans, drained and rinsed (sometimes I use pinto beans or just leave them out, depending what’s lurking in the pantry)
- 1 cup frozen corn (or canned, but I think frozen is sweeter)
- 2 1/4 cups chicken broth (beef broth or even veggie broth works—once I even used half water and it still turned out edible!)
- 2-3 tablespoons taco seasoning (store-bought or homemade if you’re feeling fancy)
- 1 cup shredded cheddar cheese (Monterey Jack is lovely, or that orange-y Mexican blend bag)
- Salt & pepper, to taste (if needed; sometimes it’s plenty salty from the broth)
- Chopped cilantro, for serving (definitely optional, but it does look pretty…unless you think it tastes like soap, in which case, skip it!)
Instructions
-
1Grab your biggest, heaviest lidded skillet or Dutch oven and heat it up over medium heat. Add the ground beef and cook, breaking it up with a spoon as you go, until no longer pink. If there’s more grease than you care for, drain some off, but I usually just let it ride (extra flavor!).
-
2Toss in the diced onion and bell pepper. Stir them around and let them soften, about 3-4 minutes. Add the minced garlic and cook it about 30 seconds, until it smells amazing (don’t let the garlic burn, I always say—unless, whoops, you do; I’ve been there too!).
-
3Pour in the rice, stirring to get everything coated well and the grains kind of glossy. This is where I usually sneak a taste of beef to “check seasoning”—highly recommended.
-
4Add the diced tomatoes (juice and all), black beans, corn, chicken broth, and sprinkle in your taco seasoning. Stir it all together (it’ll look a bit soupy at this stage—don’t worry, the rice will soak up the liquid like magic).
-
5Bring it all to a gentle simmer—then slap the lid on, reduce heat to low, and let it go for about 18-20 minutes. Don’t be tempted to peek too often, though I know it’s hard. If your rice seems a hair crunchy at the end, just let it sit a few extra minutes with the lid on; usually sorts itself out.
-
6Once the rice is tender and the liquid’s mostly absorbed, give everything a big stir. Sprinkle the cheese over the top, pop the lid back on, and turn off the heat. The cheese will get fabulously melty in about 2-3 minutes. (I’ve been known to add a little extra cheese on top just for luck.)
-
7Taste for salt and pepper, then serve right from the pot, maybe with chopped cilantro if you’re on Team Cilantro. Or just dollop sour cream on top—up to you.
CLICK FOR NUTRITION INFO
↑
Approximate Information for One Serving
Serving Size:
1 serving
Calories:
480 caloriescal
Protein:
27gg
Fat:
18gg
Saturated Fat:
0g
Trans Fat:
0g
Cholesterol:
0mg
Sodium:
0mg
Potassium:
0mg
Total Carbs:
52gg
Fiber:
0g
Sugar:
0g
Net Carbs:
0g
Vitamin A:
0
Vitamin C:
0mg
Calcium:
0mg
Iron:
0mg
Nutrition Disclaimers
Number of total servings shown is approximate. Actual number of servings will depend on your preferred portion sizes.
Nutritional values shown are general guidelines and reflect information for 1 serving using the ingredients listed, not including any optional ingredients. Actual macros may vary slightly depending on specific brands and types of ingredients used.
To determine the weight of one serving, prepare the recipe as instructed. Weigh the finished recipe, then divide the weight of the finished recipe (not including the weight of the container the food is in) by the desired number of servings. Result will be the weight of one serving.
Did you make this recipe?
Please consider Pinning it!