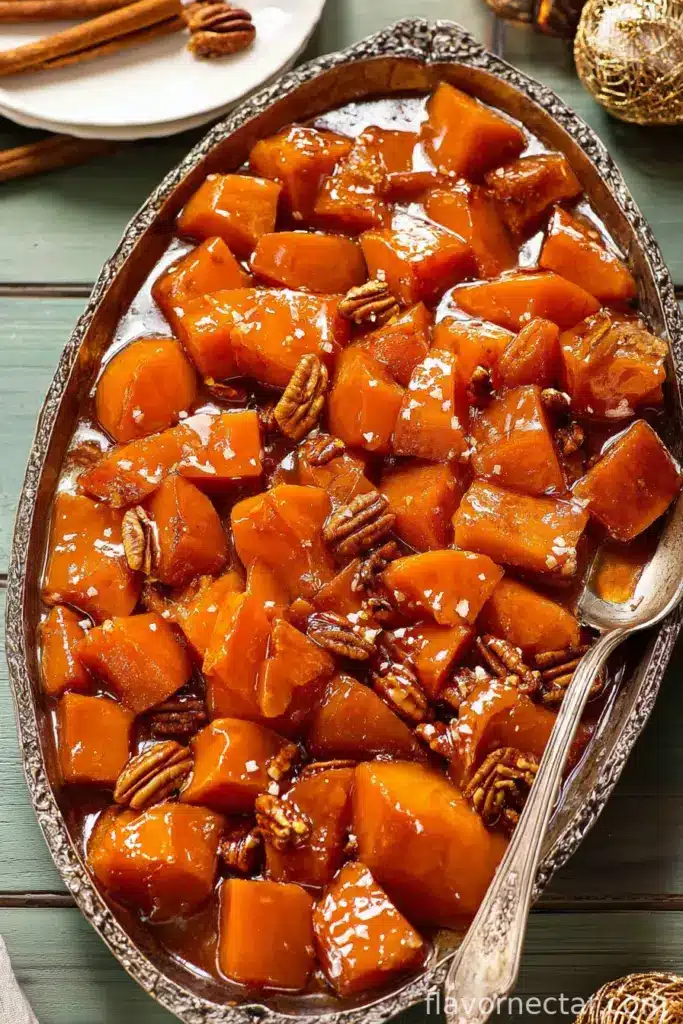
If you ever walked into my kitchen on Thanksgiving morning—back when Aunt Myrna still insisted on running the gravy show—there’s a good chance you’d find me elbow-deep in sweet potatoes with a sugar jar dangerously close by. This Old Fashioned Candied sweet potatoes recipe is the one I keep coming back to, messy notes scribbled on a batter-stained card, and (truth be told) a couple of shortcuts I’ve picked up since my first slightly scorched attempt. It always brings me back to those crazy holiday mornings when everyone is talking at once and, somehow, nobody listens to directions. Or maybe that’s just my lot.
Why You’ll Love This (Or At Least Why I Do)
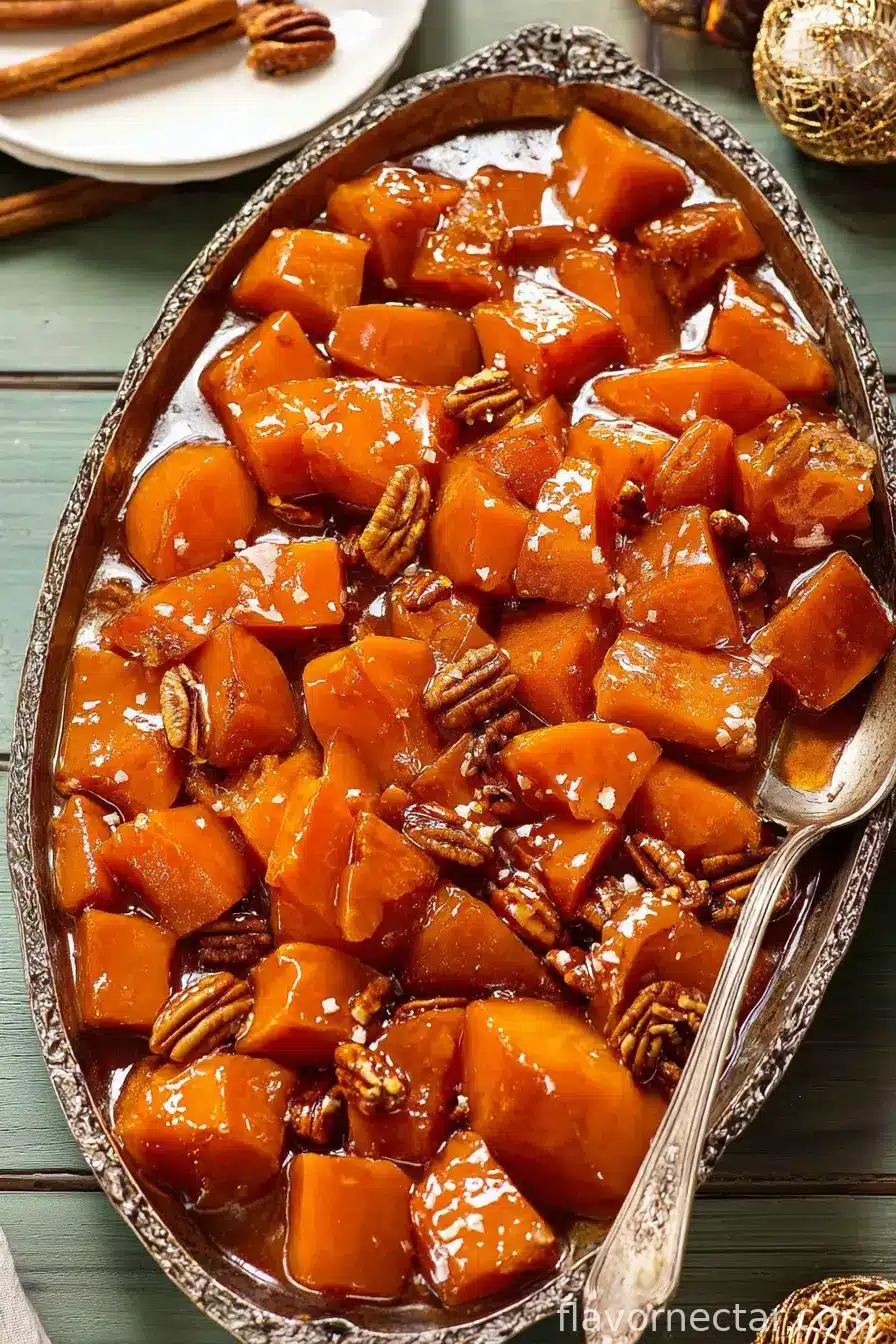
I make candied sweet potatoes when I want my house to smell like a holiday, even if it’s just a rainy March Thursday. My family goes bananas for these golden slices swimming in sticky, spiced buttery syrup (especially my youngest, who once tried to sneak a whole pan upstairs—classic). I’ve even found them oddly comforting as leftovers, eaten cold on a way-too-late night. If you’re anything like me and sometimes grumble about peeling potatoes, well—deal with it. It’s worth it. Actually, I’ve started just leaving the skins on sometimes; my brother claims that’s sacrilege, but what does he know?
Ingredients (With Some Slack)
- 3 large sweet potatoes (or yams, if that’s what the shop’s got—honestly, they’re both fine)
- 1/2 cup real butter (margarine will do, but you’ll notice the difference… or maybe that’s just me being picky)
- 3/4 cup brown sugar (light, dark, or whatever you’ve got crowding your sugar jar)
- 1/4 cup white sugar (sometimes I skip this if I’m feeling virtuous)
- 1/2 teaspoon cinnamon (My grandmother swore by McCormick, but I’ve used store brand and lived to tell)
- 1/2 teaspoon nutmeg – totally optional, but I always toss it in. Go easy though; seriously, it gets pushy fast
- 1 teaspoon good vanilla extract (imitation vanilla does the trick if cash is tight)
- Pinch of salt (or more, if you’re like me and never measure properly)
How To Make ‘Em—Just Like We Do
- Preheat your oven to 350°F (about 180°C). No need to be exact—my old oven runs hot, so I watch it close.
- Peel the sweet potatoes. Or don’t, if you like a bit of texture: they crisp up nicely actually. Chop ’em into chunky slices—about half an inch thick. Don’t get the ruler out.
- Toss those slices into a big baking dish. Something glass or ceramic, ideally. Metal pans work, but mine always seem to brown unevenly.
- Scatter the brown sugar and white sugar all over. Then sort of tuck the pats of butter here and there, like you’re hiding little treasure bits for future-you to find. Sprinkle over the cinnamon, nutmeg if using, vanilla, and a hefty pinch of salt.
- Now, using your hands (don’t be shy), toss and squeeze everything together until the potatoes are glossy. They’ll look sticky and weird. Totally normal.
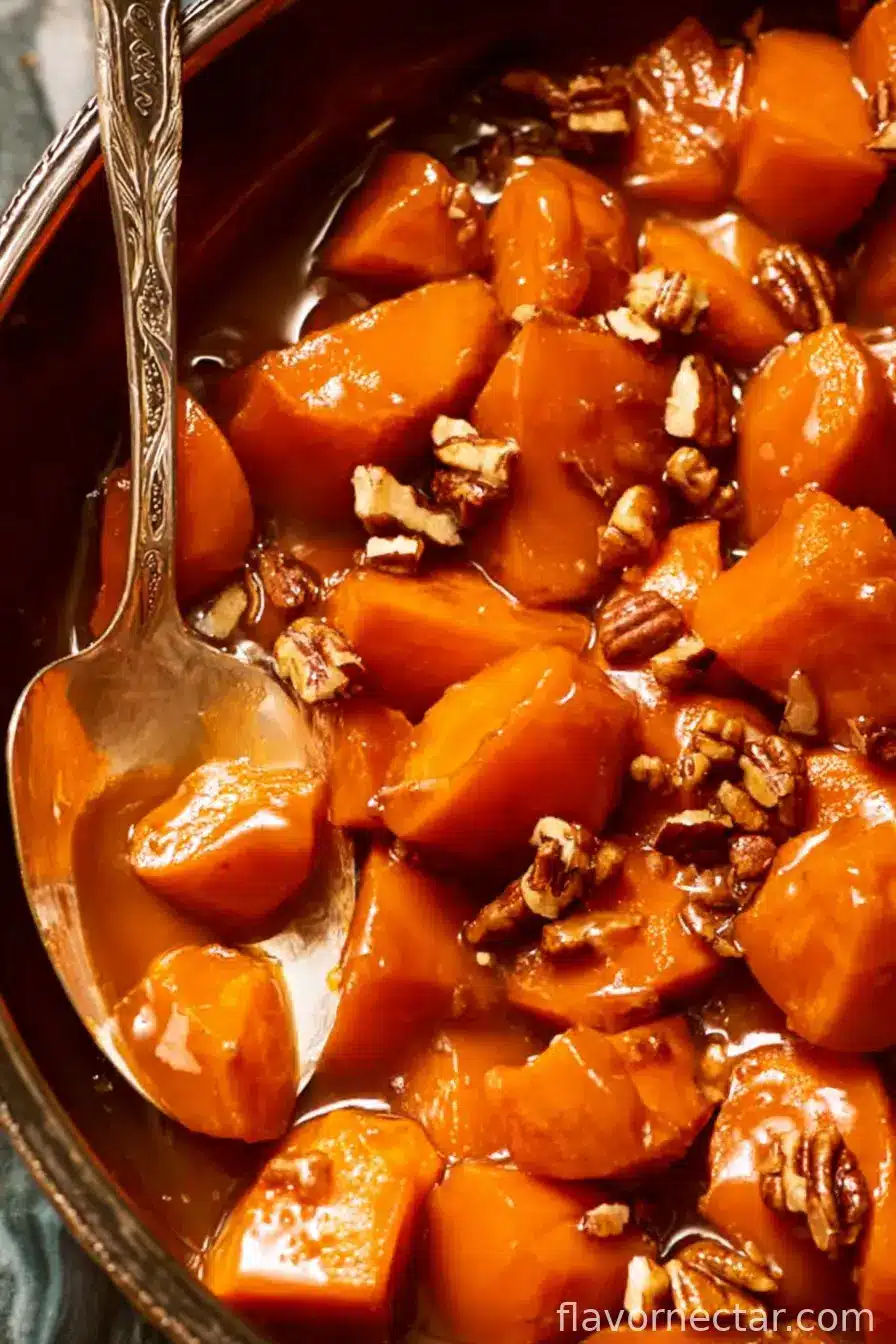
- Cover with foil and bake for 35 minutes. This is where I usually sneak a taste—watch your fingers though, it’s hot. Uncover, baste with those syrupy juices (I just use a big spoon), and bake uncovered for another 20-25 minutes until everything’s bubbling and borderline caramelized.
- Let ’em cool a bit before serving. They’re always lava hot. Ask me how I know.
Little Notes From The Trenches
- I used to boil the sweet potatoes first. Honestly, they get mushy. Roasting form raw is my go-to now.
- Resist the urge to reduce the sugar too much. Once I tried halving it and the result was just kind of “meh”.
- That sticky glaze will thicken more as it sits. Don’t panic when it first comes out runny!
Twists & Variations—And One Oops
I’ve subbed in maple syrup for half the sugar before, which is pretty lush—and kind of makes me feel like I’m up north in Vermont somewhere. Once, thinking I was clever, I tossed in a splash of bourbon… let’s just say my dad still won’t let me live it down. Oh, and mini marshmallows on top? Not traditional, I know, but my friend’s kids love it (I like to toast them like this method shows on Serious Eats sometimes!).
Equipment (Or Making Do)
You’ll want a big old casserole or baking dish. Don’t have one? Use a couple pie pans, or even a deep roasting tray. If you don’t have foil, a baking sheet on top works okay—it’s not rocket science. Potato peeler’s helpful, but a small knife does fine if your peeler’s at the bottom of the random drawer of doom (everyone’s got one, right?).
Storing (But Let’s Be Real)
If you actually have leftovers—rare at my place—just cover and keep them in the fridge for up to four days. They reheat best in the oven to re-crisp the edges, but microwave works in a pinch. Though, honestly, these are always gone by the next afternoon when school lunchboxes are being packed (ok, sometimes for breakfast; no judgement here).
How I Like To Serve It
Truth be told, I think these taste even better the next day with some crunchy bits on top (well, that’s if there are any left…). For holidays, I put ’em out next to the turkey or ham with a sprinkle of toasted pecans—fancy, but not fussy. And every now and then, my partner puts a scoop over vanilla ice cream, and I pretend I didn’t see him do it.
Pro Tips I Learned The Hard Way
- Don’t rush the bake—it really needs time for the syrup to thicken; trust me, I tried to cut corners once and it was a soupy disappointment.
- Stir half-way if you want even glaze—but don’t stress if you forget. It’ll still be great.
- If you go heavy on the nutmeg (I did this once, distracted by a phone call), you’ll taste nothing else. A gentle background note is all you want.
FAQ—Straight From My Inbox (and My Neighbors)
Can I make this ahead?
For sure. I usually bake it earlier in the day and just re-warm it, uncovered. Actually, in my book, the glaze gets even gooier after sitting.
What if I’ve only got canned yams?
No problem! Just rinse them, pat dry, and skip the first bake step—only go about 20 min in the oven, since they’re already cooked. No need to complicate things.
Is this gluten-free?
Yup, provided none of your additives have weird floury stuff (double-check if you’re playing it super safe, but I’ve never had a problem). There’s a good quick resource on ingredients on the Celiac Disease Foundation site, btw.
Can I freeze leftovers?
Technically yes, but the syrup can get a bit grainy. I usually don’t bother. Eat ’em fresh if you can!
Anyway, that’s my take on candied sweet potatoes: a bit old-school, a bit scrappy, and definitely sticky. Drop me a note if you’ve got a family twist—I’m always collecting ideas (and cautionary tales).
Ingredients
- 3 pounds sweet potatoes, peeled and sliced into 1/2 inch rounds
- 1/2 cup unsalted butter
- 1 cup light brown sugar, packed
- 1/4 cup water
- 1/4 cup maple syrup
- 1 teaspoon ground cinnamon
- 1/4 teaspoon ground nutmeg
- 1/4 teaspoon salt
- 1 teaspoon vanilla extract
Instructions
-
1Preheat oven to 350°F (175°C). Lightly grease a 9×13-inch baking dish.
-
2Arrange the sweet potato slices evenly in the prepared baking dish.
-
3In a saucepan over medium heat, melt the butter. Stir in brown sugar, water, maple syrup, cinnamon, nutmeg, salt, and vanilla extract. Cook, stirring, until the sugar dissolves and syrup thickens slightly, about 3-4 minutes.
-
4Pour the syrup evenly over the sweet potatoes. Toss gently to coat all slices.
-
5Cover the dish with aluminum foil and bake for 30 minutes. Uncover, baste the potatoes with syrup from the dish, and continue baking uncovered for 20-25 minutes until the potatoes are tender and caramelized.
-
6Let cool for 10 minutes before serving. Spoon syrup over potatoes before serving.
CLICK FOR NUTRITION INFO
↑
Approximate Information for One Serving
Serving Size:
1 serving
Calories:
310 caloriescal
Protein:
2 gg
Fat:
9 gg
Saturated Fat:
0g
Trans Fat:
0g
Cholesterol:
0mg
Sodium:
0mg
Potassium:
0mg
Total Carbs:
56 gg
Fiber:
0g
Sugar:
0g
Net Carbs:
0g
Vitamin A:
0
Vitamin C:
0mg
Calcium:
0mg
Iron:
0mg
Nutrition Disclaimers
Number of total servings shown is approximate. Actual number of servings will depend on your preferred portion sizes.
Nutritional values shown are general guidelines and reflect information for 1 serving using the ingredients listed, not including any optional ingredients. Actual macros may vary slightly depending on specific brands and types of ingredients used.
To determine the weight of one serving, prepare the recipe as instructed. Weigh the finished recipe, then divide the weight of the finished recipe (not including the weight of the container the food is in) by the desired number of servings. Result will be the weight of one serving.
Did you make this recipe?
Please consider Pinning it!!