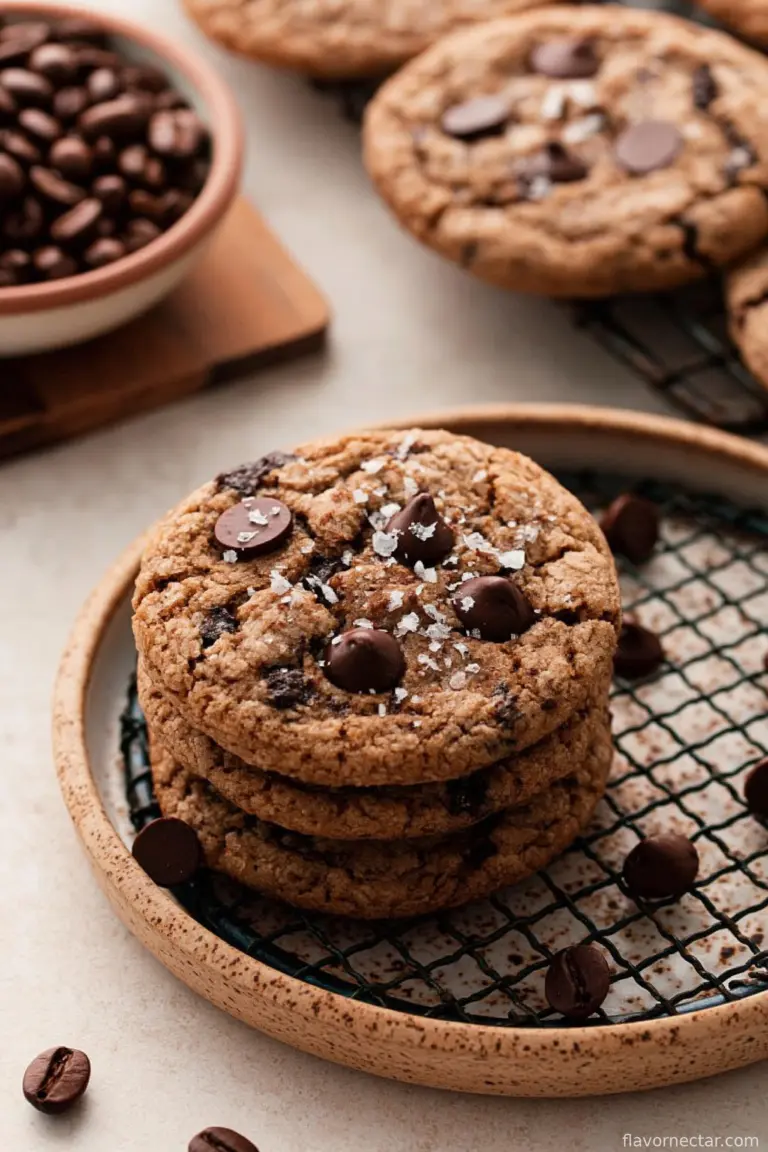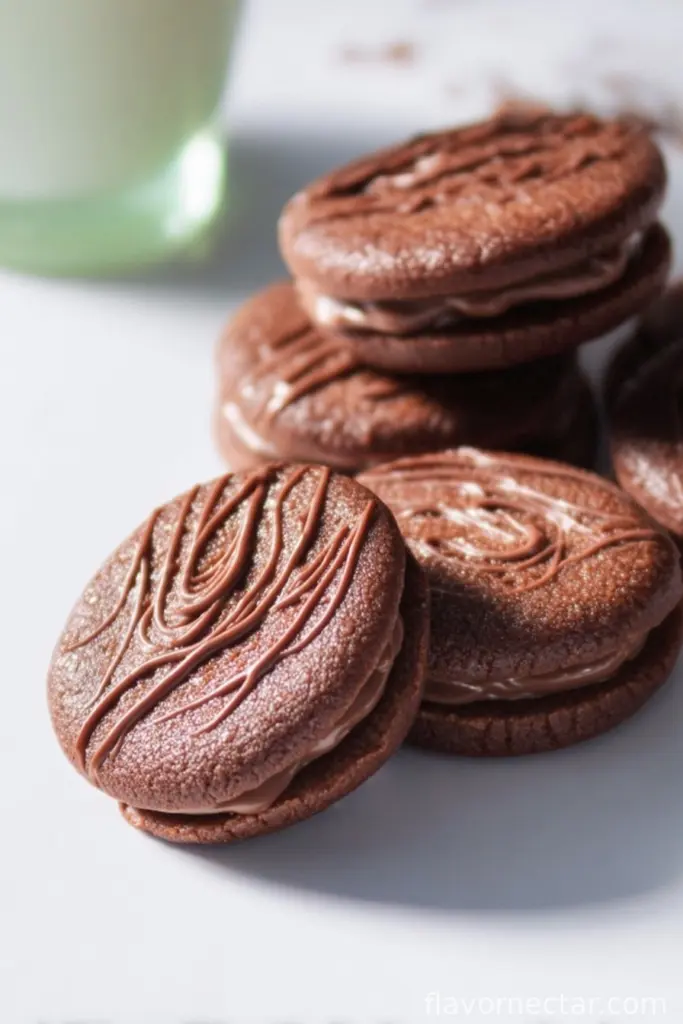
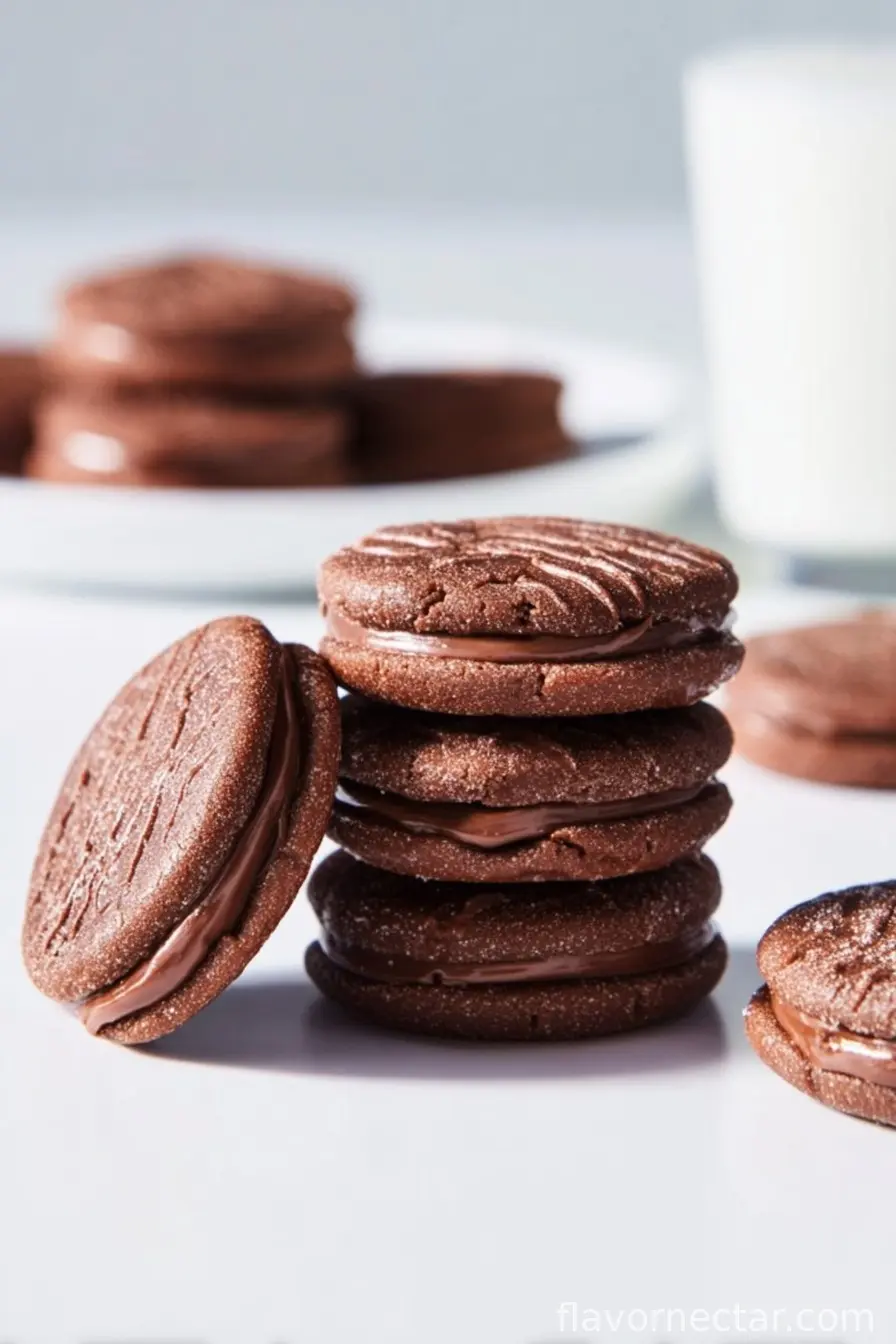
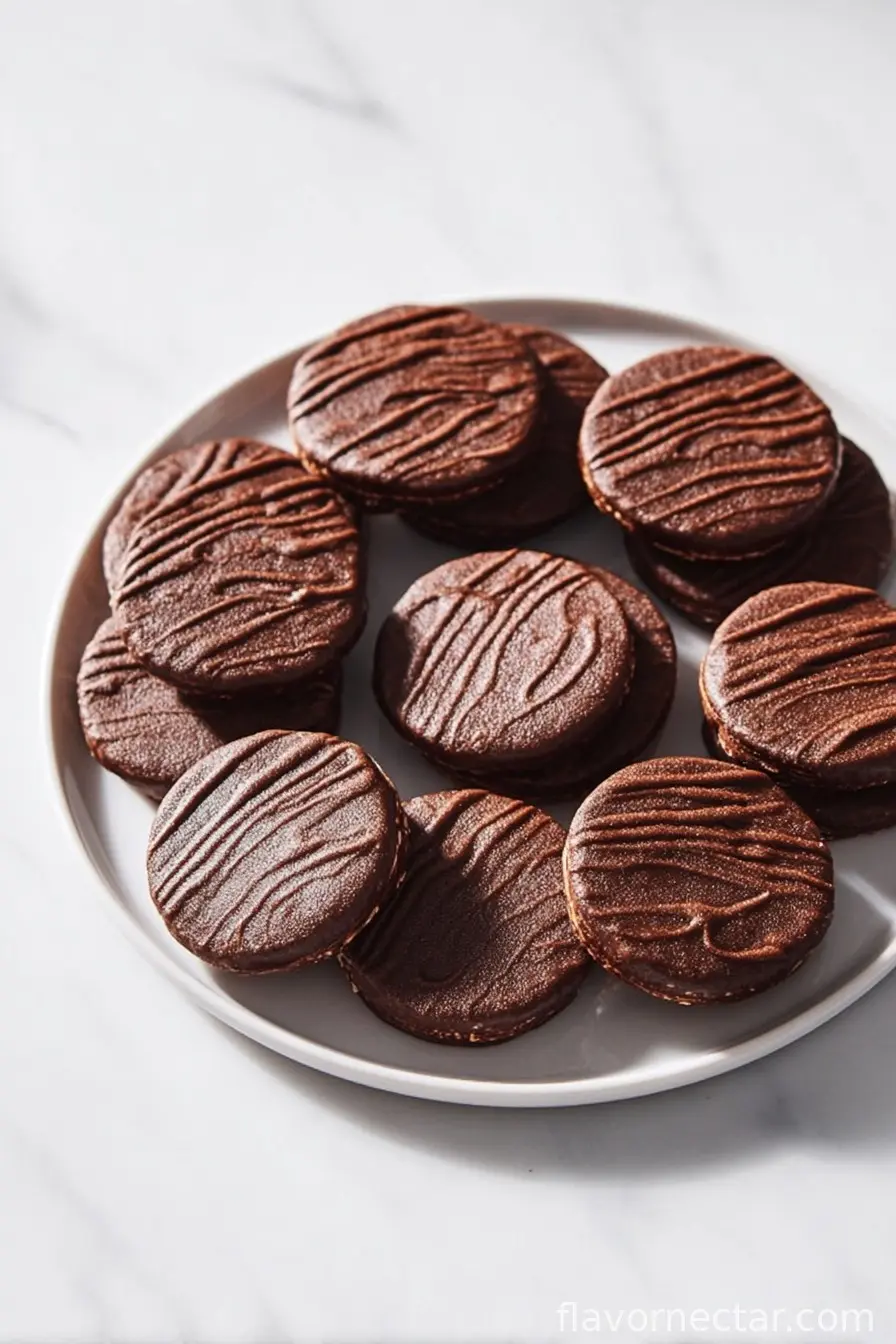
Let’s Make Homemade Fudge Rounds! (It’s Easier Than You Think)
Oh boy, fudge rounds. Every time I make these, it takes me right back to the days when I’d beg my mom for those snack cakes at the grocery store checkout aisle. Spoiler: she rarely caved, so now—I just bake my own. To be honest, my first attempt was way messier than the store-bought ones, but nobody complained about the extra chocolate smeared everywhere. I figure it’s a bonus.

You know that feeling when the house smells like chocolate and you have to swat eager hands away from the cooling rack? Yup. That’s my Saturdays now. Funny side story: my dog tried to run off with one, but we both learned a lesson about speed (and chocolate safety for pups) that day!
Why You’ll Love This Recipe (Or… Why I Keep Making It)
I whip these up when I want to impress my kids, but I also secretly munch on them with my coffee when no one’s looking. My family goes wild when they spot these on the counter—though if I don’t hide a few, there’s nothing left by nightfall. (And while piping chocolate drizzle is technically optional, it’s the fun messy kind of project I bribe the kids to help with when they’re bored.)
I struggled for a while to get that perfect soft, chewy texture, but honestly, with this version, I’ve finally stopped fiddling. The accidental fudge-smudged apron? Worth it.
The Ingredients (With a Few Real-Life Notes)
- For the cookies:
- 10 tablespoons (142 grams) unsalted butter, at cool room temperature (I’ve used salted butter before, just skip the added salt if you do. Both work.)
- 3/4 cup (150 grams) granulated sugar
- 1 large egg, at cool room temperature
- 1 tablespoon light corn syrup* (sometimes I swap in honey when I’m out of corn syrup. It’s a little different, but still tasty.)
- 1 teaspoon vanilla extract (Imitation vanilla will do in a pinch. My grandmother always insisted on the real deal, but… well, sometimes you gotta go with what you’ve got.)
- 1 1/4 cups (159 grams) all-purpose flour
- 6 tablespoons (32 grams) unsweetened natural cocoa powder (Dutch process is a bit smoother, but honestly, any unsweetened cocoa works well here.)
- 1 teaspoon cornstarch (It’s not mandatory, but helps the cookies stay chewy.)
- 1/2 teaspoon baking soda
- 1/4 teaspoon fine sea salt
- For the chocolate drizzle:
- 1/2 cup (85 grams) milk chocolate chips (I’ve thrown in dark chocolate chips before for a richer flavor. No one’s complained yet.)
- 1 teaspoon vegetable oil (Canola, honestly, is what I usually grab.)
- For the filling:
- 1 stick (113 grams) unsalted butter, at cool room temperature
- 2 tablespoons (11 grams) unsweetened natural cocoa powder, sifted (I’ve accidentally skipped sifting—lumpy but still edible!)
- 1 1/2 cups (188 grams) powdered sugar, sifted
- 2 tablespoons warm water (about 100°F)
- 1/2 teaspoon vanilla
How To Make Fudge Rounds (Just Hang In There, It Gets Fun)
- Preheat and Prep: Crank your oven up to 350°F. Grab two baking sheets and line ’em with parchment paper—you really don’t want these sticking! (I’ve forgotten once, peeled cookies off with a spatula, and cussed under my breath. Parchment is key.)
- Mix the Cookie Dough: Pop your butter and sugar into the bowl of a stand mixer fitted with the paddle attachment, and beat away on medium-high. I stop once or twice to scrape down the sides, otherwise, you get a sugar-butter sculpture in the corner. Aim for light and fluffy—takes about 2 to 3 minutes. Then add your egg, corn syrup, and vanilla. Beat it all in, and don’t forget to scrape after.
- Combine Dry Ingredients: In a separate, smaller bowl, whisk together your flour, cocoa, cornstarch, baking soda, and salt. Then, with your mixer on low, slowly tip those dry ingredients into the wet. Don’t rush this part—it’ll look a bit thick and sticky, but that’s just right. (This is the bit where I usually sneak a little taste. No shame.)
- Shape and Bake: Using a 1½-tablespoon spring-loaded scoop (or your hands if you’re like me and it’s stuck somewhere), portion out balls of dough onto your lined sheets. Pop in the oven and bake for 8 to 9 minutes. They’re ready when the tops are a bit puffy and the edges look set—though they’ll collapse and flatten as they cool, which is totally normal and kind of satisfying to watch.
- Cool Down: Take the baking sheets out and let everything hang out for a few minutes (those pans are hot, mate). When the cookies have firmed up a bit, move them over to a wire rack so they don’t get soggy bottoms. This is where family members start hovering, pretending to “just check” on you.
- Chocolate Drizzle Time: In a microwave-safe bowl, melt the milk chocolate chips with the vegetable oil. Zap for 15 seconds at a time, stirring after each burst (uneven melting is a real thing). Once it’s smooth, drizzle over cooled cookies. Or get fancy—use a piping bag, a fork, or even a zip-top bag you’ve snipped the corner off. Chill the cookies in the fridge for at least half an hour so the chocolate sets up firm; longer is even better.
- Make That Fudgy Filling: While cookies and chocolate are chilling, get the stand mixer back out. Beat the butter on its own on medium until it’s creamy—takes a minute. Then dump in the sifted cocoa and powdered sugar. Beat for about 3 minutes, scraping the sides so you don’t get sugar avalanches. Add warm water and vanilla, and crank up the speed to medium-high for another 2 minutes or so, until it’s looking airy and fluffy like chocolate mousse (try not to eat it all at this point, seriously).
- Assemble the Sandwiches: Spread (or pipe, if you want to be proper) the filling on the flat side of half your cookies. Top each with a second cookie, giving it a light, gentle squish. You now have a stack of world-class fudge rounds. Try not to eat them all before you’ve finished assembling—though I never do.
- Stash and Serve: You can pile your fudge rounds into an airtight container. They’re fine at room temp for a day, but will last about five days in the fridge (or freeze for a month if you’re very, very disciplined). Worth knowing: the colder these are, the fudgier they get. My family prefers ’em straight from the fridge, but you do you!
Notes & Discoveries (The Joys and Oopses)
- I overbaked the cookies once—didn’t read the timer—and they turned out more like crunchy chocolate pucks. So watch those last couple minutes!
- Baking on a really hot day? I’ve found chilling the dough for ten minutes first keeps them from flattening too quickly, though it’s honestly optional unless your kitchen is toasty.
- I sometimes sprinkle a little sea salt on top for that salty-sweet magic (my neighbor says it’s “next level” but, taste is subjective, right?)
Fun Variations (And The Ones That Got Away)
- Swap in a few dark chocolate chips for an extra chocolatey punch (but my kids notice and sometimes mutiny).
- Use marshmallow fluff instead of chocolate filling for a s’moresy feel. Fun, but it makes the rounds a bit of a mess to store.
- I once tried stuffing peanut butter in with the filling. It sounded better than it tasted—at least, according to my crew.
What If I Don’t Have a Stand Mixer?
No worries. I’ve whipped everything up with a trusty wooden spoon and some elbow grease. If you skip the fancy gear, it’s a bit of a workout, but hey—consider it your pre-dessert exercise.
Keeping & Storing (Though Good Luck Making Them Last)
If you somehow have leftovers, these keep best in a container with a tight-fitting lid. Room temp for a day, fridge for five, freezer up to a month. To be honest, they’ve only made it past breakfast once in my house.
Serving It Up – My Traditions
I like to serve fudge rounds straight from the fridge, with a big glass of cold milk. Once, though, we sandwiched ice cream in there instead of filling… and it was glorious, even if it melted everywhere. Saturday breakfast of champions? Maybe not, but I won’t tell if you don’t.
The “Don’t Skip This!” Trick
One year I tried to rush the chocolate drizzle and didn’t let it firm up in the fridge—big mistake. Ended up with smeary hands, sticky cookies, and lots of complaints. Actually, giving them that chill makes a real difference.
FAQs – Real Questions From Real (and Imaginary) Folks
- Can I make these ahead of time? Sure thing! They actually get a bit more fudgy if left overnight. Just keep cold if your place is warm.
- Do I have to use corn syrup? Nope, honey works in a pinch, but the texture isn’t quite as “factory-finish”—still yummy though.
- What’s the best way to get that signature zigzag drizzle? I’ve had luck with a piping bag, and sometimes just use a fork and fling—just cover the counter first!
- Can I double the recipe? Yes, but remember the dough gets firmer as it sits, so you might need to let it rest a couple minutes if scooping gets tough.
- Why are my cookies so flat? Over-soft butter or a super warm kitchen can do that—next time, try chilling the dough a few minutes. Or just call them “crispy rounds” and serve anyway; they’ll still get eaten!
If you’re ever on the fence about making these fudge rounds, let me just say: they’re comfort food at its finest, messy aprons and chocolate fingerprints included.
Ingredients
- 10 tablespoons (142 grams) unsalted butter, at cool room temperature
- 3/4 cup (150 grams) granulated sugar
- 1 large egg, at cool room temperature
- 1 tablespoon light corn syrup*
- 1 teaspoon vanilla extract
- 1 1/4 cups (159 grams) all-purpose flour
- 6 tablespoons (32 grams) unsweetened natural cocoa powder
- 1 teaspoon cornstarch
- 1/2 teaspoon baking soda
- 1/4 teaspoon fine sea salt
- 1/2 cup (85 grams) milk chocolate chips
- 1 teaspoon vegetable oil
- 1 stick (113 grams) unsalted butter, at cool room temperature
- 2 tablespoons (11 grams) unsweetened natural cocoa powder, sifted
- 1 1/2 cups (188 grams) powdered sugar, sifted
- 2 tablespoons warm water (about 100°F)
- 1/2 teaspoon vanilla
Instructions
-
1Preheat your oven to 350°F. Line two baking sheets with parchment paper to avoid sticking (seriously, don’t skip this step).
-
2Add butter and sugar to your stand mixer fitted with the paddle, and beat them on medium-high until the mix is light and fluffy. This usually takes about 2-3 minutes, but give the sides a scrape a couple times so everything gets evenly mixed. Then, toss in the egg, corn syrup, and vanilla, and beat again. Remember to scrape those sides!
-
3In a separate bowl, whisk together the flour, cocoa, cornstarch, baking soda, and salt. Now, with your mixer on low speed, pour in those dry ingredients little by little. You’ll end up with a soft, slightly sticky dough. Don’t stress if it sticks to the paddle; that’s perfect.
-
4Using a 1½-tablespoon scoop (or your hands if you don’t have one), make dough balls and space them out on your prepared sheets. Bake for 8-9 minutes, just until they puff up a bit and have set edges. Pull the sheets out and let the cookies cool for a few minutes before moving them to a rack. They’ll flatten as they cool—totally normal.
-
5For the chocolate drizzle, melt the milk chocolate chips with vegetable oil in a microwave-safe bowl. Do 15-second bursts in the microwave, stirring each time until you get a smooth mix. Drizzle or pipe this on top of your (fully cooled!) cookies. Pop them in the fridge for at least 30 minutes to set.
-
6Now for the filling! In your mixer, beat the butter until creamy. Add the sifted cocoa powder and powdered sugar, and beat for around 3 minutes until super light and airy, scraping the bowl as needed. Pour in the warm water and vanilla and keep beating for another 2 minutes or so, until you’ve got a fluffy, spreadable filling.
-
7Either pipe or spread a good spoonful of filling onto the flat side of half your cookies. Place another cookie on top, gently pressing to create a sandwich.
-
8Store your finished fudge rounds in an airtight container—room temp for a day, fridge for up to 5 days, or freezer for up to a month. The colder they are, the more fudgy they get! (Though, honestly, they barely last 24 hours at my place.)
CLICK FOR NUTRITION INFO
↑
Approximate Information for One Serving
Serving Size:
1 serving
Calories:
370cal
Protein:
3 gg
Fat:
20 gg
Saturated Fat:
0g
Trans Fat:
0g
Cholesterol:
0mg
Sodium:
0mg
Potassium:
0mg
Total Carbs:
47 gg
Fiber:
0g
Sugar:
0g
Net Carbs:
0g
Vitamin A:
0
Vitamin C:
0mg
Calcium:
0mg
Iron:
0mg
Nutrition Disclaimers
Number of total servings shown is approximate. Actual number of servings will depend on your preferred portion sizes.
Nutritional values shown are general guidelines and reflect information for 1 serving using the ingredients listed, not including any optional ingredients. Actual macros may vary slightly depending on specific brands and types of ingredients used.
To determine the weight of one serving, prepare the recipe as instructed. Weigh the finished recipe, then divide the weight of the finished recipe (not including the weight of the container the food is in) by the desired number of servings. Result will be the weight of one serving.
Did you make this recipe?
Please consider Pinning it!