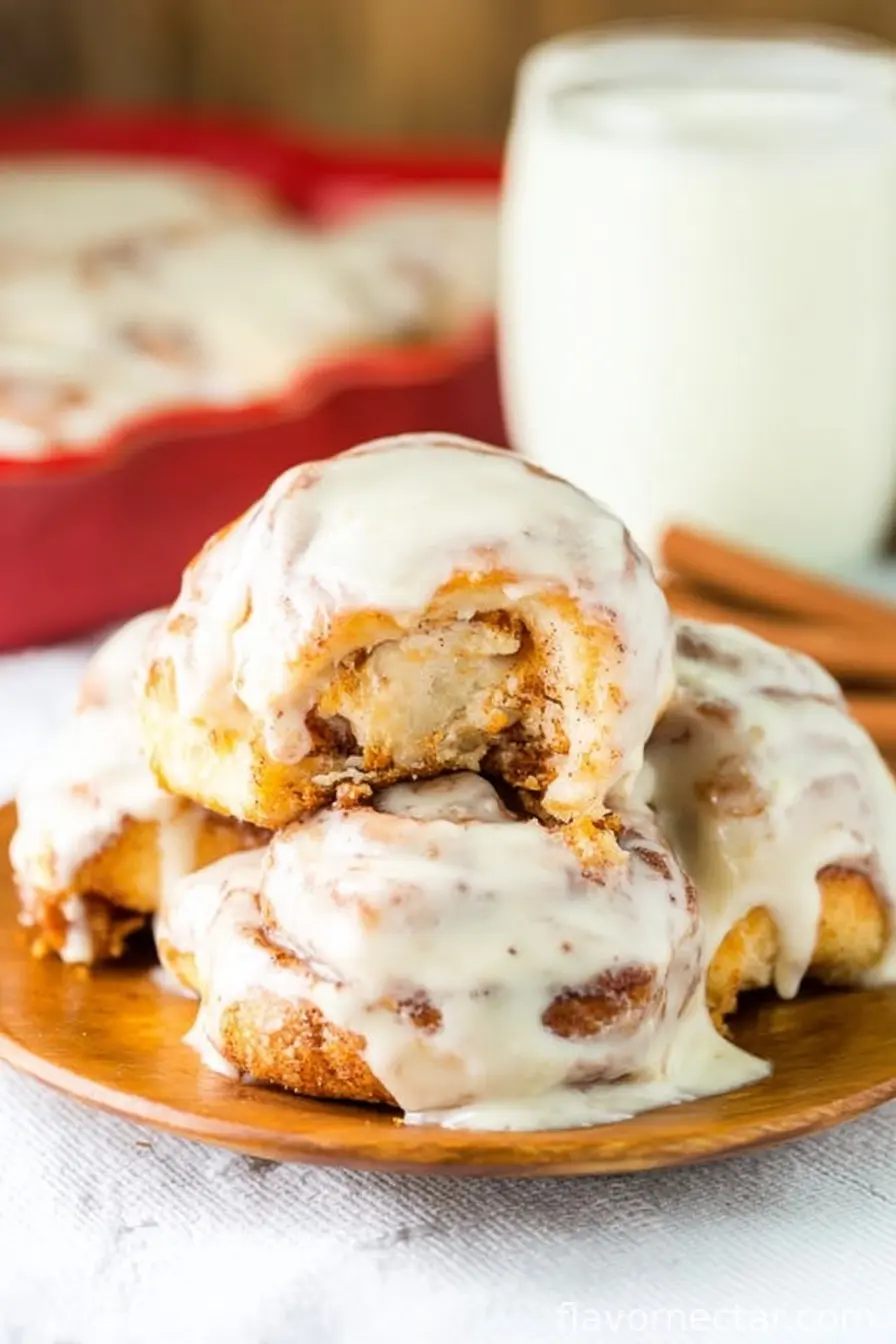
The Rolls That Disappear the Fastest in My Kitchen
Oh man, let me tell you about these Hawaiian Cinnamon Rolls. I stumbled into making them one lazy Saturday, mostly because I bought a pack of Hawaiian rolls because they were on sale and, honestly, those sweet pillowy things call to me every time. I took one bite of this cinnamon-laced, buttery number and immediately regretted not doubling the batch. Now, whenever my kids smell these baking, it’s like a starter’s pistol has gone off—I basically have to elbow my way to the pan.
Also, side note: don’t be fooled. These look fancy, but they’re deceptively easy. Weirdly enough, the hardest part for me is keeping my husband from eating half the rolls before I’ve even added the frosting (he says they’re best warm without—I say he’s missing out). So, don’t worry if you don’t get everything perfect. I’ve never managed it and somehow they still vanish faster than free donuts at an office party.
Why I Always Come Back to This Recipe
- I make these when company’s coming in ten minutes (yes, it’s possible; no, I don’t always tell anyone how simple it actually is).
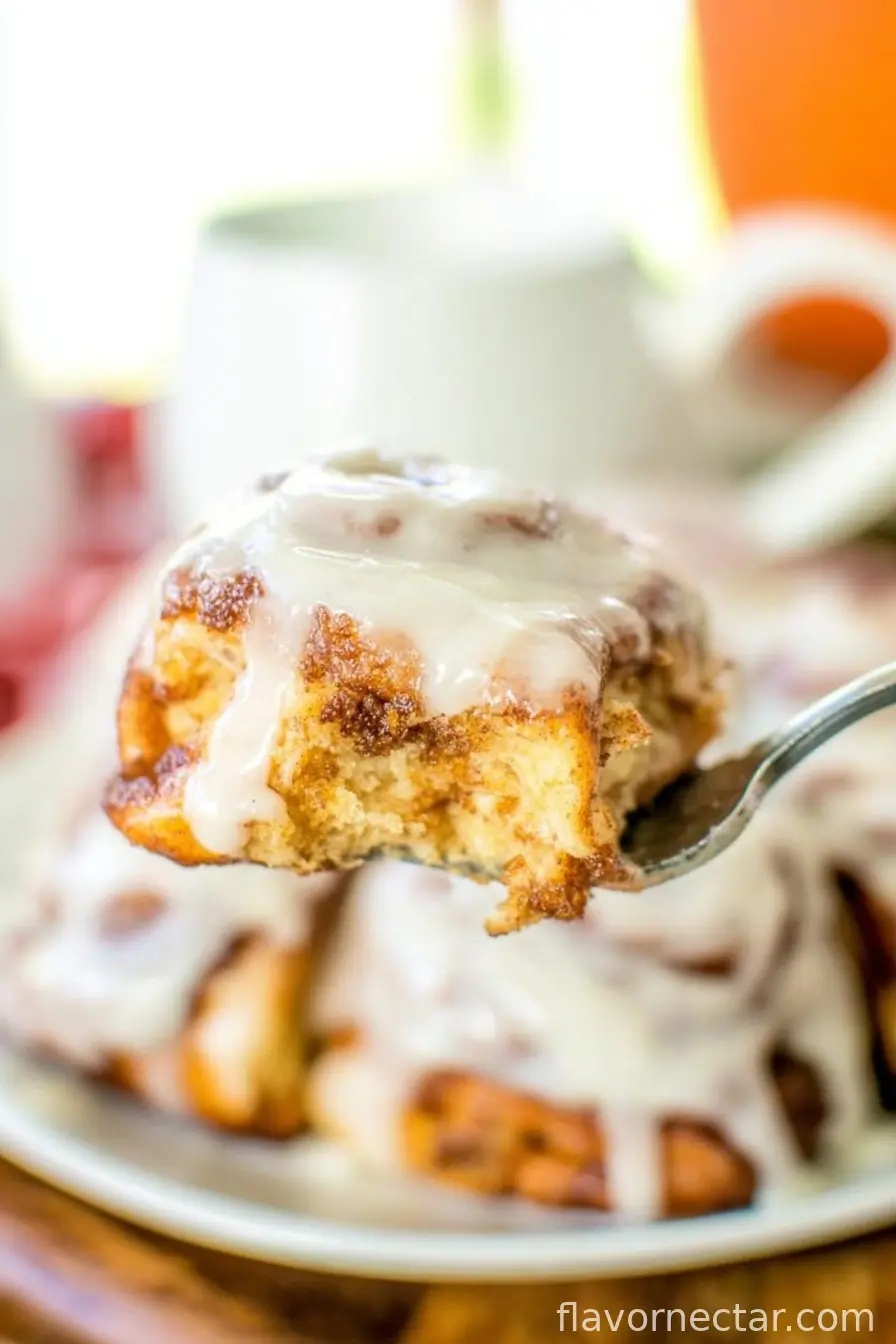
- My family goes wild for the gooey middles and extra slathering of frosting—honestly, the smell alone gets people poking their noses in the oven.
- Once, I forgot to preheat the oven, and it still turned out—sort of, haha. I do recommend remembering, but it’s not the end of the world if you don’t.
- Minimal mess. Just one pan and a bowl, and if you line your pan with parchment, boom, you barely have to clean anything!
What You’ll Need From the Cupboard
- 12 Hawaiian Rolls – I usually just grab the little orange bag (King’s, if you’re fancy), but honestly, any sweet dinner roll works. I’ve even made it with plain white rolls when that’s all I’ve got (just add a tiny bit more sugar to the filling).
- 12 tablespoons butter, divided (yes, it’s a lot… and yes, your heart will forgive you for this because your taste buds will celebrate)
- 2/3 cup brown sugar – dark or light, take your pick; I use whatever’s closest at hand.
- 2 teaspoons cinnamon – I will admit to sometimes giving a generous three shakes because why not.
- 4 ounces cream cheese, softened (the brick kind or the tub; both work in a pinch. Once I accidentally left it out overnight; no harm done, still delicious.)
- 2 cups powdered sugar – give or take, I usually start with about one and a half and add more if the frosting is too thin (or if I have a sweet tooth battle going on).
- 1/4 cup milk – 2%, whole, almond; in a pinch, I’ve used cream and it was lush.
Optional: splash of vanilla in the frosting, though my grandma always said a little extra butter is better than any extract. Up to you.
Let’s Make Hawaiian Cinnamon Rolls – My Way
- Get your oven going at 350°F (that’s 180°C for my international buddies). Don’t be like me and forget—these babies need to be piping hot to get gooey!
- With a big-ish bread knife, carefully slice the Hawaiian rolls horizontally so you get a top half and a bottom half. Don’t worry if it’s a little wonky. I’ve had entire rolls escape and roll off the counter, it still works. Set the tops aside for now.
- Take 2 tablespoons of your butter and melt them—just chuck it in the microwave for 30 seconds. Pour this golden goodness into the bottom of a 9×13 inch baking dish (if you only have a smaller dish, just squeeze things in—it’ll work).
- Place the bottom halves of your rolls, cut side up, into the pan. No need to be perfect here; mine never fit perfectly, but somehow by baking time, they fuse together anyway.
- In a small bowl, melt 8 tablespoons (that’s a whole stick!) of butter. Again, I just nuke it for about a minute. If you forget and let it bubble over, a quick wipe and you’re fine (and your kitchen will smell like brown butter, which isn’t exactly a crime).
- Add your brown sugar and cinnamon straight into the melted butter. Mix it all up until it’s a crumbly, sugary, almost-paste—not pretty, but this is where the magic starts. I usually give it a quick taste because, why not?
- Scoop out half of this cinnamon-sugar-butter mix and spread it over the bottoms of your rolls in the baking dish. Use a spatula, or your fingers if nobody’s looking.
- Now pop the tops of the rolls back on, gently nestling them down so everything’s cozy. At this point I’m always tempted just to eat one with my fingers, but you must wait…
- Pour the rest of the cinnamon-butter mixture over the tops of the rolls, trying to coat as evenly as you can. If it spills down the sides, all the better for those crispy caramelized pan edges.
- Slide the whole dish into your preheated oven and bake for about 15 minutes. The smell should start calling people to the kitchen at the ten-minute mark. Don’t panic if the tops look a little too dark—that extra color means crunch.
- While those bake, let’s whip up the frosting (I use this time to sing loudly to the radio, but you do you).
- In a small bowl, melt your last 2 tablespoons of butter. You can do this in a matter of seconds in the microwave or on the stove, but don’t let it get too hot or your frosting will be runny (ask me how I know).
- Add in the softened cream cheese, powdered sugar, and milk. Whisk (or beat if you’ve got a hand mixer—and if not, muscle power!) until it’s glossy and smooth. I occasionally add a shake of vanilla or an extra tablespoon of powdered sugar if it looks thin.
- Once the rolls are out, hang tight for about 10 minutes. They need to cool a little, or your frosting will straight up melt right off. I’ve learned this the hard (sticky) way.
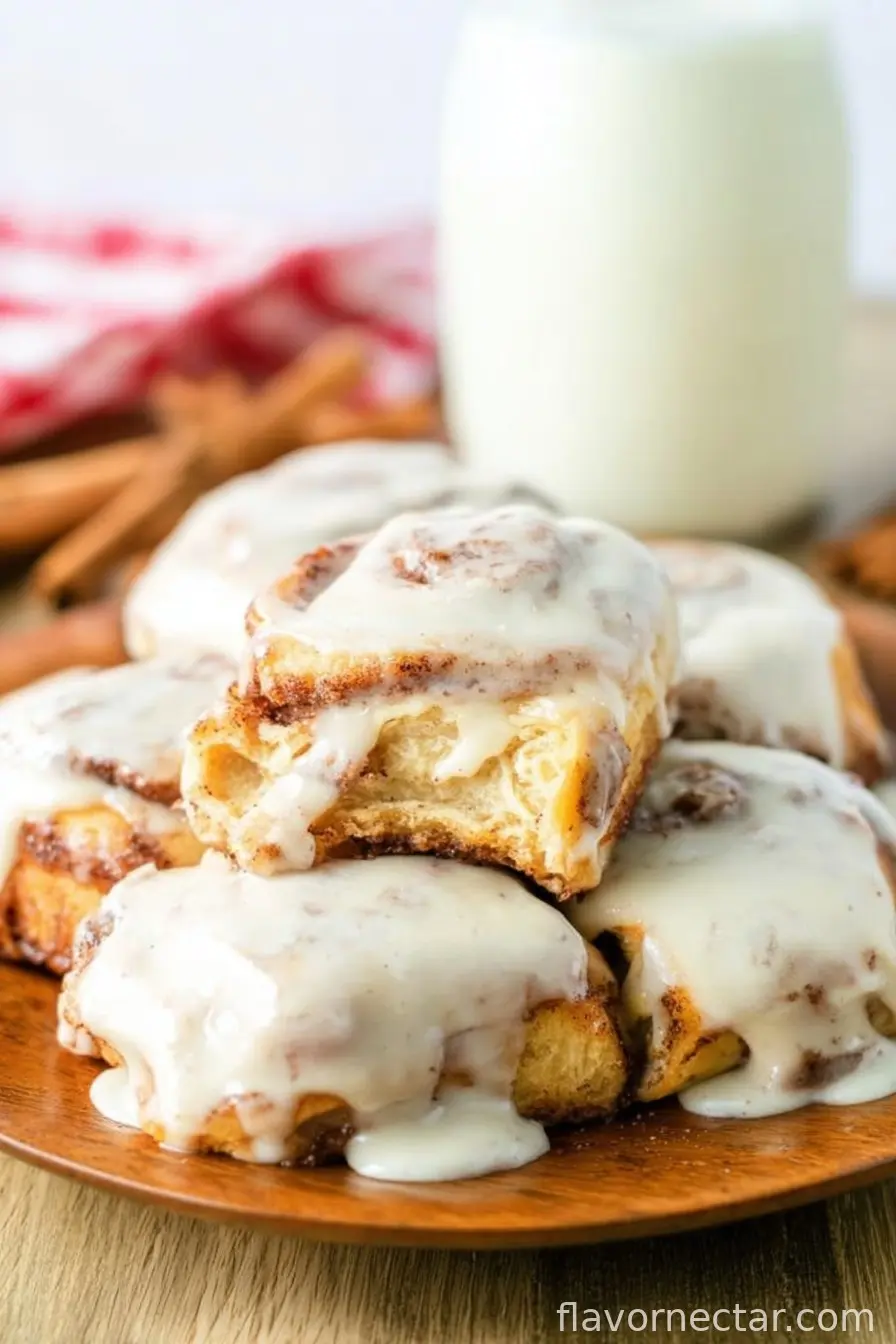
- Pour or spread the dreamy frosting all over the warm rolls, getting it into all the cracks and crevices. Use every drop—you owe it to yourself.
- Cut into squares, serve, and try (ha!) to get a photo before the pan is gone. Good luck.
What I’ve Learned (AKA: Notes That Could Save Your Sanity)
- If the rolls sit a bit before serving, the syrupy cinnamon goodness soaks right in—almost tastes better the next morning (if there’s any left, which in my house, hahaha—yeah, right).
- Forgot the cream cheese once? Just use extra butter and powdered sugar. You’ll miss the tang, though.
- I sometimes add just a pinch of salt to balance all the sweet, but honestly, not everyone notices.
- Clean-up is a breeze if you line your pan with parchment. I wish someone had told me this three pans ago.
Variations I’ve Tried (Some Were… Interesting)
- Once, I added chopped pecans to the middle layer—so good for crunch!
- Maple in the frosting instead of milk? Whoa. Just use a little.
- I tried to make a tropical version with pineapple bits. Not my finest hour—don’t recommend it. The rolls got soggy. Live and learn.
Do You Even Need Special Equipment?
I always use my trusty 9×13 pan—no need for anything fancy. One time I made this in a round cake tin; just had to stack them awkwardly, but they still baked up fine. No mixer? Just some solid elbow grease will do the trick for the frosting (though your arm might need a snack afterwards).
How To Store (Though They Never Last Around Here)
These rolls are happiest on the day you make them—trust me, they’ll disappear. If you do have leftovers, just wrap the pan tightly or toss into an airtight container. I stick leftovers in the fridge, and they’re great cold or warmed for like 15 seconds in the microwave. But, between you and me, I’d be shocked if you get to day two!
How I Like To Serve ‘Em
I’m all about slathering every roll with way too much frosting and then serving with hot coffee or just a big glass of milk. My kids insist on licking the spoon (I do, too). Sometimes, for brunch, I’ll throw sliced strawberries on the side—but that’s just to feel a little more virtuous.
Lessons Learned (So You Don’t Make My Mistakes)
- Patience! If you frost them straight out of the oven, you’ll have frosting soup. Wait that solid 10 minutes (I know, it feels like hours).
- Don’t skimp on the butter. I once tried it low-fat and, well, never again.
- Leaving the rolls uncovered overnight? They dry out quick — at least, that’s what my neighbor told me (we’ve never managed leftovers that long).
FAQs Nobody Asks (But Should)
- Can I make these ahead? Yeah, you can assemble ahead and bake the next morning. Actually, it’s even better—the rolls get soakier (that’s now a word, I guess?).
- Does it freeze? Eh, not really. The texture’s just off when thawed. Best fresh.
- Milk substitutes? Almond, oat, or even water will work in a pinch—the frosting might be runnier, so add sugar slowly.
- What do I do if I have extra frosting? Put it on toast. Or eat it by the spoonful. No judgment here.
- Why is my frosting lumpy? You might not have softened the cream cheese enough. Give it a good whisk (or walk away, come back, and try again).
And there you have it. If you try these, let me know how quickly they vanished—I’ve got a running theory they’re the closest thing to edible magic. Enjoy!
Ingredients
- 12 count Hawaiian Rolls
- 12 tablespoons butter, divided
- ⅔ cup brown sugar
- 2 teaspoons cinnamon
- 4 ounces cream cheese, softened
- 2 cups powdered sugar
- ¼ cup milk
Instructions
-
1Get your oven going at 350°F (that’s 180°C for my international buddies). Don’t be like me and forget—these babies need to be piping hot to get gooey!
-
2With a big-ish bread knife, carefully slice the Hawaiian rolls horizontally so you get a top half and a bottom half. Don’t worry if it’s a little wonky. I’ve had entire rolls escape and roll off the counter, it still works. Set the tops aside for now.
-
3Take 2 tablespoons of your butter and melt them—just chuck it in the microwave for 30 seconds. Pour this golden goodness into the bottom of a 9×13 inch baking dish (if you only have a smaller dish, just squeeze things in—it’ll work).
-
4Place the bottom halves of your rolls, cut side up, into the pan. No need to be perfect here; mine never fit perfectly, but somehow by baking time, they fuse together anyway.
-
5In a small bowl, melt 8 tablespoons (that’s a whole stick!) of butter. Again, I just nuke it for about a minute. If you forget and let it bubble over, a quick wipe and you’re fine (and your kitchen will smell like brown butter, which isn’t exactly a crime).
-
6Add your brown sugar and cinnamon straight into the melted butter. Mix it all up until it’s a crumbly, sugary, almost-paste—not pretty, but this is where the magic starts. I usually give it a quick taste because, why not?
-
7Scoop out half of this cinnamon-sugar-butter mix and spread it over the bottoms of your rolls in the baking dish. Use a spatula, or your fingers if nobody’s looking.
-
8Now pop the tops of the rolls back on, gently nestling them down so everything’s cozy. At this point I’m always tempted just to eat one with my fingers, but you must wait…
-
9Pour the rest of the cinnamon-butter mixture over the tops of the rolls, trying to coat as evenly as you can. If it spills down the sides, all the better for those crispy caramelized pan edges.
-
10Slide the whole dish into your preheated oven and bake for about 15 minutes. The smell should start calling people to the kitchen at the ten-minute mark. Don’t panic if the tops look a little too dark—that extra color means crunch.
-
11While those bake, let’s whip up the frosting (I use this time to sing loudly to the radio, but you do you).
-
12In a small bowl, melt your last 2 tablespoons of butter. You can do this in a matter of seconds in the microwave or on the stove, but don’t let it get too hot or your frosting will be runny (ask me how I know).
-
13Add in the softened cream cheese, powdered sugar, and milk. Whisk (or beat if you’ve got a hand mixer—and if not, muscle power!) until it’s glossy and smooth. I occasionally add a shake of vanilla or an extra tablespoon of powdered sugar if it looks thin.
-
14Once the rolls are out, hang tight for about 10 minutes. They need to cool a little, or your frosting will straight up melt right off. I’ve learned this the hard (sticky) way.
-
15Pour or spread the dreamy frosting all over the warm rolls, getting it into all the cracks and crevices. Use every drop—you owe it to yourself.
-
16Cut into squares, serve, and try (ha!) to get a photo before the pan is gone. Good luck.
CLICK FOR NUTRITION INFO
↑
Approximate Information for One Serving
Serving Size:
1 serving
Calories:
310 caloriescal
Protein:
4gg
Fat:
15gg
Saturated Fat:
0g
Trans Fat:
0g
Cholesterol:
0mg
Sodium:
0mg
Potassium:
0mg
Total Carbs:
42gg
Fiber:
0g
Sugar:
0g
Net Carbs:
0g
Vitamin A:
0
Vitamin C:
0mg
Calcium:
0mg
Iron:
0mg
Nutrition Disclaimers
Number of total servings shown is approximate. Actual number of servings will depend on your preferred portion sizes.
Nutritional values shown are general guidelines and reflect information for 1 serving using the ingredients listed, not including any optional ingredients. Actual macros may vary slightly depending on specific brands and types of ingredients used.
To determine the weight of one serving, prepare the recipe as instructed. Weigh the finished recipe, then divide the weight of the finished recipe (not including the weight of the container the food is in) by the desired number of servings. Result will be the weight of one serving.
Did you make this recipe?
Please consider Pinning it!