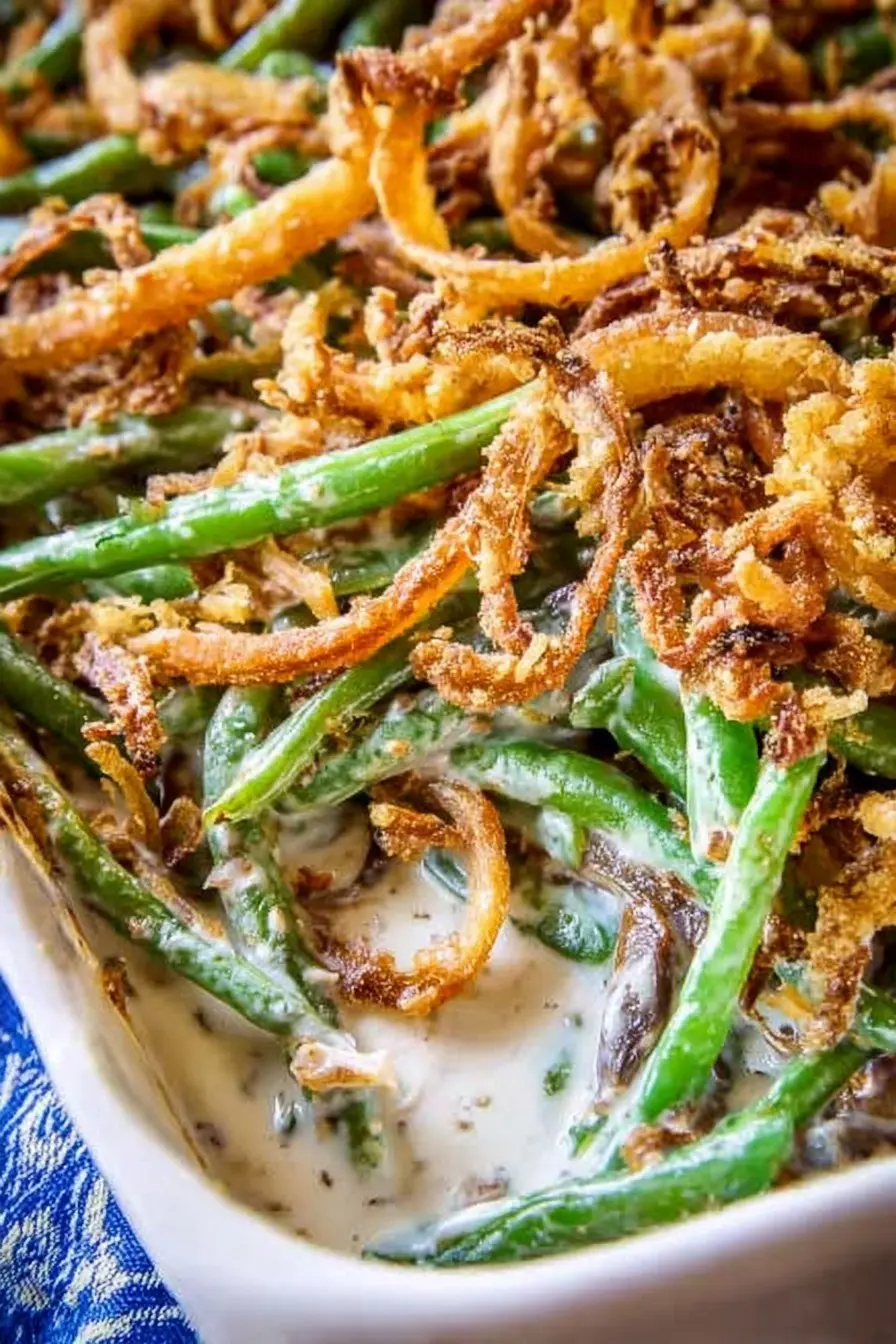
Let Me Tell You About My Green Bean Casserole Journey
Alright, pull up a chair—because I have some strong feelings (and, honestly, a long history) with green bean casserole. I grew up in a house where the only time anyone ate green beans was basically Thanksgiving, and even then, the dish came out of cans and got a mega blast of those little crunchy onions. I mean, no shade, but I always thought, Is it weird I actually like the beans the most? Fast-forward to my twenties, and I decided I wanted actual fresh green beans in my life—floppy beans just weren’t cutting it. My first attempt at making this from scratch was, well, kind of a mess—the sauce was too thick and I almost set off the smoke alarm because I got distracted by a text from my friend Sam (typical me). But when I finally nailed it, it became my go-to side dish for every big family meal. Full disclosure: I still buy those crunchy onions sometimes, just in case I need backup.
Why You’ll Love Making This Version
I usually pull out this recipe when, honestly, I want to impress people a little—like, Look, I can cook something that didn’t come out of a box! My family goes absolutely wild for it (my brother actually requested it for his birthday dinner and he never eats vegetables unless they’re buried under cheese). So, if you want a dish that feels kinda fancy but not fussy—and doesn’t rely on mystery ingredients—this is the one. Plus, you get to sneak a few tastes along the way—no judgment, happens every time. And, if you ever cursed at lumpy canned soup ruining your vibe, trust me, homemade sauce is way better (even if it dirties more pans).
What You’ll Need (Ingredients… plus my little swaps)
- 1 pound fresh green beans, ends trimmed (Look, if you’re having one of those weeks—frozen is fine. I won’t tell anyone. You can even use haricots verts if you’re feeling schmancy.)
- 3 tablespoons butter (Grandma swore by Land O’Lakes, but I just use what’s on sale. Margarine in a pinch? Sure, it’ll work, but it’s not quite as rich.)
- 8 ounces mushrooms, chopped (White button or cremini, honestly I grab whatever looks decent at the shop. Sometimes I go half and half if I’m feeling wild.)
- 1 medium yellow onion, diced (Red onion works too—once I used shallots because it’s all I had. It was fancy but a tad sweet.)
- 2 garlic cloves, minced (Garlic powder if you must, but double-check the date on the jar. Found out the hard way…)
- 3 tablespoons all-purpose flour (I once used whole wheat flour… let’s just say, don’t.)
- 1 cup milk (Whole milk is lush, but I sometimes use 2%. Tried oat milk once, it was “interesting.”)
- 1/2 cup chicken or veggie broth (Use veggie for full-on vegetarian. I like low-sodium, that way I don’t oversalt by accident.)
- 1/2 cup shredded sharp cheddar (This isn’t canon, but I love the tang. Leave it out if you’re a purist or want it more classic.)
- Salt and pepper to taste
- 1 cup crispy fried onions (The classic ones in the can. Sometimes I get wild and make my own, except when I can’t be bothered.)
How I Actually Make It (Directions—More or Less)
- Preheat your oven to 375°F (that’s about 190°C if you’re more cosmopolitan than me). Butter or spray a casserole dish (about 9×13, but honestly, whatever fits on your shelf).
- Blanch those beans. Bring a big pot of salted water to a boil, toss in your green beans. Cook 4-5 minutes, until they’re green and just on the tender side of crunchy. Drain and slap them in some ice water. Or, use your sink with cold tap water like me when I forget the ice. Drain again—spread ’em out in the baking dish.
- In a skillet over medium heat, melt butter. Add onions and a little pinch of salt. Stir for 2-3 minutes till the onions get softish, then toss in mushrooms. Cook until mushrooms lose that raw look and shrink down (maybe seven minutes? Be patient—this is where I usually sneak a little taste).
- Garlic goes in next, cook for about 60 seconds. Then, sprinkle in flour—not all in one spot—stir it up and cook about 2 mins. It’ll get thickish and look, um, kinda questionable. That’s normal.
- Pour in milk and broth slowly, whisking like a person trying to impress their chef neighbor. Keep stirring until it’s smooth. Simmer on low for 3-5 minutes—it should look like a sauce but a little thinner than gravy. (If it’s too thick, add a slosh more milk. If too runny, crank the heat.)
- Stir in your cheese, if using, and let it get nice and melty. Taste and add salt and pepper as you like—sometimes I toss in a pinch of nutmeg for depth. Pour the mushroom sauce over the beans. Gently stir to coat unless you’re like my aunt and love things layered.
- Bake uncovered about 20-25 mins. It should bubble around the edges. Top with crispy fried onions (and maybe a little more cheese if you’re in the mood) and then bake another 8-10 mins till golden and irresistible.
- Let it cool for, I dunno, at least 5 minutes so you don’t burn your tongue off—I speak from (painful) experience. Then dig in.
Stuff I Wish I Knew Sooner (Notes)
- If your beans come out a bit squeaky, you probably undercooked ’em when blanching. Actually, I find it works better if you let them go just an extra minute.
- Forgotten to pat the beans dry before saucing? It’ll be a bit runnier, but just call it French style.
- Tried skipping the cheese? Still good, just different. My cousin swore he tasted “magic” the first time I used extra-sharp cheddar though.
- Once I skipped the onion step and tried those pre-chopped ones—honestly, not as fragrant but fine in a real pinch.
Variations I’ve Messed With
- Added crumbled bacon one year. So good, but that’s probably obvious.
- Tried gluten-free flour to help my friend out—it worked, but texture was a bit odd. She was happy, so hey.
- Once I tried using almond milk and coconut oil instead of dairy. Won’t lie, that one was kind of a kitchen disaster—nobody finished their portion, and my uncle pretended it tasted “tropical” to be polite.
- For a big crowd, sometimes I assemble early and keep in the fridge till showtime—just wait to add fried onions till the last ten minutes of baking or they’ll go soggy.
The Gear: What You (Actually) Need
- Casserole dish (9×13-ish is nice, but I’ve used a big oven-safe skillet in a pinch)
- Large pot—or honestly, even a big deep pan for blanching
- Colander (or improvise with a slotted spoon—I’ve done it many times)
- Mixing spoon and whisk (fork works if you’re desperate, just go slow to avoid splashes)
- Cutting board, knife, good playlist (Okay, you don’t need that last one, but it helps)
How It Keeps (Storage Info)
This will hang out in your fridge for about 3 days, covered. The crispy onions sog up a bit (still tasty, just… different). Honestly, in my house, it never lasts more than a day, but on the off chance you have leftovers, I like reheating them in a skillet to get a bit of that crispy magic back. Here’s a good article on reheating casseroles that I found super helpful once when I panicked about ruining leftovers.
How I Serve It (Serving Suggestions… and My Family’s Quirks)
I always, always do this with good crusty bread (ideally homemade if I’ve got time—but who does?). Sometimes we do a little drizzle of lemon on top; my mom claims it “brightens it up” whatever that means. Some folks mix in roasted almonds for a Texas twist, but my group just loves it straight up. Sometimes I double the crispy onions on top for good measure. Personal opinion: the leftovers (if any) really are tastier the next day, after the flavors mesh—don’t ask me why.
Stuff I Learned the Hard Way (Pro Tips)
- Once I rushed the blanching step and the beans were tough as old boots. Don’t be me—let ’em get a bit tender.
- Making sauce over high heat? Bad idea. Learned this the smoky, pan-scraping way. Go low and slow, and yes, the sauce will eventually thicken.
- If you try to slice onions while streaming your favorite show, just know, you’ll cry and not just from the onions. Focus (at least for the knife bit).
Folks Have Asked Me…
- Can I use canned beans?
- Yeah, you can. But honestly? It’s just not the same. If you do, rinse ’em well and skip the blanching. Sauce will be a tad runnier, but it’ll still get eaten.
- What’s the best way to make it ahead?
- I assemble everything but the fried onions, cover and stick it in the fridge. Throw onions on top before last bake. Actually, I find it works better if you let it sit for at least a couple hours, the flavors get even better.
- Is there a vegan version?
- There are loads online (a friend sent me this one from Minimalist Baker). If I’m honest, I tried it once—it was “fine,” but not really my thing. You do you!
- Can I freeze leftovers?
- Kinda—not my favorite. The onions go soft and the sauce splits a bit. I’d just eat it in the first couple days, but freezing won’t kill anyone, just don’t expect perfect.
Oh, and just for fun: once, in the middle of making this dish, I realized my cat had stolen a green bean off the counter. So apparently, it’s feline-approved too.
Ingredients
- 1 1/2 pounds fresh green beans, trimmed and cut into 2-inch pieces
- 2 tablespoons unsalted butter
- 1 medium yellow onion, finely chopped
- 8 ounces mushrooms, sliced
- 2 cloves garlic, minced
- 3 tablespoons all-purpose flour
- 1 cup whole milk
- 1 cup low-sodium chicken broth
- 1/2 cup grated Parmesan cheese
- 1 1/2 cups crispy fried onions
- Salt and black pepper to taste
Instructions
-
1Preheat oven to 375°F (190°C). Bring a large pot of salted water to a boil and blanch the green beans for 4-5 minutes, then drain and set aside.
-
2Melt the butter in a large skillet over medium heat. Add the chopped onion and mushrooms, cooking until softened and golden brown, about 7 minutes. Stir in the garlic and cook for 1 more minute.
-
3Sprinkle the flour over the vegetables and cook, stirring constantly, for 2 minutes. Gradually whisk in the milk and chicken broth, cooking until the sauce thickens, about 4-5 minutes. Season with salt and black pepper.
-
4Stir in the blanched green beans and half of the crispy fried onions. Mix to combine, then pour into a greased 9×13-inch baking dish. Sprinkle the Parmesan cheese and remaining fried onions evenly on top.
-
5Bake for 25 minutes, or until the casserole is bubbly and the onions are golden brown. Let it rest for 5 minutes before serving.
CLICK FOR NUTRITION INFO
↑
Approximate Information for One Serving
Serving Size:
1 serving
Calories:
220 caloriescal
Protein:
7 gg
Fat:
11 gg
Saturated Fat:
0g
Trans Fat:
0g
Cholesterol:
0mg
Sodium:
0mg
Potassium:
0mg
Total Carbs:
22 gg
Fiber:
0g
Sugar:
0g
Net Carbs:
0g
Vitamin A:
0
Vitamin C:
0mg
Calcium:
0mg
Iron:
0mg
Nutrition Disclaimers
Number of total servings shown is approximate. Actual number of servings will depend on your preferred portion sizes.
Nutritional values shown are general guidelines and reflect information for 1 serving using the ingredients listed, not including any optional ingredients. Actual macros may vary slightly depending on specific brands and types of ingredients used.
To determine the weight of one serving, prepare the recipe as instructed. Weigh the finished recipe, then divide the weight of the finished recipe (not including the weight of the container the food is in) by the desired number of servings. Result will be the weight of one serving.
Did you make this recipe?
Please consider Pinning it!!