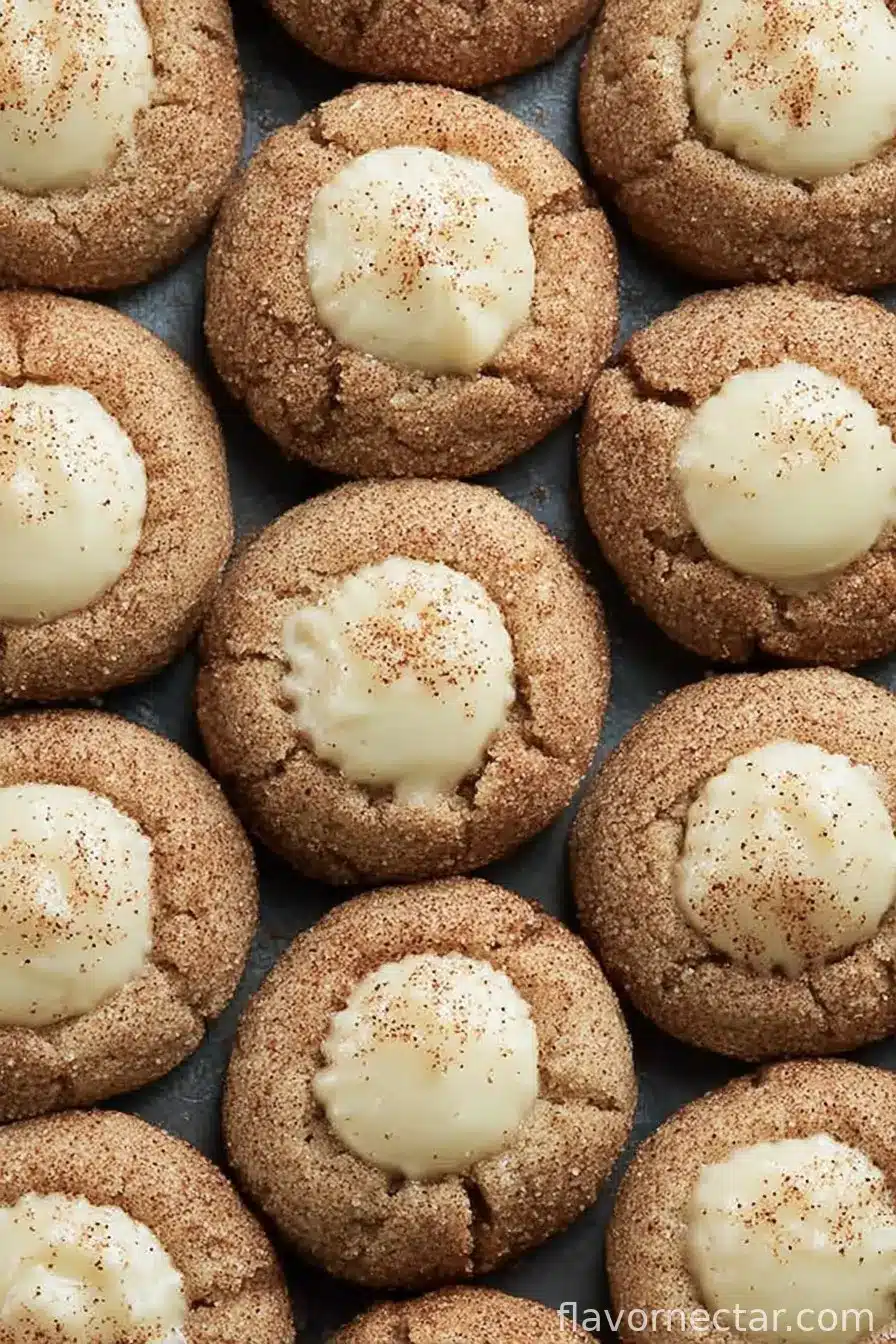
If you’ve never tried stuffing snickerdoodles with eggnog cream, friend, let me tell ya—you’re missing out on a chewy, creamy, can’t-stop-after-one cookie experience. So, despite my kids’ fond memory of the Great Flour Spill of 2021 (where kitchen counters weren’t the only thing dusted like snow), these Eggnog Snickerdoodle Thumbprint Cookies are a must in our holiday lineup. In fact, the first time I made these, I wasn’t even sure thumbprints belonged in the Snickerdoodle family. Turns out, family is what you make it (and Cookies too). Or as my Aunt Cheryl says, “All cookies are cousins, anyway.” Oh, right—before I ramble too much, let’s bake!
Why You’ll Love This (Besides the Obvious)
I make these every year around Christmas, but honestly, sometimes just because the weather’s bleak and I need a pick-me-up (and eggnog’s on sale; win-win). My family goes slightly bananas for these—my son calls them “Santa’s bellybuttons.” I used to get real stressed about perfect thumbprint cookies, but this recipe’s pretty forgiving. Even if the shapes are wonky, they taste awesome. And yes, once or twice I’ve doubled the filling because, well, life’s short and eggnog is tasty.
What You’ll Need (with a Few Honest Substitutions)
- 1 1/2 cups all-purpose flour (Whole wheat works, but it’s a bit denser—not my favorite, but if that’s what you’ve got…)
- 1/2 teaspoon baking soda (Brand doesn’t matter, despite what my grandma said!)
- 1/4 teaspoon salt
- 1/2 teaspoon ground nutmeg (Fresh is fancy, jarred is fine. If you’re really pinched, pumpkin pie spice sort of works)
- 1/2 cup unsalted butter, room temp (Margarine worked in a pinch once, but honestly, butter’s better)
- 3/4 cup sugar—plus 2 tablespoons for rolling
- 1 large egg (Once I used two medium eggs, it was… okay?)
- 1 tablespoon eggnog (More if you want, but things might get a bit sticky!)
- 1 teaspoon vanilla extract (No vanilla? Almond works, in a pinch, just go halfsies)
- 1 teaspoon ground cinnamon (Or a mix of cinnamon and cardamom—just for kicks)
- For the filling: 3/4 cup powdered sugar, 2 tablespoons eggnog, 1 tablespoon melted butter, a pinch of nutmeg
Making These Is (Mostly) Fun – Directions
- Preheat your oven to 350°F (180°C). Or don’t—if you forget, you’ll just have extra fridge time (ask me how I know).
- Mix the dry stuff: Whisk flour, baking soda, salt, and nutmeg in a big-ish bowl. It’ll look kinda boring, but trust the process.
- Butter time: In another bowl, beat the butter and sugar until it’s light and fluffy. This takes 2-3 minutes unless you’re using elbow grease and a wooden spoon (which works, but it’ll count as your workout).
- Egg, eggnog, vanilla: Add the egg, vanilla, and eggnog to the butter mix. Beat just until it comes together. If it looks split, don’t stress—flour will fix it up!
- Combine it: Stir the dry mix into the wet until just combined. Don’t over-mix (I once did, and got hockey puck cookies).
- Mix the coating: Stir 2 tablespoons sugar and all your cinnamon in a shallow plate. Use this for rolling the dough balls—maybe eat a spoonful because, hey, who’s watching?
- Shape and roll: Scoop about a tablespoon of dough and roll into balls. Plop each ball in the cinnamon sugar, spin it like it’s a disco. Drop onto a lined baking sheet (parchment, or butter the heck out of your tray).
- Thumbprint time: Press your thumb or the back of a teaspoon into the center of each ball. Don’t worry if you poke through a bit; you can smush it closed later.
- Bake 9–11 minutes, or until edges are just set. They might look soft at first, but they’ll firm up as they cool (promise!).
- Cool completely before you fill (or you’ll have a melty eggnog waterfall situation… which is fun, but messy).
- Filling: Whisk powdered sugar, eggnog, melted butter, a pinch of nutmeg together until smooth. Spoon or pipe (very casual) into thumbprints. Taste test, you know, for safety.
What I Learned the Hard Way (Notes)
- Actually, it works better if you let the cookies cool fully before filling, otherwise the icing just kind of runs for the hills.
- Sprinkle a little extra nutmeg on top if you’re feeling fancy; don’t bother if you’re not.
- The dough can chill overnight, too—if you remember to cover it (which I sometimes don’t, and it gets a bit odd and dry).
- If you run out of eggnog, milk + a splash of rum extract is a halfway decent hack.
How You Can Switch Things Up (and One Flop)
- Swapped the eggnog for Irish cream last December (grown-ups-only hit!)
- One time, tried adding chopped pecans to the dough—good crunch, but a little distracting
- I do not recommend stuffing the filling before baking; it just oozes everywhere and you’ll mutter choice words
Do You Need Fancy Gear? (Nah, But…)
You probably want an electric mixer if you’ve got it—but I’ve mixed by hand with a sturdy wooden spoon after my old mixer smoked and died. For thumbprints, a teaspoon or the handle of a spatula totally gets the job done (plus, less sticky fingers).
How to Store These Beauties (If You Can)
Keep them in an airtight container on the counter for 2-3 days… so says the experts. But honestly, in my house, these cookies have about a 24-hour lifespan before only crumbs remain. I think they taste even better the day after baking, but I’ve yet to convince the family to wait that long. If they’re somehow lingering, pop them in the fridge—that keeps the filling happy, too. Serious Eats has more on cookie storage if you’re curious.
How We Serve ‘Em (My House’s Way)
We eat these straight up, but honestly, they’re ace with hot cocoa—especially the kind you make from scratch. Sometimes they show up next to a big holiday cheese board (don’t knock it ‘til you try it!). My daughter dunks ‘em in eggnog, my son just pockets a few on his way to do, well, whatever 12-year-olds do these days.
Hard-Earned Cookie Wisdom (Pro Tips)
- I once rushed the cooling step and the filling just slid off, making what looked like sticky volcanoes. Just go have a cuppa while you wait.
- If your thumbprints close up while baking, just press them again while warm. The cookies forgive you.
- I keep a tiny offset spatula nearby for easy filling, but a regular spoon or even a chopstick (yep, tried it!) works for getting filling into those nooks.
FAQ (Answers to the Stuff Folks Really Ask Me)
Q: Can I make these ahead of time?
Yep, totally. Sometimes I make the dough two days early, though it sometimes dries out a bit—just add a smidge more eggnog if it’s too crumbly.
Q: What about freezing?
Actually, yes. You can freeze the rolled balls before baking, or the finished (unfilled) cookies. Fill after thawing for best results—or not, if you’re feeling rebellious.
Q: What if I’m out of eggnog?
No stress! Milk works, but add a pinch of nutmeg and a drop of vanilla/rum extract to fake it. Is it the real deal? Maybe not, but it works in a pinch.
Q: Can I make these gluten free?
I haven’t personally, but a friend swears by using a 1-to-1 gluten free blend. She says they’re a bit crumblier though. If you try it, let me know—seriously, I’m curious!
(Also, if you ever need a distraction while baking, check out Food52—I lose myself in their stories all the time.)

Ingredients
- 2 1/2 cups all-purpose flour
- 1/2 teaspoon baking soda
- 1/2 teaspoon cream of tartar
- 1/2 teaspoon salt
- 1/2 teaspoon ground cinnamon
- 1/4 teaspoon ground nutmeg
- 1 cup unsalted butter, softened
- 1 1/4 cups granulated sugar, divided
- 1 large egg
- 1/4 cup eggnog
- 1 teaspoon vanilla extract
- 1/2 teaspoon rum extract
- 3/4 cup powdered sugar (for filling)
- 2 tablespoons eggnog (for filling)
- 1/4 teaspoon ground nutmeg (for filling)
Instructions
-
1Preheat the oven to 350°F (175°C) and line two baking sheets with parchment paper.
-
2In a medium bowl, whisk together the flour, baking soda, cream of tartar, salt, cinnamon, and nutmeg.
-
3In a large bowl, cream together the butter and 1 cup of granulated sugar until light and fluffy. Beat in the egg, eggnog, vanilla extract, and rum extract until well combined.
-
4Gradually mix the dry ingredients into the wet ingredients until a soft dough forms. In a small bowl, combine the remaining 1/4 cup granulated sugar with a pinch of cinnamon. Roll tablespoon-sized balls of dough in the cinnamon sugar and place them on the prepared baking sheets.
-
5Use your thumb or the back of a spoon to make an indentation in each cookie. Bake for 10-12 minutes, or until the cookies are set and just starting to turn golden around the edges.
-
6While the cookies cool, make the filling by whisking together powdered sugar, eggnog, and nutmeg until smooth. Fill each cooled cookie with a small spoonful of the eggnog filling. Allow the icing to set before serving.
CLICK FOR NUTRITION INFO
↑
Approximate Information for One Serving
Serving Size:
1 serving
Calories:
120 caloriescal
Protein:
1gg
Fat:
5gg
Saturated Fat:
0g
Trans Fat:
0g
Cholesterol:
0mg
Sodium:
0mg
Potassium:
0mg
Total Carbs:
18gg
Fiber:
0g
Sugar:
0g
Net Carbs:
0g
Vitamin A:
0
Vitamin C:
0mg
Calcium:
0mg
Iron:
0mg
Nutrition Disclaimers
Number of total servings shown is approximate. Actual number of servings will depend on your preferred portion sizes.
Nutritional values shown are general guidelines and reflect information for 1 serving using the ingredients listed, not including any optional ingredients. Actual macros may vary slightly depending on specific brands and types of ingredients used.
To determine the weight of one serving, prepare the recipe as instructed. Weigh the finished recipe, then divide the weight of the finished recipe (not including the weight of the container the food is in) by the desired number of servings. Result will be the weight of one serving.
Did you make this recipe?
Please consider Pinning it!!