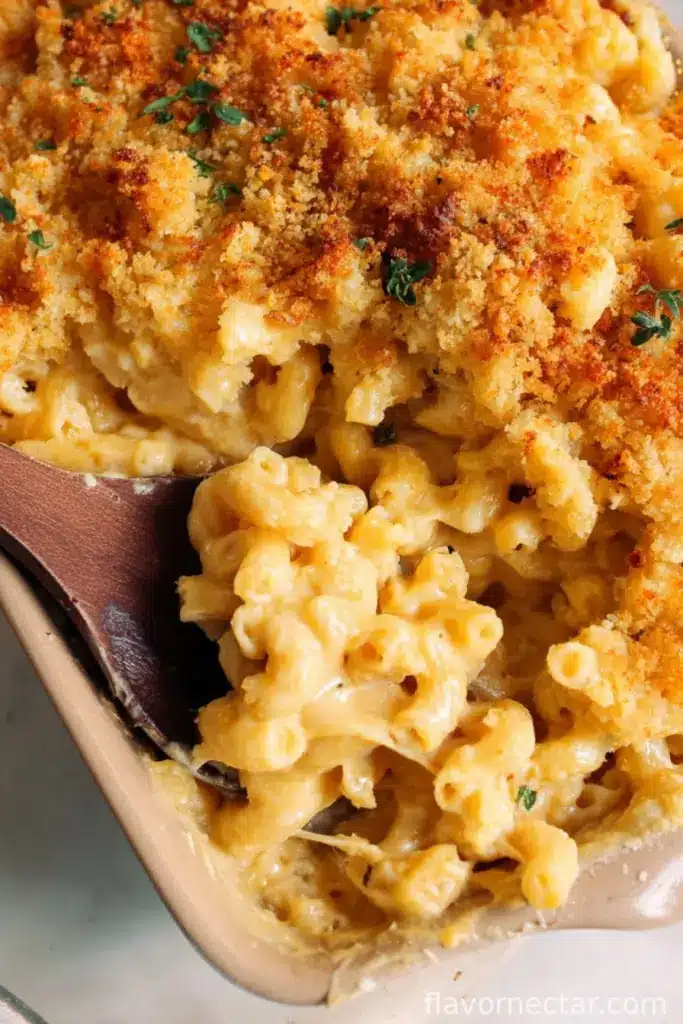
So, Let’s Talk About This Mac and Cheese
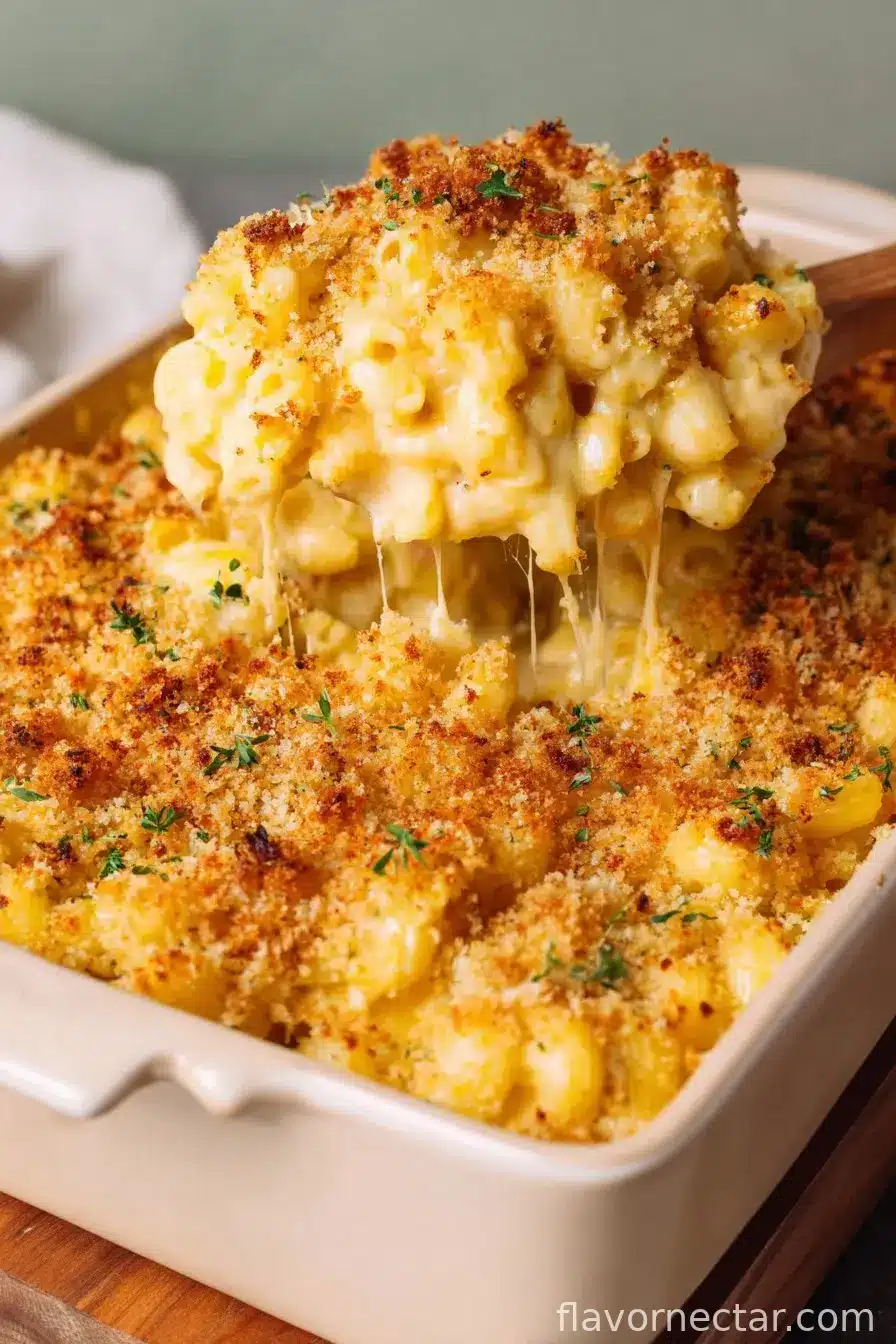
Hey there! If you ever find yourself knee-deep in a week that’s just been…a week, creamy baked mac and Cheese with a mound of crispy breadcrumbs on top has honestly rescued me (and, not to be dramatic, but perhaps my sanity). The first time I made it, I completely forgot to pre-cook the pasta. Who does that? It tasted a bit… toothsome, we’ll say. My little sister still teases me about “that crunchy pasta casserole” anytime baked mac and Cheese is mentioned. But these days, it’s proper comfort food and a regular request when everyone piles over for movie night. Plus, something about that golden, shattering topping just makes people happy—like, properly happy, you know?
And, quick question—why does grating Cheese always take way longer than you think? I feel like the Cheese somehow multiplies in your fridge overnight. Anyway, let’s get to it before I start rambling about cheese dreams again.
What Makes This Recipe Worth Making?
I make this when it’s been one of those days (or when I see a block of sharp cheddar daring me to do something about it). My family goes wild for this because it manages to be rich and creamy without being a cheese soup mess. And the topping? That’s the part they fight over (yes, even the grown-ups—don’t ask who’s thrown an elbow for the corner slice).
Also, and I’ll admit this only here—I used to get really annoyed when homemade mac turned out gritty. But after some trial, error, and a few near-meltdowns (over a pan of lumpy sauce), I’ve finally cracked the code. If you want a smooth sauce and extra crispy top, stick with me. Or at least muddle through with me; I’ve made the mistakes so you don’t have to.
Ingredients: Do I Follow This Exactly? Eh, Not Always
- 400g (about 14oz) dried macaroni (I’ve swapped in penne when out of elbows, and my granny swore elbows were non-negotiable—but, honestly, use what you got)
- 3 cups whole milk (I sometimes use 2 percent if that’s all that’s left—the world won’t end)
- 1 cup heavy cream (or just use all milk if you’re feeling virtuous)
- 4 tablespoons unsalted butter (I accidentally used salted once, just dial back any added salt if you do!)
- 1/4 cup all-purpose flour
- 3 cups shredded sharp cheddar (I’m a fiend for Cabot, but store brand is fine, too)
- 1 cup shredded gruyere or fontina cheese (or just more cheddar; I even used some smoked gouda once—pretty tasty!)
- 1/2 teaspoon paprika
- 1/2 teaspoon mustard powder (optional, but adds that little somethin’ somethin’)
- Salt and black pepper
- 1 1/2 cups panko breadcrumbs (regular will do in a pinch, but panko is where it’s at for crunch)
- 2 tablespoons butter (for topping)
- 1/4 cup freshly grated parmesan (or, honestly, the stuff in the jar works if that’s what you have)
How I Actually Make It—Directions (With Some Wandering Off-Topic)
- Preheat your oven to 180°C (350°F).
- Cook the macaroni in well-salted water, but a minute or two less than the package says. You want a little bite—otherwise, you’re making noodle mush. Drain and set aside (okay, sometimes I forget this step and end up with a sticky noodle blob. Just give it a quick rinse!).
- While that’s happening, in a big saucepan, chuck in the butter over medium heat. When it’s melted and foaming—but not brown—sprinkle in the flour. Whisk like you mean it for about a minute; this bit always smells kind of nutty. Now gradually whisk in the milk and cream. I used to just dump it in, but then got annoyed at lumps, so go slow. Stir until it’s smooth and maybe coating the back of a spoon.
- Here’s where I (sometimes) sneak a spoonful—it’s just white sauce, but you can tell if it’s on the right road.
- Dump in the cheese, handful by handful. Keep stirring. It might look a bit weirdly stringy; don’t panic, it comes together. Add the paprika, mustard powder, and a good bit of pepper. Salt now, but taste as you go—some cheeses are saltier than others.
- Chuck the drained pasta into the cheese sauce. Stir until everyone’s coated. If I’m feeling fancy, I fold in a tiny bit more cheese at this point. Your call.
- Scrape it all into a buttered baking dish (mine is, I think, 3-liter but a 9×13 tin is grand).
- Now for the topping: In a bowl, melt the remaining 2 tablespoons butter, toss the panko and parmesan through that until it looks sandy. Scatter it all over the mac.
- Bake 25–30 minutes or until bubbling and golden and the smell is making your stomach grumble. If the top isn’t brown enough, give it a quick blast under the grill (broiler)—but don’t wander off like I did once unless you like charcoal surprise.
Stuff I Learned (Sometimes the Hard Way)
- If you use pre-shredded cheese, the sauce can go a bit grainy—I still do it in a pinch though, I’m not grating like a lunatic every time.
- Don’t bother with fancy pasta shapes. Yes, I once tried fusilli. Everyone just poked at it.
- Let it sit for 10 minutes before serving, otherwise it’s basically molten cheese lava (I never wait, and always regret it).
Variations: Mac Experiments (Some Winners, Some… Not So Much)
- Stir in some crispy bacon or roast broccoli for a twist—both get devoured.
- Slice a few jalapeños on top before baking for a spicy kick. My uncle called this “danger mac” which… is about right.
- I tried adding truffle oil; my family was decidedly unimpressed. Save your cash, maybe?
Kit You Need (Probably Have It Already!)
- Large saucepan
- Big mixing bowl
- Baking dish (but actually, I’ve used a disposable tin when I’m taking this to a mate—works fine)
- Grater or food processor for cheese (or a knife if you like living dangerously)
- Whisk (folks, I found a fork works in a pinch—just don’t tell my mum!)
What About Leftovers?
If—if—you have any left, let it cool; throw it in a container and into the fridge for 3 days max. I think it actually tastes better the next day (but honestly, it never makes it 24 hours in my house). Reheat gently or, if you’re feeling lazy, cold mac and cheese isn’t the worst midnight snack I’ve stumbled upon.
How I Serve It Up (Plus a Family Quirk)
We usually chop up some tomatoes or throw together a green salad (I have a soft spot for this one here) to go alongside. Bread, too—because carbs with carbs is living right. My nephew dunks his in ketchup which, well, kids have weird ideas about cuisine. I tried it once. Not for me.
What I’ve Learned the Hard Way—A Few Pro Tips
- Don’t try to rush the sauce. I once cranked the heat to save time and the sauce split. Just, don’t.
- Layering cheese between the pasta and topping sometimes seems like overkill, but actually, I find it works better if you do (double cheese insurance, right?).
- Bake on the middle rack—I scorched the topping once by putting it too close to the top wire. Not fun scraping off burned bits.
Mac and Cheese Questions I Get All the Time
Can I freeze this? Honestly, yes, but the sauce can get a bit grainy after thawing. If that doesn’t bother you, go for it! Otherwise, just make a half batch.
Can I use gluten-free pasta? I’ve tried it with bionaturae gluten-free pasta—works pretty well! Just don’t overboil.
What if I don’t have panko? Regular breadcrumbs work, or even crushed crackers. Ritz, the snacky kind, straight form the sleeve (don’t ask why I know this), actually made a pretty epic topping once.
Is there a lighter version? Sort of? Use milk only instead of cream, less cheese, even toss in some steamed cauliflower for half the pasta (tried it once, kids spotted it instantly, but I liked it).
How do I avoid sauce lumps? The trick is slow whisking and not dumping the milk in all at once. Or just blend the whole lot with a stick blender if it’s really gone pear-shaped—done this a time or two and no one noticed.
Can I prep it ahead? Absolutely. Assemble, chill, then bake when you need it—add 10 extra minutes to the bake time. Or just steal a forkful cold. No judgment.
And if you fancy comparing versions, serious eats does a great deep dive—just a warning: rabbit hole ahead!
Phew, think that’s everything. Let me know if you try it—or if you improve it (would not be the first time someone outdoes me on my own dish!).

Ingredients
- 12 oz elbow macaroni
- 3 cups shredded sharp cheddar cheese
- 1 cup shredded mozzarella cheese
- 1/4 cup unsalted butter
- 1/4 cup all-purpose flour
- 3 cups whole milk
- 1/2 cup heavy cream
- 1 cup panko breadcrumbs
- 2 tbsp grated Parmesan cheese
- 1/2 tsp salt
- 1/2 tsp ground black pepper
- 1/4 tsp smoked paprika
Instructions
-
1Preheat oven to 375°F (190°C). Cook elbow macaroni according to package instructions until al dente. Drain and set aside.
-
2In a large saucepan, melt butter over medium heat. Whisk in flour and cook for 1-2 minutes until smooth.
-
3Gradually whisk in milk and heavy cream. Cook, stirring constantly, until mixture thickens—about 5 minutes.
-
4Remove from heat. Stir in cheddar, mozzarella, salt, pepper, and smoked paprika until cheese is fully melted. Add cooked macaroni and combine well.
-
5Pour macaroni mixture into a greased 9×13-inch baking dish. In a bowl, mix panko breadcrumbs with Parmesan cheese and sprinkle evenly over the top.
-
6Bake for 25-30 minutes, or until the topping is golden brown and the cheese is bubbling. Let cool slightly before serving.
CLICK FOR NUTRITION INFO
↑
Approximate Information for One Serving
Serving Size:
1 serving
Calories:
530 caloriescal
Protein:
21 gg
Fat:
29 gg
Saturated Fat:
0g
Trans Fat:
0g
Cholesterol:
0mg
Sodium:
0mg
Potassium:
0mg
Total Carbs:
48 gg
Fiber:
0g
Sugar:
0g
Net Carbs:
0g
Vitamin A:
0
Vitamin C:
0mg
Calcium:
0mg
Iron:
0mg
Nutrition Disclaimers
Number of total servings shown is approximate. Actual number of servings will depend on your preferred portion sizes.
Nutritional values shown are general guidelines and reflect information for 1 serving using the ingredients listed, not including any optional ingredients. Actual macros may vary slightly depending on specific brands and types of ingredients used.
To determine the weight of one serving, prepare the recipe as instructed. Weigh the finished recipe, then divide the weight of the finished recipe (not including the weight of the container the food is in) by the desired number of servings. Result will be the weight of one serving.
Did you make this recipe?
Please consider Pinning it!!