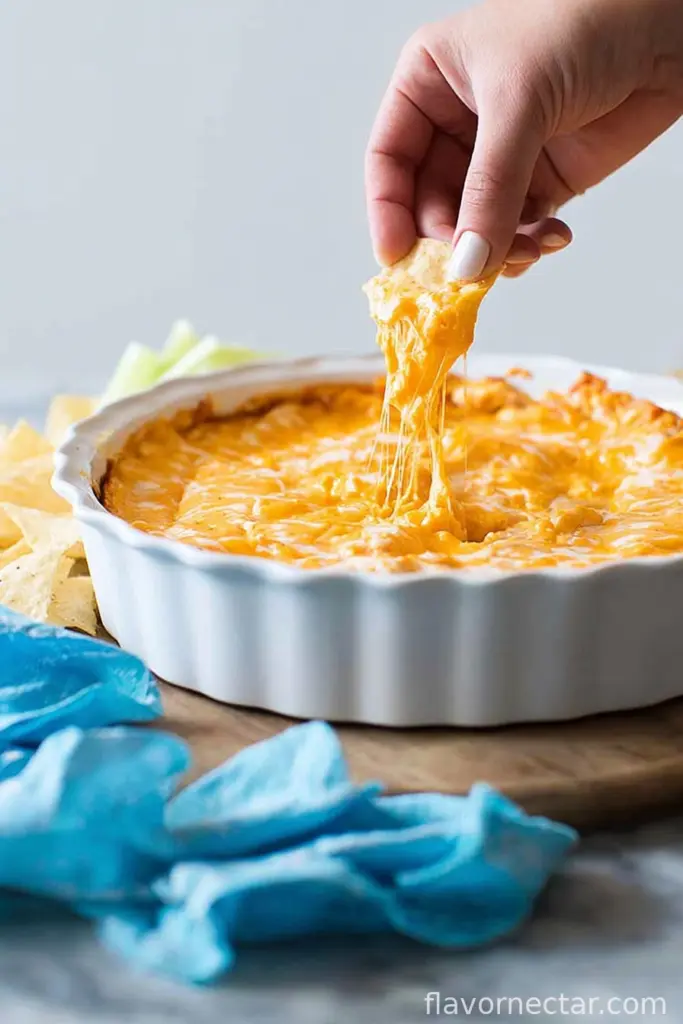
Alright—Here’s Why Buffalo Chicken Dip Is Always a Hit
You know those recipes you pull out of your back pocket every time you need a sure-fire crowd pleaser? Buffalo Chicken Dip is that dish for me. Honestly, I’ve made this more times than I can count, usually in a half-panic because people are coming over and my fridge looks like a teenager’s science experiment. The first time I made this, I went way overboard on the hot sauce (oops), but nobody seemed to mind — in fact, my cousin Max tried to eat it with a spoon. Classic Max. And now, I’m convinced this dip is less a recipe and more a family tradition disguised as a cheese volcano.
Why You’ll Love This (Or: Why I Can’t Stop Making It)
I make this when I want to feel like a kitchen hero with close to zero effort. My family goes wild for Buffalo Chicken Dip—like, elbows-on-the-table, arguing-over-the-last-scoop wild. Sometimes I use rotisserie chicken if I’m in a rush (or, honestly, just lazy). Don’t judge. The dip is messy, spicy, comforting, cheesy—it’s basically all my snack cravings mashed together in one bowl. Oh! And if you forget to soften your cream cheese like I always do, I’ve found microwaving it for 20 seconds works fine (as long as you don’t walk away and let it melt into liquid—ask me how I know).
Everything You’ll Need (and What You Can Swap)
- 2 cups shredded chicken (about 250g; rotisserie, leftover grilled, even canned in a pinch—the world is your chicken)
- 225g (an 8 oz block) cream cheese, softened (my grandma swore by Philadelphia but honestly, store brand does the trick if you ask me)
- 1/2 cup Frank’s RedHot sauce (sometimes I go less spicy and use Sweet Baby Ray’s Buffalo—no judging your heat tolerance here)
- 1/2 cup ranch dressing (or blue cheese dressing if you like it funkier—my partner is on Team Ranch, so we usually go that route)
- 1 cup shredded cheddar cheese (sometimes I get wild and do half mozzarella, half cheddar—just what’s on hand, really)
- 1/2 cup crumbled blue cheese (completely optional; I leave out if kids are eating—their cheese opinions are strong and confusing)
- Scallions or chives for sprinkling on top (optional—though it does make you look like you know what you’re doing)
How I Actually Make It (The Good, The Bad, The Ugly Cheese Bits)
- Preheat your oven to 180°C (350°F). Or just eyeball it if your oven dial has seen better days. Trust your gut.
- In a big mixing bowl (or the actual baking dish if you hate dishes as much as I do), toss in the shredded chicken, softened cream cheese, hot sauce, ranch, half of the cheddar, and the blue cheese if you’re using it. Use a wooden spoon, spatula, or clean hands—nobody’s watching. This is where I usually sneak a taste (or three).
- Spread the whole glorious mess evenly into a oven-safe dish; about a 9-inch (23cm) pie plate or whatever casserole thing you’ve got is fine. Don’t worry if it looks kind of orange and streaky—it always comes together in the oven.
- Sprinkle the rest of the cheddar cheese over the top. Extra cheese never killed anyone.
- Bake uncovered for about 20–25 minutes, until it’s bubbling and starting to brown at the edges. If you like it super gooey, pull it at 20; for firmer edges, let it go the whole 25 (sometimes I even broil it for 2 minutes at the end, but keep an eye out—burnt cheese happens fast, and suddenly your house smells like a campfire, trust me).
- Let it rest for maybe 10 minutes if you have the patience. I rarely do. Sprinkle on the scallions or chives if you’re feeling fancy and dig in with crackers, celery sticks, or a spoon if nobody’s looking.
Some Real-Life Notes Worth Reading (Because I Mess Up So You Don’t Have To)
- If you don’t soften your cream cheese enough, you’ll get little lumps—but honestly, no one ever complained, so don’t lose sleep over it.
- I tried using Greek yogurt instead of ranch one time. Regreeted it. Stick with the dressing or at least do half-and-half if you want it lighter.
- This actually tastes even better the next day, cold out of the fridge. Or maybe that’s just me?
- Buffalo sauce is prone to separating a bit after sitting, especially if you reheat it. Just give it a stir (or accept the swirl—embrace the chaos).
How I’ve Switched This Up (and When I Shouldn’t Have)
- Tried swapping chicken for shredded rotisserie turkey after the holidays—actually pretty solid.
- One time, I subbed in Monterey Jack for cheddar, and it was lovely and gooey.
- Mistake: swapped in BBQ sauce for the Buffalo—nope, just not the same. Still edible, but not Buffalo Chicken Dip anymore.
- Sometimes I scatter a can of drained corn in there for a Tex-Mex vibe. It’s weird but oddly good.
Equipment I Use (and What To Do If You Don’t Have It)
- Mixing bowl (but honestly, I just use the baking dish half the time—less to wash!)
- Oven-safe dish, about 9-inch or whatever fits.
- A large spoon or spatula. Or your (cleanish) hands—nobody’s checking. If you’re short on utensils, you can even get away with a fork for the whole process, though your forearm might regret it halfway through.
How to Store This Dip (If You Have Any Left!)
Just scoop leftovers into any airtight container—I’ve done it in a regular old Tupperware or even wrapped in foil if it’s all that’s handy. It keeps in the fridge for up to 3 days. Reheat in a microwave or oven, but honestly, in my place it never lasts more than a day. Someone always “accidentally” finishes it.
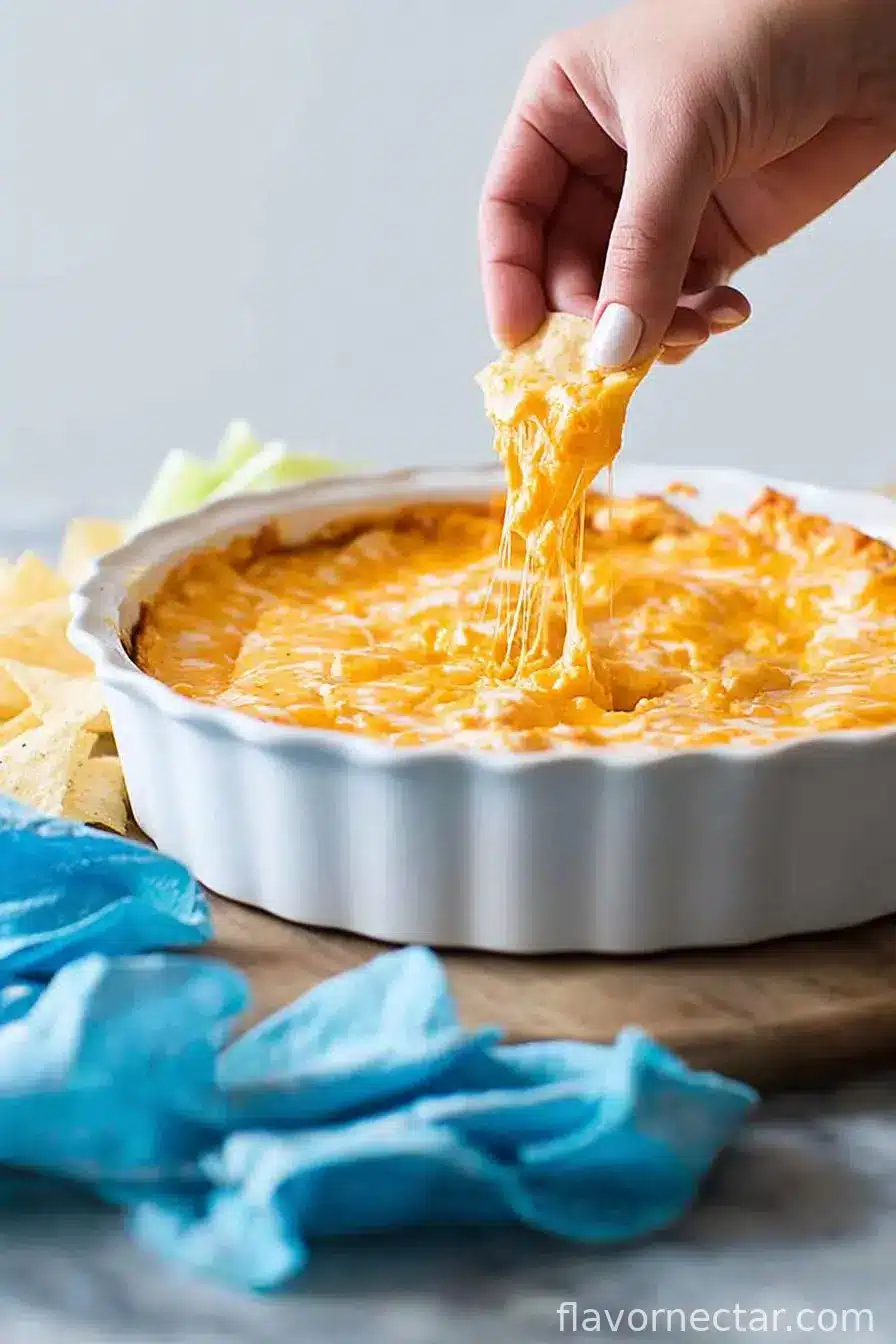
How We Serve It (And What Goes Surprisingly Well)
I’m a big fan of serving this with celery or carrot sticks, partly because it makes me feel healthy. My sister swears by tortilla chips; my dad eats it on toasted baguette rounds like he’s in a fancy sports bar. At the last family reunion, someone even dumped a scoop onto a baked potato, and… not bad! Friday nights, we just plop the dish in the middle of the coffee table and let the wolves (I mean, kids) dig in.
My Hard-Earned Pro Tips (AKA, Don’t Do What I Did)
- I once tried rushing the baking by cranking up the oven. Big mistake—the edges burned, and the middle was still cold. Be patient. (Easier said than done if you’re hungry but trust me.)
- Don’t use pre-shredded cheese if you can help it. It’s coated in something that makes the dip a bit grittier. Though, if you’re in a hurry, it’s not the end of the world.
- Mix the hot sauce and cream cheese together first if you hate stirring lumps—learned this one the hard way on game day with a room full of hangry humans.
FAQs (Yes, People Have Actually Asked!)
-
Can I make Buffalo Chicken Dip ahead of time?
For sure! Mix everything together and stash it in the fridge, unbaked, for up to a day; just bake it right before serving. Actually, sometimes the flavors get even better that way. -
What if I don’t have Buffalo sauce?
You can hack it with hot sauce and a bit of melted butter if you’re in a pinch. Is it the same? Not exactly, but it works—my friend Kelly swears by it, and she’s picky. -
Can this be made in a slow cooker?
Absolutely. Dump everything in, set to low for about 2–3 hours, and stir occasionally. It works (though a little more oily sometimes—just give it a good mix). -
Can I freeze the leftovers?
Technically yes, but the cheese gets a bit weird when thawed—grainy, kind of like old snow. Not my favorite. I just eat it cold from the fridge instead, but you do you. -
Is there a vegetarian version?
Probably! I haven’t tried it, but I’ve heard jackfruit or even canned chickpeas can be used instead of chicken, though I suspect it’s a bit different (in a good way?). Let me know if you try!
If you try this, let me know how it goes—or if you find a new twist that actually works, I’m always up for a kitchen adventure. And if your family fights over the last scoop, consider it a job well done.
Ingredients
- 2 cups shredded chicken (about 250g; rotisserie, leftover grilled, even canned in a pinch—the world is your chicken)
- 225g (an 8 oz block) cream cheese, softened (my grandma swore by Philadelphia but honestly, store brand does the trick if you ask me)
- 1/2 cup Frank’s RedHot sauce (sometimes I go less spicy and use Sweet Baby Ray’s Buffalo—no judging your heat tolerance here)
- 1/2 cup ranch dressing (or blue cheese dressing if you like it funkier—my partner is on Team Ranch, so we usually go that route)
- 1 cup shredded cheddar cheese (sometimes I get wild and do half mozzarella, half cheddar—just what’s on hand, really)
- 1/2 cup crumbled blue cheese (completely optional; I leave out if kids are eating—their cheese opinions are strong and confusing)
- Scallions or chives for sprinkling on top (optional—though it does make you look like you know what you’re doing)
Instructions
-
1Preheat your oven to 180°C (350°F). Or just eyeball it if your oven dial has seen better days. Trust your gut.
-
2In a big mixing bowl (or the actual baking dish if you hate dishes as much as I do), toss in the shredded chicken, softened cream cheese, hot sauce, ranch, half of the cheddar, and the blue cheese if you’re using it. Use a wooden spoon, spatula, or clean hands—nobody’s watching. This is where I usually sneak a taste (or three).
-
3Spread the whole glorious mess evenly into a oven-safe dish; about a 9-inch (23cm) pie plate or whatever casserole thing you’ve got is fine. Don’t worry if it looks kind of orange and streaky—it always comes together in the oven.
-
4Sprinkle the rest of the cheddar cheese over the top. Extra cheese never killed anyone.
-
5Bake uncovered for about 20–25 minutes, until it’s bubbling and starting to brown at the edges. If you like it super gooey, pull it at 20; for firmer edges, let it go the whole 25 (sometimes I even broil it for 2 minutes at the end, but keep an eye out—burnt cheese happens fast, and suddenly your house smells like a campfire, trust me).
-
6Let it rest for maybe 10 minutes if you have the patience. I rarely do. Sprinkle on the scallions or chives if you’re feeling fancy and dig in with crackers, celery sticks, or a spoon if nobody’s looking.
CLICK FOR NUTRITION INFO
↑
Approximate Information for One Serving
Serving Size:
1 serving
Calories:
300 caloriescal
Protein:
17gg
Fat:
24gg
Saturated Fat:
0g
Trans Fat:
0g
Cholesterol:
0mg
Sodium:
0mg
Potassium:
0mg
Total Carbs:
4gg
Fiber:
0g
Sugar:
0g
Net Carbs:
0g
Vitamin A:
0
Vitamin C:
0mg
Calcium:
0mg
Iron:
0mg
Nutrition Disclaimers
Number of total servings shown is approximate. Actual number of servings will depend on your preferred portion sizes.
Nutritional values shown are general guidelines and reflect information for 1 serving using the ingredients listed, not including any optional ingredients. Actual macros may vary slightly depending on specific brands and types of ingredients used.
To determine the weight of one serving, prepare the recipe as instructed. Weigh the finished recipe, then divide the weight of the finished recipe (not including the weight of the container the food is in) by the desired number of servings. Result will be the weight of one serving.
Did you make this recipe?
Please consider Pinning it!