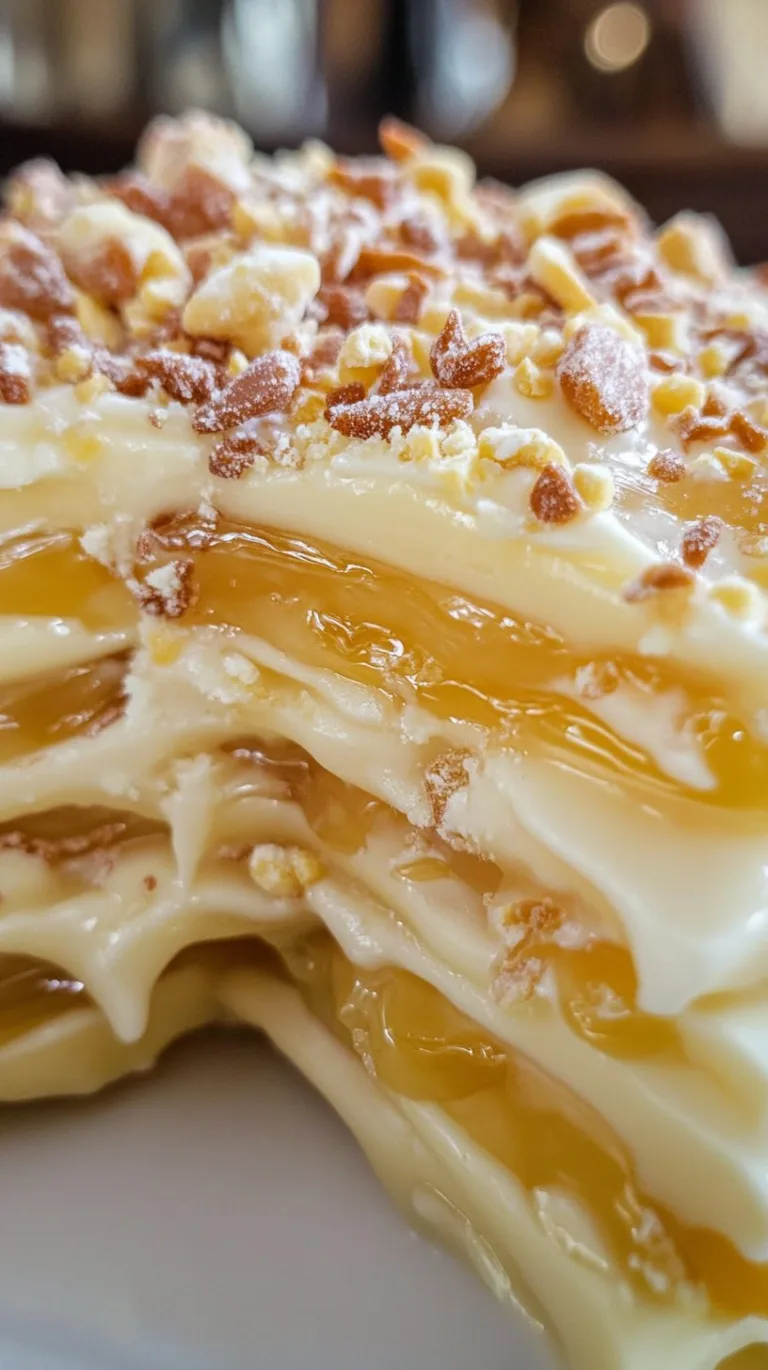
If you’ve never made Boston Cream Donuts at home before, let me tell you—it’s a bit of an adventure, but in all the right ways. First time I tried, I managed to get flour absolutely everywhere, then realized halfway through I didn’t have enough eggs (classic). But when you bite into that donut with its soft, pillowy inside, rich custard that oozes out, and that not-so-perfectly-smooth chocolate glaze, you kind of forget about every little mishap along the way. Actually, making these at home always reminds me of Saturday mornings growing up; my dad would bring back a dozen donuts from the local bakery—Boston Cream was my absolute favorite, even if it left my hands coated in chocolate for the rest of the morning!

So, why should you give these a try?
I make these when the craving hits for something sweet and ridiculously satisfying, but I don’t want to drive 20 minutes for a bakery treat (also, I refuse to pay $3 for a single donut anymore!). My family goes wild for these—my partner especially; actually, once he ate three in one sitting and then went for a run. I love that you can fill them to the brim with custard, and it’s totally okay if some spills out the side. Honestly, they’re a little messy and a lot indulgent—the only thing that frustrates me is waiting for the dough to rise (patience is not my superpower, though it’s worth it here).
Here’s what you’ll need—and a few swaps if you like
- 3 cups (375g) all-purpose flour (if I run out, half bread flour and half cake flour works in a pinch, but don’t tell my baker friend)
- 1/4 cup (50g) granulated sugar
- 2 1/4 tsp active dry yeast (or just use instant yeast—the rise feels the same to me, honestly)
- 3/4 cup (180ml) whole milk, warmed (sometimes I use 2% if that’s all that’s left)
- 1/4 cup (55g) unsalted butter, melted (margarine works, but the taste isn’t as rich)
- 1 large egg (once I used two small eggs; they did the job)
- 1/2 tsp salt
- Vegetable oil, for frying (I usually just eyeball enough to fill my pot about 2 inches deep)
Cream Filling:
- 1 cup (240ml) whole milk
- 3 tbsp granulated sugar
- 2 egg yolks (if you don’t want to waste the whites, throw them in an omelette!)
- 2 tbsp cornstarch
- 1 tsp vanilla extract (my grandmother always insisted on the real stuff, but honestly any version works fine)
- 1 tbsp unsalted butter
Glaze:
- 3 oz (85g) semi-sweet chocolate, chopped (milk chocolate tastes sweeter if you want more dessert-vibes)
- 2 tbsp unsalted butter
- 3 tbsp whole milk
- 3/4 cup (90g) powdered sugar
Let’s get these donuts going!
- Make the donut dough: In a big bowl, whisk together flour, sugar, and salt. In a separate small bowl, dissolve yeast in warm milk—let it sit until a bit bubbly (like 5 minutes tops—the impatient version is me stirring enthusiastically until it sort of froths). Add melted butter and egg; mix it all up until it comes together. I use a wooden spoon and then ditch the spoon for my hands.
- Knead until it’s elastic and smooth (about 10 minutes by hand, or 7 minutes in a mixer if you’ve got one). Lightly oil the bowl and plop the dough back in, covered with a dish towel. Let it rise somewhere warm for an hour—go watch half a movie or scroll your phone. If your kitchen is chilly, I stick mine in the oven with just the light on.
- Once the dough is doubled and puffy, punch it down (my favorite part). Roll it out on a floured surface to about 1/2 inch thick. Cut out circles using a cookie cutter or any glass you’ve got on hand—about 3-inch wide is good. Place the rounds on parchment, cover, let them rest for 20–30 minutes. They’ll puff up a bit more (honestly, if they spread a little, it doesn’t matter; they fry up awesome anyway).
- Meanwhile, make the filling: Whisk egg yolks, sugar, and cornstarch together in a bowl (the mixture looks odd but keep going). Heat milk in a saucepan until just steaming—not boiling! Slowly whisk the hot milk into the egg mix, then pour it all back into the pan. Cook over medium-low heat, whisking, until thick and pudding-like (it’ll go lumpy before it smoothes out—don’t panic). Remove from heat, stir in vanilla and butter. Chill it in the fridge—press a bit of plastic wrap on top to avoid that weird skin.
- Heat your oil to about 350°F (175°C). Carefully lower in a few dough rounds at a time; fry 1-2 minutes per side, until golden brown. Flip with a slotted spoon (I’ve dropped one before—splashes everywhere, so go slow). Drain on paper towels. Let cool a bit, otherwise you’ll melt the filling instantly.
- Make the glaze: Melt the chocolate, butter, and milk together—microwave or double boiler; either works. Stir till smooth (it smells amazing). Whisk in powdered sugar. If it’s too thick, add a teeny splash more milk. If it’s runny, just let it sit for a couple minutes.
- Fill the donuts: Use a small sharp knife to poke a hole in the side of each donut, then pipe or spoon in the cooled cream (I’ve used a zip-top bag when I lost my piping tip). You’ll be tempted to overfill—go for it. It’s half the fun.
- Dunk the tops of the filled donuts in the chocolate glaze. I always get it everywhere; don’t sweat it. Let the glaze set—or eat one right away, no one’s judging.

Some honest notes direct form my kitchen
- If the custard gets lumpy, you can whisk like crazy or just pass it through a sieve (no shame in cheating a little for smoothness).
- The dough can feel super sticky; just keep dusting your hands, or stick it in the fridge for 20 min if it’s driving you wild.
- If your donuts taste greasy, your oil was too cool—let it get good and hot before frying the next batch.
Stuff I’ve experimented with
Once I tried stuffing these with chocolate pudding. It tasted…not right; the donut wanted old-school vanilla custard. But swapping the semi-sweet chocolate for dark makes the glaze extra rich—totally recommend. I’ve also let the custard cool in the freezer for twenty minutes for a super thick bite. (Just don’t forget about it, or you’ll have frozen chunks!)

What you’ll need (and what to do if you don’t have it)
- Large mixing bowl (or just use a big soup pot—done it, still works)
- Whisk, wooden spoon
- Rolling pin (I’ve used a wine bottle when my pin wandered off)
- 3-inch round cutter or glass
- Small saucepan (nonstick is a treat but not mandatory)
- Piping bag or zip-top bag
- Slotted spoon or even a big fork
- Thermometer is great for oil, but honestly, I drop in a little cube of bread—if it bubbles and turns golden, you’re good
Getting them to actually last (but they won’t)
They’re honestly best fresh, but you can store these covered at room temp for up to 24 hours. The filling’s fine in the fridge another day—if you live with snackers, good luck making them last that long. Sometimes I make the custard the day before to get ahead (and then sneak a spoonful after dinner, whoops).
How I love to serve them
The best way, in my book? Coffee, sunshine, maybe one more donut than you planned. My uncle dunks them—looks messy, but I kinda get it. We once added sprinkles for a birthday breakfast—instant party vibes. (Okay, these are amazing warm, just saying.)
Mistakes you can learn from me (I made them so you don’t have to)
- Don’t rush the dough rising—it really is fluffier if you just wait. I’ve tried speeding it up by blasting heat: nope, turned out chewy.
- If you skip cooling the donuts before filling, the cream runs everywhere. (Learned this the hard way. Twice.)
- Trying to double the recipe in one pot. Disaster. Just do a batch at a time.
Actual questions I’ve gotten (yes, people text me about donuts!)
- Can I bake these instead of frying? You can, but they’ll taste more like filled buns than that classic donut flavor. Try 375°F for 12–14 minutes. Not my favorite, but okay in a pinch.
- Do I really need a thermometer? Nope, but it makes frying a little less stressful. Otherwise, use the old bread-cube trick I mentioned above.
- Can I use store-bought custard? You bet—no one will know except you (and maybe your tastebuds, but who cares on a busy day?).
- Help! My glaze is lumpy! Warm it gently and whisk—a little extra milk will smooth things out. Or just spread it anyway; it tastes the same.
- Are these okay to freeze? The donuts freeze alright (unfilled), but the custard? It does weird things. If you really want to, freeze just the donuts, then fill and glaze after thawing.
Who knows, maybe you’ll end up with a new Saturday tradition (and probably a sticky counter). Enjoy!
Ingredients
- 3 cups (375g) all-purpose flour (if I run out, half bread flour and half cake flour works in a pinch, but don’t tell my baker friend)
- 1/4 cup (50g) granulated sugar
- 2 1/4 tsp active dry yeast (or just use instant yeast—the rise feels the same to me, honestly)
- 3/4 cup (180ml) whole milk, warmed (sometimes I use 2% if that’s all that’s left)
- 1/4 cup (55g) unsalted butter, melted (margarine works, but the taste isn’t as rich)
- 1 large egg (once I used two small eggs; they did the job)
- 1/2 tsp salt
- Vegetable oil, for frying (I usually just eyeball enough to fill my pot about 2 inches deep)
- 1 cup (240ml) whole milk
- 3 tbsp granulated sugar
- 2 egg yolks (if you don’t want to waste the whites, throw them in an omelette!)
- 2 tbsp cornstarch
- 1 tsp vanilla extract (my grandmother always insisted on the real stuff, but honestly any version works fine)
- 1 tbsp unsalted butter
- 3 oz (85g) semi-sweet chocolate, chopped (milk chocolate tastes sweeter if you want more dessert-vibes)
- 2 tbsp unsalted butter
- 3 tbsp whole milk
- 3/4 cup (90g) powdered sugar
Instructions
-
1Make the donut dough: In a big bowl, whisk together flour, sugar, and salt. In a separate small bowl, dissolve yeast in warm milk—let it sit until a bit bubbly (like 5 minutes tops—the impatient version is me stirring enthusiastically until it sort of froths). Add melted butter and egg; mix it all up until it comes together. I use a wooden spoon and then ditch the spoon for my hands.
-
2Knead until it’s elastic and smooth (about 10 minutes by hand, or 7 minutes in a mixer if you’ve got one). Lightly oil the bowl and plop the dough back in, covered with a dish towel. Let it rise somewhere warm for an hour—go watch half a movie or scroll your phone. If your kitchen is chilly, I stick mine in the oven with just the light on.
-
3Once the dough is doubled and puffy, punch it down (my favorite part). Roll it out on a floured surface to about 1/2 inch thick. Cut out circles using a cookie cutter or any glass you’ve got on hand—about 3-inch wide is good. Place the rounds on parchment, cover, let them rest for 20–30 minutes. They’ll puff up a bit more (honestly, if they spread a little, it doesn’t matter; they fry up awesome anyway).
-
4Meanwhile, make the filling: Whisk egg yolks, sugar, and cornstarch together in a bowl (the mixture looks odd but keep going). Heat milk in a saucepan until just steaming—not boiling! Slowly whisk the hot milk into the egg mix, then pour it all back into the pan. Cook over medium-low heat, whisking, until thick and pudding-like (it’ll go lumpy before it smoothes out—don’t panic). Remove from heat, stir in vanilla and butter. Chill it in the fridge—press a bit of plastic wrap on top to avoid that weird skin.
-
5Heat your oil to about 350°F (175°C). Carefully lower in a few dough rounds at a time; fry 1-2 minutes per side, until golden brown. Flip with a slotted spoon (I’ve dropped one before—splashes everywhere, so go slow). Drain on paper towels. Let cool a bit, otherwise you’ll melt the filling instantly.
-
6Make the glaze: Melt the chocolate, butter, and milk together—microwave or double boiler; either works. Stir till smooth (it smells amazing). Whisk in powdered sugar. If it’s too thick, add a teeny splash more milk. If it’s runny, just let it sit for a couple minutes.
-
7Fill the donuts: Use a small sharp knife to poke a hole in the side of each donut, then pipe or spoon in the cooled cream (I’ve used a zip-top bag when I lost my piping tip). You’ll be tempted to overfill—go for it. It’s half the fun.
-
8Dunk the tops of the filled donuts in the chocolate glaze. I always get it everywhere; don’t sweat it. Let the glaze set—or eat one right away, no one’s judging.
CLICK FOR NUTRITION INFO
↑
Approximate Information for One Serving
Serving Size:
1 serving
Calories:
320 caloriescal
Protein:
6gg
Fat:
15gg
Saturated Fat:
0g
Trans Fat:
0g
Cholesterol:
0mg
Sodium:
0mg
Potassium:
0mg
Total Carbs:
41gg
Fiber:
0g
Sugar:
0g
Net Carbs:
0g
Vitamin A:
0
Vitamin C:
0mg
Calcium:
0mg
Iron:
0mg
Nutrition Disclaimers
Number of total servings shown is approximate. Actual number of servings will depend on your preferred portion sizes.
Nutritional values shown are general guidelines and reflect information for 1 serving using the ingredients listed, not including any optional ingredients. Actual macros may vary slightly depending on specific brands and types of ingredients used.
To determine the weight of one serving, prepare the recipe as instructed. Weigh the finished recipe, then divide the weight of the finished recipe (not including the weight of the container the food is in) by the desired number of servings. Result will be the weight of one serving.
Did you make this recipe?
Please consider Pinning it!