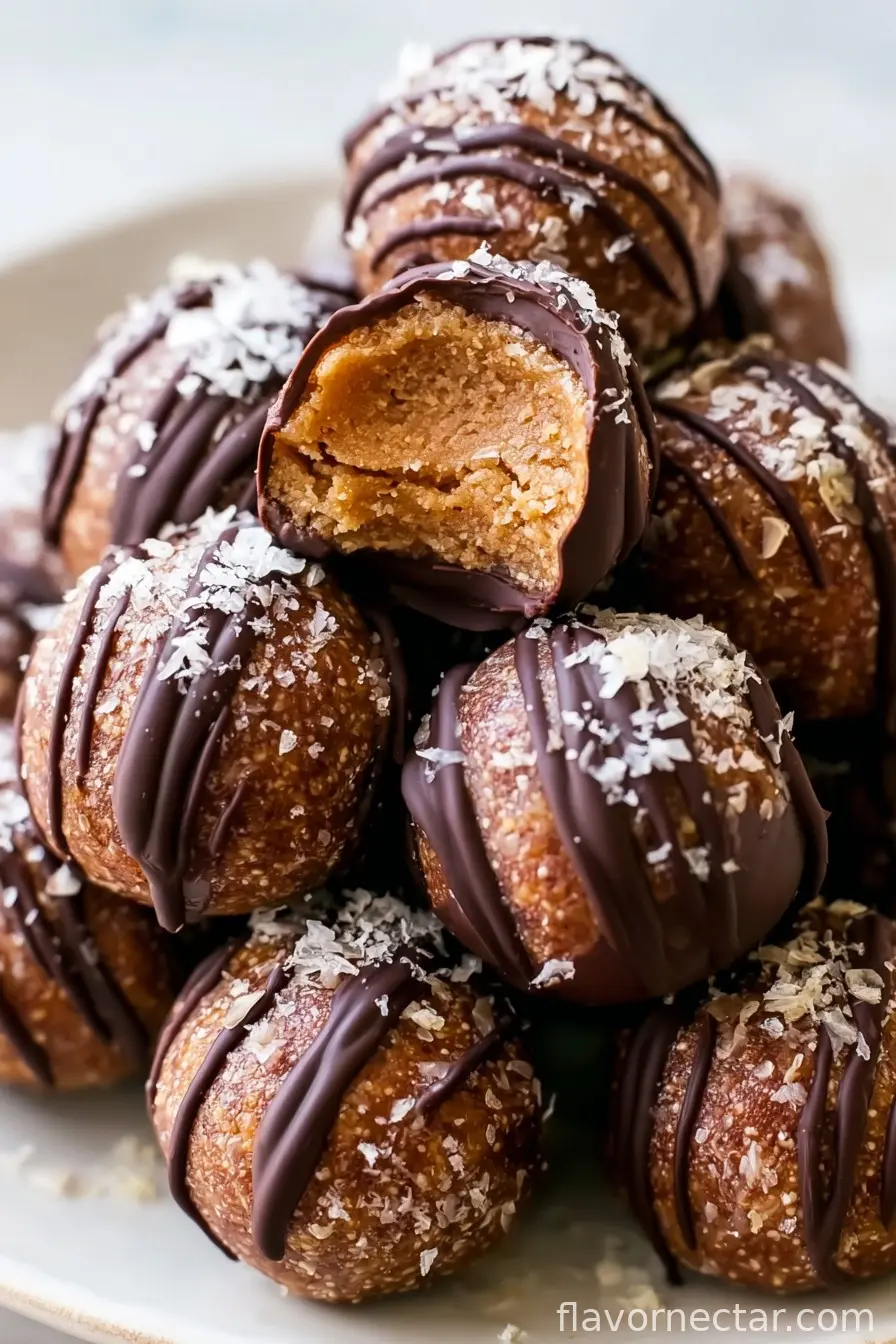
If you’ve ever found a lonely banana going spotty brown in your fruit bowl, welcome to the club—happens around here at least once a week. That’s when I whip up these Banana Bread Protein Balls. Honestly, I started making them during one of those snack attacks when you want Banana Bread, but waiting an hour for the oven seems like a cruel joke. Now, half my extended family texts me for the recipe whenever I mention I’ve made a fresh batch (no exaggeration—it’s like word travels by banana telegraph). Once, I brought them to a book club, and they vanished faster than spoilers at a mystery novel reveal. There’s something about the combo of creamy almond butter, a touch of cinnamon, and that slightly gooey chocolate top that makes everyone think they’re fancier than they actually are. Real talk though? They’re simple enough to make with one hand while wrangling a toddler (not that I’d know…).
Why You’ll Love Making These Protein Balls
I make these when I want something sweet but not so sweet that I regret it; you know? My family goes a little wild for them—especially because they’re just as good after a few days in the fridge (if we don’t inhale them immediately, which, let’s be honest, almost never happens). Sometimes I try to sneak the batch away for my own mid-afternoon snack and fail—my partner always finds them. What I love most is, you get all that banana bread-y goodness with a lot less fuss and none of the oven drama. Oh, pro tip? If you’re like me and occasionally make a mess with the melted chocolate, don’t stress. Even a messy drizzle tastes fabulous!
Gathering What You’ll Need (and a Few Cheeky Swaps)
- 1 ripe banana (120g), mashed (if yours is a tad bigger don’t sweat it, but a super-ripe banana really amps the flavor!)
- ¾ cup (112g) oat flour (sometimes I blitz rolled oats in my blender if I run out—totally works!)
- ½ cup almond butter (my grandmother insisted on the chunky kind, but smooth is great too)
- ⅓ cup (45g) vanilla plant-based protein powder (this is what I use, but I’ve tried chocolate, and it’s… well, very chocolatey!)
- ¼ cup mini chocolate chips (regular chips are fine, the minis just scatter more evenly)
- 3 tablespoons maple syrup (honey’s okay in a pinch, but the flavor is a bit different)
- ½ teaspoon cinnamon (feel free to be heavy-handed if cinnamon is your thing—I often am)
- ¼ teaspoon salt (I use sea salt, but table salt won’t ruin it)
- For The Chocolate Coating:
- ½ cup chocolate chips (I usually go for dark, but any type works—my cousin swears by milk chocolate)
- 1 teaspoon coconut oil
- Flaky sea salt, for topping (completely optional—but honestly, it makes them feel a little posh)
Alright, Here’s How You Make ‘Em
- Mash your banana. Grab a medium bowl and mush up that banana until it’s basically a puddle. No chunks left—you want it super smooth, like baby food (or at least, that’s what I aim for, though sometimes I leave a bit too much texture and it’s still fine!)
- Mix it all together. Chuck in your oat flour, almond butter, protein powder, mini chocolate chips, maple syrup, cinnamon, and salt. I stir first with a spoon, but (full disclosure) usually end up switching to my hands. It’ll be thick and kind of sticky—just embrace the mess; it’s part of the fun!
- Shape the balls. Either grab a small cookie scoop or just use your hands. Roll the dough into balls about the size of a walnut. You’ll get around 14, give or take. Size isn’t critical—make them bigger for a more substantial snack, smaller if you’re feeding a crowd. (Also, this is where I usually sneak a taste. Quality control!)
- Chill so they firm up. Toss your lovely orbs onto a plate or baking sheet and pop them in the freezer for 10–15 minutes. They set up quickly. Don’t forget about them though—I did once and came back to little ice cubes!
- Melt the chocolate. In a small microwave-safe bowl, combine the ½ cup chocolate chips and coconut oil. Zap them in 30-second bursts, stirring after each, until smooth and glossy. Should take about 1 to 1.5 minutes max. (If you don’t have a microwave, a double boiler on the stove is totally fine; just don’t wander off or the chocolate will seize!)
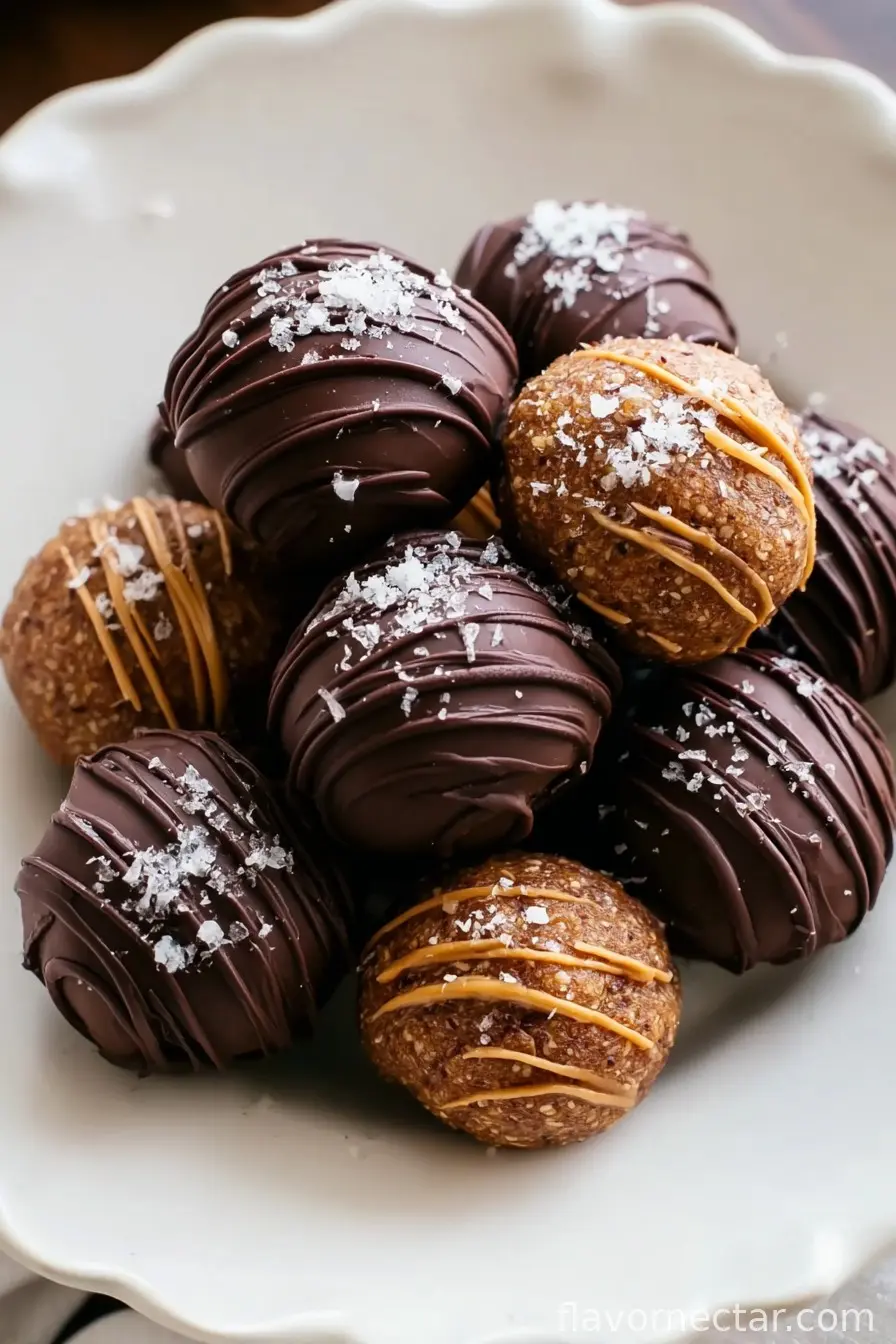
- Dip and finish. Using a fork or spoon (or, honestly, your fingers if you don’t mind a little mess), dunk each protein ball in the melted chocolate, letting the extra drip off. Set them back on parchment or a plate. Too lazy to dip? Just drizzle the chocolate over the top—works like a charm. Before the chocolate hardens, sprinkle on some flaky sea salt if you want to feel fancy, or skip it if you’re not in the mood.
- Final chill. Pop the chocolate-covered balls back into the fridge or freezer for another 10–15 minutes so the coating sets firm. After that, either dig in or move them to an airtight container for later (though they don’t last long around here—I caught my neighbor with one last week!)
A Few Honest Notes (Because Perfection is Overrated)
- If your dough feels way too sticky, try adding a smidge more oat flour. Too dry? Another dab of almond butter usually does the trick.
- Swapping peanut butter for almond butter didn’t win any popularity contests in my house, but maybe that’s just us.
- Dark chocolate is awesome here, but milk or even white chocolate works if it’s what you’ve got. Go wild.
- If you use honey instead of maple syrup, you might need a tiny bit less—taste as you go.
Variations I’ve Played With (and a Fail or Two)
- Sometimes I roll the finished balls in crushed nuts for a bit of crunch—pecans are my favorite.
- I tried adding a scoop of Greek yogurt once. Super creamy, but the mixture got too sticky to handle, so I had to abandon that plan (learn form my mistakes!).
- Throwing in shredded coconut is a good way to fancy things up—plus, it keeps the balls from sticking together in a container.
Equipment (Plus Improv Tips!)
- Bowl for mixing (bonus points for a second one for the chocolate, but I just rinse and reuse most of the time)
- Fork for mashing, spoon for mixing. Or, hands work great if you’re brave!
- Parchment paper is nice, but in a pinch, a clean plate is totally fine for resting the balls
- Microwave for melting the chocolate. No microwave? A heatproof bowl over simmering water works too. No heatproof bowl? Well, that’s a conundrum—maybe just skip the chocolate or ask your neighbor!
Storage (But Good Luck Making Them Last)
Once they’ve set, I keep these in an airtight container in the fridge where they’ll technically last for up to a week. But, in my house, if they make it past Day 2, it’s basically a miracle (I’ve even hidden a few behind the broccoli to save them for myself, but shhh!). They freeze really well if you want to stretch them out (just give them 10 minutes at room temp before eating so you don’t chip a tooth—I’ve learned the hard way!).
How We Love to Serve ‘Em
Most mornings my partner grabs two as a grab-and-go breakfast, but I like them best with a strong cup of milky tea around mid-afternoon slump o’clock. Sometimes, I serve them at get-togethers with fresh berries—very posh! And if you’re feeling wild, crumble a few over Greek yogurt and call it a protein sundae. Why not?
Real-Life Pro Tips I Wish Someone Had Told Me
- Don’t skip chilling before dunking in chocolate—if they’re too soft, they dive bomb right into the chocolate and you’ll be fishing them out with a spoon (yes, speaking from experience!)
- Go easy on the protein powder; too much and they end up powdery. I once experimented with an extra scoop and… yeah, don’t do that.
- If the chocolate seizes, just add a tiny splash more coconut oil and stir like mad—it usually comes back.
Frequently Asked Questions
-
Do I have to use plant-based protein powder?
If you’ve only got whey, that’ll work too. The texture might change a smidge, but not so much that anyone’s mad about it. -
Can I skip the chocolate coating?
Absolutely—sometimes I get lazy and just drizzle a little, other times I skip it entirely and nobody complains. -
Is this safe for kids or folks with allergies?
As long as nobody’s allergic to almonds or the other ingredients, you’re good! Swap sunflower seed butter if you need nut-free (yep, I’ve tried it and it’s not bad at all). -
Can I double the batch?
Oh, 100%. Actually, I’d recommend it if you’ve got snack-hounds in your house. -
Mine are too sticky/dry—what do I do?
Add extra oat flour (tiny bits at a time) if too sticky; more nut butter if too dry. It’s all very forgiving.
Alright, enough chit-chat. Go make some Banana Bread Protein Balls! And if you invent a wild variation, send it my way—always up for an experiment (successful or not).
Ingredients
- 1 ripe banana (120g), mashed
- ¾ cup (112g) oat flour
- ½ cup almond butter
- ⅓ cup (45g) vanilla plant-based protein powder
- ¼ cup mini chocolate chips
- 3 Tablespoon maple syrup
- ½ teaspoon cinnamon
- ¼ teaspoon salt
- ½ cup chocolate chips
- 1 teaspoon coconut oil
- Flaky sea salt, for topping
Instructions
-
1Grab a medium bowl and mush up that banana until it’s basically a puddle. No chunks left—you want it super smooth, like baby food (or at least, that’s what I aim for, though sometimes I leave a bit too much texture and it’s still fine!)
-
2Chuck in your oat flour, almond butter, protein powder, mini chocolate chips, maple syrup, cinnamon, and salt. I stir first with a spoon, but (full disclosure) usually end up switching to my hands. It’ll be thick and kind of sticky—just embrace the mess; it’s part of the fun!
-
3Either grab a small cookie scoop or just use your hands. Roll the dough into balls about the size of a walnut. You’ll get around 14, give or take. Size isn’t critical—make them bigger for a more substantial snack, smaller if you’re feeding a crowd. (Also, this is where I usually sneak a taste. Quality control!)
-
4Toss your lovely orbs onto a plate or baking sheet and pop them in the freezer for 10–15 minutes. They set up quickly. Don’t forget about them though—I did once and came back to little ice cubes!
-
5In a small microwave-safe bowl, combine the ½ cup chocolate chips and coconut oil. Zap them in 30-second bursts, stirring after each, until smooth and glossy. Should take about 1 to 1.5 minutes max. (If you don’t have a microwave, a double boiler on the stove is totally fine; just don’t wander off or the chocolate will seize!)
-
6Using a fork or spoon (or, honestly, your fingers if you don’t mind a little mess), dunk each protein ball in the melted chocolate, letting the extra drip off. Set them back on parchment or a plate. Too lazy to dip? Just drizzle the chocolate over the top—works like a charm. Before the chocolate hardens, sprinkle on some flaky sea salt if you want to feel fancy, or skip it if you’re not in the mood.
-
7Pop the chocolate-covered balls back into the fridge or freezer for another 10–15 minutes so the coating sets firm. After that, either dig in or move them to an airtight container for later (though they don’t last long around here—I caught my neighbor with one last week!)
CLICK FOR NUTRITION INFO
↑
Approximate Information for One Serving
Serving Size:
1 serving
Calories:
140cal
Protein:
4 gg
Fat:
8 gg
Saturated Fat:
0g
Trans Fat:
0g
Cholesterol:
0mg
Sodium:
0mg
Potassium:
0mg
Total Carbs:
15 gg
Fiber:
0g
Sugar:
0g
Net Carbs:
0g
Vitamin A:
0
Vitamin C:
0mg
Calcium:
0mg
Iron:
0mg
Nutrition Disclaimers
Number of total servings shown is approximate. Actual number of servings will depend on your preferred portion sizes.
Nutritional values shown are general guidelines and reflect information for 1 serving using the ingredients listed, not including any optional ingredients. Actual macros may vary slightly depending on specific brands and types of ingredients used.
To determine the weight of one serving, prepare the recipe as instructed. Weigh the finished recipe, then divide the weight of the finished recipe (not including the weight of the container the food is in) by the desired number of servings. Result will be the weight of one serving.
Did you make this recipe?
Please consider Pinning it!