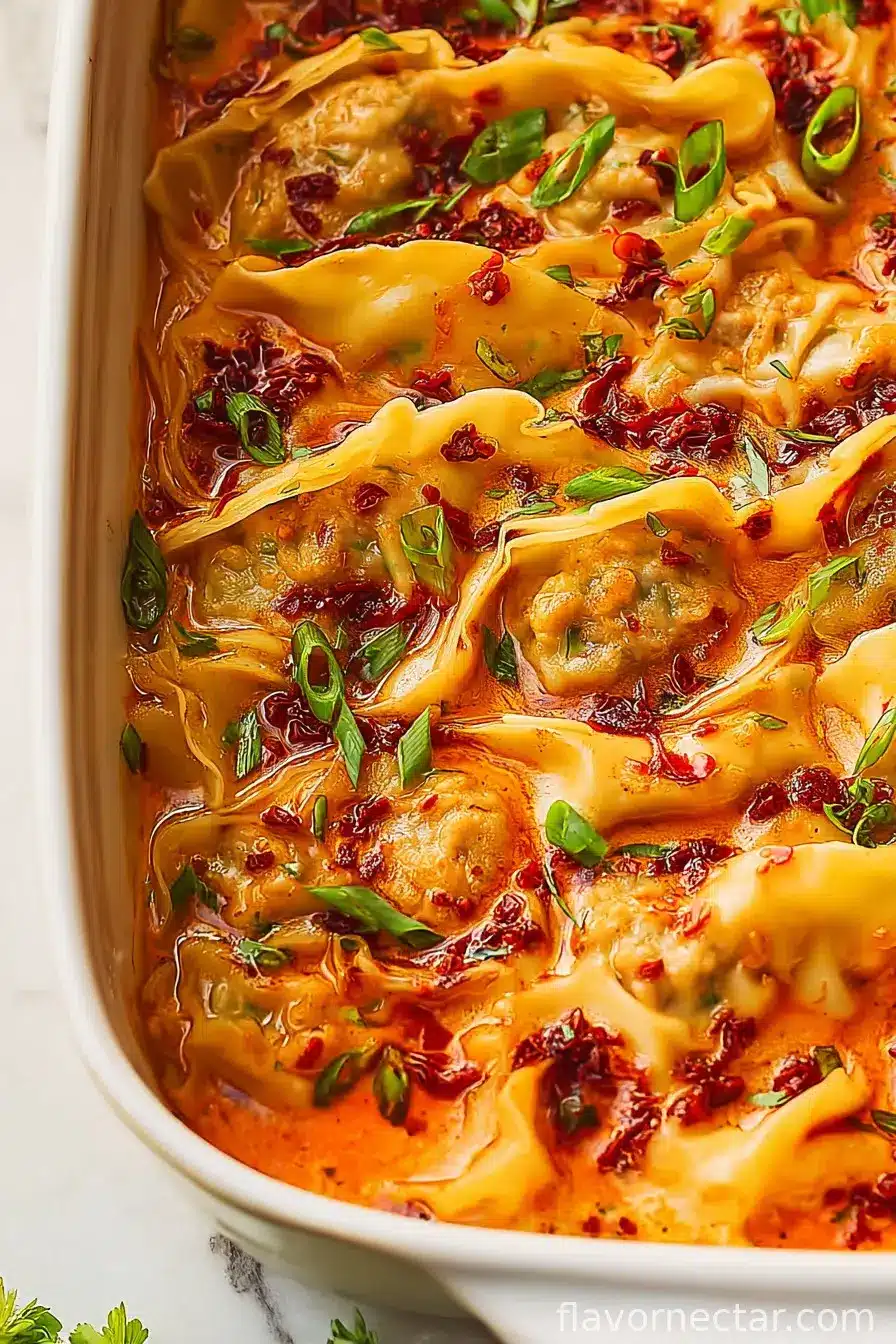
Okay, so you ever start thinking about dinner at like 5:03 p.m. and realize you haven’t defrosted a single thing? That was me last Wednesday, standing with my fridge door open and just hoping for inspiration or, honestly, divine intervention. Enter the viral Trader Joe’s Dumpling Bake. I first tried this out of pure desperation (those TikTok videos made it look so easy, and I am nothing if not easily influenced after work). But wow, it came out so good my family asked why I don’t cook ‘like this’ all the time. Still laughing about that one.
Why I Keep Coming Back to This Dumpling Bake
I make this when I’m craving a cozy, weeknight dinner but literally cannot be bothered with more than one pan. My family goes absolutely wild for it—like, fighting-over-the-last-scoop wild (yes, I may have hidden a portion in the back of the fridge once…or twice). It’s the best for those ‘oops, I forgot to meal-plan’ evenings because you just sort of layer everything and bake. There is a weird stage where you think, ‘is this becoming soup?’ but I promise, by the end, everything comes together. Oh, and I finally stopped burning my fingers by using a mitt, because yes, I used to just go in with a towel like an amateur.
What You’ll Need (and What You Can Swap Out)
- 1 20-ounce bag Trader Joe’s Chicken Gyoza Potstickers (or veggie, or the pork ones—sometimes I use store-brand if I can’t find TJ’s, still works!)
- 1 cup frozen mixed veggies (I use the blend with corn, peas, carrots, and beans—sometimes just corn if that’s all I’ve got)
- 1 cup shredded mozzarella (I’ve subbed cheddar when that’s all that’s left, a little weird but honestly, not bad)
- 1/2 cup sliced scallions (my grandmother always insisted on scallions for ‘good luck’—but you can use chives or skip it, no one will really notice)
- 1 cup Trader Joe’s Gyoza Sauce (or, in a pinch, soy sauce mixed with a splash of rice vinegar and a bit of honey—it’s not the exact same but it’ll do!)
- 1/2 cup water (or chicken broth for a little more flavor, but water is the no-brainer here)
- Optional: 1 tablespoon sesame seeds for sprinkling (sometimes I forget these—don’t sweat it)
How To Put This Delicious Mess Together
- Preheat your oven to 375°F (or 190°C). Don’t skip this—you want it hot so the dumplings get nice and golden. If you have an old oven like mine, maybe set it a bit higher; mine is always lying to me.
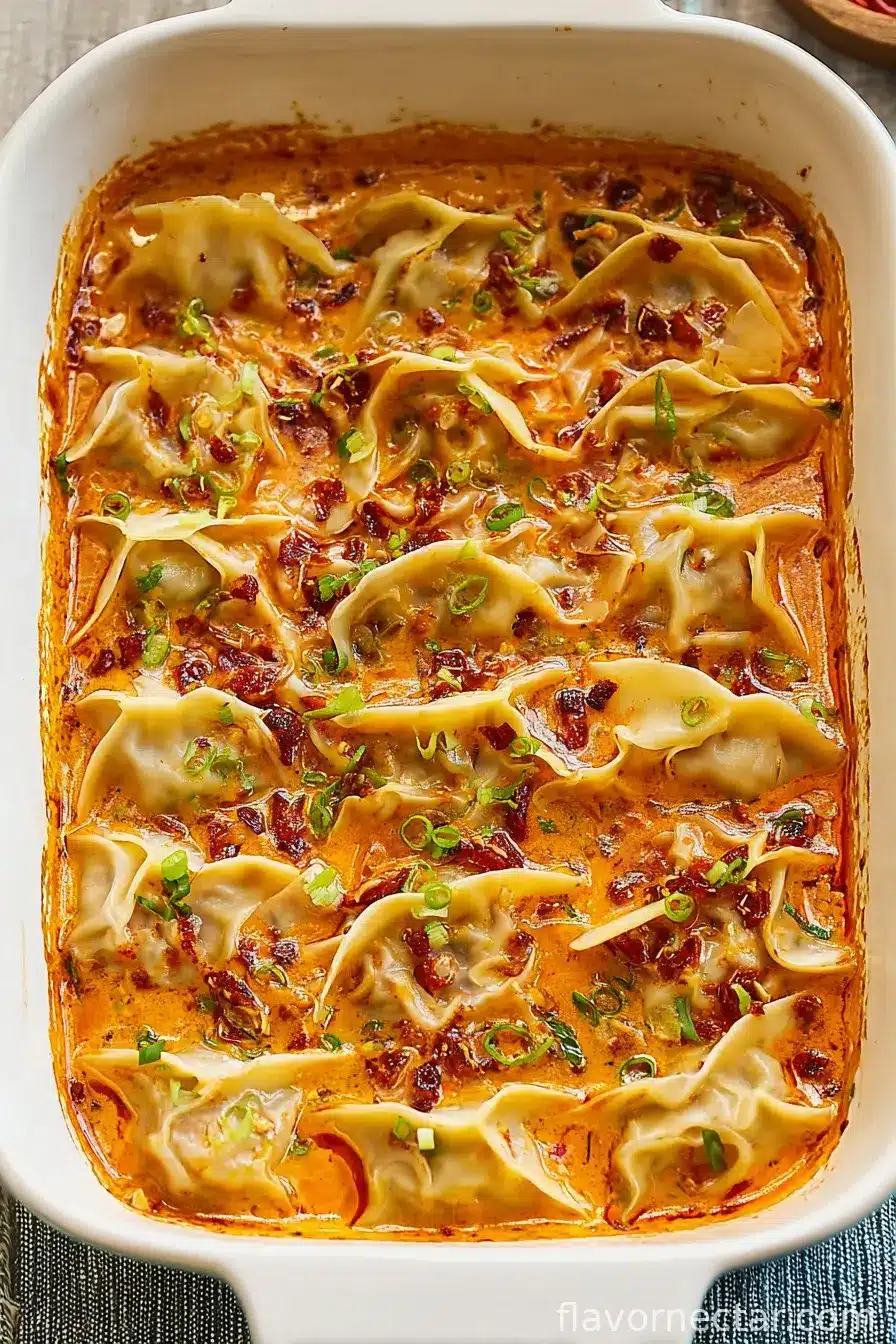
- Grab a 9×13-inch baking dish and spread your frozen gyoza in a single layer. Don’t worry if they’re a little clumped. They break apart in the oven anyway (I usually give them a little nudge with a spoon halfway through).
- Scatter the frozen mixed veggies all over the top. No need to thaw them—straight form the bag is just fine.
- Pour the gyoza sauce over everything, making sure you hit most of the dumplings. Add the water (or broth), just drizzled around, not dumped all in one spot.
- Toss on your shredded cheese—cover as much as you can, but it doesn’t have to be perfect. This is where I usually sneak a handful of cheese for myself. Tradition.
- Bake uncovered for 35 minutes. Halfway through, open the oven and stir things up a bit (it always looks kinda weird at this stage; trust me, you want to get things moving so nothing dries out).
- Check the top: cheese should be bubbly and kinda browned. If not, give it another 3–5 minutes. (I once broiled it for a minute and… well, I ate the crispy bits for myself.)
- Sprinkle with scallions and sesame seeds. Try to let it cool for at least 10 minutes before serving, but who am I kidding? No one ever waits.
Honestly Useful Notes From My Many (Many) Attempts
- If you add too much sauce it can get a little swampy. Start with the smaller amount, you can always add more after it’s done.
- The veggie gyoza need a tiny bit less time than the chicken. I learned the hard way after my first try went a little mushy—but it still tasted good!
- Don’t skip the cheese. I did once (trying to be ‘healthier’) and, wow, major regret.
Variations I’ve Actually Tried (And a Flop)
- Spicy kick: Sriracha drizzle over the top is amazing—if you love heat as much as I do.
- Asian BBQ vibes: Swapped out half the gyoza sauce for Korean BBQ sauce; really tasty, but if you go all in, it gets a bit too sweet.
- One-bowl version: Tried making it in a deep dish so it was extra saucy; honestly, a bit much (borderline dumpling casserole soup… not my best work).
Gear (Don’t Freak Out If You’re Missing Something)
I always use my trusty glass 9×13 dish, but a big oven-safe skillet works in a pinch. Forgot to grease your dish? Eh, there’s enough sauce, cleaning is only a minor headache.
Will It Actually Keep? Storage Tips
Store leftovers in some kind of airtight container in the fridge. Lasts 2–3 days, though honestly, in my house it never makes it past breakfast the next day. Weird but true: I think it tastes even better reheated—the sauce just soaks in more.
What Do We Eat This With? Serving Thoughts
We usually just scoop it straight into bowls and slurp away while binge-watching something. But if you’re feeling fancy, sprinkle some extra scallions or plop it over steamed rice. On Sundays, I sometimes add a fried egg on top (overkill? Maybe, but it works for us!).
Stuff I Learned the Hard Way (Pro Tips For Real Life)
- Patience is your friend: I once tried to rush the bake at 425°F and everything kind of exploded. Just… don’t.
- Don’t skip the mid-bake stir—even if it looks watery at first. This is when the magic happens.
- Covering with foil doesn’t help. I thought it’d keep things moist. Nope. It just makes the top less spot-on.
Real Questions (And My Honest, Sometimes Rambly Answers)
-
Q: Can I use homemade dumplings?
Honestly, yes—but I only tried this once, and found it just as good (well, almost?) with frozen. Plus, who has time for homemade on a Tuesday? -
Q: Is there a vegetarian version?
Totally! The veggie gyoza are really solid here. Maybe go easy on the cheese if you want to keep it lighter. -
Q: Sauce alternatives?
Look, any savory, Asian-y sauce works. Oyster sauce plus water, even teriyaki, can stand in if you’re in a pinch. -
Q: Can I freeze the leftovers?
Hmmm, only if you really must. The texture gets a bit odd after freezing. Much better to just eat it as is—c’mon, it’s not going to last that long anyway! -
Q: What if I don’t have mozzarella?
Cheddar, Monterey Jack—even a sprinkle of parmesan if you want a salty kick. Just don’t use blue cheese. Learned that one the hard way.
Anyway, there you have it. Enjoy, mess and all! And if you find an even better sauce combo, feel free to send me a note. Or just eat an extra serving—I won’t tell.
Ingredients
- 1 20-ounce bag Trader Joe’s Chicken Gyoza Potstickers (or veggie, or the pork ones—sometimes I use store-brand if I can’t find TJ’s, still works!)
- 1 cup frozen mixed veggies (I use the blend with corn, peas, carrots, and beans—sometimes just corn if that’s all I’ve got)
- 1 cup shredded mozzarella (I’ve subbed cheddar when that’s all that’s left, a little weird but honestly, not bad)
- 1/2 cup sliced scallions (my grandmother always insisted on scallions for ‘good luck’—but you can use chives or skip it, no one will really notice)
- 1 cup Trader Joe’s Gyoza Sauce (or, in a pinch, soy sauce mixed with a splash of rice vinegar and a bit of honey—it’s not the exact same but it’ll do!)
- 1/2 cup water (or chicken broth for a little more flavor, but water is the no-brainer here)
- Optional: 1 tablespoon sesame seeds for sprinkling (sometimes I forget these—don’t sweat it)
Instructions
-
1Preheat your oven to 375°F (or 190°C). Don’t skip this—you want it hot so the dumplings get nice and golden. If you have an old oven like mine, maybe set it a bit higher; mine is always lying to me.
-
2Grab a 9×13-inch baking dish and spread your frozen gyoza in a single layer. Don’t worry if they’re a little clumped. They break apart in the oven anyway (I usually give them a little nudge with a spoon halfway through).
-
3Scatter the frozen mixed veggies all over the top. No need to thaw them—straight form the bag is just fine.
-
4Pour the gyoza sauce over everything, making sure you hit most of the dumplings. Add the water (or broth), just drizzled around, not dumped all in one spot.
-
5Toss on your shredded cheese—cover as much as you can, but it doesn’t have to be perfect. This is where I usually sneak a handful of cheese for myself. Tradition.
-
6Bake uncovered for 35 minutes. Halfway through, open the oven and stir things up a bit (it always looks kinda weird at this stage; trust me, you want to get things moving so nothing dries out).
-
7Check the top: cheese should be bubbly and kinda browned. If not, give it another 3–5 minutes. (I once broiled it for a minute and… well, I ate the crispy bits for myself.)
-
8Sprinkle with scallions and sesame seeds. Try to let it cool for at least 10 minutes before serving, but who am I kidding? No one ever waits.
CLICK FOR NUTRITION INFO
↑
Approximate Information for One Serving
Serving Size:
1 serving
Calories:
430 caloriescal
Protein:
18gg
Fat:
16gg
Saturated Fat:
0g
Trans Fat:
0g
Cholesterol:
0mg
Sodium:
0mg
Potassium:
0mg
Total Carbs:
54gg
Fiber:
0g
Sugar:
0g
Net Carbs:
0g
Vitamin A:
0
Vitamin C:
0mg
Calcium:
0mg
Iron:
0mg
Nutrition Disclaimers
Number of total servings shown is approximate. Actual number of servings will depend on your preferred portion sizes.
Nutritional values shown are general guidelines and reflect information for 1 serving using the ingredients listed, not including any optional ingredients. Actual macros may vary slightly depending on specific brands and types of ingredients used.
To determine the weight of one serving, prepare the recipe as instructed. Weigh the finished recipe, then divide the weight of the finished recipe (not including the weight of the container the food is in) by the desired number of servings. Result will be the weight of one serving.
Did you make this recipe?
Please consider Pinning it!