Straight From My Kitchen: Vegan Korean Strawberry Milk
Let me tell you, the first time I tried making Vegan Korean Strawberry Milk at home, I had pink juice splatters everywhere and a sticky countertop for days. Still worth it. There’s just something pure joy-ish about real strawberries, creamy non-dairy milk, and that grown-up version of nostalgia in a glass—plus, it made my niece giggle for about fifteen straight minutes (which is the highest form of recipe endorsement, if you ask me). I love making a big batch and pretending it’s for the kids, but it’s mostly for me. Anyway, long story short: if you want a little pop of happiness in a cup, this is it.
Why You’ll Love This Little Sweet Treat (Promise!)
I make this when I want to remember summer even though there’s rain hitting the window. My family likes it because it’s actually made with real strawberries, not some bottle labeled “strawberry flavor.” (Fun fact: one time, I tried using the bottled stuff and my son described it as “sort of like strawberry, but also like cough syrup.” Lesson learned!) Plus, it’s dairy-free so even my cousin with a tricky stomach can have a big glass. If I had to sum it up—this is happiness in a glass, whether it’s blazing hot outside or you’re stuck inside binging dramas like me.
What You Need (and Some Handy Swaps)
- 1 pound strawberries, finely diced (about 2 ¾ cups) – I split it into two big handfuls: 2 cups for syrup, ¾ cup for the chunky bits. Sometimes, I’ll grab whatever berries are lurking in the fridge if I’m short. It’s not traditional, but it tastes just as good. My friend swears by organic, but honestly, a decent farm box haul works fine.
- ¼ cup cane or brown sugar – Go with what you have; brown makes it a hint richer, cane keeps it classic.
- Squeeze of lemon juice – Lime works in pinch, or even a splash of apple cider vinegar if you’re desperate (not my favorite, but it’ll do).
- 2-3 cups unsweetened non-dairy milk – I use unsweetened soy when I’m being proper, but oat, almond, honestly anything you’d usually use for cereal works here. Coconut wouldn’t be my first pick unless you like things super tropical, which I sometimes do on holidays!
How To Do It (Don’t Worry, It’s Never Perfect)
- Take that little ¾ cup of your diced strawberries, toss them into a bowl, and add 1 heaping tablespoon of sugar. Give them a really good stir — you want them to start looking glossy and give up some of their juice. Pop this to the side. If you forget it for an extra 10 minutes while you chase the dog off the counter (guilty), it’s totally fine.
- Now, take your 2 cups of diced strawberries, dump them in a saucepan with the rest of your sugar (that’s 3 tablespoons), and squeeze a good hit of lemon juice over the top—no need to measure perfectly, just don’t go overboard. Fire up the heat to bring it just to a boil, then immediately slide it down to just above a simmer. Stir often—it wants to stick sometimes—and let it bubble away for about 10 minutes. It’ll go syrupy and slightly jammy (this is where I usually do a taste-test with a spoon, but careful, it’s hot!). Don’t get too worried if it seems runny at first; it thickens up a bit as it cools.
- Scrape the syrup into a heatproof jar or bowl and stash it in the fridge until it’s nice and cold. I have, more than once, stuck it in the freezer for a speedy chill while I clean up the chaos. Just don’t forget it in there… unless you want strawberry ice cubes.
- Assembly time! Scoop 2-3 big spoonfuls of strawberry syrup into a glass (go on, be generous), then add about ¾ cup of your favorite non-dairy milk over the top. Throw in a handful of ice (unless it’s freezing outside, then maybe skip the ice), and finally, top it all off with a spoonful of those juicy, macerated strawberries you made earlier. Stir it up! Taste and see if it’s sweet enough for you—more syrup or more strawberries if you like. I always wind up adding extra syrup. Store anything leftover in the fridge for sweet emergencies.
A Few Notes I Wish I’d Known The First Time
- That syrup? It tastes even better after sitting overnight but goes fast in our house.
- I used to skip the lemon, but it actually brightens the whole thing up—don’t skip it unless you absolutely have to.
- If you like it chunky, keep the strawberry bits big. If smooth’s your thing, mash them up more before chilling.
Variations I’ve Tried (And a Fail or Two)
- I swapped in frozen strawberries once—tasted about 95% as good. Not bad in a pinch.
- If you sneak a slosh of vanilla extract into the milk, it’s like a dessert dream. But I tried cocoa powder once and, well… not my best idea. It just got weird.
- A little mint muddled in makes it brunchy, if that’s your vibe.
Equipment I Use (But You Don’t Actually Need Much)
- A saucepan for the syrup—anyone will do. I once used a battered camping pot and my neighbor never knew the difference.
- A decent sharp knife for the strawberries. Or, just use kitchen scissors if you’re lazy (I sometimes am).
- Honestly, any bowl and glass—it’s low-tech and forgiving. No fancy gadgets here.
How To Store It (If You Have Any Left…)
Stick any leftover syrup and macerated strawberries in jars in the fridge—should last about 3 days, probably more. But in my house, one teenager later and it’s gone by nightfall. The milk, though, always pour fresh when you’re ready to drink.
Here’s How I Like To Serve It
I usually pair this with a slice of toast for breakfast, or pour it into a fancy glass with a straw for movie nights. My cousin dunks shortbread in hers (I raised a skeptic). It’s actually kind of perfect with spicy snacks, too; cools your tongue down after a little too much gochujang.
What I’ve Learned The Hard Way (Pro Tips)
- Don’t try to rush the syrup on high heat—it’ll stick, scorch, and you’ll lose half your strawberries (yes, I did this, never again).
- Macerate the chunky berries for longer if you can; they get juicier and the flavors meld better.
- I once forgot the syrup in the freezer, so I discovered strawberry slush. Not terrible, but… not the plan.
Frequently Asked Questions (That I’ve Actually Been Asked!)
- Can I use regular dairy milk? – Sure, but then it’s not vegan. No judgement from me!
- What about other sweeteners? – Maple syrup works, but the taste is different. Agave is fine if that’s your thing, but I always come back to basic sugar.
- Can I blend the strawberries to make it all smooth? – Yup, just blitz the syrup and chunky bits together. On second thought, maybe strain for seeds if you really hate them.
- Do I have to keep it cold? – For best results, yes. Warm strawberry milk is… let’s say, an acquired taste. I wouldn’t bother with it.
- My syrup looks weird—help? – Don’t stress! It settles and looks a bit odd before you stir it all up. If it smells good, it’s fine. If in doubt, give it a good mix or zap it in the microwave (but let it cool before you pour over ice, trust me).
So, that’s my favorite way to make Vegan Korean Strawberry Milk. The only real rule: don’t overthink it. Enjoy the process and maybe wear an apron the first time. Or don’t—just have fun with it!
Ingredients
- 1 pound strawberries, finely diced (2 ¾ cups) – Divided into 2 cups and ¾ cup
- ¼ cup cane/brown sugar
- Squeeze of lemon juice
- 2-3 cups unsweetened non dairy milk
Instructions
-
1Take that little ¾ cup of your diced strawberries, toss them into a bowl, and add 1 heaping tablespoon of sugar. Give them a really good stir — you want them to start looking glossy and give up some of their juice. Pop this to the side. If you forget it for an extra 10 minutes while you chase the dog off the counter (guilty), it’s totally fine.
-
2Now, take your 2 cups of diced strawberries, dump them in a saucepan with the rest of your sugar (that’s 3 tablespoons), and squeeze a good hit of lemon juice over the top—no need to measure perfectly, just don’t go overboard. Fire up the heat to bring it just to a boil, then immediately slide it down to just above a simmer. Stir often—it wants to stick sometimes—and let it bubble away for about 10 minutes. It’ll go syrupy and slightly jammy (this is where I usually do a taste-test with a spoon, but careful, it’s hot!). Don’t get too worried if it seems runny at first; it thickens up a bit as it cools.
-
3Scrape the syrup into a heatproof jar or bowl and stash it in the fridge until it’s nice and cold. I have, more than once, stuck it in the freezer for a speedy chill while I clean up the chaos. Just don’t forget it in there… unless you want strawberry ice cubes.
-
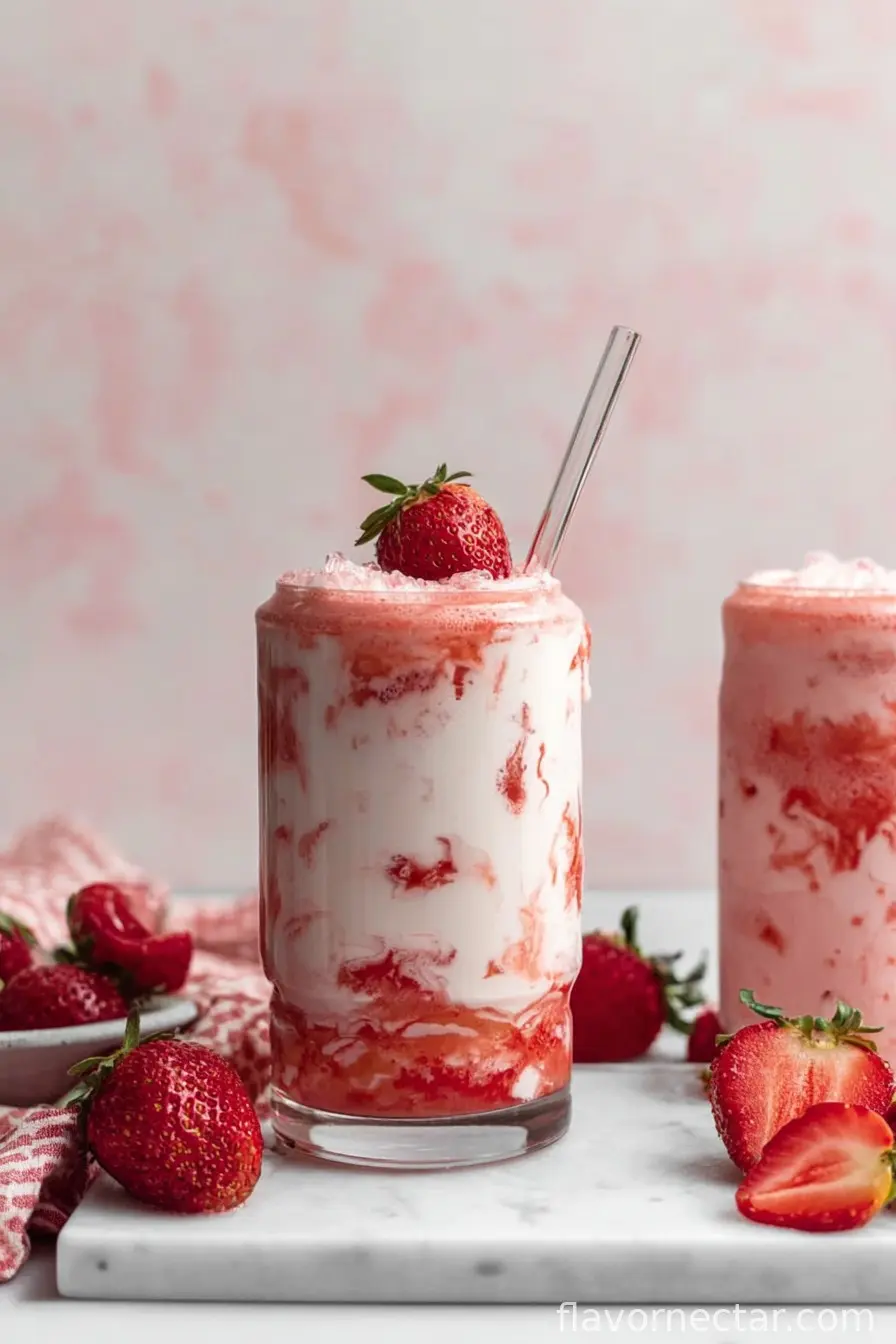
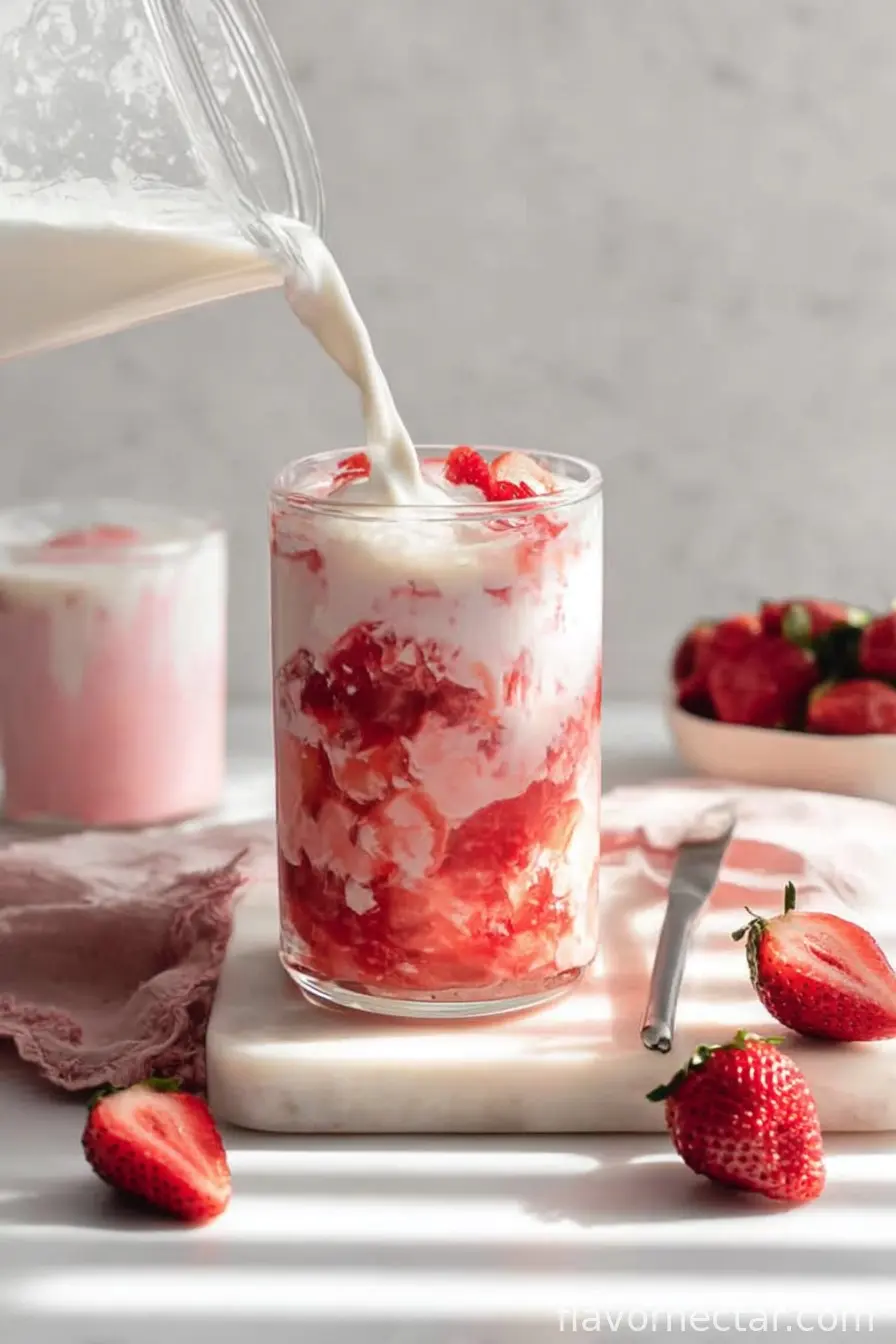
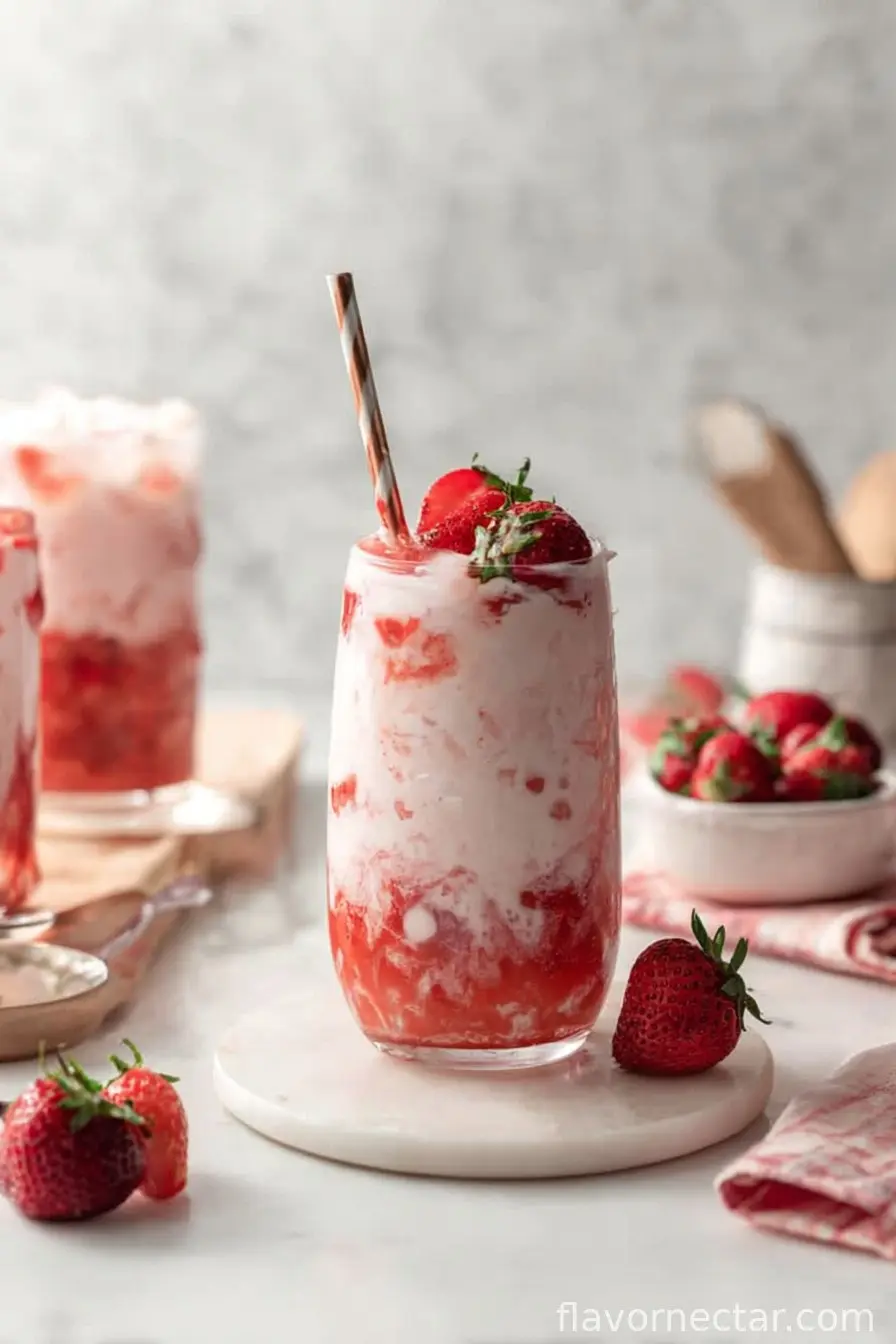
4Assembly time! Scoop 2-3 big spoonfuls of strawberry syrup into a glass (go on, be generous), then add about ¾ cup of your favorite non-dairy milk over the top. Throw in a handful of ice (unless it’s freezing outside, then maybe skip the ice), and finally, top it all off with a spoonful of those juicy, macerated strawberries you made earlier. Stir it up! Taste and see if it’s sweet enough for you—more syrup or more strawberries if you like. I always wind up adding extra syrup. Store anything leftover in the fridge for sweet emergencies.
CLICK FOR NUTRITION INFO
↑
Approximate Information for One Serving
Serving Size:
1 serving
Calories:
160cal
Protein:
3 gg
Fat:
3 gg
Saturated Fat:
0g
Trans Fat:
0g
Cholesterol:
0mg
Sodium:
0mg
Potassium:
0mg
Total Carbs:
34 gg
Fiber:
0g
Sugar:
0g
Net Carbs:
0g
Vitamin A:
0
Vitamin C:
0mg
Calcium:
0mg
Iron:
0mg
Nutrition Disclaimers
Number of total servings shown is approximate. Actual number of servings will depend on your preferred portion sizes.
Nutritional values shown are general guidelines and reflect information for 1 serving using the ingredients listed, not including any optional ingredients. Actual macros may vary slightly depending on specific brands and types of ingredients used.
To determine the weight of one serving, prepare the recipe as instructed. Weigh the finished recipe, then divide the weight of the finished recipe (not including the weight of the container the food is in) by the desired number of servings. Result will be the weight of one serving.
Did you make this recipe?
Please consider Pinning it!