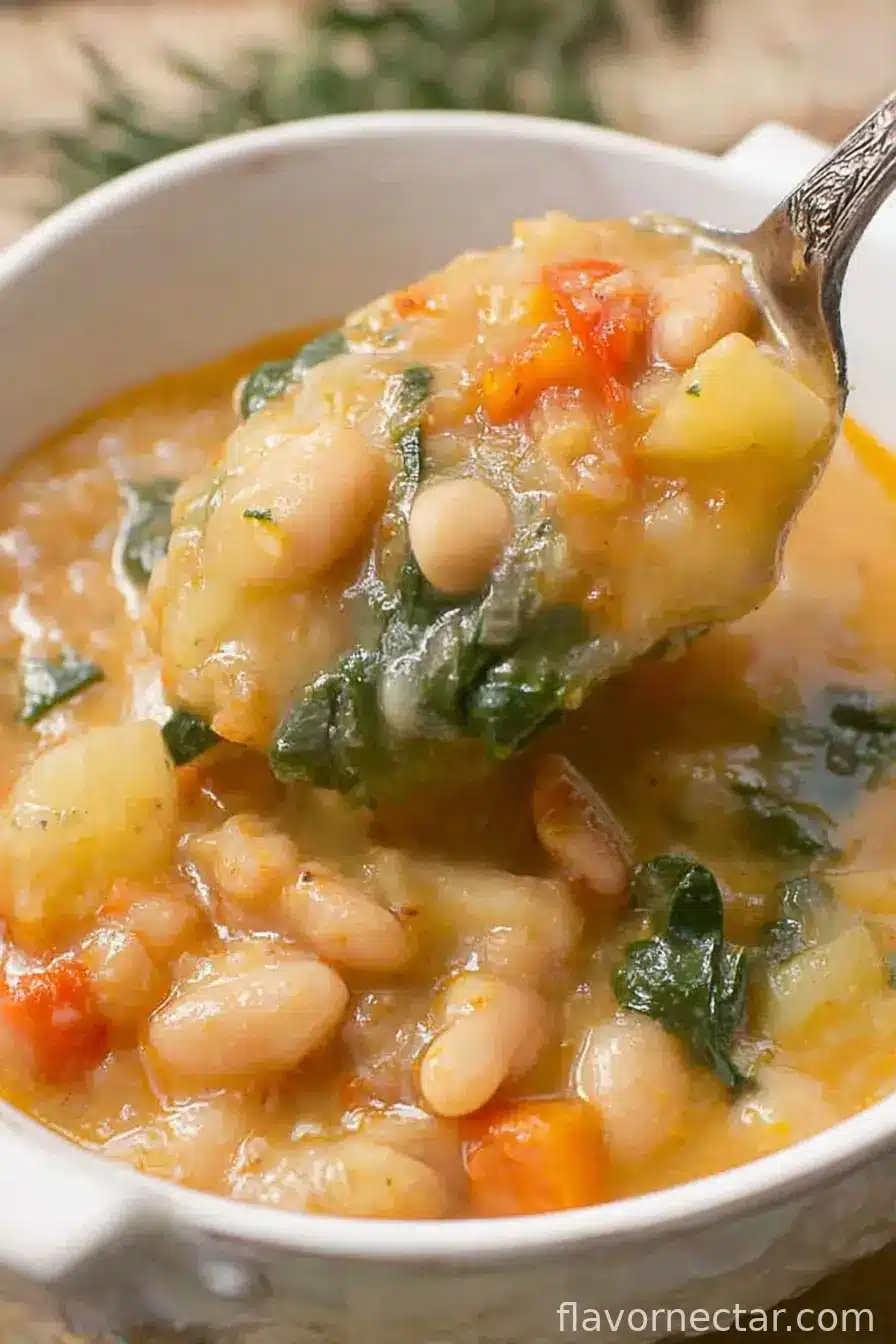
Let’s Talk White Bean Soup (And Why I Can’t Stop Making It)
So you know how sometimes, when the weather does that drizzly, can’t-make-up-its-mind nonsense, you just crave something warm and, uh, cozy as a big wooly jumper? That’s honestly when I start tossing together a batch of this white Bean Soup. I can’t say it’s a family secret—my mum never wrote recipes down anyway, so I just kind of cobbled this together form bits and pieces (and memories of some frankly tragic attempts at Bean Soup with the consistency of paste). Honestly, though, this one’s the keeper. Oh, and the first time I made it to impress a date, I scorched it; now I always set a timer. Lesson learnt.
Why This Soup Ends Up On My Table All The Time
I make this when I’m feeling a bit droopy or need easy lunch for a few days (if I don’t eat it all at once, anyway). My sister-in-law, who claims to hate beans, goes back for seconds—go figure! It’s hearty without being heavy, and I like that it doesn’t need loads of weird ingredients. Sometimes, if I’ve had a rough day, I even add extra garlic—because as my nan used to say, garlic never broke a dish, but it sure fixes a cold. If you’ve ever struggled with bland soups (been there, got the T-shirt), trust me, a squeeze of lemon at the end is a game-changer.
What You’ll Need (And Where I Tend To Wing It)
- 2 cans (15 oz each) white beans (cannellini, navy, or Great Northern all work—I usually grab whatever’s cheapest, but my gran would insist on cannellini)
- 2 tablespoons olive oil (or butter, in a pinch, but oil is my go-to)
- 1 large yellow onion, diced (though red onion works if it’s what you’ve got; I tried shallots once—not bad at all, actually)
- 2 medium carrots, chopped into rough coins (I leave skins on, because who’s got time?)
- 2 celery stalks, diced
- 4 garlic cloves, minced (let’s be real, I rarely measure—sometimes it’s five)
- 4 cups veggie broth (or chicken, if you’re not vegan—boxed or homemade, but I’ve used bouillon cubes in a mad rush and survived)
- 1 bay leaf (I forget it sometimes, still turns out fine—shh)
- 1 teaspoon dried thyme
- 1/2 teaspoon dried rosemary (I’ve totally chucked in fresh when I could, a small handful, chopped)
- Salt and black pepper, to taste (don’t be timid)
- Juice of half a lemon (seriously, don’t skip this—makes the flavor pop)
- Optional: a good shake of chili flakes, and/or a handful of fresh parsley, chopped
How I Throw It Together (Honestly, Don’t Stress About Perfection)
- Drizzle olive oil in a big pot over medium heat—big enough so things can breathe, not a tiny saucepan (learned the hard way!).
- Toss in the onion, carrots, and celery. Let ‘em sauté for about 8-10 minutes, stirring now and then. They’ll get soft. (I usually wander off for a cuppa but keep an ear out.)
- Chuck in the garlic; stir for another minute till it’s fragrant—not burnt. If it turns brown, just say you wanted it “extra toasty,” and move on.
- Pour in your broth, bay leaf, thyme, and rosemary. Bring everything up to a boil. If you forgot to open your beans, do it now—I’ve chopped more than one thumbnail in haste here, so take your time.
- Drain and rinse the beans, then dump them in. I actually mash up about a cup of the beans before adding for creaminess (back of a spoon works) but sometimes I’m too hungry and skip it.
- Lower the heat, toss on a lid slightly askew, and let the soup simmer away for 15-20 minutes. (This is where I sneak a taste, blow on it furiously, and inevitably burn my tongue.)
- Fish out the bay leaf. Add salt, pepper, and lemon juice. The lemon part is where people go, “Wait, are you sure?” YES. Trust me. Add chili flakes if you want a kick.
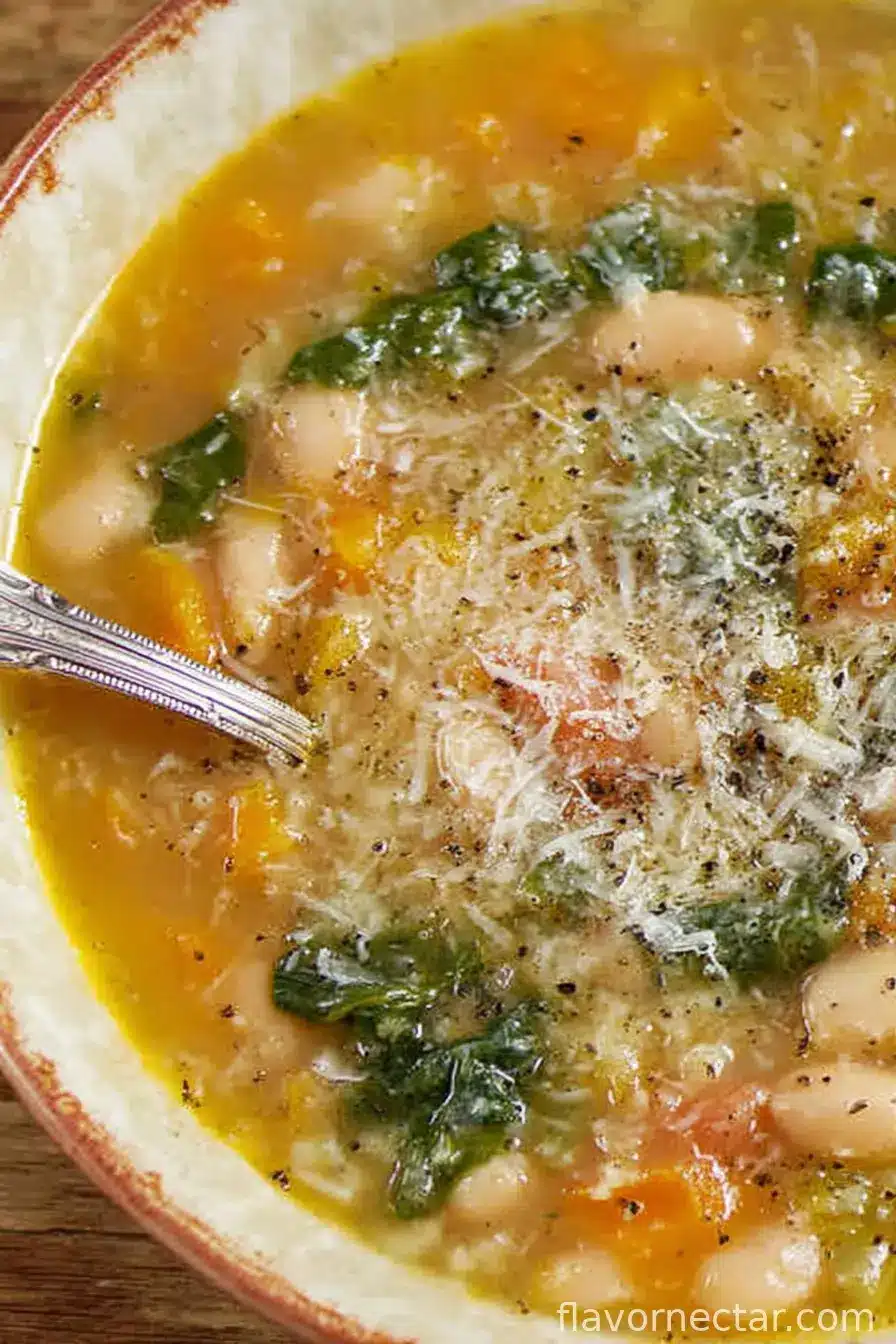
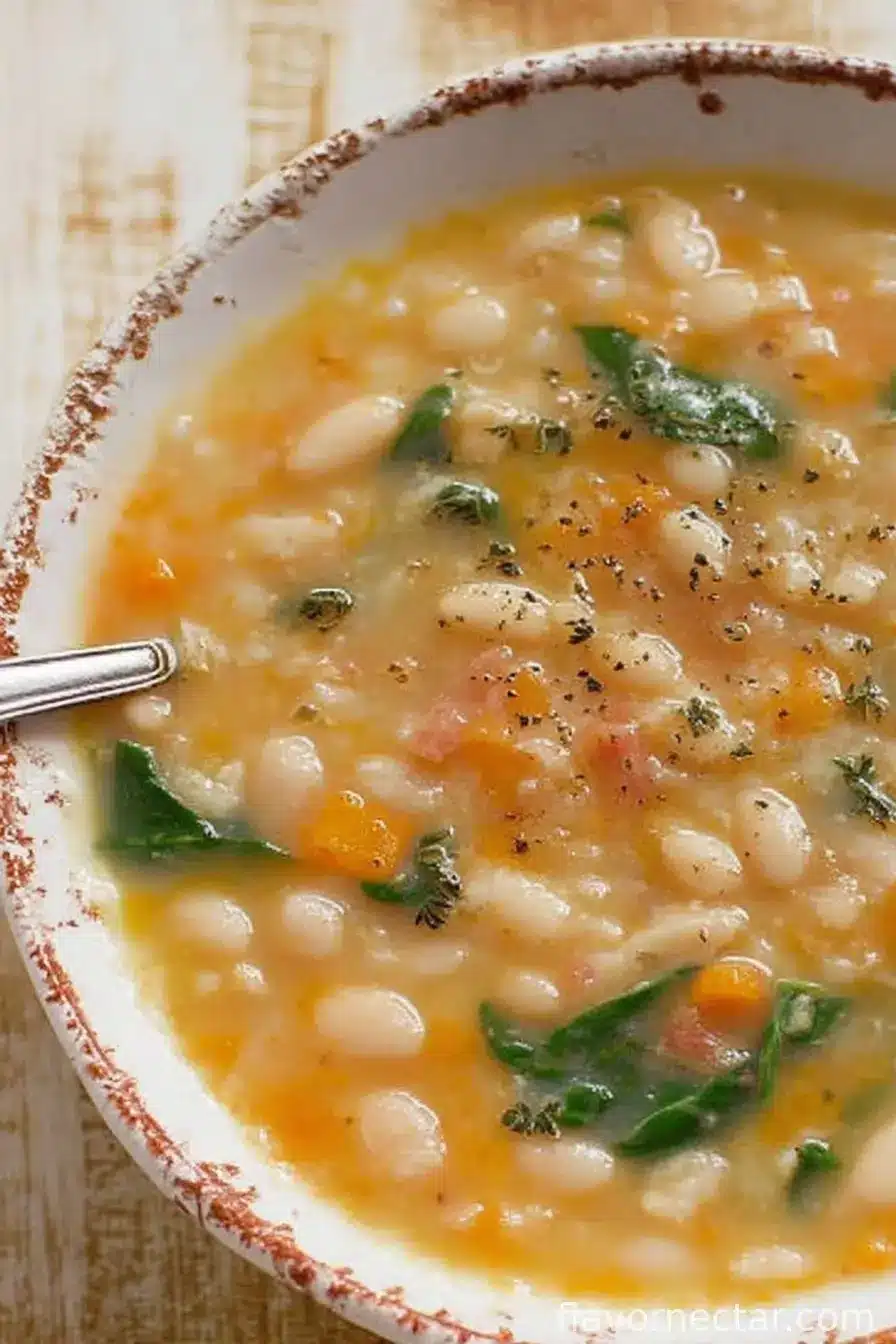
- Ladle into bowls and top with chopped parsley. Sometimes I add a glug of olive oil for flair. Serve hot, with a big chunk of crusty bread to mop up all the good bits.
Some Notes (Or: Oops, Here’s What I Figured Out After Messing Up)
- Do not (I repeat, do not) add lemon juice until right at the end—otherwise the soup gets weirdly bitter. Learnt that one the hard way.
- Mashing some of the beans thickens things up so you don’t need to blend—though if you do want it super smooth, a stick blender’s handy, but honestly, a good old potato masher does fine.
- If it gets too thick, just add a splash of water or broth; if it’s soupy, simmer it a bit longer.
- Once, I forgot the salt until bowl time, and everyone just added way too much. Do yourself a favor: taste as you go!
How I’ve Tweaked (And Sometimes Botched) This Soup
- Added a Parmesan rind in with the broth—wow, flavor bomb. Just don’t forget to fish it out before serving, or you’ll get some weird looks.
- Tried it with kale or spinach stirred in at the end—good way to get in some greens, and the kids won’t notice if you chop fine.
- Once, I tried smoked paprika—maybe too adventurous, it took over the whole flavor… but hey, live and learn.
Equipment (But Don’t Panic If You Don’t Have It All)
- Decent sized heavy-bottomed pot—mine’s a flea market find
- A wooden spoon (or any spoon, really—it’s soup, not rocket science)
- If you want smooth soup, a stick blender. Or just mash with a fork like I do when I can’t be bothered to dig out gadgets.
How It Stores (Though It Never Lasts Long Here)
Just pop leftovers in a lidded container in the fridge; it’ll last 3-4 days in theory, though honestly, in my house it never lasts more than a day! Reheats well on the stove or microwave (give it a stir halfway—that’s a trick I learnt after one too many bowlfuls with hot and cold patches; not fun).
Serving: Here’s What We Do
I like to ladle this into big bowls, top with parsley, and serve with thick slices of buttered sourdough, especially if it’s been raining. Sometimes we sprinkle on grated cheese—my youngest claims it makes everything better… and she’s probably right.
Pro Tips (Or: Learn From My Many Mistakes)
- I once rushed the veggie sauté step, thinking, “Eh, they’ll cook in the broth”—but then the onion stayed crunchy in the worst possible way. Let them soften properly. Seriously.
- If you skimp on seasoning, the soup will be good but not great. Don’t be shy with salt and pepper (taste near the end—you can always add, never take away!).
- I tried using un-rinsed canned beans once—don’t. The soup turned out oddly gluey. Rinse ‘em.
FAQ (You Asked, I Answer…Sometimes With a Tangent)
- Can I use dried beans instead of canned?
- Yep! Just soak and cook them first (because no one likes crunchy beans). I’d say use about 3 cups cooked—but honestly, if you forget to soak overnight like I always do, canned is your pal.
- Is this vegan?
- If you use veggie broth and don’t finish with cheese or butter, it’s totally vegan. I’ve made it both ways, and both are tasty.
- What if I have no celery?
- No stress—the soup’s still good, it just misses a bit of savory flavor. A shake of extra dried herbs or even a splash of soy sauce works in a pinch (a trick I learned form a roommate who never bought veggies).
- Can it be frozen?
- Yep. Let it cool, portion into single servings, and freeze. Just stir it well as it defrosts; beans get a little mushy, but for me that’s half the charm.
- How can I make this spicier?
- Chili flakes, a bit of hot sauce, or even a fresh chili chopped in. I’ve yet to measure, just shake or stir until it catches you in the back of the throat—in a good way.
So there you have it. The best white Bean Soup—at least according to my kitchen table, slightly distracted cook included.
Ingredients
- 2 cans (15 oz each) white beans (cannellini, navy, or Great Northern all work—I usually grab whatever’s cheapest, but my gran would insist on cannellini)
- 2 tablespoons olive oil (or butter, in a pinch, but oil is my go-to)
- 1 large yellow onion, diced (though red onion works if it’s what you’ve got; I tried shallots once—not bad at all, actually)
- 2 medium carrots, chopped into rough coins (I leave skins on, because who’s got time?)
- 2 celery stalks, diced
- 4 garlic cloves, minced (let’s be real, I rarely measure—sometimes it’s five)
- 4 cups veggie broth (or chicken, if you’re not vegan—boxed or homemade, but I’ve used bouillon cubes in a mad rush and survived)
- 1 bay leaf (I forget it sometimes, still turns out fine—shh)
- 1 teaspoon dried thyme
- 1/2 teaspoon dried rosemary (I’ve totally chucked in fresh when I could, a small handful, chopped)
- Salt and black pepper, to taste (don’t be timid)
- Juice of half a lemon (seriously, don’t skip this—makes the flavor pop)
- Optional: a good shake of chili flakes, and/or a handful of fresh parsley, chopped
Instructions
-
1Drizzle olive oil in a big pot over medium heat—big enough so things can breathe, not a tiny saucepan (learned the hard way!).
-
2Toss in the onion, carrots, and celery. Let ‘em sauté for about 8-10 minutes, stirring now and then. They’ll get soft. (I usually wander off for a cuppa but keep an ear out.)
-
3Chuck in the garlic; stir for another minute till it’s fragrant—not burnt. If it turns brown, just say you wanted it “extra toasty,” and move on.
-
4Pour in your broth, bay leaf, thyme, and rosemary. Bring everything up to a boil. If you forgot to open your beans, do it now—I’ve chopped more than one thumbnail in haste here, so take your time.
-
5Drain and rinse the beans, then dump them in. I actually mash up about a cup of the beans before adding for creaminess (back of a spoon works) but sometimes I’m too hungry and skip it.
-
6Lower the heat, toss on a lid slightly askew, and let the soup simmer away for 15-20 minutes. (This is where I sneak a taste, blow on it furiously, and inevitably burn my tongue.)
-
7Fish out the bay leaf. Add salt, pepper, and lemon juice. The lemon part is where people go, “Wait, are you sure?” YES. Trust me. Add chili flakes if you want a kick.
-
8Ladle into bowls and top with chopped parsley. Sometimes I add a glug of olive oil for flair. Serve hot, with a big chunk of crusty bread to mop up all the good bits.
CLICK FOR NUTRITION INFO
↑
Approximate Information for One Serving
Serving Size:
1 serving
Calories:
295cal
Protein:
14 gg
Fat:
7 gg
Saturated Fat:
0g
Trans Fat:
0g
Cholesterol:
0mg
Sodium:
0mg
Potassium:
0mg
Total Carbs:
44 gg
Fiber:
0g
Sugar:
0g
Net Carbs:
0g
Vitamin A:
0
Vitamin C:
0mg
Calcium:
0mg
Iron:
0mg
Nutrition Disclaimers
Number of total servings shown is approximate. Actual number of servings will depend on your preferred portion sizes.
Nutritional values shown are general guidelines and reflect information for 1 serving using the ingredients listed, not including any optional ingredients. Actual macros may vary slightly depending on specific brands and types of ingredients used.
To determine the weight of one serving, prepare the recipe as instructed. Weigh the finished recipe, then divide the weight of the finished recipe (not including the weight of the container the food is in) by the desired number of servings. Result will be the weight of one serving.
Did you make this recipe?
Please consider Pinning it!