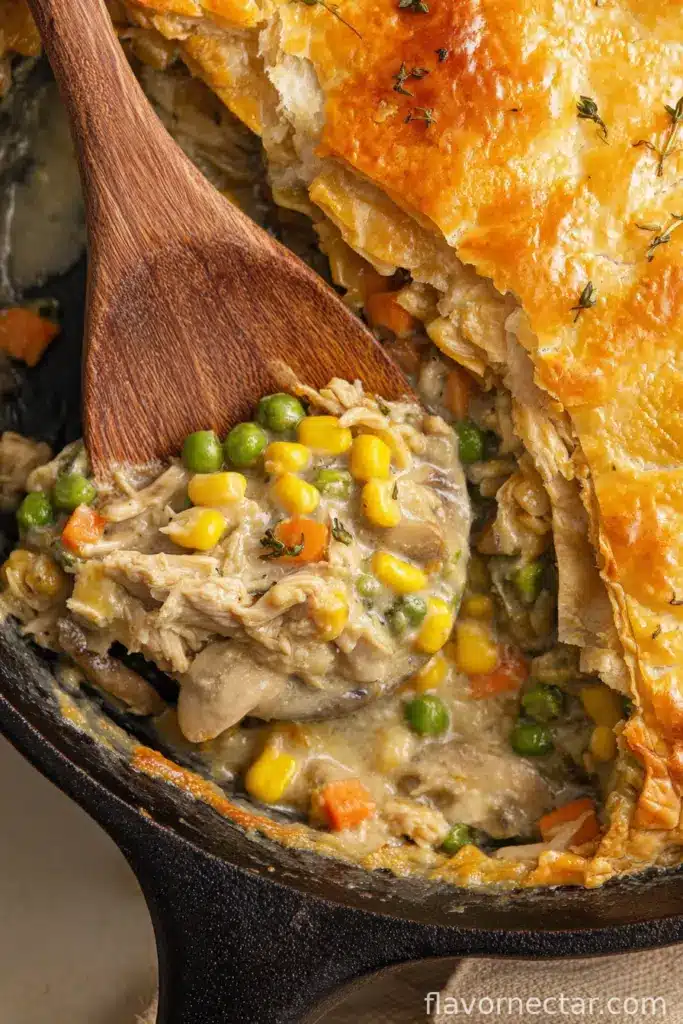
Let Me Tell You About This Pot Pie
You know, there are certain recipes I come back to again and again—this skillet chicken pot pie with puff pastry is absolutely one of them. Actually, I made it last Sunday when it rained sideways all morning and my youngest proclaimed, “It smells like a bakery in here, Mom!” (I take this as the highest praise.) I first tried something like this on a wintery trip to Yorkshire visiting my weirdly competitive aunt, who swore her crust never went soggy. Spoiler: mine did… but ironically, with puff pastry, my crust luck totally changed! Anyway, enough about my personal baggage with pastry—let’s talk chicken and veg in a pan, all warm and cozy.
Why This Is My Cold-Weather Go-To
I make this whenever I’m after something hearty but don’t want to spend ages fussing over pie crust (because honestly, life’s too short for that on a Tuesday). My family totally polishes off the whole skillet every single time, and I don’t feel like the dinner police monitoring their veggie intake—it’s all snuck in there! If you ever battle the “what do I do with leftover rotisserie chicken” dilemma (I sure do), this is your answer. Also, one less dish to wash is always a win. These days I just accept that sometimes my puff pastry puffs heroically and other times it leans a little more… rustic. Still tasty. That said, don’t be surprised if it disappears fast; my crew is a hungry lot.
Ingredients – With My Chaotic Substitutions
- 2 tablespoons butter (unsalted or, to be honest, whatever’s in your fridge)
- 1 medium yellow onion, diced (or two shallots if you’re fancy, but I’m usually not)
- 2 carrots, peeled and sliced
- 2 celery stalks, chopped (I’ve skipped this in a pinch—no one noticed)
- 3 cloves garlic, minced (Gran always threw in four—you do you)
- 1/4 cup all-purpose flour
- 1 1/2 cups chicken broth (homemade if you’re extra, or, you know, a cube and hot water)
- 1/2 cup whole milk (I’ve totally swapped in cream or even oat milk when empty fridge strikes)
- 2 1/2 cups cooked chicken, shredded (rotisserie chicken is my midweek savior)
- 1 cup frozen peas (sometimes I use a frozen veggie mix—cauliflower makes it oddly sweet, FYI)
- 1 teaspoon salt
- 1/2 teaspoon black pepper
- 1 teaspoon fresh thyme leaves (dried is fine too, or skip if you must)
- 1 sheet frozen puff pastry, thawed (my gran only used brand X, but honest—brand Y works fine too)
- 1 egg, beaten (for brushing the pastry, not snacking, though the temptation’s real)
How I Actually Make This (No Fancy Pies Here)
- Preheat your oven to 400°F (that’s about 200°C if you’re non-American like my cousin Dave). Fish out your 10 or 12-inch oven-safe skillet and put it over medium heat.
- Melt the butter in the skillet. Throw in the onion, carrot, and celery. Sauté for 6-7 minutes until the onion goes soft (cue your kitchen starting to smell like you know what you’re doing). Toss in garlic; cook about 1 minute more, stirring so it doesn’t get weirdly bitter.
- Sprinkle the flour over the veggies—don’t worry, it’ll look a little pasty at first. Stir well for a minute; this is the bit that thickens everything later.
- Gradually add chicken broth, using your best “one hand whisk, one hand pour” technique. Then add milk. Give it all a good stir and let it blip along for 3–4 minutes. Don’t panic if it’s lumpy at first; it smooths out, promise.
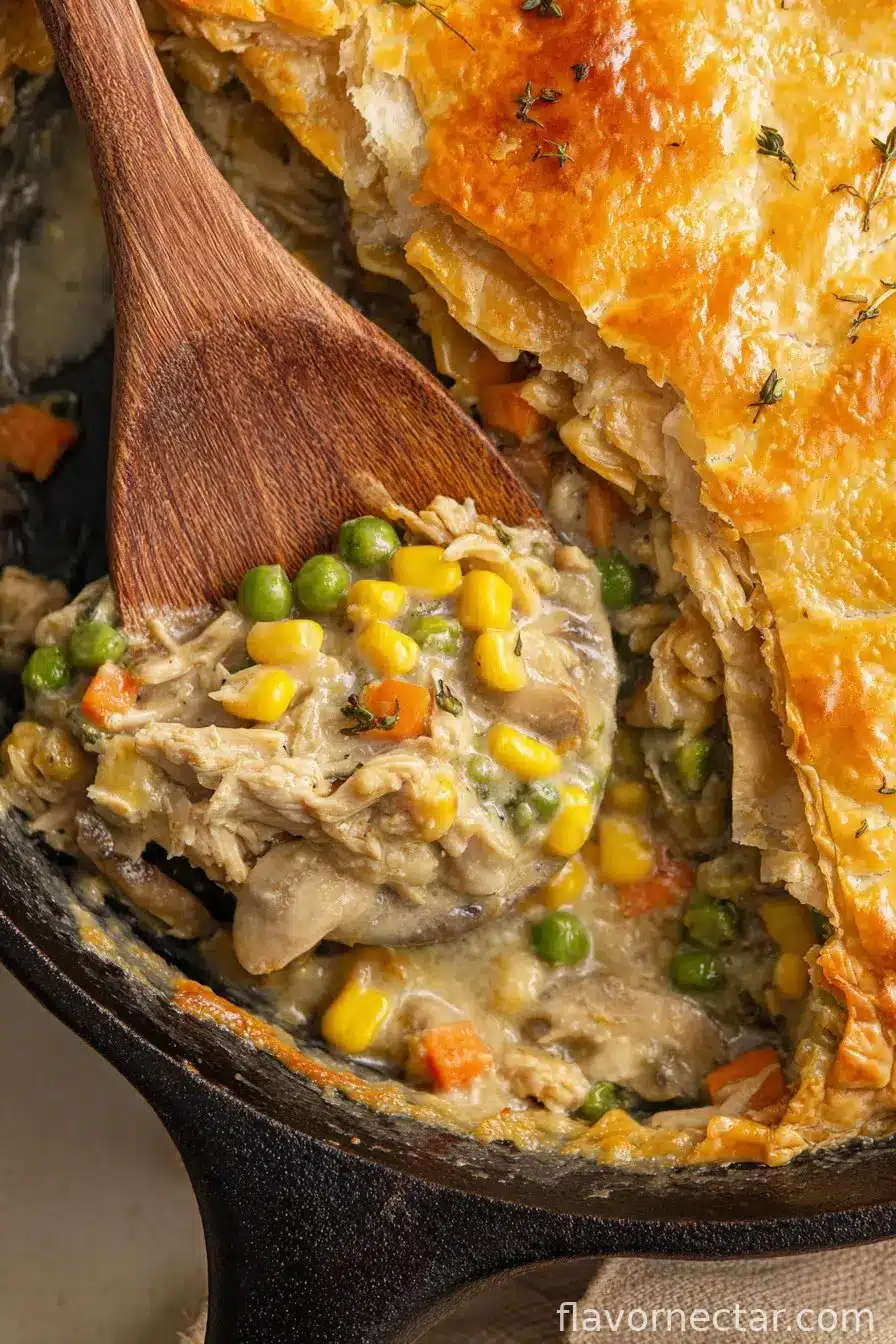
- Add chicken, peas, salt, pepper, and thyme. Give it a gentle stir to mix (honestly, this is where I sneak a little taste—chef’s rights, right?). Let everything get cozy for a couple minutes.
- Unroll your thawed puff pastry and drape it over the skillet. If it’s too big, just trim the edges (and, okay, sometimes I bake the scraps with a bit of cinnamon sugar for a snack later—highly recommend). Press the pastry gently onto the sides. Cut a couple slits for steam to escape; no need to be precious.
- Brush the pastry with your beaten egg. Skip this step if you’re out—it’ll still turn golden, just less glossy.
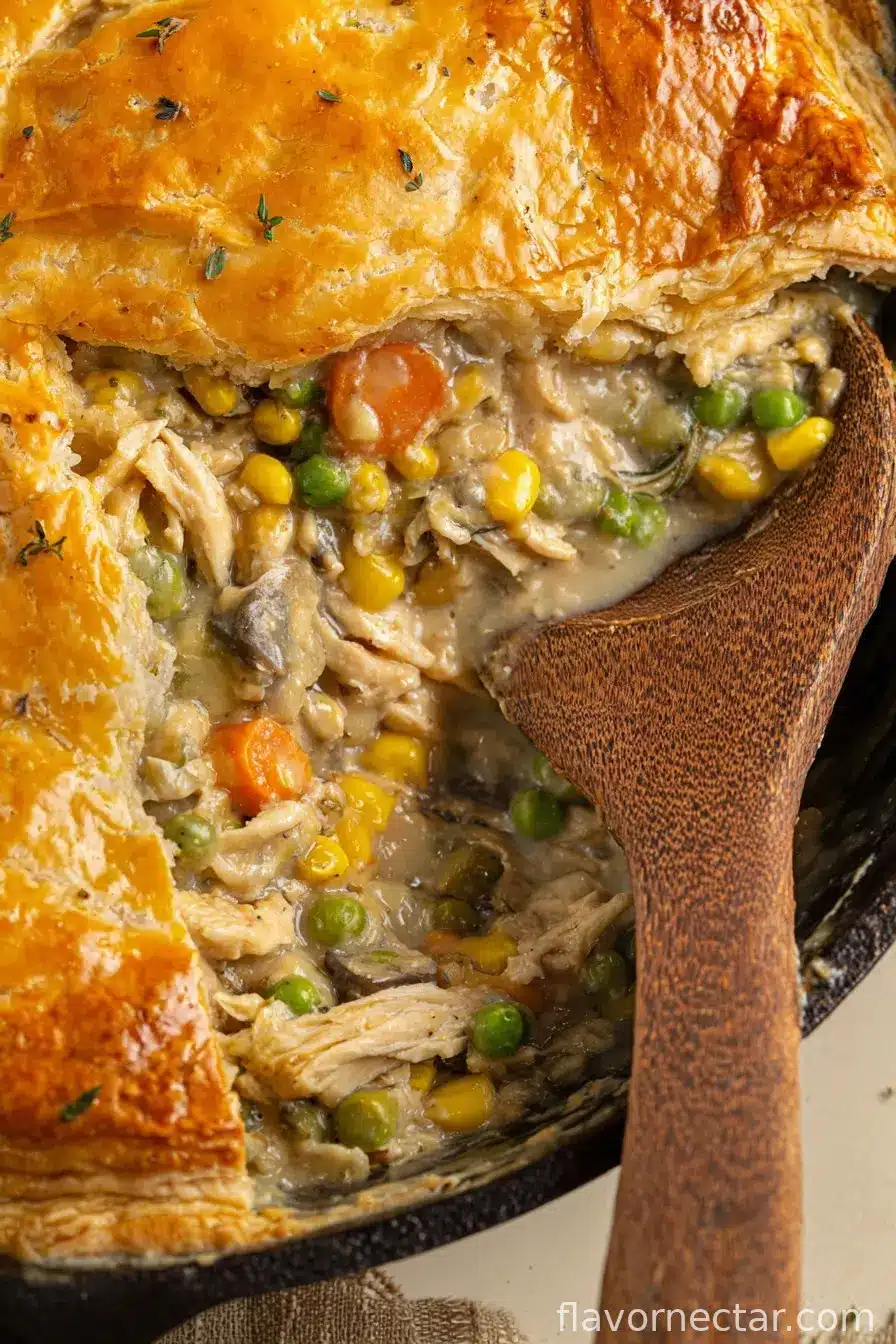
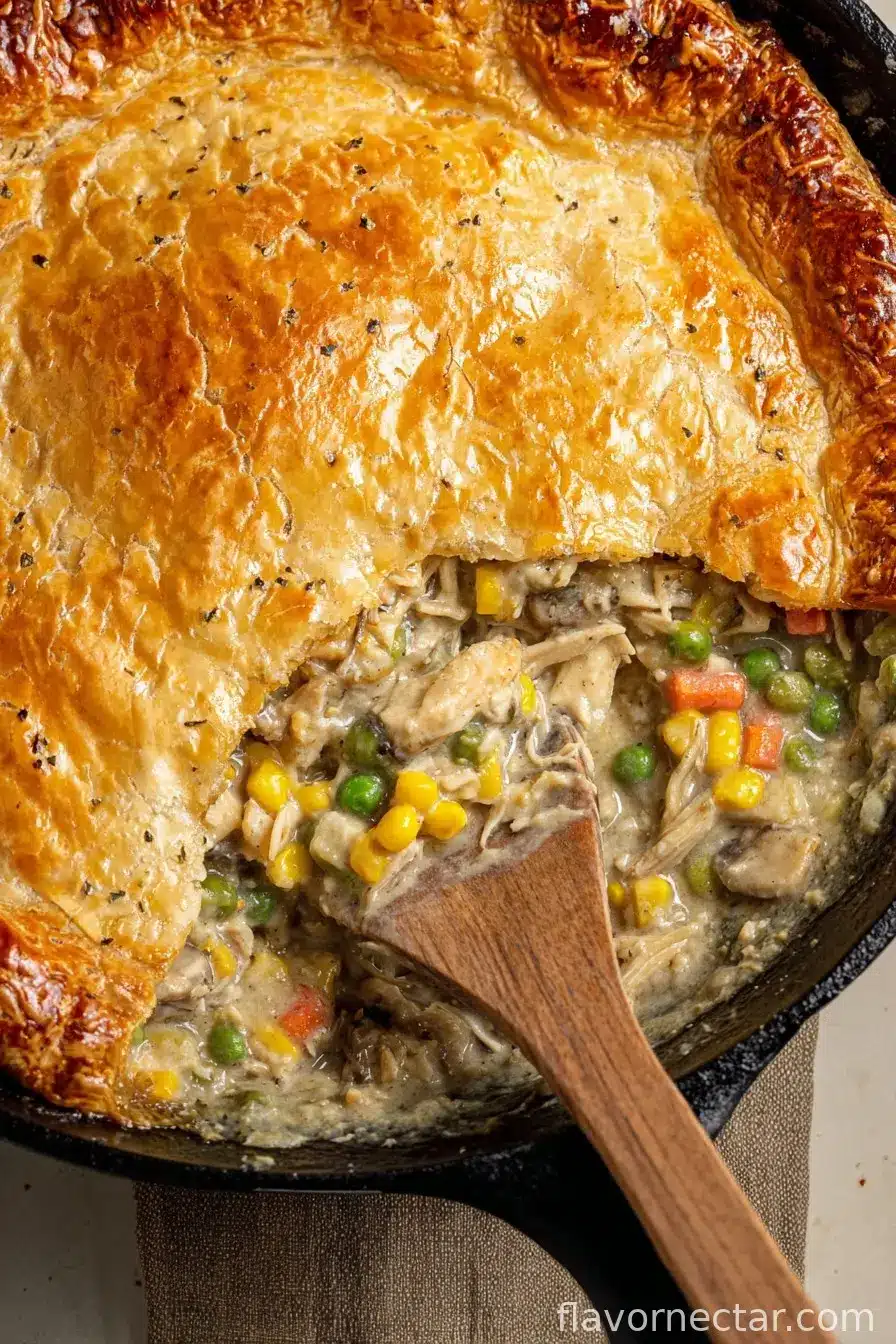
- Slide the whole skillet into the oven (use oven mitts, trust me) and bake 23–28 minutes, or until your kitchen turns into a puff pastry-scented wonderland. The pastry looks absurdly puffed and golden when it’s ready.
- Let it sit for at least 5 minutes after you pull it out. Every time I try to rush this, I regret it (scalded tongue, anyone?). Ladle out and serve straight from the skillet; it always feels a bit wild-west that way.
Notes – My School of Hard Knocks
- If your skillet isn’t oven-proof, just transfer everything to an 8×8 baking dish. Done it plenty.
- I used to skip the egg wash; now I sometimes add a pinch of salt to it—minor tweak, but it tastes fancier.
- I’ve forgotten to thaw the pastry more times than I care to admit…just microwave on low till bendy but not soggy.
- Letting it sit after baking helps the sauce not flood everywhere (but even if it does, who cares, mop it up with bread!).
Tweaks and Experiments (Some Hits, Some Misses)
- One time, I swapped peas for corn and regretted it—too sweet for my taste, but maybe your kids will love it?
- Shredded turkey works if you’re in Thanksgiving leftovers mode.
- Mushrooms take this into a whole other realm (earthier). Just slice and sauté with the onion and carrot.
- For a veggie version, I just chuck in more root veg and use vegetable broth.
Don’t Stress If You’re Short an Appliance (Or Three)
I say you need an oven-safe skillet, but actually, for years I made it in a regular frying pan then tossed everything in a pyrex before topping with pastry. I even used an old lasagne dish once—didn’t win any beauty contests, but no complaints at the table.
Storage—If It Lasts That Long (Spoiler: It Won’t)
Pop any leftovers in the fridge, covered up. Stays good for about 2 days, though honestly it never, ever sees a second sunrise at my house. If I were the organized type, I’d freeze individual portions, but I’m not. Reheat in the oven so your pastry stays crispish.
How I Love to Serve It (Other Than Eating Straight from the Pan)
This is all you really need for a meal, but if I’m feeling extra (doesn’t happen daily), I’ll whip up a green salad or some roasted green beans. My kids like it with a glug of hot sauce—totally optional. For Sunday lunch, we’ll sometimes have it with warm rolls (don’t ask me why, but my mom insists). Leftovers make a surprisingly fabulous breakfast. Cold pie, still in the pan. Tell no one.
Lessons Learned – My “Don’t Repeat My Mistakes” List
- Never use cold pastry—it cracks and sulks.
- Rushing the veggie sauté leaves everything oddly crunchy (not rustic, just underdone, trust me).
- Trying to use low-fat milk? It just makes a thinner sauce. Creamier = yummier (in my humble, slightly biased opinion).
Reader Questions—A Few From Friends and a Few I Made Up
- Can I make this ahead of time?
- Yep, totally—assemble everything except the pastry top, stash in the fridge, then bake off when you’re ready. Add pastry just before baking. It’s not quite as puff-tastic if you bake and reheat, but pretty darn close.
- Does this freeze well?
- Sort of! Freezing after baking is okay if you don’t mind softer pastry. I personally prefer it fresh, but life’s messy.
- Can I use biscuit dough instead?
- Absolutely. Sometimes I go rogue and use those pop-can biscuits if I’m low on puff pastry. Just squish and flatten over the top and bake a bit longer. Results: different, but good for lazy days.
- What if I have no fresh herbs?
- No biggie. Just use dried (about a third as much). Or go without; pie isn’t fussy!
- Why doesn’t my pastry brown?
- Probably needs that egg wash. Or your oven runs cooler than mine. Sometimes I broil for a minute but watch it like a hawk!
There you go. Give it a whirl—or a bash—however you like to say it where you’re from. Chicken pot pie isn’t precious; that’s the beauty. And if you ever catch yourself licking the skillet clean, know you’re in good company.
Ingredients
- 2 tablespoons butter (unsalted or, to be honest, whatever’s in your fridge)
- 1 medium yellow onion, diced (or two shallots if you’re fancy, but I’m usually not)
- 2 carrots, peeled and sliced
- 2 celery stalks, chopped (I’ve skipped this in a pinch—no one noticed)
- 3 cloves garlic, minced (Gran always threw in four—you do you)
- 1/4 cup all-purpose flour
- 1 1/2 cups chicken broth (homemade if you’re extra, or, you know, a cube and hot water)
- 1/2 cup whole milk (I’ve totally swapped in cream or even oat milk when empty fridge strikes)
- 2 1/2 cups cooked chicken, shredded (rotisserie chicken is my midweek savior)
- 1 cup frozen peas (sometimes I use a frozen veggie mix—cauliflower makes it oddly sweet, FYI)
- 1 teaspoon salt
- 1/2 teaspoon black pepper
- 1 teaspoon fresh thyme leaves (dried is fine too, or skip if you must)
- 1 sheet frozen puff pastry, thawed (my gran only used brand X, but honest—brand Y works fine too)
- 1 egg, beaten (for brushing the pastry, not snacking, though the temptation’s real)
Instructions
-
1Preheat your oven to 400°F (that’s about 200°C if you’re non-American like my cousin Dave). Fish out your 10 or 12-inch oven-safe skillet and put it over medium heat.
-
2Melt the butter in the skillet. Throw in the onion, carrot, and celery. Sauté for 6-7 minutes until the onion goes soft (cue your kitchen starting to smell like you know what you’re doing). Toss in garlic; cook about 1 minute more, stirring so it doesn’t get weirdly bitter.
-
3Sprinkle the flour over the veggies—don’t worry, it’ll look a little pasty at first. Stir well for a minute; this is the bit that thickens everything later.
-
4Gradually add chicken broth, using your best “one hand whisk, one hand pour” technique. Then add milk. Give it all a good stir and let it blip along for 3–4 minutes. Don’t panic if it’s lumpy at first; it smooths out, promise.
-
5Add chicken, peas, salt, pepper, and thyme. Give it a gentle stir to mix (honestly, this is where I sneak a little taste—chef’s rights, right?). Let everything get cozy for a couple minutes.
-
6Unroll your thawed puff pastry and drape it over the skillet. If it’s too big, just trim the edges (and, okay, sometimes I bake the scraps with a bit of cinnamon sugar for a snack later—highly recommend). Press the pastry gently onto the sides. Cut a couple slits for steam to escape; no need to be precious.
-
7Brush the pastry with your beaten egg. Skip this step if you’re out—it’ll still turn golden, just less glossy.
-
8Slide the whole skillet into the oven (use oven mitts, trust me) and bake 23–28 minutes, or until your kitchen turns into a puff pastry-scented wonderland. The pastry looks absurdly puffed and golden when it’s ready.
-
9Let it sit for at least 5 minutes after you pull it out. Every time I try to rush this, I regret it (scalded tongue, anyone?). Ladle out and serve straight from the skillet; it always feels a bit wild-west that way.
CLICK FOR NUTRITION INFO
↑
Approximate Information for One Serving
Serving Size:
1 serving
Calories:
590 caloriescal
Protein:
28gg
Fat:
31gg
Saturated Fat:
0g
Trans Fat:
0g
Cholesterol:
0mg
Sodium:
0mg
Potassium:
0mg
Total Carbs:
49gg
Fiber:
0g
Sugar:
0g
Net Carbs:
0g
Vitamin A:
0
Vitamin C:
0mg
Calcium:
0mg
Iron:
0mg
Nutrition Disclaimers
Number of total servings shown is approximate. Actual number of servings will depend on your preferred portion sizes.
Nutritional values shown are general guidelines and reflect information for 1 serving using the ingredients listed, not including any optional ingredients. Actual macros may vary slightly depending on specific brands and types of ingredients used.
To determine the weight of one serving, prepare the recipe as instructed. Weigh the finished recipe, then divide the weight of the finished recipe (not including the weight of the container the food is in) by the desired number of servings. Result will be the weight of one serving.
Did you make this recipe?
Please consider Pinning it!