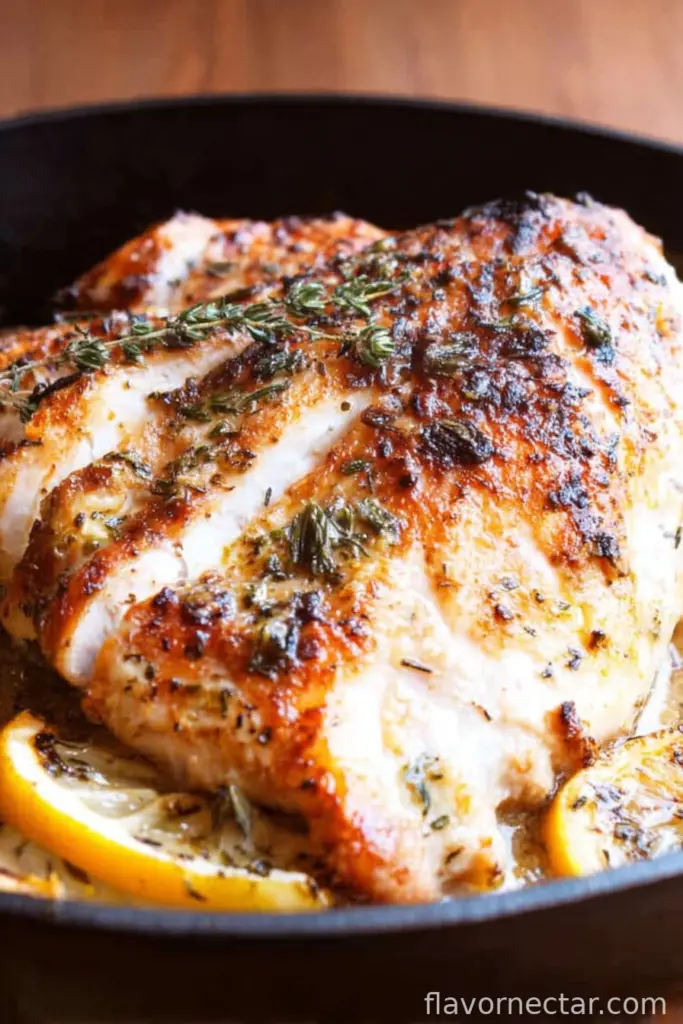
Let Me Tell You About My Turkey Breast Obsession
Okay, I know everyone thinks of the whole Turkey at big gatherings, but honestly, sometimes that’s just… a lot of bird. So a few years back, after an especially epic leftover situation at Christmas (I think we had turkey curry for four days straight, my kids were not thrilled), I switched to just making a simple oven roasted turkey breast—and now, it’s kind of my thing.

If you love getting a juicy, herby bite of turkey without wrestling giant roasting pans or, you know, feeling like you need to choreograph basting, this one’s for you. Plus, as a side bonus: turkey breast fits in my tiny oven, which is about the size of a shoebox. Oh, side note: When I made it last Easter, my dog tried to steal it off the counter, but only got away with a single sprig of rosemary. So, learn from my mistakes—pet-proof your kitchen!
Why You’ll Love This
I cook this when I’m not in the mood to supervise anything for two hours. Seriously, you slap it in the oven and go sort the laundry, or if you’re like me, start binge-watching something and promptly forget time exists (the kitchen timer is the real MVP here).
My family goes wild for it—something about the crispy skin and that buttery layer underneath. (Also, you just slice it at the table and everyone thinks you’ve worked twice as hard as you did. Win!)
Oh, and when I’m out of patience for all the fancy trappings, this is the bird I make. No wrestling with twine, no brining overnight (not that I’ve ever managed to remember to brine a turkey, honestly). Just simple, stress-free turkey that still feels a bit special.
What You’ll Need—And a Few Kitchen Shortcuts
- 1 bone-in turkey breast (mine’s usually about 1.5 to 2kg, but whatever fits your roastin’ tin, really)
- 2-3 tbsp butter (if you’re out of butter, olive oil actually works—my friend swears by it)
- 1 small handful of fresh herbs—rosemary, thyme, or sage (or honestly, just a spoonful of dried mixed herbs if your fridge is as bare as mine sometimes is)
- 2 garlic cloves, minced (I sometimes use the jarred kind in winter because let’s be real, it’s way easier)
- Salt & pepper to taste (my grandmother always used Maldon salt, but table salt does just fine if that’s what you’ve got)
- Optional: a splash of chicken broth or white wine for the roasting pan (makes nice drippings, but it’s not a dealbreaker if you skip it)
How I Roast My Turkey Breast (and Occasionally Go Off Script)
- Preheat your oven to 200°C/400°F. Or just crank it up to 200ish if your dial’s worn off. Happens.
- Pat the turkey breast dry with some paper towels. Don’t skip this, it really does make the skin get lovely and crispy.
- Carefully loosen the skin from the meat, and smear about half the butter (or oil) under there. It feels weird, but it’s worth it. Toss the fresh herbs and garlic right in with it (or just sprinkle dried herbs in if that’s your jam). The rest of the butter goes on top. (This is where I sneak a taste of the buttery-herb mix. No shame!)
- Season the outside really well with salt and pepper. Actually, go a little heavier than you think.
- If you’ve got broth or wine, pour it into the bottom of the pan. If not, a splash of water is fine. Don’t overthink it.
- Roast, uncovered, in the middle of the oven. For a 2kg breast, start checking at about 1 hour 10 mins. If you’ve got a meat thermometer, aim for 74°C/165°F in the thickest bit. If you don’t, poke it—the juices should run clear. (Don’t worry if it looks a bit pale and frumpy halfway through—it always perks up and browns nicely at the end.)
- Let it rest for 15-20 minutes, loosely covered with foil, before carving. This part always feels like eternity, but it’s essential if you don’t want dry turkey.
Stuff I’ve Noticed Along the Way (aka My Notes)
- If you can, let the turkey breast sit out for 20 minutes before roasting. It just roasts more evenly that way. I forget half the time, but when I remember, it seems juicier.
- Don’t skimp on butter under the skin; it seems like too much, but trust me, it’s gold.
- Actually, basting isn’t strictly necessary with a turkey breast (I barely do it), but every now and then I’ll tilt the pan so the juices run over the top, just for kicks.
If You Want to Switch Things Up—A Few Experiments
- Once, I swapped out the herbs for Cajun seasoning and a squeeze of lemon—it was… interesting, but probably best if you prefer big, bold spicier flavors.
- I sometimes put thinly sliced onions or carrots in the roasting pan under the turkey; they soak up the juices and are great with gravy (if you’re extra like me)
- Tried using maple syrup once—too sweet for me, but maybe if you love a sweet-salty combo?

Stuff You’ll Need (But Don’t Panic If You Don’t Have Everything)
- Roasting pan (or, in a pinch, a big casserole dish—once, I even used my old enamel lasagna tray and it worked fine)
- Meat thermometer (helpful, but if you don’t have one, just check for clear juices)
- Actually, you can MacGyver foil out of anything if you need to, but proper kitchen foil is nicer.
Storing Leftovers (If There Are Any…)
Wrap leftovers tightly and pop them in the fridge—they’re good for up to three days. Some say you can freeze it, but I think the texture gets a bit weird on thawing, so I usually just eat it cold in a sandwich next day (though honestly, in my house it never lasts more than a day!).
How I Serve It (Turkey’s Not Just For Christmas, You Know!)
I like to slice it at the table—makes it feel a little fancy even if it’s just Tuesday. My lot likes it with creamy mash and some kind of green (broccoli’s a winner), but I sometimes just do thick, crusty bread and a quick gravy. At Thanksgiving, it’s a law in our house that cranberry sauce must be present—arguments have occurred, I won’t lie.
What I’ve Learned the Hard Way (Pro Tips)
- I once tried to skip letting it rest. Dryest turkey known to mankind. Don’t be me. Always rest it.
- If you go too light on salt, it’s a bit bland…but there’s always gravy for backup. Still, season it well up front—trust me.
- Don’t panic about crispy skin until the final 20 minutes. Sometimes I’ve tried cranking up the oven at the start, and that just dries it out—bad move, honestly.
Real Questions I’ve Actually Been Asked (FAQ—No Judgement!)
- Do I have to use fresh herbs? Oh, no way. Dried works just fine—I’ve even used Italian seasoning in a pinch. Still yummy.
- Can I cook it ahead? Sure, but I think turkey tastes better the next day, especially cold in sandwiches. If you do, carve it up and store with a little pan juice to keep it from drying out.
- What if my turkey’s pink near the bone? That happens—sometimes turkey has a rosy tinge by the bone, even when it’s done. As long as it’s up to temp and juices are clear, you’re good.
- I forgot to buy broth! Will it be dry? Nah, just add a splash of water, wine, or skip it. Actually, sometimes I forget altogether and no one’s noticed.
- My oven cooks fast—help? Just tent the turkey with foil if it’s browning too fast. Once, I didn’t and, well, had to rescue it with extra gravy.
And that’s pretty much everything I know about keeping turkey easy, tasty, and doable, even when you’re not feeling chef-y. If you ever try a weird twist that works out, let me know—I’m always up for something new (except, maybe, maple syrup again…)
Ingredients
- 1 (4 to 5 lb) boneless turkey breast
- 3 tablespoons unsalted butter, softened
- 1 tablespoon olive oil
- 2 teaspoons kosher salt
- 1 teaspoon freshly ground black pepper
- 1 tablespoon fresh rosemary, chopped
- 1 tablespoon fresh thyme leaves
- 4 cloves garlic, minced
- 1 cup low-sodium chicken broth
Instructions
-
1Preheat the oven to 350°F (175°C). Pat the turkey breast dry with paper towels.
-
2In a small bowl, mix together the butter, olive oil, salt, pepper, rosemary, thyme, and minced garlic.
-
3Rub the butter and herb mixture all over the turkey breast, making sure to coat it evenly.
-
4Place the turkey breast on a rack in a roasting pan. Pour the chicken broth into the bottom of the pan.
-
5Roast the turkey breast for 1 hour 30 minutes, or until an instant-read thermometer inserted into the thickest part reaches 165°F (74°C). Baste occasionally with the pan juices.
-
6Remove from the oven and let rest for 10-15 minutes before slicing and serving.
CLICK FOR NUTRITION INFO
↑
Approximate Information for One Serving
Serving Size:
1 serving
Calories:
340cal
Protein:
48 gg
Fat:
15 gg
Saturated Fat:
0g
Trans Fat:
0g
Cholesterol:
0mg
Sodium:
0mg
Potassium:
0mg
Total Carbs:
2 gg
Fiber:
0g
Sugar:
0g
Net Carbs:
0g
Vitamin A:
0
Vitamin C:
0mg
Calcium:
0mg
Iron:
0mg
Nutrition Disclaimers
Number of total servings shown is approximate. Actual number of servings will depend on your preferred portion sizes.
Nutritional values shown are general guidelines and reflect information for 1 serving using the ingredients listed, not including any optional ingredients. Actual macros may vary slightly depending on specific brands and types of ingredients used.
To determine the weight of one serving, prepare the recipe as instructed. Weigh the finished recipe, then divide the weight of the finished recipe (not including the weight of the container the food is in) by the desired number of servings. Result will be the weight of one serving.
Did you make this recipe?
Please consider Pinning it!!