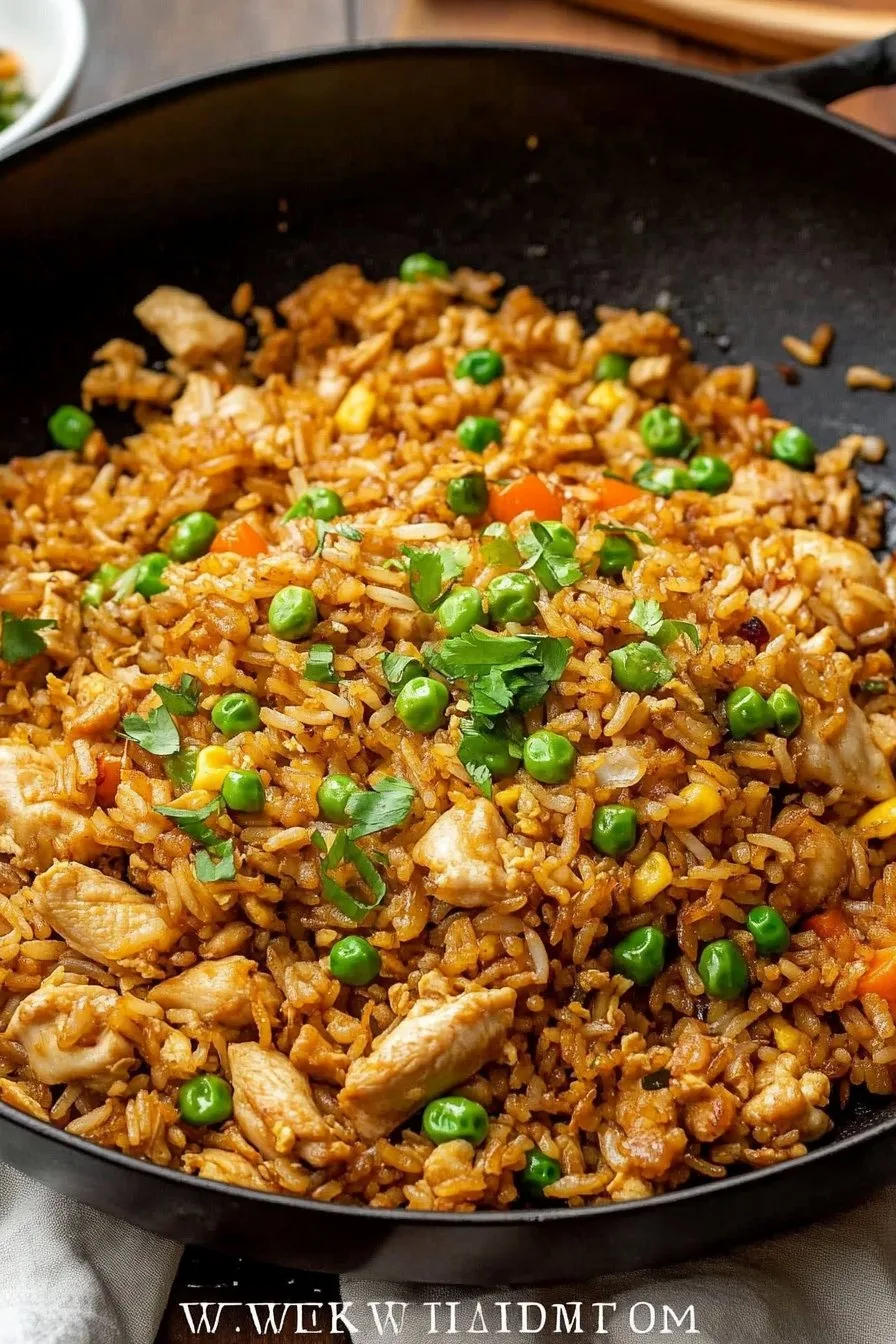
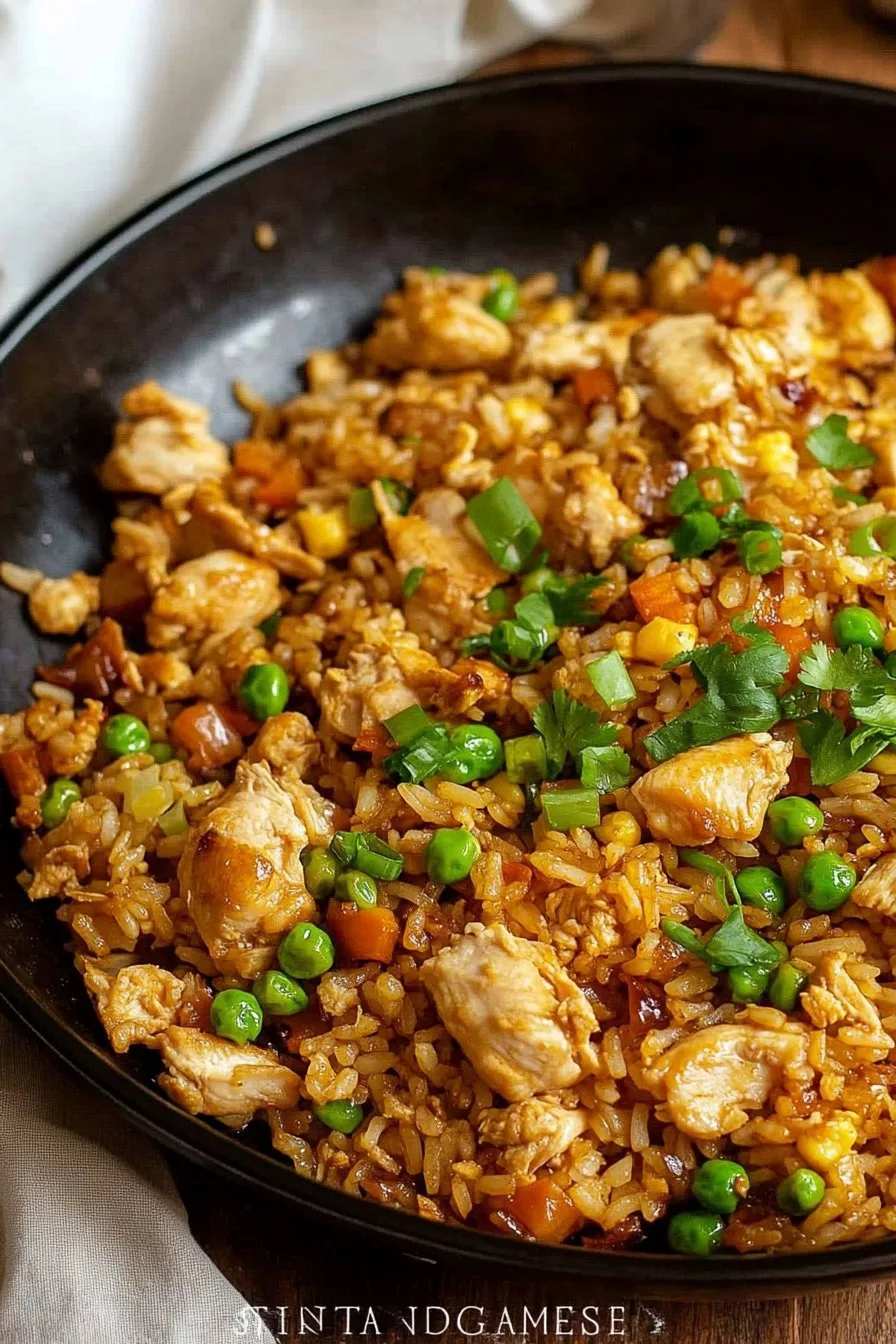
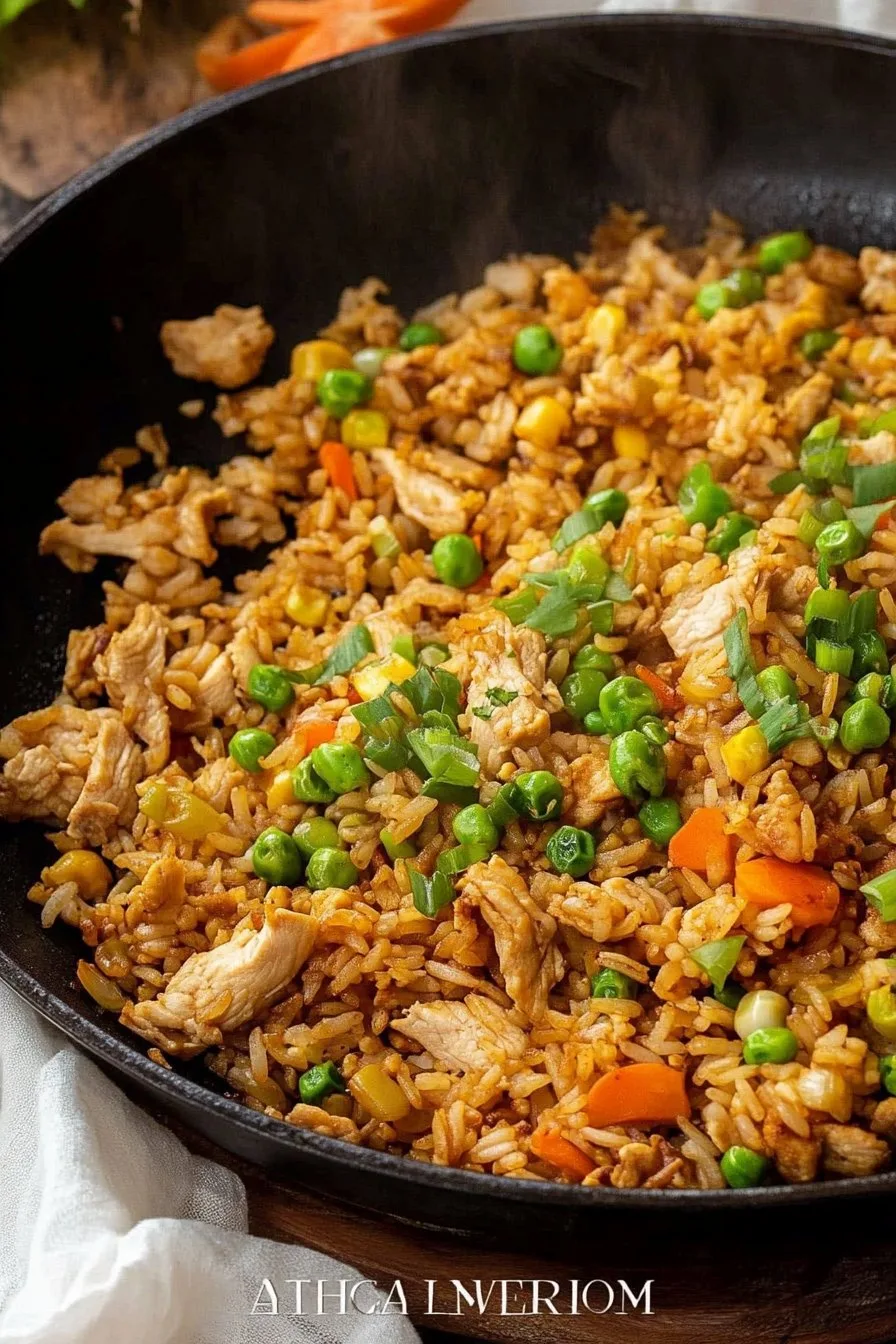
Hey y’all! Craving that irresistible, savory-sweet flavor of Restaurant-Style Chicken Fried Rice but want to skip the takeout menu? This recipe brings sizzling, perfectly seasoned chicken, fluffy rice, and crisp veggies right to your kitchen. Whether it’s a weeknight dinner or a weekend feast, this dish hits the spot every time. Let’s get cooking!
Why You’ll Love This Restaurant-Style Chicken Fried Rice
- It’s faster and fresher than takeout, with bold flavors and tender chicken.
- Loaded with colorful veggies and customizable to your taste.
- Perfect for using up leftover rice and fridge staples.
- One-pan meal—less cleanup, more enjoyment!
- Ready in just 30 minutes, ideal for busy weeknights.
Ingredients for Restaurant-Style Chicken Fried Rice
- 2 cups cooked and chilled jasmine rice (preferably day-old)
- 1 lb boneless, skinless chicken breast, diced into ½-inch pieces
- 2 tbsp vegetable oil (divided)
- 3 large eggs, lightly beaten
- 1 small onion, diced
- 1 cup frozen peas and carrots, thawed
- 3 cloves garlic, minced
- 4 tbsp low-sodium soy sauce
- 1 tbsp oyster sauce
- 1 tsp sesame oil
- ½ tsp ground white pepper
- 2 green onions, sliced (plus extra for garnish)
- Salt, to taste
How to Make Restaurant-Style Chicken Fried Rice
Step 1: Prepare the Ingredients
Dice your chicken, chop veggies, and have all sauces measured and ready. Cold, day-old rice works best for that signature texture!
Step 2: Cook the Chicken
Heat 1 tablespoon of vegetable oil in a large nonstick skillet or wok over medium-high heat. Add diced chicken and a pinch of salt. Stir-fry for 4-5 minutes until golden and cooked through. Transfer to a plate and set aside.
Step 3: Scramble the Eggs
In the same pan, add another ½ tablespoon of oil. Pour in the beaten eggs and gently scramble for about 1 minute until just set. Transfer eggs to the plate with chicken.
Step 4: Sauté the Veggies
Add remaining oil. Sauté onion for 1-2 minutes until translucent, then add garlic, peas, and carrots. Stir-fry for another 2 minutes until veggies are heated through.
Step 5: Fry the Rice
Add the chilled rice to the pan, breaking up clumps with a spatula. Stir-fry for 3-4 minutes, allowing the rice to get a little crispy.
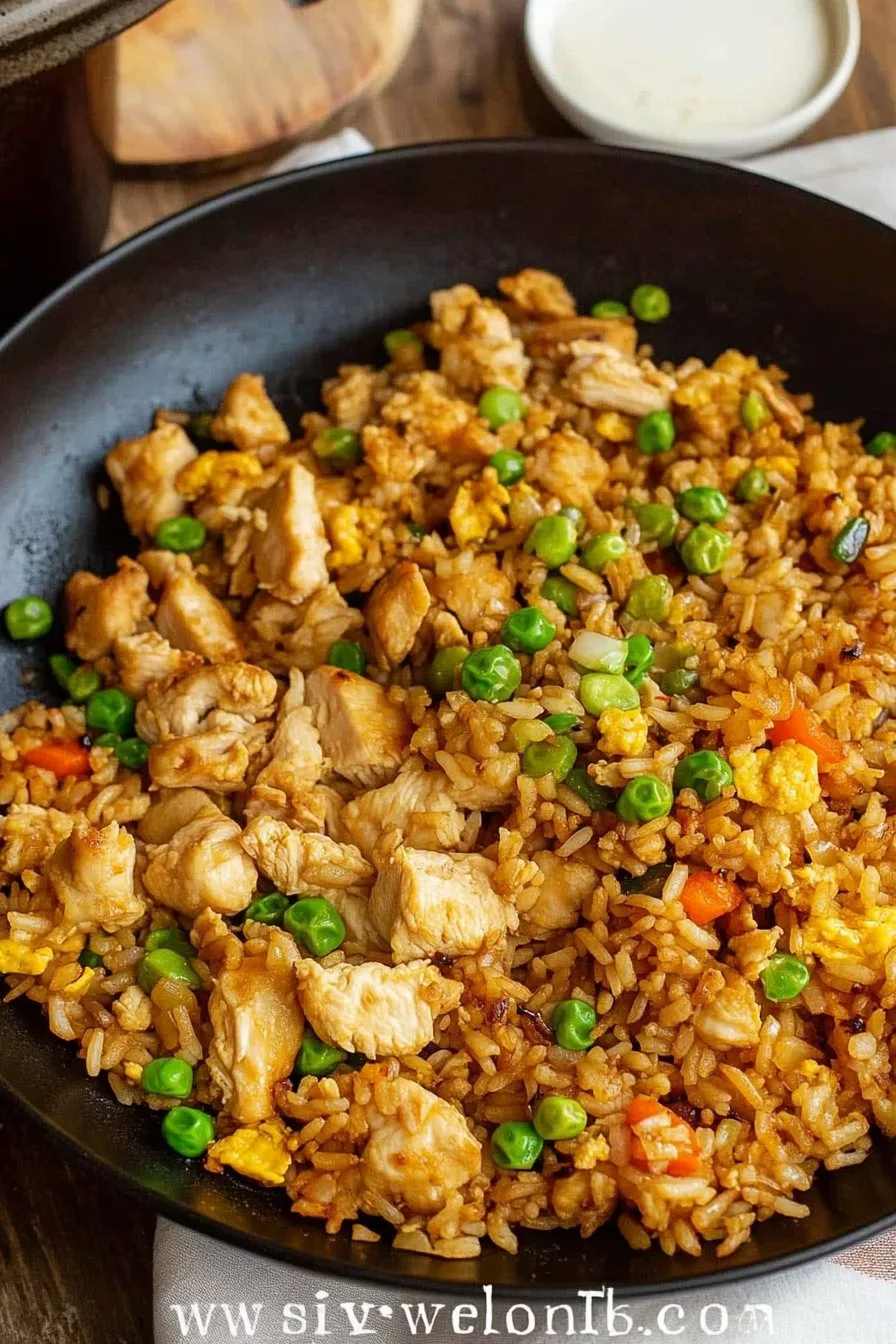
Step 6: Season and Combine
Return chicken and eggs to the pan. Drizzle soy sauce, oyster sauce, and sesame oil. Sprinkle with white pepper. Stir everything together for 2-3 minutes to combine and heat through.
Step 7: Garnish and Serve
Stir in sliced green onions, then taste and adjust salt if needed. Serve hot, garnished with extra green onions!
Notes: Tips for the Best Chicken Fried Rice
- Use cold, day-old rice for the best texture—it won’t clump or get mushy.
- Prep and chop all ingredients before you start—fried rice cooks fast!
- Swap in other proteins like shrimp, tofu, or beef if you like.
Variations on Restaurant-Style Chicken Fried Rice
- Spicy Fried Rice: Stir in 1 tablespoon of sriracha or chili garlic sauce for a kick.
- Pineapple Fried Rice: Add ½ cup diced pineapple for a sweet, tropical twist.
- Veggie-Loaded: Toss in bell peppers, snap peas, or broccoli for extra crunch and color.
Required Equipment for Chicken Fried Rice
- Large nonstick skillet or wok
- Spatula
- Sharp knife and cutting board
- Measuring cups and spoons
- Mixing bowls
Restaurant-Style Chicken Fried Rice Storage Instructions
Let leftovers cool, then store in an airtight container in the fridge for up to 4 days. To reheat, microwave or stir-fry in a hot pan until thoroughly heated. Learn more about food storage safety here.
Serving Suggestions & Pairings
- Pair with crispy egg rolls, steamed dumplings, or a simple Asian cucumber salad for a restaurant-style meal.
- Serve alongside hot and sour soup or miso soup for added comfort.
- Enjoy with a refreshing green tea or chilled jasmine tea.
Pro Tips for Perfect Restaurant-Style Chicken Fried Rice
- Use high heat and a large pan so the rice fries, not steams.
- Don’t over-crowd the pan—cook in batches if needed for crispy rice.
- Try adding a splash of fish sauce or extra oyster sauce for deeper umami flavor.
FAQ: Restaurant-Style Chicken Fried Rice
-
Can I use freshly cooked rice instead of day-old?
Day-old rice is best for fried rice because it’s drier and won’t get mushy. If using fresh rice, spread it out on a tray and let it cool in the fridge for at least 30 minutes first. -
Is it possible to make this gluten-free?
Yes! Just use gluten-free soy sauce (tamari) and ensure your oyster sauce is gluten-free as well. -
What vegetables can I add to this fried rice?
Feel free to mix in bell peppers, broccoli, corn, mushrooms, or spinach for extra color and nutrients.
Prep Time: 15 minutes
Cook Time: 15 minutes
Total Time: 30 minutes
Servings: 4
Ingredients
- 2 cups cooked jasmine rice (preferably day-old)
- 1 lb boneless, skinless chicken breast, diced
- 2 tablespoons vegetable oil
- 2 large eggs, beaten
- 1 cup frozen mixed vegetables (peas, carrots, corn)
- 3 green onions, sliced
- 3 tablespoons soy sauce
- 1 tablespoon oyster sauce
- 1 teaspoon sesame oil
- Salt and pepper to taste
Instructions
-
1Heat 1 tablespoon of vegetable oil in a large skillet or wok over medium-high heat. Add the diced chicken and season with salt and pepper. Stir-fry until fully cooked, about 5-6 minutes. Remove chicken from the pan and set aside.
-
2Add the remaining 1 tablespoon of oil to the pan. Pour in the beaten eggs and scramble until just set. Push the eggs to the side of the pan.
-
3Add the cooked rice and frozen mixed vegetables to the pan. Stir-fry for 2-3 minutes, breaking up any clumps of rice.
-
4Return the cooked chicken to the pan. Add soy sauce, oyster sauce, and sesame oil. Stir well to combine all ingredients and heat through, about 2-3 minutes.
-
5Stir in the sliced green onions. Taste and adjust seasoning with additional salt or pepper if needed. Serve hot.
CLICK FOR NUTRITION INFO
↑
Approximate Information for One Serving
Serving Size:
1 serving
Calories:
420cal
Protein:
27 gg
Fat:
13 gg
Saturated Fat:
0g
Trans Fat:
0g
Cholesterol:
0mg
Sodium:
0mg
Potassium:
0mg
Total Carbs:
48 gg
Fiber:
0g
Sugar:
0g
Net Carbs:
0g
Vitamin A:
0
Vitamin C:
0mg
Calcium:
0mg
Iron:
0mg
Nutrition Disclaimers
Number of total servings shown is approximate. Actual number of servings will depend on your preferred portion sizes.
Nutritional values shown are general guidelines and reflect information for 1 serving using the ingredients listed, not including any optional ingredients. Actual macros may vary slightly depending on specific brands and types of ingredients used.
To determine the weight of one serving, prepare the recipe as instructed. Weigh the finished recipe, then divide the weight of the finished recipe (not including the weight of the container the food is in) by the desired number of servings. Result will be the weight of one serving.
Did you make this recipe?
Please consider Pinning it!!