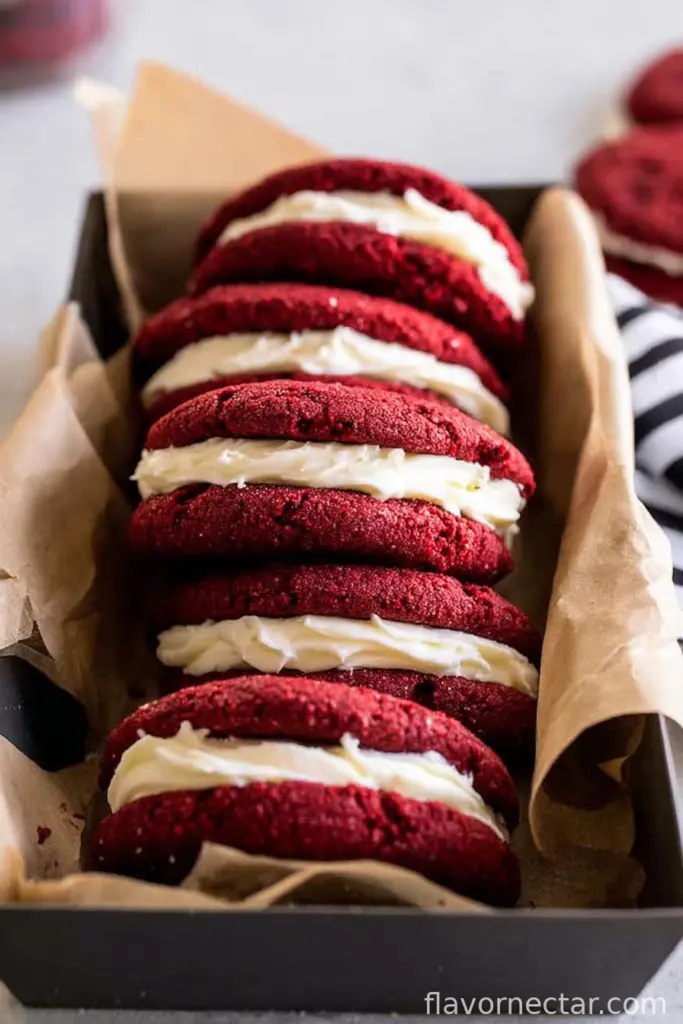
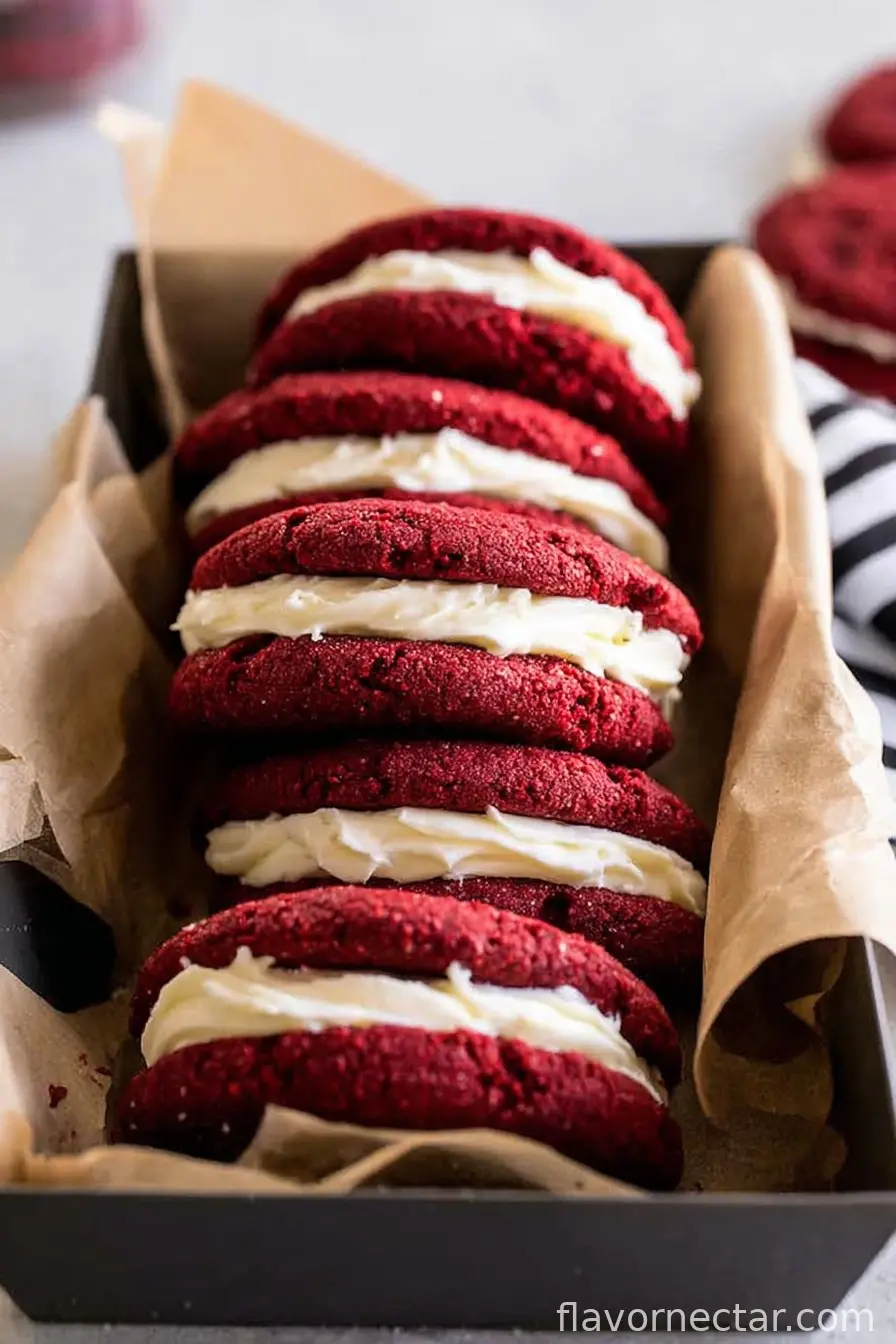
Let Me Tell You About These Cookies
Okay, I’ll be the first to admit: I have a complicated relationship with cookies. Sometimes I’m lazy (who isn’t on a rainy Tuesday?) and the idea of pulling out a bunch of flour and baking powder just makes me sigh loudly to myself. So, one day while hunting through my pantry, I spotted a forgotten box of red velvet cake mix wedged between a half-eaten bag of marshmallows and some sad spaghetti, and it hit me—why not use cake mix for cookies? Turns out, it’s the baking shortcut I’ve always needed. Now, these Red Velvet Cake Mix Cookies with Cream Cheese Icing have become my go-to when the sweet tooth hits and time (or, honestly, motivation) is at an all-time low. I brought these to a potluck once and someone asked if I bought them at a bakery, which just… made my week.
Why You’ll Want to Make These Over and Over
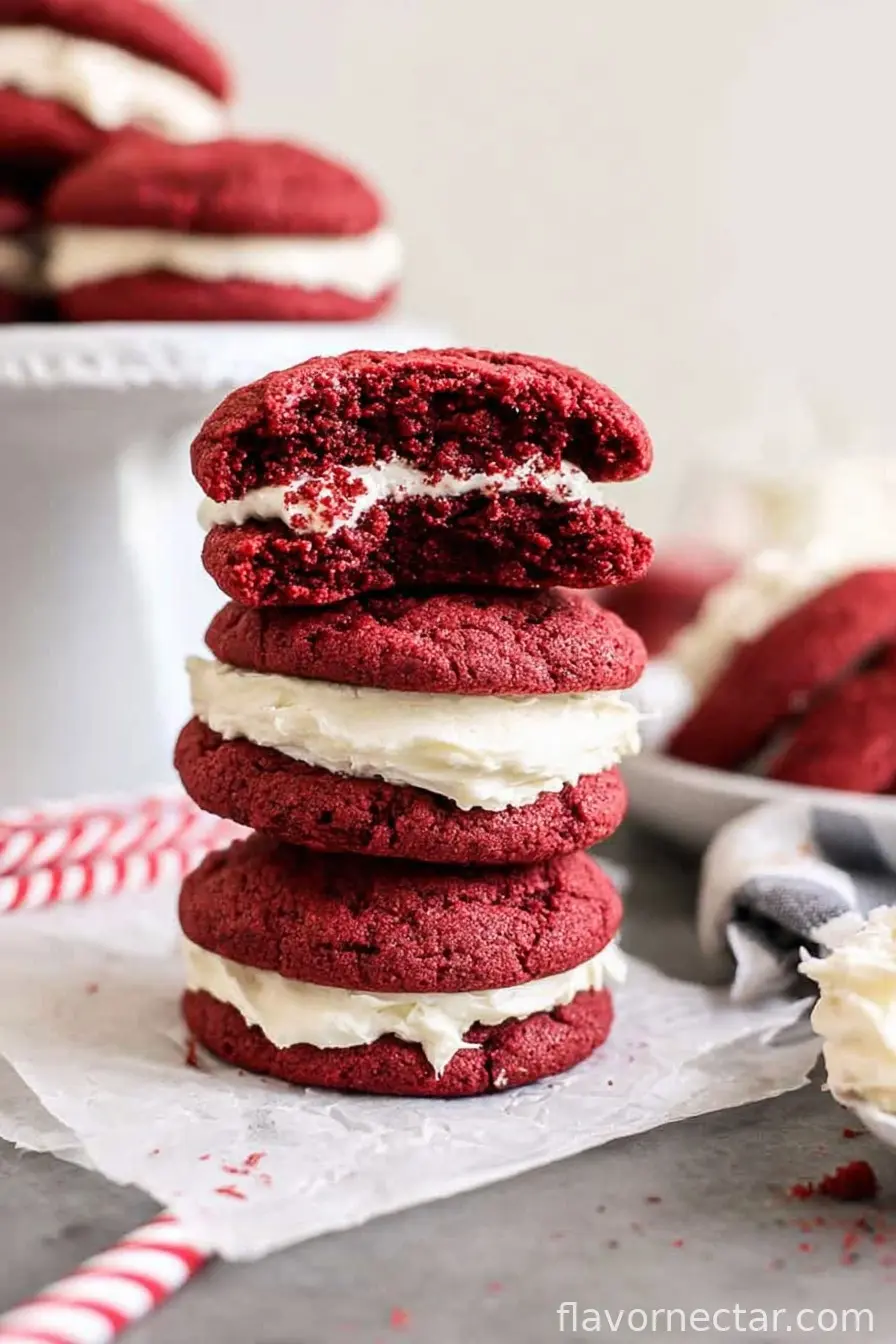
I whip these up whenever I want to look like I tried way harder than I actually did. My family pretty much inhales them (sometimes I have to hide a few just so I get one the next day). They’ve got that classic red velvet flavor, super soft in the middle, a tiny crunch on the edge, and that tangy Cream Cheese icing—ugh, to die for! Also, you hardly need to measure much (which, if you know me, is both a blessing but also a curse—once I mixed up tablespoons with teaspoons, that was a bit much). If you’ve never tried cookies form cake mix, you’ll kick yourself for waiting. I do every time.
Here’s What You’ll Need (and a Few Swaps)
- 1 box (around 15.25 oz) red velvet cake mix (my grandma swears by Duncan Hines, but honestly, whatever’s on sale works fine—I’ve used the store brand without any tragedies)
- 2 large eggs
- 1/2 cup (about 115g) vegetable oil (or, on a wild day, melted butter—makes them richer, but it’s your call)
- 1 teaspoon vanilla extract (sometimes I skip it, but it does add a lil somethin’ special)
- 4 ounces (115g) cream cheese, softened
- 2 tablespoons unsalted butter, softened (if salted is all you’ve got, just skip that tiny pinch of salt in the icing)
- 1 1/2 cups powdered sugar (give or take—I’ve accidentally eyeballed it and survived)
- Pinch of salt (optional)
How To Whip ‘Em Up
- Preheat your oven to 350°F (180°C), unless you’re like me and occasionally forget until halfway in. Line a baking sheet with parchment paper, or just spray it with whatever nonstick stuff you have—it’s all good.
- Grab a big bowl (I started in a medium one once and there was red dough everywhere—don’t be like me). Toss in your cake mix, eggs, oil, and vanilla. Mix it up with a wooden spoon, or even your hands if you’re feeling rustic. It’ll look thick and kind of sticky—don’t panic.
- Scoop out little balls of dough, about a tablespoon each. I use a cookie scoop, but honestly two spoons work fine, or just pinch off bits. Plop them on your tray with some breathing room. They don’t really spread a ton.
- Bake for 9-11 minutes, but start checking at 9—underbaking is your friend here for a chewy center. If the edges look set but the tops are slightly soft, that’s perfect. Let them chill out on the tray for 5 minutes (seriously, don’t rush—one time I did and they broke apart like sad little pancakes), then move to a wire rack or, you know, a plate.
- While the cookies cool, let’s make the icing! In a bowl, beat the soft cream cheese and butter till it looks creamy, or at least not totally lumpy. Add in the powdered sugar (slowly, or you’ll be wearing it—ask me how I know), the vanilla, and a pinch of salt if you feel like it. Beat until smooth. Taste it—this is mandatory.
- Once the cookies are cool (important! Otherwise the icing just melts off and it’s a right mess), slather on some icing with a knife or the back of a spoon. You can get fancy with a piping bag if you want, but I haven’t got the patience most days.
My Actually Useful Notes (No Judgement)
- If the dough feels too sticky to roll, just pop it in the fridge for like 20 minutes (I only learned this after years of red fingers).
- I sometimes make double the icing because my household likes it thick, but that’s probably a little over the top for most folks.
- Powdered sugar clouds are inevitable. Just accept it. On second thought, mix slower if you value a tidy kitchen.
Cookie Experiments (AKA Variations)
- I once mixed in white chocolate chips—game changer. Regular chocolate chips work too, though they’re not as pretty.
- If you only have chocolate cake mix, try that with the same icing—oddly good, not exactly red velvet, but totally edible.
- One time I tried using margarine instead of oil, but honestly it made them kinda bland and a bit… rubbery? Wouldn’t recommend.
What If You Don’t Have Fancy Equipment?
A mixer is great, but honestly, a wooden spoon and some muscle is just fine for the dough. For the icing, a fork or whisk will do the trick if you don’t mind a tiny arm workout. And if you don’t have parchment, I’ve greased foil before—worked in a pinch (though, full disclosure, some stuck and left half-cookies…we called them “cookie bites”).
How to Store (If They Even Last)
You can keep these in an airtight container for up to 3 days at room temp—but let’s be real, in my house they disappear within about 20 hours. If you want them colder (especially in hot weather), stash them in the fridge and the icing sets up firm like a bakery treat. I think they tastes better day two, but who’s keeping track?
Serving Ideas That Actually Happen
We usually just pile them on a plate and stand around the kitchen munching. But for birthdays I make a stack and squish extra icing between two cookies for “whoopie pies” (kids love this, adults do too but won’t admit it). Also, a glass of cold milk or hot coffee if it’s chilly—classic.
Stuff I’ve Learned the Hard Way (Pro Tips)
- Don’t try to scoop warm cookies—total heartbreak. Let them rest, even if you’re hungry.
- I skipped sifting powdered sugar once—lumpy icing city. You can just mash them out, but it’s annoying.
- Resist the urge to overbake; they get dry really fast, trust me, I learned this the stubborn way.
Questions Folks Have Actually Asked Me
- Can I make these without eggs? Probably! I’ve swapped in 1/4 cup applesauce per egg once for a vegan friend—not quite as chewy but still good.
- Can I freeze these? Yep, freeze un-iced cookies in a zip-top bag. Ice them after thawing, otherwise the icing does weird things.
- Do I have to use red velvet cake mix? Nah—swap in fudge cake or even lemon (though obviously it won’t be red velvet anymore, right?).
- Help! My cookies are flat! Usually means the dough’s too warm or your oven runs hot. Maybe just chalk it up to rustic charm and call them “cookie thins.”
- How many cookies does this make anyway? I get about 20, sometimes 18 if I go big with the scoops and sneak one raw (I know, I know, not supposed to).
Sidebar: If you’re ever bored, watching cats chase blobs of icing on YouTube while your cookies cool is weirdly therapeutic. Anyway, happy baking—I hope you have as much fun making (and eating) these as I do!
Ingredients
- 1 box (around 15.25 oz) red velvet cake mix
- 2 large eggs
- 1/2 cup (about 115g) vegetable oil
- 1 teaspoon vanilla extract
- 4 ounces (115g) cream cheese, softened
- 2 tablespoons unsalted butter, softened
- 1 1/2 cups powdered sugar
- Pinch of salt (optional)
Instructions
-
1Preheat your oven to 350°F (180°C), unless you’re like me and occasionally forget until halfway in. Line a baking sheet with parchment paper, or just spray it with whatever nonstick stuff you have—it’s all good.
-
2Grab a big bowl (I started in a medium one once and there was red dough everywhere—don’t be like me). Toss in your cake mix, eggs, oil, and vanilla. Mix it up with a wooden spoon, or even your hands if you’re feeling rustic. It’ll look thick and kind of sticky—don’t panic.
-
3Scoop out little balls of dough, about a tablespoon each. I use a cookie scoop, but honestly two spoons work fine, or just pinch off bits. Plop them on your tray with some breathing room. They don’t really spread a ton.
-
4Bake for 9-11 minutes, but start checking at 9—underbaking is your friend here for a chewy center. If the edges look set but the tops are slightly soft, that’s perfect. Let them chill out on the tray for 5 minutes (seriously, don’t rush—one time I did and they broke apart like sad little pancakes), then move to a wire rack or, you know, a plate.
-
5While the cookies cool, let’s make the icing! In a bowl, beat the soft cream cheese and butter till it looks creamy, or at least not totally lumpy. Add in the powdered sugar (slowly, or you’ll be wearing it—ask me how I know), the vanilla, and a pinch of salt if you feel like it. Beat until smooth. Taste it—this is mandatory.
-
6Once the cookies are cool (important! Otherwise the icing just melts off and it’s a right mess), slather on some icing with a knife or the back of a spoon. You can get fancy with a piping bag if you want, but I haven’t got the patience most days.
CLICK FOR NUTRITION INFO
↑
Approximate Information for One Serving
Serving Size:
1 serving
Calories:
190 caloriescal
Protein:
2 gg
Fat:
8 gg
Saturated Fat:
0g
Trans Fat:
0g
Cholesterol:
0mg
Sodium:
0mg
Potassium:
0mg
Total Carbs:
28 gg
Fiber:
0g
Sugar:
0g
Net Carbs:
0g
Vitamin A:
0
Vitamin C:
0mg
Calcium:
0mg
Iron:
0mg
Nutrition Disclaimers
Number of total servings shown is approximate. Actual number of servings will depend on your preferred portion sizes.
Nutritional values shown are general guidelines and reflect information for 1 serving using the ingredients listed, not including any optional ingredients. Actual macros may vary slightly depending on specific brands and types of ingredients used.
To determine the weight of one serving, prepare the recipe as instructed. Weigh the finished recipe, then divide the weight of the finished recipe (not including the weight of the container the food is in) by the desired number of servings. Result will be the weight of one serving.
Did you make this recipe?
Please consider Pinning it!