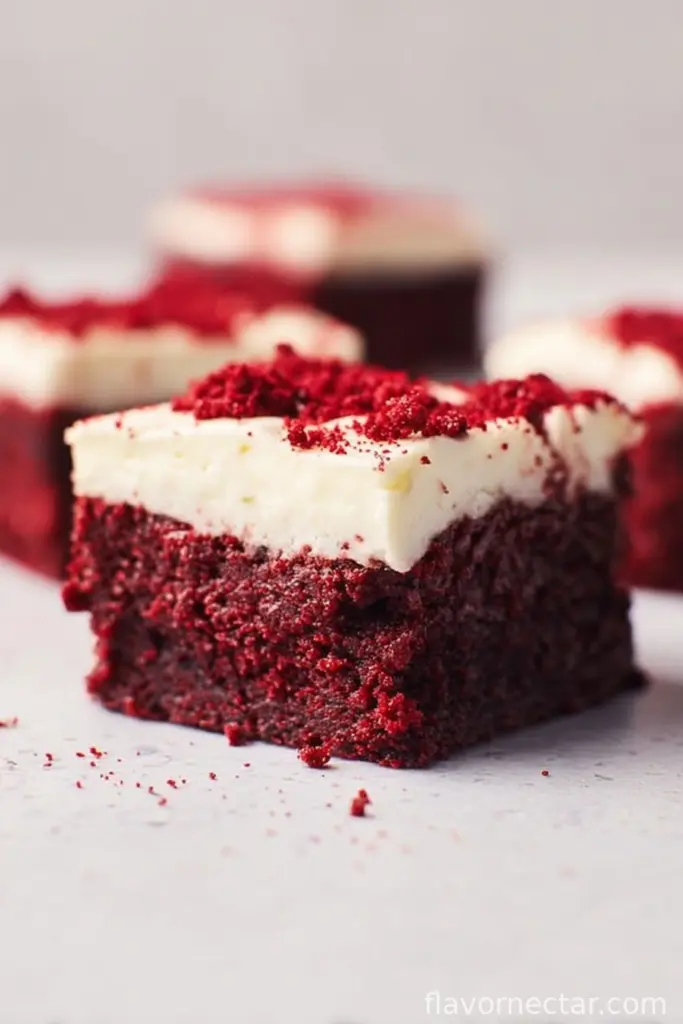
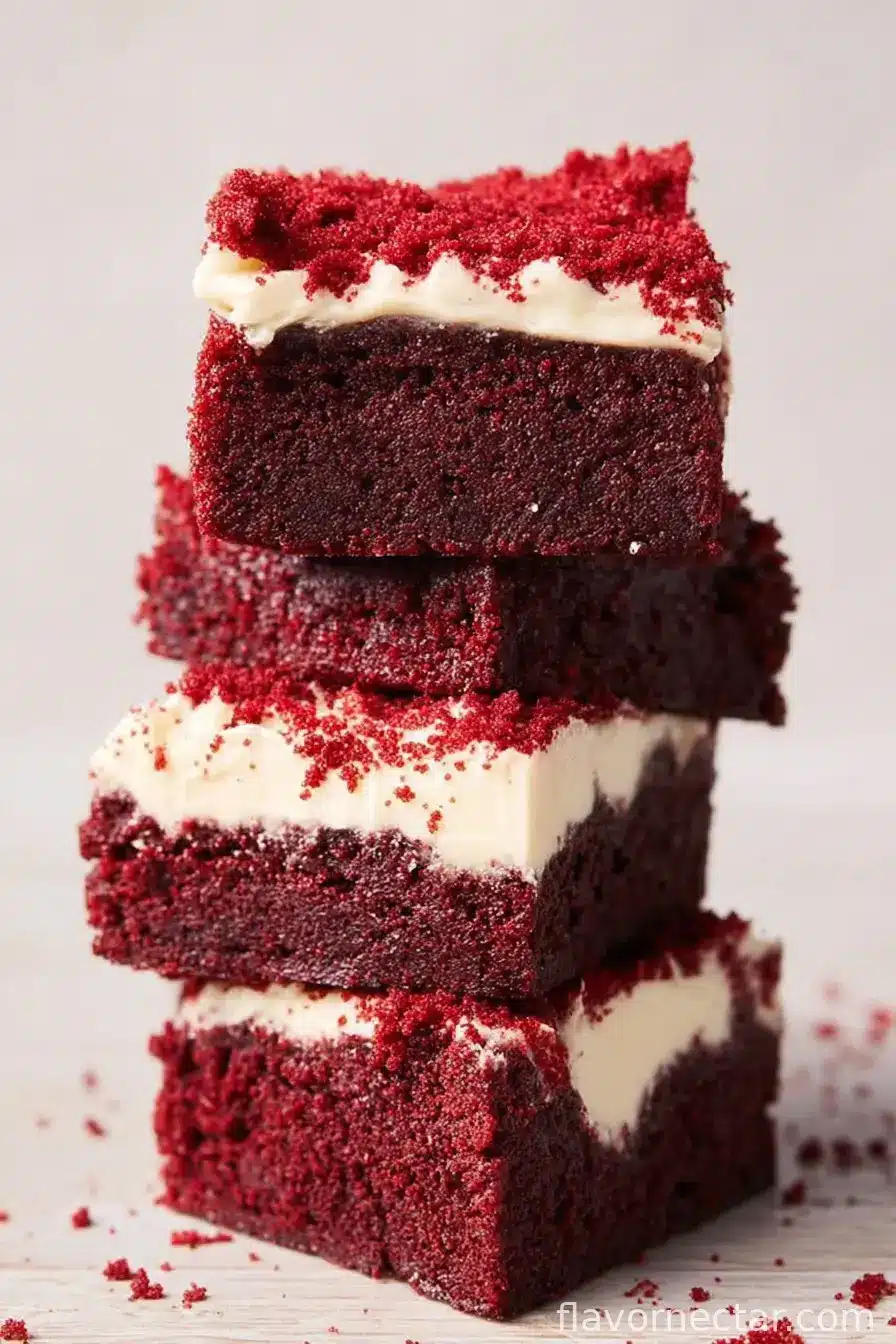
Alright, Let’s Talk Red Velvet Brownies (and Why I Can’t Stop Making Them)
So here’s the thing: I didn’t even know what Red Velvet Brownies were until my friend Jenny brought them to a casual game night. I mean, sure, I’d had classic brownies, and don’t get me started on the amount of red velvet cake I’ve eaten over the years, but brownies? That was a new lane for me. I remember taking my first bite—messy, warm, just a little gooey in the middle—and thinking, ‘Okay, where have these been all my life?’

Ever since then, I’ve been a bit (read: a lot) obsessed. Now I make them for birthdays, awkward family get-togethers, lazy Sunday afternoons—honestly, any excuse will do. Sometimes they look pretty, sometimes they look like a bit of a mess, but as my gran used to say, “It all goes down the same way, love.” Also, if I’m being honest, I’ll eat them straight from the tin with a fork when no one’s watching—no shame in my game.
Why I Keep Coming Back to These Brownies
I make this recipe when I want something fudgy but a bit showy, too. My family gobbles these up before they’ve even cooled. I kid you not—my nephew once asked if we could have them instead of birthday cake, which says it all (though, trying to stick candles in brownies is trickier than you’d think). They’re rich, with that mysterious cocoa flavor—the one that makes people go, “Is there something in here I’m not tasting?” (In a good way, I hope!)
And, confession: I used to be pretty anti-red food coloring (I know, I know, but I was on a wholefood kick), but these just look so happy and festive. Plus, if yours come out more burgundy than red? Don’t stress. They’ll still taste banging.
Stuff You’ll Need (But Swap If Needed!)
- 2/3 cup unsalted butter, melted (once, I ran out and used salted; just skip the extra salt—you’re fine)
- 1 and 1/4 cups sugar (sometimes I use half brown sugar for a chewier vibe)
- 2 large eggs (room temp, if you remember; if not, I won’t tell)
- 1 tbsp red liquid food coloring (gel is okay, but honestly, I just grab whatever’s cheap at the shop)
- 1 tsp vanilla extract (My gran swore by Nielsen-Massey, but… any kind’s fine!)
- 2/3 cup all-purpose flour (whole wheat? Tried it—not great. Don’t do it, unless fibre’s your jam)
- 1/4 cup unsweetened cocoa powder (I usually reach for Hershey’s, but store brand is just dandy)
- 1/4 tsp salt
- 1/2 tsp white vinegar (this is the secret, trust me—gives a bit of *zing*)
- Optional: 1/2 cup white chocolate chips or pecans (my husband picks those out, but I add them anyway)
How I Actually Make These (With a Few Side Notes)
- Preheat your oven to 350°F (about 180°C); grease and line an 8×8 inch baking pan—if you only have a 9×9 tin, your brownies will be a smidge thinner, just keep an eye on the bake time.
- Whisk your melted butter and sugar together in a big bowl until it looks like a pale, gloopy mess—this is where I usually sneak a fingertip taste (don’t tell anyone).
- Add in eggs, one at a time; mix after each. Now’s also when I stir in the food coloring and vanilla, which, fyi, sometimes splatters more than you’d expect. Wear an apron, or don’t, if you want to look like an accidental artist.
- Dump in the flour, cocoa powder, and salt. Fold it all together. It might look a bit stiff, but that’s normal, honest—it’ll smooth out in the oven.
- Add the vinegar. (Weird, right? But it helps keep things tender, and no, you won’t taste it.)
- If you’re using chips or nuts, throw them in now. Or don’t—I’m not your mum.
- Scrape that gloriously red batter into your pan. Smooth the top. Lick the spatula (as long as no kids are looking).
- Bake for about 27 to 32 minutes; but here’s the tricky bit—they’re done when just set in the middle. If you like yours extra gooey, pull them early, if you want them cake-ier, go longer. Actually, sometimes I even bake half the pan less and slide it out first, but that’s a faff.
- Let them cool as long as you can bear. Or, do what I do: cut them while they’re warm, but expect a bit of a squidge.
Bits I Learned the Hard Way
- If you overmix once the flour’s in, they can get a bit tough. (Yes, I learned this from impatience…)
- Don’t skip lining the pan unless you love scraping stuck bits with a spoon, which I suppose is a vibe?
- If your red dye looks brownish before baking, it usually pops in the oven. And if not, well, they still taste banging.
Let’s Chat Variations (Some Winners, Some…Not)
- I tried swirling in cream cheese once—mega yum, but messy. Worth a go if you’re feeling ambitious.
- Peanut butter chips? Sounded like a dream, but actually, I think it overpowered the cocoa, so maybe not.
- Add a dash of instant coffee if you want a deeper flavor—don’t go wild, though, or it’s “Mum’s All-Nighter Brownies.”
If You Don’t Have All the Gear
All you really need is a bowl, a spatula, and something to bake them in. Don’t have a square tin? Just use a loaf tin and cut funny shapes—no one ever complains. (Once, I made them in a casserole dish and called them a “deconstructed brownie experience.” Nobody batted an eye.)
How I Store (or Fail to Store) Them
If you happen to have leftovers (miracle!), pop them in an airtight tin and they’ll keep for about 3 days at room temp. Actually, I think they taste even better on day two—more fudgy, less crumbly. Though, honestly, in my house it never lasts more than a day! You can freeze them, too, if you’re organized (I, however, am not).
The Best Ways To Eat Them (According to Me)
Warm with a scoop of vanilla ice cream—proper heaven. My brother likes to dunk hazelnut gelato over the top, which feels a bit fancy for a Tuesday but hey, whatever floats your boat. If it’s for a party, I sometimes dust with icing sugar. Or, serve them for breakfast (I won’t judge; breakfast brownies are a thing here now).
Don’t Be Like Me—Pro Tips You’ll Thank Me For
- Trying to cut these before they cool is a recipe for a mushy mess (though still edible, trust me, I speak form experience).
- Never, ever skip the pan lining step. Cleaning that mess is for the birds.
- Chill the brownies before slicing for cleaner squares—if you’re patient (I never am).
FAQ—Because I’ve Actually Been Asked
- Do I need the vinegar? Yep, it’s for the texture. I once left it out, and they were oddly flat and dull—so just use it.
- Can I use beet juice instead of food coloring? You know, I’ve tried, and it kinda works but the flavor gets weird. I’d stick to dye.
- How do I know when they’re done? If the middle doesn’t jiggle outrageously but still looks glossy, you’re golden. Don’t worry, they set up as they cool.
- Can I double the recipe? For sure, just use a 9×13 pan and add a couple more minutes’ bake time. Don’t overbake—learned that the hard way.
- Are these super sweet? They’re sweet but not over the top. I suppose you could cut the sugar, though I like them as-is. My dad says they’re perfect for someone with a sweet tooth and that’s me, so…
Right, then—I think that covers everything. If you make these, let me know how your brownies turn out! Or just… eat them all and call it a success. Life’s too short for empty tins, after all. Cheers!
Ingredients
- 1 cup unsalted butter, melted
- 1 1/2 cups granulated sugar
- 2 large eggs
- 2 teaspoons vanilla extract
- 2 tablespoons red food coloring
- 1/4 cup unsweetened cocoa powder
- 1 1/4 cups all-purpose flour
- 1/2 teaspoon salt
- 4 oz cream cheese, softened (for optional frosting)
Instructions
-
1Preheat the oven to 350°F (175°C). Grease a 9×9-inch baking pan or line with parchment paper.
-
2In a large bowl, combine melted butter and sugar. Whisk until well combined. Add eggs, vanilla extract, and red food coloring; mix until smooth.
-
3Sift in the cocoa powder, flour, and salt. Stir just until incorporated and no dry streaks remain.
-
4Pour the batter into the prepared baking pan and smooth the top.
-
5Bake for 28-32 minutes, or until a toothpick inserted in the center comes out with a few moist crumbs. Allow to cool completely.
-
6Optional: Beat the softened cream cheese with 2 tablespoons powdered sugar until fluffy. Spread over cooled brownies before serving.
CLICK FOR NUTRITION INFO
↑
Approximate Information for One Serving
Serving Size:
1 serving
Calories:
260 caloriescal
Protein:
3gg
Fat:
13gg
Saturated Fat:
0g
Trans Fat:
0g
Cholesterol:
0mg
Sodium:
0mg
Potassium:
0mg
Total Carbs:
33gg
Fiber:
0g
Sugar:
0g
Net Carbs:
0g
Vitamin A:
0
Vitamin C:
0mg
Calcium:
0mg
Iron:
0mg
Nutrition Disclaimers
Number of total servings shown is approximate. Actual number of servings will depend on your preferred portion sizes.
Nutritional values shown are general guidelines and reflect information for 1 serving using the ingredients listed, not including any optional ingredients. Actual macros may vary slightly depending on specific brands and types of ingredients used.
To determine the weight of one serving, prepare the recipe as instructed. Weigh the finished recipe, then divide the weight of the finished recipe (not including the weight of the container the food is in) by the desired number of servings. Result will be the weight of one serving.
Did you make this recipe?
Please consider Pinning it!!