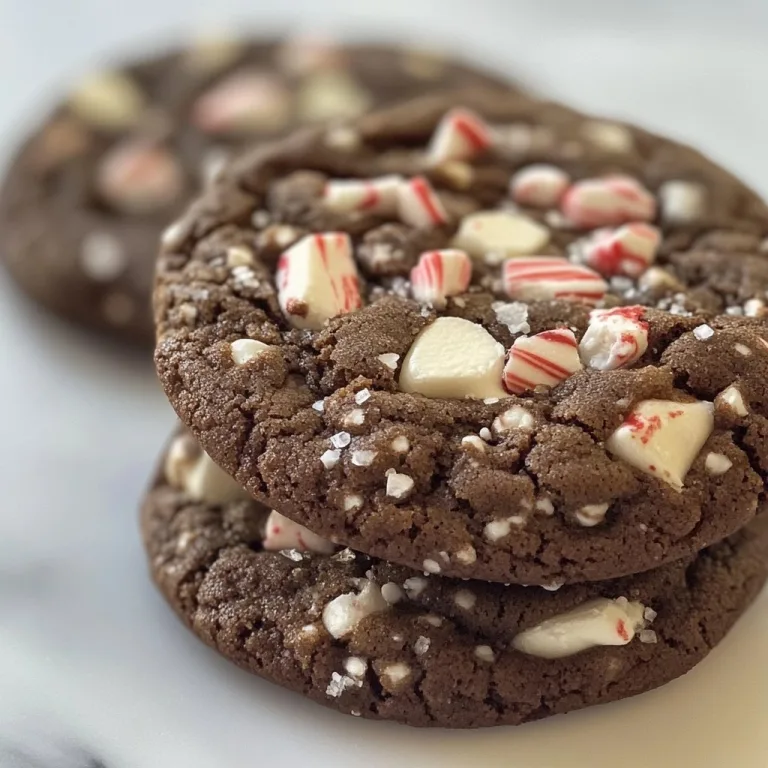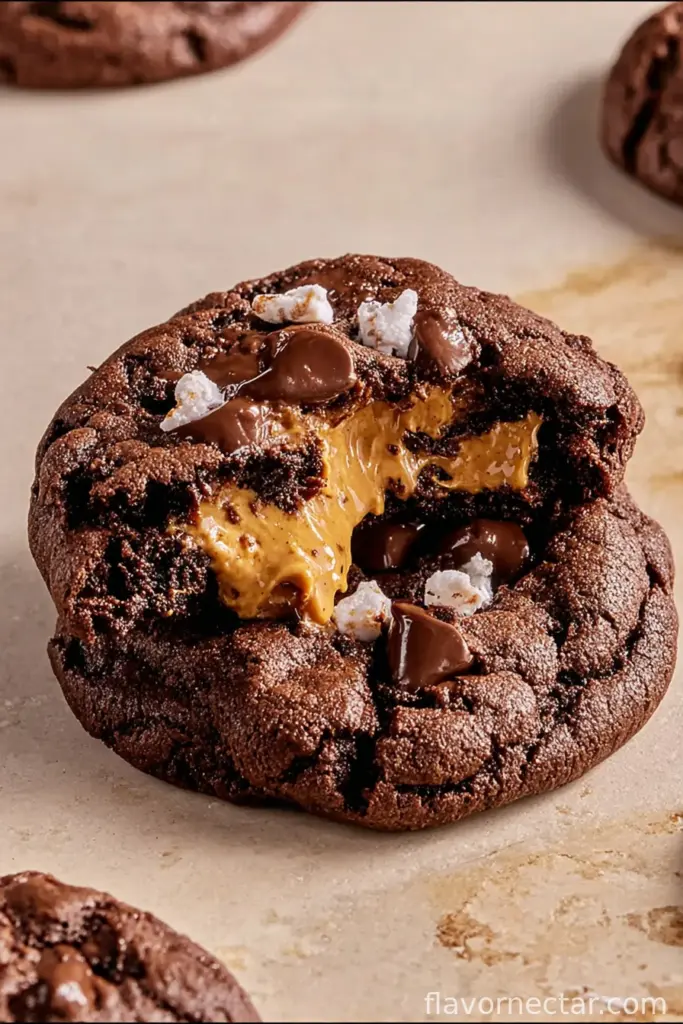
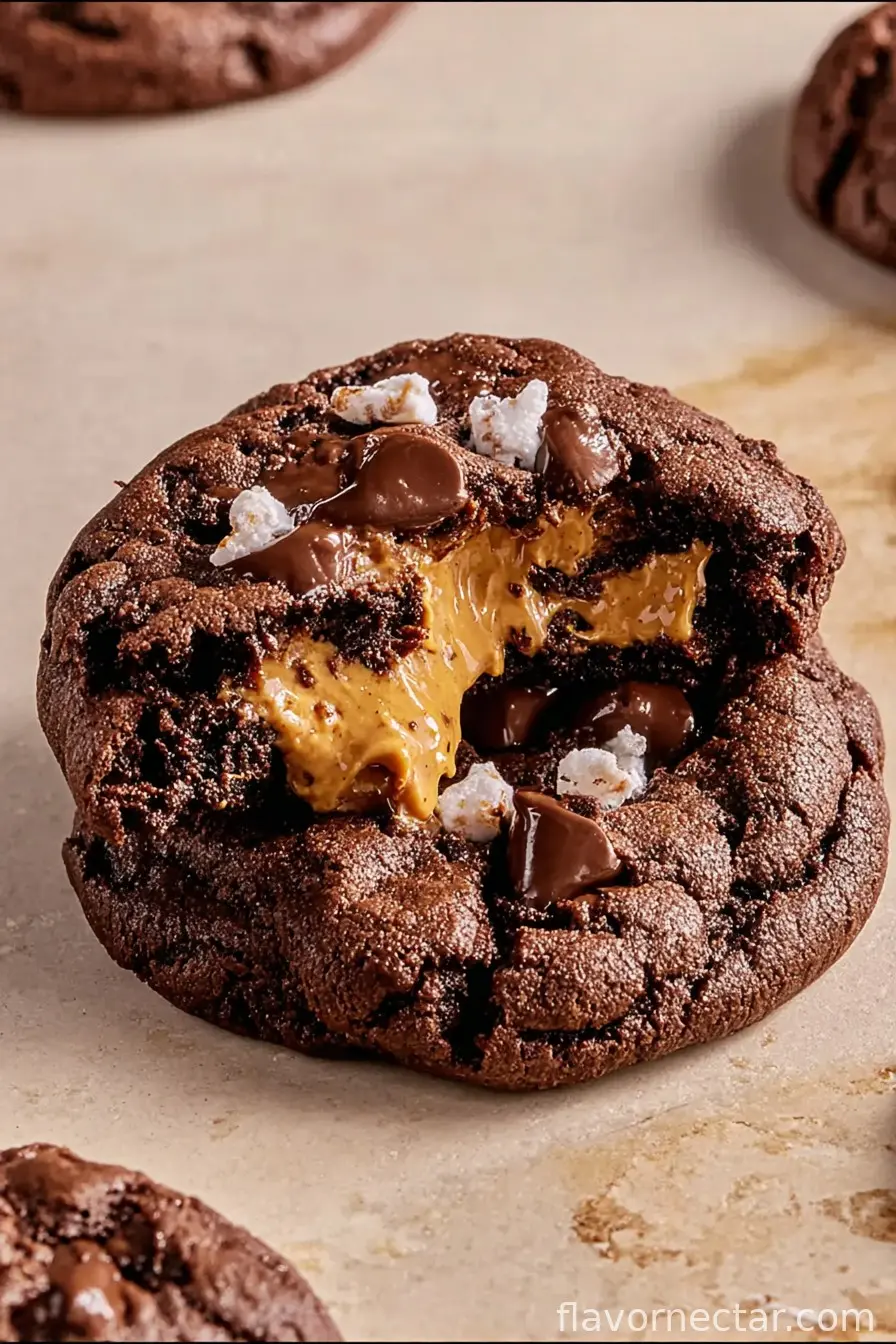
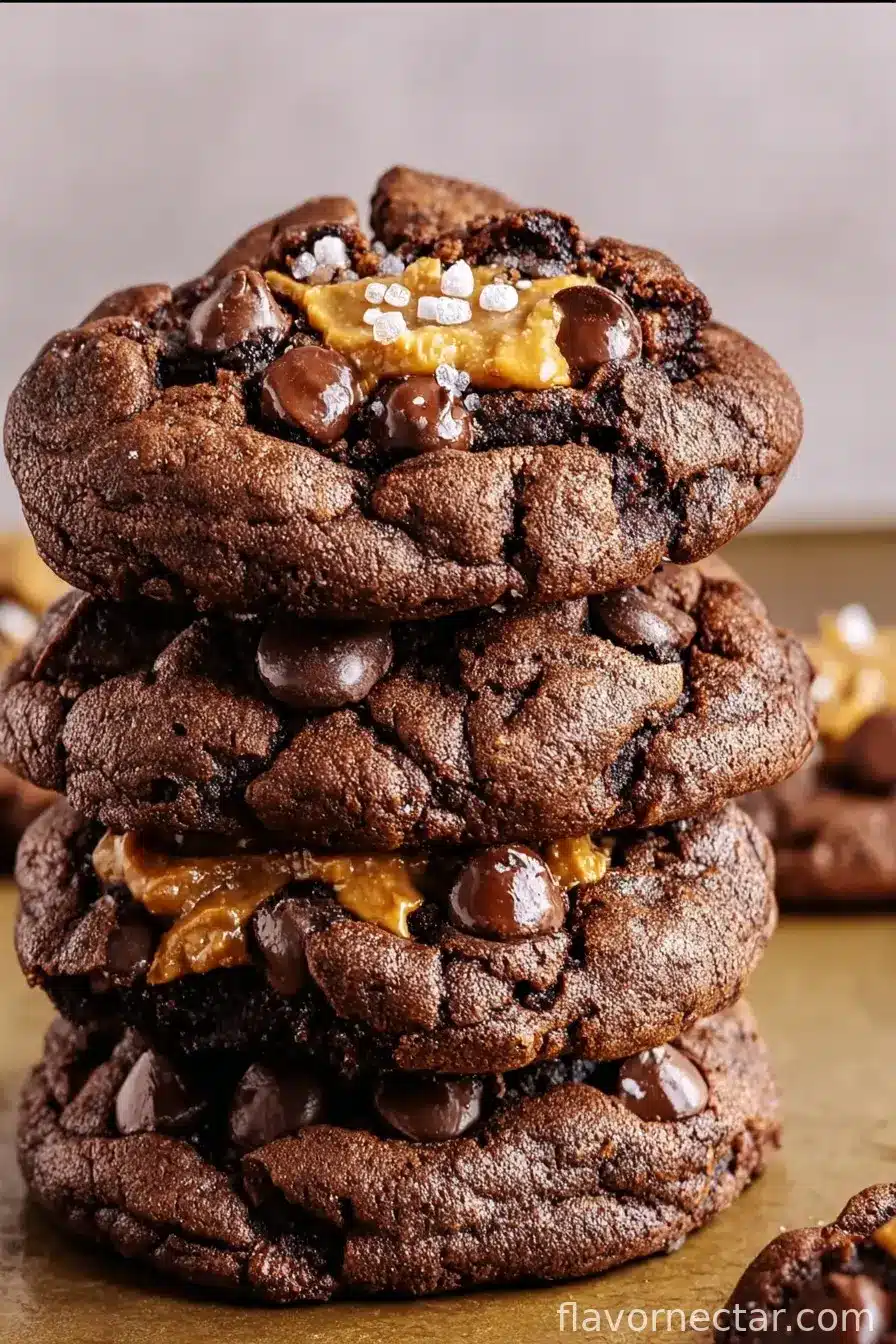
Let’s Talk Peanut Butter Stuffed Chocolate cookies
Alright, so here’s the deal—I’ve baked probably a thousand cookies in my time (not exaggerating, ask my relatives) but these Peanut Butter Stuffed Chocolate Cookies? These are the ones people bribe me to make. First time I baked them was for my cousin’s game night and, honestly, half the batch disappeared before we could put the kettle on. I have a very clear memory of rescuing the last one from the bottom of the tin, only for my dog Max to stare at me like I’d committed the ultimate betrayal. So yes, these cookies don’t last long. Also, once my nephew tried to barter his Halloween candy stash just for an extra cookie… which, if you know him, is a big deal.
Why I Always Come Back to This Recipe
I whip these up when it’s grey outside, or just, you know, on a random Wednesday when I need a little joy. My family loses their marbles for these: it’s the mix of melty, sweet chocolate and that surprise pocket of Peanut Butter in the centre (plus, there’s the look on someone’s face when they crack one open—worth it.)
Hot tip: the only challenging bit is not eating all the Peanut Butter filling before it makes it into the cookies. Actually, I used to get annoyed trying to keep the Peanut Butter from sticking to everything. But I’ve found using slightly chilled peanut butter helps a ton—less mess, more cookies for everyone. Take that, sticky fingers!
Gather Your Stuff: Ingredients
- 1 cup (225g) unsalted butter, room temp (or salted butter if that’s what you’ve got—just cut back on the added salt later)
- 1 cup (200g) brown sugar—dark or light, I flip-flop depending on what’s in the pantry
- 1/2 cup (100g) granulated sugar
- 2 large eggs
- 2 teaspoons vanilla extract (my grandmother insisted on pure vanilla but honestly, imitation works fine in a pinch)
- 2 cups (250g) all-purpose flour (if you’re out, bread flour makes chewier cookies)
- 3/4 cup (65g) unsweetened cocoa powder (Dutch-processed if you like it deep and chocolatey, but natural works too)
- 1 teaspoon baking soda
- 1/2 teaspoon salt (skip this if using salted butter, or don’t—won’t hurt anyone)
- 1 1/4 cups (220g) semisweet chocolate chips—milk chocolate is great too, nobody here is judging
- 3/4 cup (about 180g) creamy peanut butter (I’ve used crunchy before and it’s… texturally interesting?)
- Optional: a handful of chopped peanuts for some crunch (or pretzels if you want to live dangerously)
How To Make Them—Step by Step, More or Less
- Preheat your oven to 350°F (180°C). Line two baking trays with parchment, unless you like scraping stuck-on cookies—been there! If you only have one tray, just bake in shifts.
- In a big-ish bowl, cream the butter, brown sugar, and granulated sugar together until things get fluffy and lighter in color. You can use a mixer if you want, but old-fashioned elbow grease works—though, fair warning, your arm will know about it.
- Crack in the eggs one by one, beating well after each. Mix in the vanilla. It’s okay if it looks a bit gloopy at this point.
- In another bowl, whisk your flour, cocoa powder, baking soda, and salt. Add these dry bits into your wet dough a little at a time—less mess! Mix until just combined. Don’t go overboard with the mixing, or your cookies might turn out kind of tough (speaking from experience).
- Toss in the chocolate chips (and peanuts or pretzels, if you’re feeling wild). Stir until just spread out evenly—this is usually where I sneak a few chips for quality control, naturally.
- Now, grab chunks of dough—maybe about 2 tablespoons’ worth—and squish them into a disc in your hand. Pop a teaspoon of peanut butter in the center. Fold the dough up and over the peanut butter to seal it up. Don’t stress if they look lumpier than you expected—mine always do, and they bake up just fine.
- Place the stuffed dough balls onto the baking trays, leaving at least 2 inches between each. Trust me, they do like to spread out and get cozy.
- Bake for about 10-12 minutes, until set at the edges but still a wee bit soft in the middle. If you like a gooey middle (guilty), pull them out closer to 10 minutes.
- Let them cool on the tray for about 5 minutes (or, if you’re impatient like my brother, burn your mouth and pretend it was intentional), then transfer to a wire rack.
Some Notes from the Battlefield
- Chilling the dough for 30 minutes makes the cookies a bit thicker—but sometimes I can’t wait that long and they still taste top notch.
- If your peanut butter is runny, pop it in the fridge for a bit—it’s way easier to handle when it’s not trying to escape.
- Don’t expect perfect spheres; most times, mine look more like pleasant boulders. No two cookies identical, bit like snowflakes, right?
My Wild Experiments (for Better or Worse)
- I once swapped out peanut butter for almond butter—not bad, just different; a bit subtle.
- Tried stuffing with caramel. Turned into delicious but extremely sticky lava. Proceed with caution (or, have napkins handy).
- Attempted to make these gluten-free with oat flour… turns out, that’s not a straight swap. They were tasty crumbles, I’ll say that much.
Stuff You Might Need (and what if you don’t?)
- Mixing bowls: At least two. If you have only one, give it a quick rinse between wet and dry. Or just use the same—won’t ruin your day.
- Hand or stand mixer: Helpful but not essential. I’ve gone all-in with a wooden spoon many times.
- Baking trays + parchment paper: Parchment is the unsung hero. If you don’t have baking trays, an upside-down roasting pan works (did it once at a friend’s farm, still makes me laugh).
- Wire rack: Helps cool the cookies, but honestly, a clean tea towel on the counter does the job in a pinch.
How Long Can You Hide These?
Store these in an airtight tin or container; they stay decently soft for 3-4 days at room temp. If you want them gooey and melty, just zap one for 10 seconds in the microwave.
Though honestly, in my house they never last more than a day—the smell alone gives them away. I once tried freezing them, and surprise: they’re actually pretty delicious half-thawed, too!
Serving: Not That You Really Need Advice!
I like to serve these warm, straight from the oven, with a cold glass of milk—classic never goes out of style. My aunt dips them in coffee (she swears by it). At birthday parties, we pile them up into a cookie mountain (kids go mad for it).
Lessons Learned (The Hard Way)
- Once, I didn’t let the cookies cool before moving them and they just fell apart—patience really is a virtue for these little guys.
- Resist the urge to overbake. They look soft when they come out, but firm up as they cool. I once ignored this and ended up with hockey pucks.
- Don’t skimp on parchment or your life will become all about chiseling cookies off trays. Voice of experience here!
Real Questions People Have Asked Me
- Can you use natural peanut butter? Yes, but it’s a bit runnier—just chill it first, or add a pinch of icing sugar to thicken up. Honestly, I usually just use whatever’s on sale.
- Do these freeze well? Sure do! Either freeze the dough balls stuffed with peanut butter or the baked cookies. Either way, just thaw/toaster them a minute before eating (unless you’re that weirdo who likes cold cookies… hey, I don’t judge).
- Can I skip the cocoa powder? You can, though then it’s not really a chocolate cookie anymore. I did it once by accident—wasn’t the worst, but definitely not the dream.
- What about chunky peanut butter? Oh, go for it! The texture is a fun change, though it’s harder to make ‘perfect’ centers. But perfect is overrated, honestly.
One more thing: don’t stress too much about following every step perfectly—it’s not brain surgery, it’s just good old cookie baking.
Ingredients
- 1 cup (225g) unsalted butter, room temp (or salted butter if that’s what you’ve got—just cut back on the added salt later)
- 1 cup (200g) brown sugar—dark or light, I flip-flop depending on what’s in the pantry
- 1/2 cup (100g) granulated sugar
- 2 large eggs
- 2 teaspoons vanilla extract (my grandmother insisted on pure vanilla but honestly, imitation works fine in a pinch)
- 2 cups (250g) all-purpose flour (if you’re out, bread flour makes chewier cookies)
- 3/4 cup (65g) unsweetened cocoa powder (Dutch-processed if you like it deep and chocolatey, but natural works too)
- 1 teaspoon baking soda
- 1/2 teaspoon salt (skip this if using salted butter, or don’t—won’t hurt anyone)
- 1 1/4 cups (220g) semisweet chocolate chips—milk chocolate is great too, nobody here is judging
- 3/4 cup (about 180g) creamy peanut butter (I’ve used crunchy before and it’s… texturally interesting?)
- Optional: a handful of chopped peanuts for some crunch (or pretzels if you want to live dangerously)
Instructions
-
1Preheat your oven to 350°F (180°C). Line two baking trays with parchment, unless you like scraping stuck-on cookies—been there! If you only have one tray, just bake in shifts.
-
2In a big-ish bowl, cream the butter, brown sugar, and granulated sugar together until things get fluffy and lighter in color. You can use a mixer if you want, but old-fashioned elbow grease works—though, fair warning, your arm will know about it.
-
3Crack in the eggs one by one, beating well after each. Mix in the vanilla. It’s okay if it looks a bit gloopy at this point.
-
4In another bowl, whisk your flour, cocoa powder, baking soda, and salt. Add these dry bits into your wet dough a little at a time—less mess! Mix until just combined. Don’t go overboard with the mixing, or your cookies might turn out kind of tough (speaking from experience).
-
5Toss in the chocolate chips (and peanuts or pretzels, if you’re feeling wild). Stir until just spread out evenly—this is usually where I sneak a few chips for quality control, naturally.
-
6Now, grab chunks of dough—maybe about 2 tablespoons’ worth—and squish them into a disc in your hand. Pop a teaspoon of peanut butter in the center. Fold the dough up and over the peanut butter to seal it up. Don’t stress if they look lumpier than you expected—mine always do, and they bake up just fine.
-
7Place the stuffed dough balls onto the baking trays, leaving at least 2 inches between each. Trust me, they do like to spread out and get cozy.
-
8Bake for about 10-12 minutes, until set at the edges but still a wee bit soft in the middle. If you like a gooey middle (guilty), pull them out closer to 10 minutes.
-
9Let them cool on the tray for about 5 minutes (or, if you’re impatient like my brother, burn your mouth and pretend it was intentional), then transfer to a wire rack.
CLICK FOR NUTRITION INFO
↑
Approximate Information for One Serving
Serving Size:
1 serving
Calories:
275 caloriescal
Protein:
4gg
Fat:
15gg
Saturated Fat:
0g
Trans Fat:
0g
Cholesterol:
0mg
Sodium:
0mg
Potassium:
0mg
Total Carbs:
32gg
Fiber:
0g
Sugar:
0g
Net Carbs:
0g
Vitamin A:
0
Vitamin C:
0mg
Calcium:
0mg
Iron:
0mg
Nutrition Disclaimers
Number of total servings shown is approximate. Actual number of servings will depend on your preferred portion sizes.
Nutritional values shown are general guidelines and reflect information for 1 serving using the ingredients listed, not including any optional ingredients. Actual macros may vary slightly depending on specific brands and types of ingredients used.
To determine the weight of one serving, prepare the recipe as instructed. Weigh the finished recipe, then divide the weight of the finished recipe (not including the weight of the container the food is in) by the desired number of servings. Result will be the weight of one serving.
Did you make this recipe?
Please consider Pinning it!