
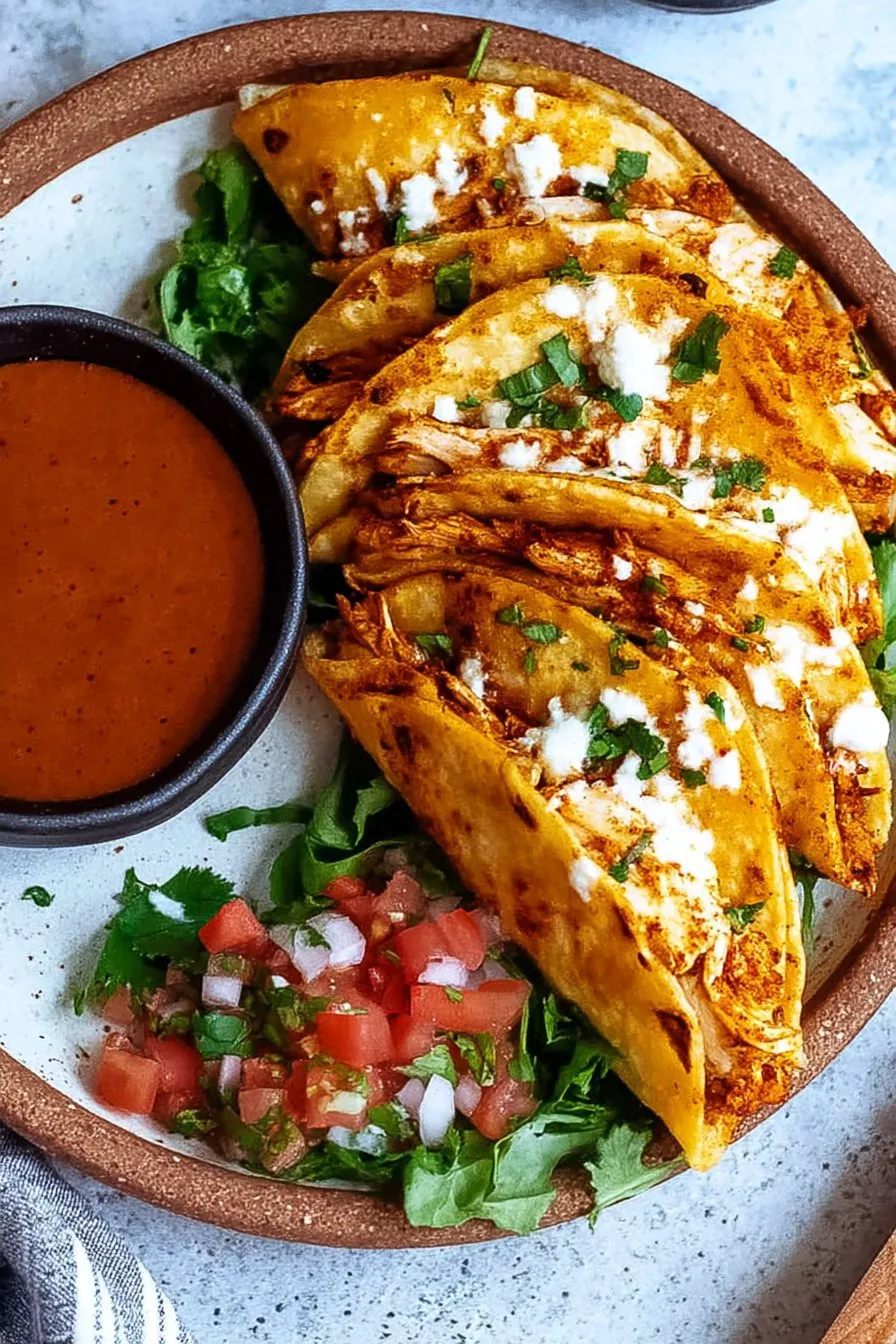
Okay, Let’s Talk Chicken Birria Tacos!
Right, so, birria. Traditionally it’s goat or beef, slow-cooked into this rich, shreddy, heavenly stew. But honestly? Sometimes I just want that incredible flavor *faster*, and chicken is my weeknight hero. I first tried making proper beef birria and let’s just say… it was an adventure (read: took forever and I almost gave up). Then I thought, why not chicken? And BAM. These Chicken Birria Tacos were born. They’ve got that deep chile flavor, the juicy shredded chicken, and that essential dipping consommé. My family literally cheers when they know these are for dinner. It’s become a bit of a staple ’round here.
Why You’ll Be Obsessed Too
Look, I make this whenever we need some serious comfort food, or frankly, when I want to impress people without spending *hours* slaving over a hot stove (though it does take a little time, don’t get me wrong!). My kids go absolutely bananas for the dipping part – messy, yes, but pure joy. It’s that combo of the savory, slightly spicy chicken, the melty cheese, the crispy-fried tortilla, and then dunking it *all* into that warm, rich broth… it’s just ace. Plus, chicken is usually cheaper and cooks way quicker than beef or goat, which is a definite win in my book. (Okay, full disclosure: the first time I made the consommé, I forgot to strain it properly. Chunky broth is… not the goal. Lesson learned!)
What You’ll Need (Give or Take)
Here’s the basic shopping list. Don’t stress if you need to swap things out a bit!
- Chicken: About 2 lbs, boneless, skinless. Thighs are best for flavor and moisture, but I often use a mix of thighs and breasts because that’s what I have. Works fine!
- Dried Chiles: This is key! You’ll want Guajillo chiles (maybe 4-5, stemmed and seeded) and Ancho chiles (like 2-3, also stemmed/seeded). If you can’t find both, use more of one, but the combo is really nice. Finding good dried chiles used to be tricky, but most bigger supermarkets have them now, or check out online places like MexGrocer.
- Aromatics: 1 whole onion (quartered), 4-5 cloves garlic (smashed), maybe a chunk of ginger if you’re feeling fancy (I sometimes skip it).
- Tomatoes: 1 can (like 14.5 oz) fire-roasted diced tomatoes are my shortcut fave. Or 2-3 fresh Roma tomatoes, roughly chopped.
- Spices: Crucial! About 1 tsp cumin seeds (or ground), 1/2 tsp coriander seeds (or ground), a few whole cloves (like 3-4), a small stick of cinnamon (or 1/4 tsp ground – my grandma swore by Ceylon cinnamon, but whatever!), maybe 4-5 whole black peppercorns. Oh, and dried oregano, about 1 tsp (Mexican oregano if you have it!).
- Broth: Chicken broth, maybe 4-5 cups. Enough to cover the chicken.
- Vinegar: A splash of apple cider vinegar (maybe 2 tbsp?) really brightens it up at the end.
- Oil: For searing and frying. Any neutral oil like vegetable or canola.
- For Serving: Corn tortillas (essential!), Oaxaca or Monterey Jack cheese (something melty!), finely chopped white onion, fresh cilantro, lime wedges.
- Optional Goodies: A bay leaf for the pot, a pinch of smoked paprika for depth.
Making the Magic Happen
- Prep the Chiles: First up, get those dried chiles ready. Pop the stems off and shake out most of the seeds (a few left behind is fine, adds character!). Briefly toast them in a dry skillet over medium heat for like 30 seconds per side – just until they smell fragrant. Don’t burn ’em! Then, cover them with hot water and let them soak for about 20-30 minutes until they’re soft and pliable.
- Sear the Chicken: While the chiles soak, season your chicken generously with salt and pepper. Get a bit of oil hot in your Dutch oven or heavy pot over medium-high heat. Sear the chicken pieces until nicely browned on all sides. Don’t cook it through, just get some color. Remove the chicken and set it aside.
- Sauté Aromatics: Lower the heat a bit, add a touch more oil if needed. Toss in the quartered onion and smashed garlic cloves. Cook for a few minutes until they soften and get a little color. Add the spices (cumin, coriander, cloves, peppercorns, cinnamon stick if using ground add later) and toast for another minute until super fragrant. This smells AMAZING right about now.
- Blend the Sauce: Drain the soaked chiles (keep the soaking liquid!). Add the softened chiles, sautéed onion/garlic/spices, the canned tomatoes, oregano (and ground cinnamon if using), and about 1 cup of the chile soaking liquid (or chicken broth) to a blender. Blend until smooth. This might take a minute or two. If it’s too thick, add a bit more liquid.
- Simmer Time: Pour the blended sauce back into the pot. Add the seared chicken back in, along with any accumulated juices. Add the bay leaf (if using) and enough chicken broth to mostly cover the chicken. Bring it to a simmer, then reduce the heat to low, cover, and let it bubble away gently for at least 45 minutes, or until the chicken is super tender and shreddable. Honestly, an hour is even better. Low and slow is the way to go.
- Shred & Strain: Carefully remove the cooked chicken pieces form the pot onto a cutting board. Let them cool slightly, then shred using two forks. This is where I usually sneak a taste (or three). Now, strain the cooking liquid (the consommé!) through a fine-mesh sieve into a bowl. Push down on the solids to get all that good stuff out. Taste the consommé and season with salt, pepper, and that splash of apple cider vinegar. This step is important – don’t skip the tasting! It usually needs more salt than you think.
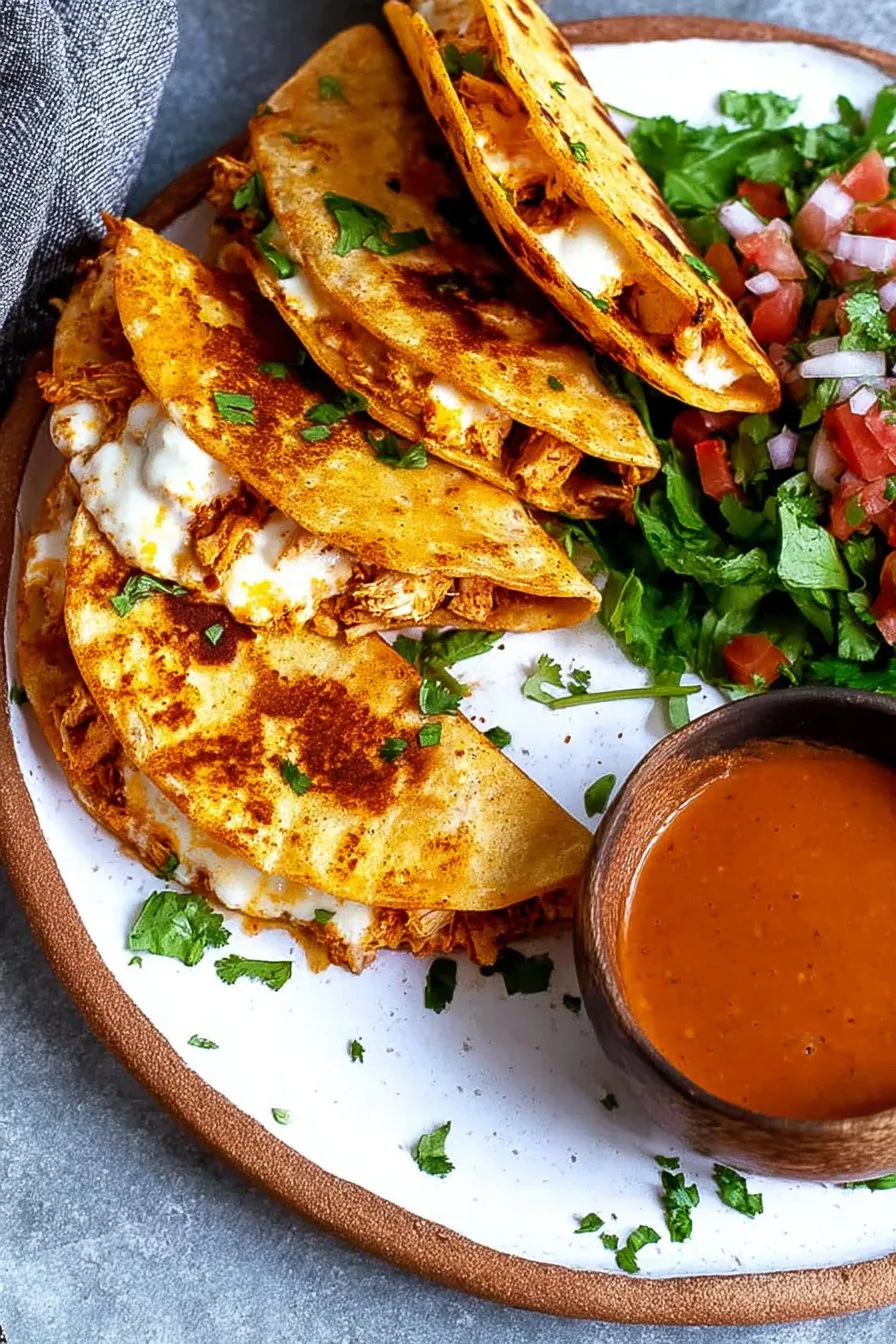
- Assemble the Tacos (The BEST Part!): Okay, dip a corn tortilla into the consommé (just quickly coat both sides). Place it onto a hot, lightly oiled griddle or skillet over medium heat. Sprinkle some shredded chicken and cheese onto one half. Fold the tortilla over. Fry for a few minutes per side until golden brown and crispy, and the cheese is gloriously melted. Repeat with remaining tortillas. Don’t worry if it looks a bit weird at this stage – it always does! Messy is part of the charm.
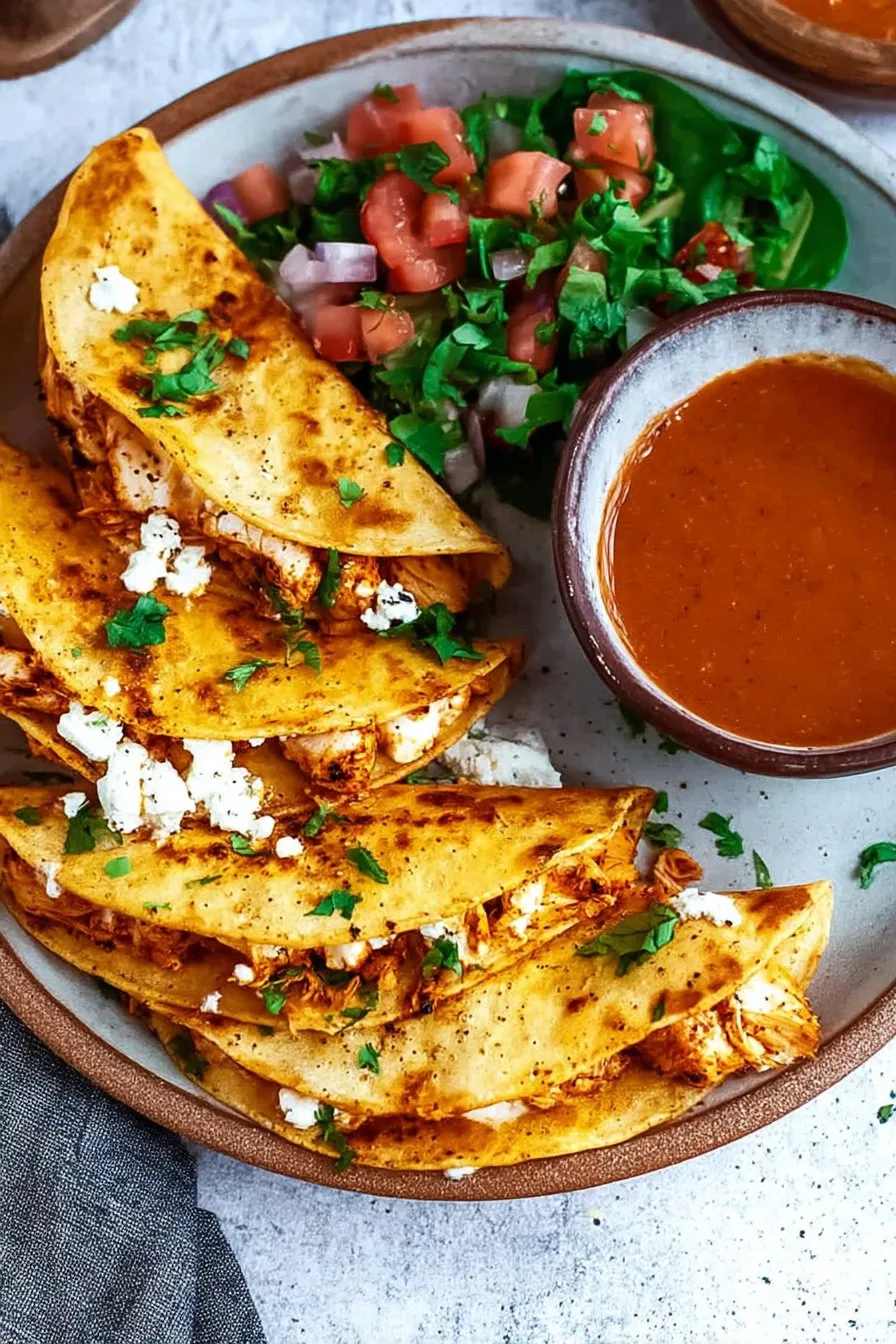
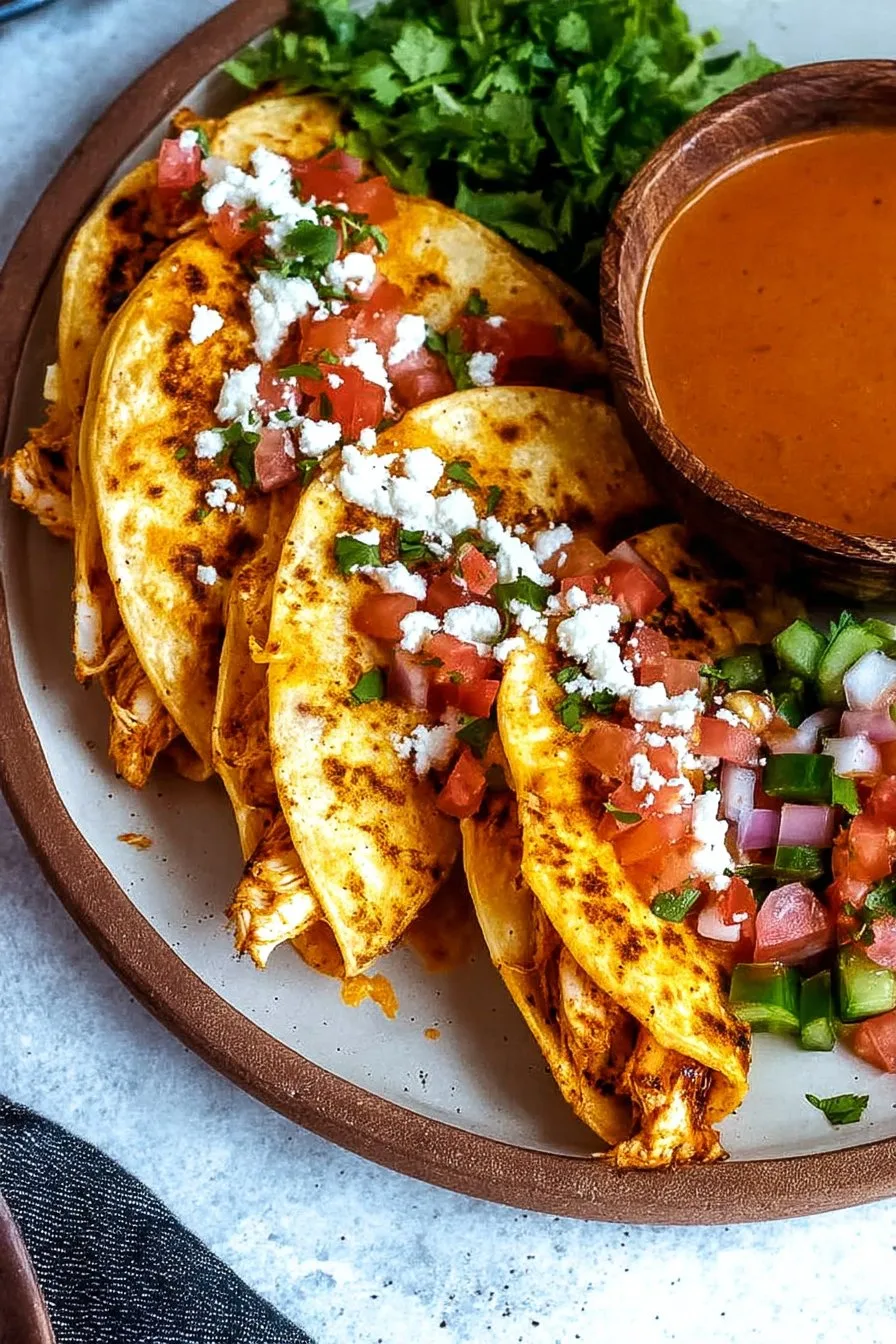
- Serve!: Serve the crispy chicken birria tacos immediately with small bowls of the warm consommé for dipping. Garnish everything generously with chopped onion, cilantro, and lime wedges for squeezing. Perfection!
My Little Notes & Discoveries
- Don’t overcrowd the pan when searing the chicken OR frying the tacos. Work in batches! Patience pays off, preventing soggy results. I learned this the hard way.
- If your consommé seems a bit thin, you can simmer it down a little longer after straining to concentrate the flavor. Or… just embrace it, its meant for dipping!
- Sometimes I add a tiny pinch of sugar or agave to the consommé if the chiles or tomatoes make it taste slightly bitter. Just a smidge.
- Make sure your blender can handle hot liquids, or let the mixture cool slightly first. Safety first, folks.
Fun Experiments (and One Fail)
I love messing with recipes! For extra smokiness, I’ve added a canned chipotle pepper in adobo sauce to the blender – delicious, but adds significant heat, so beware! I also tried adding some crumbled chorizo to the chicken when searing once, that was pretty epic. What *didn’t* work? Adding peanut butter to the sauce trying to mimic a mole vibe. Yeah… let’s just say it was… memorable in a bad way. Stick to the classic flavors for this one, trust me.
What If I Don’t Have…? (Equipment Chat)
A big heavy pot like a Dutch oven is ideal because it holds heat so well for simmering. But really, any decent-sized soup pot will do the job. You absolutely need a blender to get that sauce smooth – an immersion blender *might* work in a pinch if you’re careful not to splash hot liquid everywhere, but a regular blender is way easier. And a fine-mesh sieve is pretty important for smooth consommé, but you could try lining a regular colander with cheesecloth if needed.
Storing the Goodness
If, by some miracle, you have leftovers (seriously, how?!), store the shredded chicken and the consommé separately in airtight containers in the fridge. They’ll keep for about 3 days. I actually think the flavor gets even better the next day! Reheat the consommé gently on the stove and assemble/fry fresh tacos when ready to eat. Though honestly, in my house it never lasts more than a day!
How We Like to Eat ‘Em
The dip-and-fry method is classic birria taco style and totally worth the extra step for that crispy texture. But sometimes, if I’m feeling lazy, I just warm the tortillas, pile on the chicken, cheese, onions, cilantro, and serve the consommé in a mug on the side for sipping and dipping. My husband prefers it this way, actually. A dollop of sour cream or Mexican crema is also pretty darn good.
Things I Wish I Knew Sooner (Pro Tips!)
- Don’t skimp on soaking the chiles! If they aren’t fully softened, your sauce will be gritty. Give them the full 20-30 mins.
- I once tried rushing the simmering step because I was starving. Big mistake. The chicken wasn’t fall-apart tender, and the flavors hadn’t melded properly. Let it do its thing on low heat. It’s worth the wait!
- Taste, taste, taste! Especially the final consommé. It might need more salt, a bit more vinegar, maybe even a pinch more cumin. Adjust it until YOU love it.
Got Questions? I Might Have Answers!
Can I make this spicier?
Heck yeah! Add a chile de arbol or two (remove stems and seeds unless you’re hardcore) along with the guajillos and anchos when soaking. Or add a pinch of cayenne to the spice blend. Start small, you can always add more heat!
Is the consommé supposed to be thin?
Yep, totally! It’s not meant to be a thick gravy. It’s a rich, flavorful broth specifically for dipping those crispy tacos into. So don’t fret if it seems watery – that’s how it should be.
Can I use beef instead?
Absolutely! This recipe is adapted *from* beef birria. Use about 2 lbs of chuck roast, cut into chunks, instead of chicken. You’ll just need to simmer it much longer – probably 2.5-3 hours, or until the beef is super tender.
Help! I burned my chiles!
Ah, bummer! Toasted is good, black and bitter is bad. If they smell acrid and look charred, it’s probably best to toss them and start over with fresh ones. Burned chiles will make the whole dish taste bitter, unfortunately. It happens to the best of us!
Ingredients
- 2.5 lbs boneless, skinless chicken thighs
- 4 dried Guajillo chiles, seeds and stems removed
- 2 dried Ancho chiles, seeds and stems removed
- 1 large white onion, roughly chopped
- 6 cloves garlic
- 1 tbsp ground cumin
- 1 tsp dried Mexican oregano
- 2 bay leaves
- 6 cups chicken broth
- Salt and black pepper to taste
- 18 corn tortillas
- 2 cups shredded Oaxaca cheese (or Monterey Jack)
- Vegetable oil, for frying
- Fresh cilantro, chopped, for garnish
- Diced white onion, for garnish
Instructions
-
1Rehydrate the dried chiles by soaking them in hot water for about 20 minutes until softened. Drain and add to a blender with half of the chopped onion, garlic, cumin, oregano, and 1 cup of chicken broth. Blend until smooth.
-
2In a large pot or Dutch oven, brown the chicken thighs over medium-high heat. Pour the blended chile sauce over the chicken, add the remaining onion, bay leaves, and the rest of the chicken broth. Season generously with salt and pepper.
-
3Bring the mixture to a boil, then reduce heat to low, cover, and simmer for 2 to 2.5 hours, or until the chicken is very tender and easily shreds.
-
4Remove the chicken from the pot and shred it using two forks. Strain the broth (consommé) through a fine-mesh sieve into a separate bowl or pot, discarding the solids. Skim off excess fat if desired. Keep the consommé warm.
-
5To assemble the tacos, dip each corn tortilla into the warm consommé. Place a portion of shredded chicken and shredded cheese on one half of the tortilla. Fold the tortilla in half to create a taco.
-
6Heat a thin layer of vegetable oil in a large skillet over medium heat. Carefully place the assembled tacos in the hot oil and fry for 2-3 minutes per side, or until golden brown and crispy and the cheese is melted.
-
7Serve the crispy Chicken Birria Tacos immediately with small bowls of the warm consommé for dipping, garnished with chopped cilantro and diced white onion.
Approximate Information for One Serving
Nutrition Disclaimers
Number of total servings shown is approximate. Actual number of servings will depend on your preferred portion sizes.
Nutritional values shown are general guidelines and reflect information for 1 serving using the ingredients listed, not including any optional ingredients. Actual macros may vary slightly depending on specific brands and types of ingredients used.
To determine the weight of one serving, prepare the recipe as instructed. Weigh the finished recipe, then divide the weight of the finished recipe (not including the weight of the container the food is in) by the desired number of servings. Result will be the weight of one serving.
Did you make this recipe?
Please consider Pinning it!!