What’s so great about Mediterranean Chicken Cutlets?
I’ll just say it: this is my weeknight secret weapon whenever the fridge is looking a bit empty and I want something that feels fancier than it is. The first time I made these was honestly a bit chaotic—I didn’t have enough breadcrumbs and panicked, so I subbed crushed crackers and hey, turns out it wasn’t half bad! These days, my kids request “those crispy chicken things with the lemon,” which is about as glowing as family endorsements get. And, not to get too sentimental, but there’s something nostalgic about the smell of frying chicken in my little kitchen—it reminds me of summer evenings with all the windows open, sun setting, and everyone gradually drifting to the table without even having to call them.

Why You’ll Love This (According to My Family… and Me!)
- I make this when I’m craving a meal that’s both utterly crisp and not a total mess to pull off. Plus, the leftovers (if you have any) make surprisingly great sandwich fillings—it’s almost better on day two, I swear.
- My family goes bananas for this because the outside stays crunchy (no soggy bottoms here), and if I forget the lemon wedges, I’m bound to hear about it.
- If you’re prone to breading emergencies (like running out of one thing last minute), this technique is super forgiving—you can even sneak in panko or seasoned crumbs if that’s what’s around. No kitchen perfection required.
- Well, except for the time I rushed the resting step—do yourself a favor and don’t skip letting the coating set.
The Ingredient Lineup (and a Couple Cheats!)
- 1.5 lbs chicken (pounded to an even 1/2-inch thickness)—I’ve been known to use skinless thighs if that’s all I’ve got, but cutlets are best.
- Salt and pepper—actual measurements? I eyeball it, but go generous on the salt for proper flavor.
- 3/4 cup flour (King Arthur all-purpose if you want a brand; I sometimes use whatever’s in the bin, honestly)
- 3 eggs (let them come to room temp—trust me, it matters for coating)
- 1.5 cups breadcrumbs (homemade is great, store-bought works just fine—sometimes I swap in panko for extra crunch)
- 1/2 cup parmesan (fresh is best, but pre-grated in a pinch—don’t tell Nonna)
- 2 tsp Italian seasoning (or a mix of dried oregano, basil, thyme if you’ve got open jars cluttering the rack)
- 1/2 teaspoon garlic powder
- 1/4 teaspoon paprika (hot or sweet, your call; I usually go sweet for the kids)
- 1/3 cup olive oil (I like Bertolli extra virgin, but any decent extra virgin works—sometimes a little more is needed mid-fry)
- Lemon wedges for serving—don’t skip, unless you love missing out
Step-by-Step, with All My Usual Asides
- Set out three shallow bowls, like a little assembly line—makes cleanup easier (well, less painful anyway). Into Bowl 1, dump your flour and dust in plenty of salt and pepper. I sometimes toss in a pinch of chili flakes if I’m feeling reckless.
- Bowl 2 is for eggs: crack them in, whisk briskly until frothy, then add a trickle of water (or a splosh of milk)—this thins it out so the breadcrumbs stick right.
- Bowl 3 gets breadcrumbs, parmesan, Italian seasoning, garlic powder, and paprika. Give it all a good mix—I use my (clean) hands for this part just because it’s faster.
- Now, pat the chicken cutlets bone dry. Why? So the coating doesn’t slide right off and make you grumpy later. Season both sides with salt and pepper (I sometimes forget, and yes, you’ll notice).
- Here’s where the magic happens: dunk one piece of chicken straight into the flour, get it nice and ghostly white, shake off the excess—nobody wants clumpy bits—then into the egg wash. Make sure both sides are totally wet.
- From there, land it into the breadcrumb mix. Press down gently, give it a little massage so the crumbs cling for dear life. Flip and repeat. If the coating seems loose, press just a little firmer. I line them up on a big plate as I go.
- Let those breaded beauties rest out on the counter for 10 minutes. I used to think this was nonsense but, wow, it makes all the difference—helps the crumbs stick when frying and you won’t lose half your crust in the pan (speaking from bitter experience).
- Heat olive oil in a roomy skillet over medium-high until, if you toss in a breadcrumb, it sizzles like Friday night. Don’t overcrowd the pan (seriously, just don’t)—two or three at a time keeps things crisp. Lay the cutlets in, give them 3 minutes on the first side without poking or fussing. Let the crust do its thing.
- Flip ’em carefully. Another 3 minutes on the second side, just as golden. When done, move to a wire rack—if you only have paper towels, that’s OK, but I prefer a rack (keeps the bottom from going a bit sad and floppy).
- Repeat with the rest, adding a splash more oil if the pan gets dry or you just feel like living dangerously.
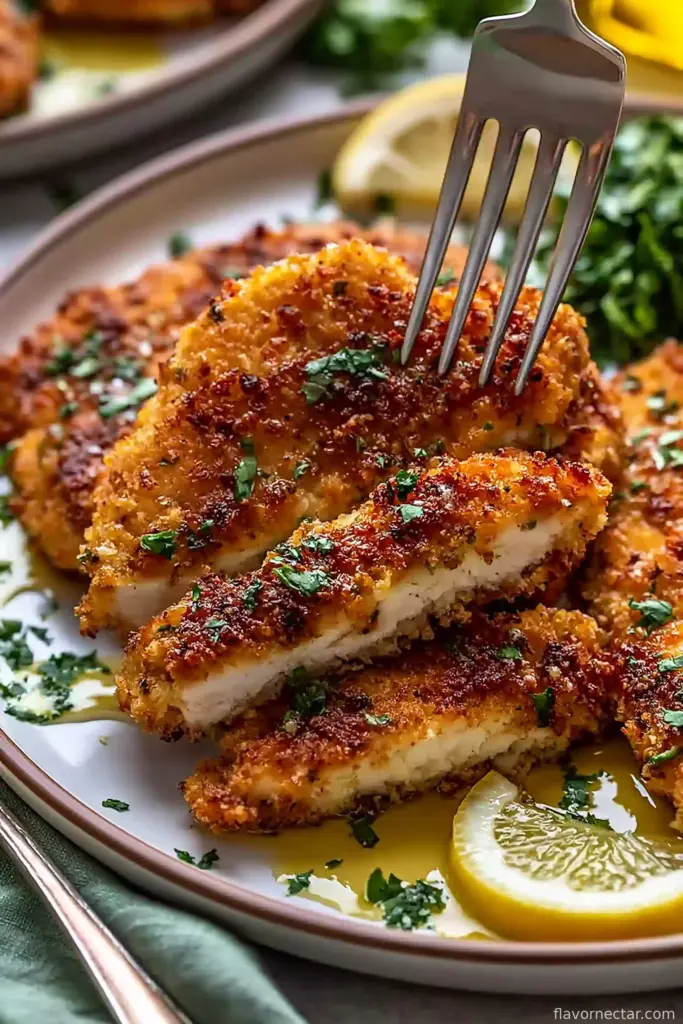
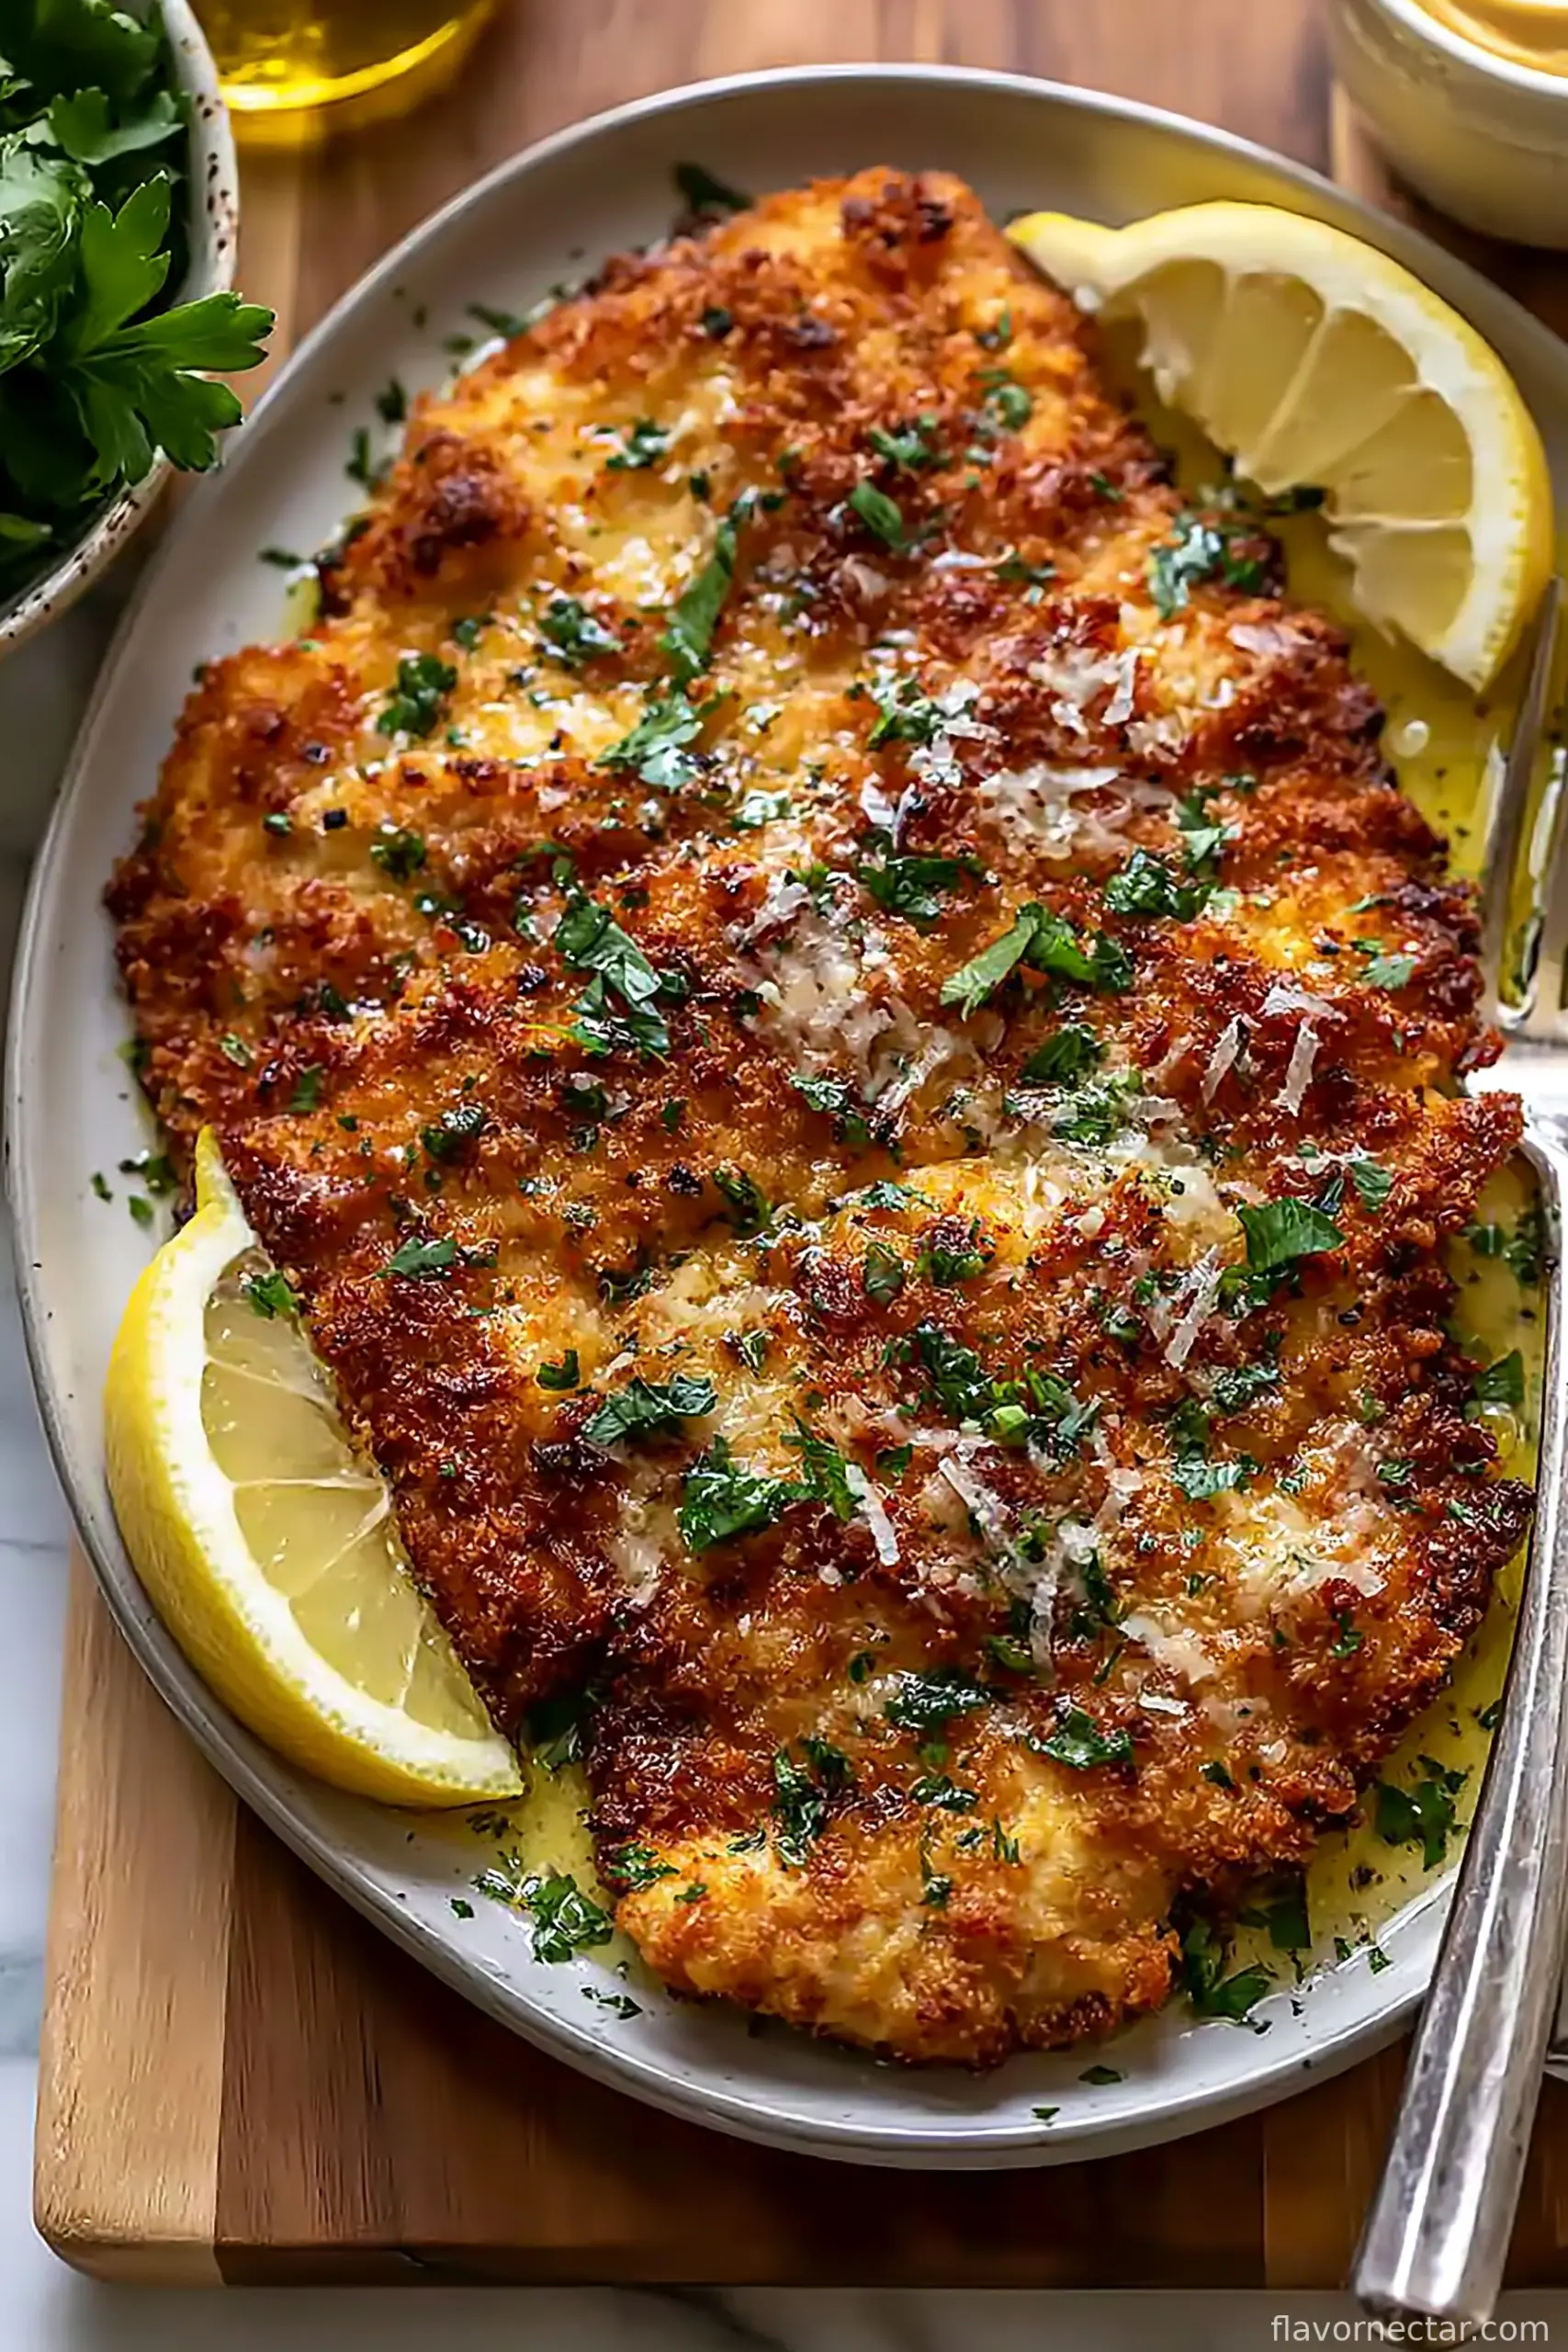
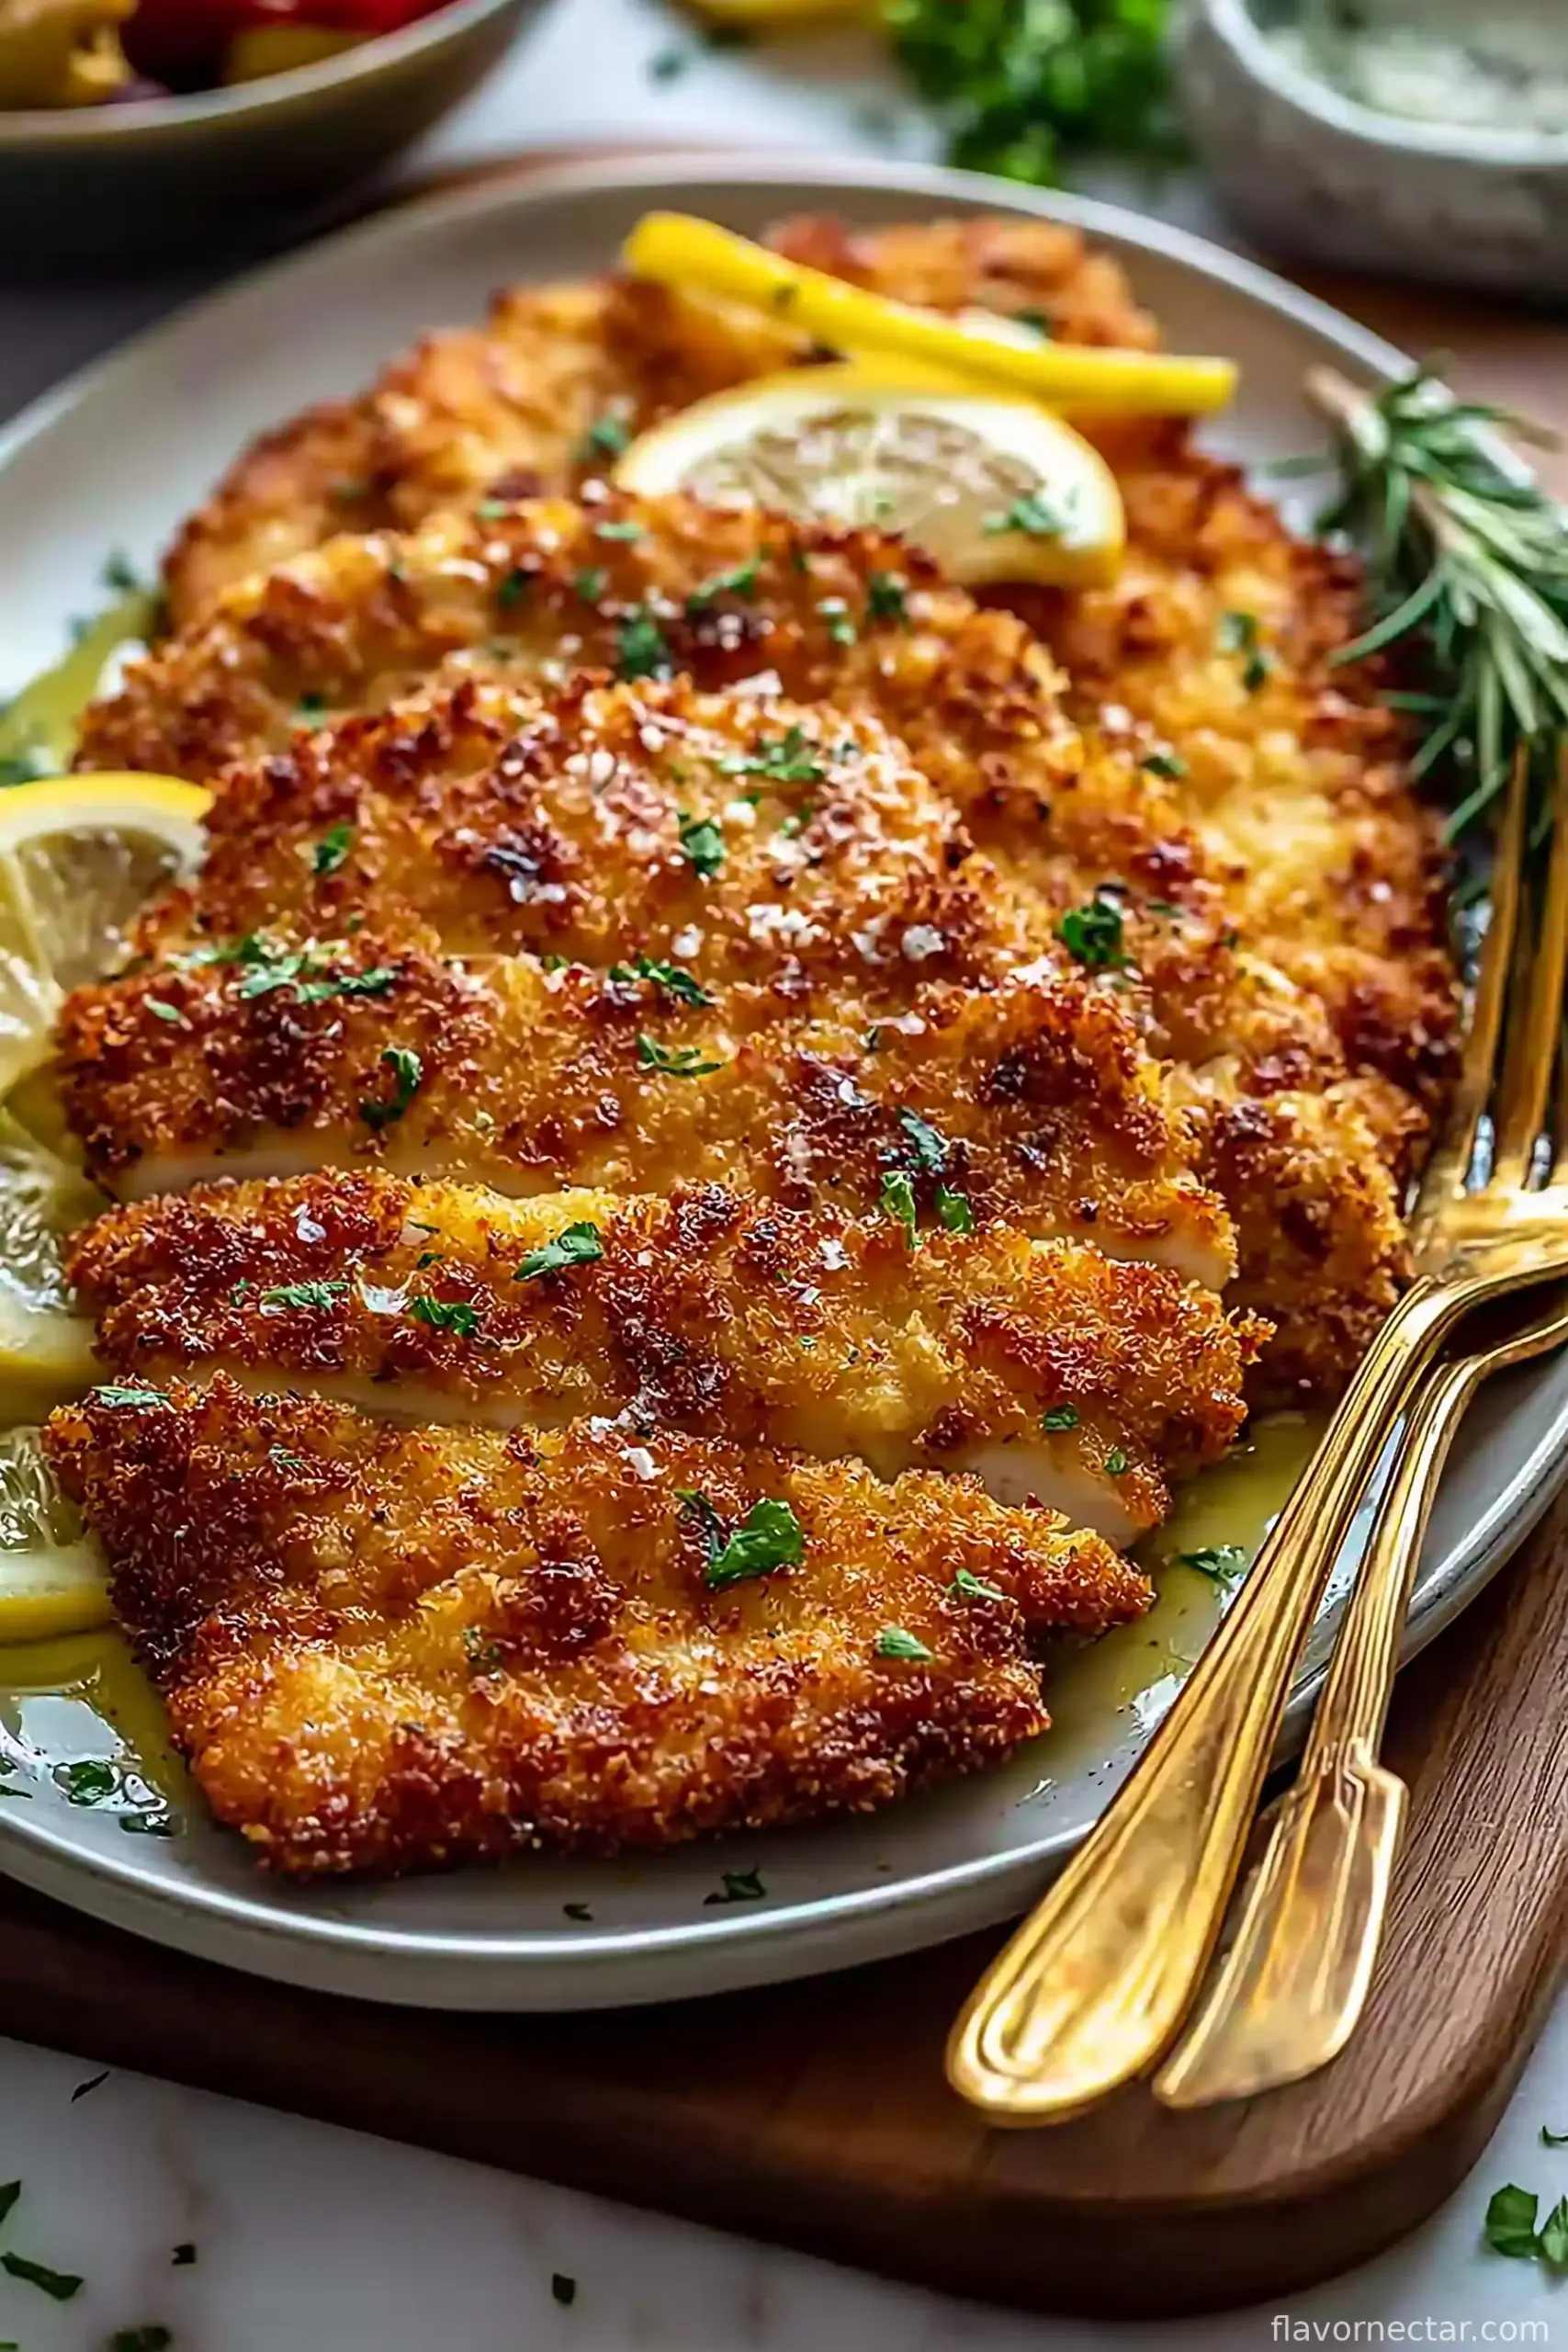
- When they’re all cooked and still singing with that fresh-out-the-pan sound, slide onto serving plates. Top with lemon wedges and squeeze one over everything—no joke, it totally makes the dish taste like a holiday somewhere sunny.
Notes (Things I Learned the Hard Way)
- If your breadcrumbs are too coarse, blitz them in the food processor for a sec so they don’t fall off during frying. I once ignored this and had more in the pan than on the chicken.
- Letting the chicken rest with its coat before frying—honestly, I skipped it once and paid for it with a spotty crust. Just 10 minutes, you’ve got time to tidy up or chase the kids.
- Wire racks are not fancy, but they do help with the crunch. Lacking one? Just prop a cooling rack over a baking tray, works fine!
Variations I Actually Tried (and One Flop)
- Sometimes I swap the Italian seasoning with za’atar for a slightly tangier, more herby crust—pretty good
- Swapping parmesan for pecorino is great if you want a sharper kick
- Frying in butter once seemed like a good idea; smells amazing, turns brown too quickly—stick with olive oil, trust me
Quick Chat About Equipment (and Shortcuts)
- You really don’t need a fancy skillet—even an old nonstick pan works (mine’s wonky but loyal). If you’re lacking three shallow bowls, pie plates or even big soup bowls do fine—it’s not science.
Storage Info
Honestly, these rarely last longer than a day over here—people seem to spot them in the fridge late at night. If you do end up with leftovers, pop them in an airtight container. They’ll stay crunchy-ish for a day or two. For best results, reheat in an oven or toaster oven (never the microwave, unless you like limp cutlets—I do not).
How I Like to Serve These
These are fab with a big salad, like arugula with a basic vinaigrette, or tucked into sandwiches the next day (if you have any left). My youngest dunks them in ketchup (to my horror), but I much prefer a bit of garlicky yogurt on the side, or even a classic tzatziki. Sometimes a handful of olives on the table really hammers home that Mediterranean vibe.
Pro Tips (Learned by Doing it Wrong a Few Times)
- Don’t skimp on the seasoning—boring chicken is a crime
- Rest the coated cutlets before frying; otherwise, the crust might just slip right off
- Test your oil with a breadcrumb. If it doesn’t sizzle, wait. If it smokes, turn it down—your kitchen (and nostrils) will thank you
- Flip gently, don’t stab with a fork. Tongs or a spatula are kinder to your crust
FAQ: Questions from My Actual Friends
- Can I bake these instead of frying? Totally! They get a little less crisp, but 425°F for 18-20 minutes on a rack still works. Just give them a spritz of oil before baking.
- Can I freeze them? You can! Freeze in a single layer on a baking sheet first, then pack into a container. Reheat in the oven for best crunch.
- Any way to make these gluten-free? Actually, yes—rice flour and GF breadcrumbs have worked pretty well for me.
- What’s the best side dish? Anything with fresh veggies or a herby couscous. Or, honestly, just fries—some traditions are worth breaking occasionally.
- Why does my crust fall off? Either your chicken is too wet or you didn’t rest before frying (I have blamed cosmic forces for this before, but it’s usually those two things).
Ingredients
- 1.5 lbs chicken (pounded to an even 1/2-inch thickness)
- salt
- pepper
- 3/4 cup flour (I always use King Arthur all-purpose flour)
- 3 eggs (room temperature, about 70°F)
- 1.5 cups breadcrumbs
- 1/2 cup parmesan (freshly grated for better melting and texture)
- 2 tsp Italian seasoning
- 1/2 teaspoon garlic powder
- 1/4 teaspoon paprika
- 1/3 cup olive oil (I prefer Bertolli extra virgin for a mild flavor)
- lemon wedges
Instructions
-
1Set out three shallow bowls, like a little assembly line—makes cleanup easier (well, less painful anyway). Into Bowl 1, dump your flour and dust in plenty of salt and pepper. I sometimes toss in a pinch of chili flakes if I’m feeling reckless.
-
2Bowl 2 is for eggs: crack them in, whisk briskly until frothy, then add a trickle of water (or a splosh of milk)—this thins it out so the breadcrumbs stick right.
-
3Bowl 3 gets breadcrumbs, parmesan, Italian seasoning, garlic powder, and paprika. Give it all a good mix—I use my (clean) hands for this part just because it’s faster.
-
4Now, pat the chicken cutlets bone dry. Why? So the coating doesn’t slide right off and make you grumpy later. Season both sides with salt and pepper (I sometimes forget, and yes, you’ll notice).
-
5Here’s where the magic happens: dunk one piece of chicken straight into the flour, get it nice and ghostly white, shake off the excess—nobody wants clumpy bits—then into the egg wash. Make sure both sides are totally wet.
-
6From there, land it into the breadcrumb mix. Press down gently, give it a little massage so the crumbs cling for dear life. Flip and repeat. If the coating seems loose, press just a little firmer. I line them up on a big plate as I go.
-
7Let those breaded beauties rest out on the counter for 10 minutes. I used to think this was nonsense but, wow, it makes all the difference—helps the crumbs stick when frying and you won’t lose half your crust in the pan (speaking from bitter experience).
-
8Heat olive oil in a roomy skillet over medium-high until, if you toss in a breadcrumb, it sizzles like Friday night. Don’t overcrowd the pan (seriously, just don’t)—two or three at a time keeps things crisp. Lay the cutlets in, give them 3 minutes on the first side without poking or fussing. Let the crust do its thing.
-
9Flip ’em carefully. Another 3 minutes on the second side, just as golden. When done, move to a wire rack—if you only have paper towels, that’s OK, but I prefer a rack (keeps the bottom from going a bit sad and floppy).
-
10Repeat with the rest, adding a splash more oil if the pan gets dry or you just feel like living dangerously.
-
11When they’re all cooked and still singing with that fresh-out-the-pan sound, slide onto serving plates. Top with lemon wedges and squeeze one over everything—no joke, it totally makes the dish taste like a holiday somewhere sunny.
CLICK FOR NUTRITION INFO
↑
Approximate Information for One Serving
Serving Size:
1 serving
Calories:
520 caloriescal
Protein:
41 gg
Fat:
26 gg
Saturated Fat:
0g
Trans Fat:
0g
Cholesterol:
0mg
Sodium:
0mg
Potassium:
0mg
Total Carbs:
32 gg
Fiber:
0g
Sugar:
0g
Net Carbs:
0g
Vitamin A:
0
Vitamin C:
0mg
Calcium:
0mg
Iron:
0mg
Nutrition Disclaimers
Number of total servings shown is approximate. Actual number of servings will depend on your preferred portion sizes.
Nutritional values shown are general guidelines and reflect information for 1 serving using the ingredients listed, not including any optional ingredients. Actual macros may vary slightly depending on specific brands and types of ingredients used.
To determine the weight of one serving, prepare the recipe as instructed. Weigh the finished recipe, then divide the weight of the finished recipe (not including the weight of the container the food is in) by the desired number of servings. Result will be the weight of one serving.
Did you make this recipe?
Please consider Pinning it!