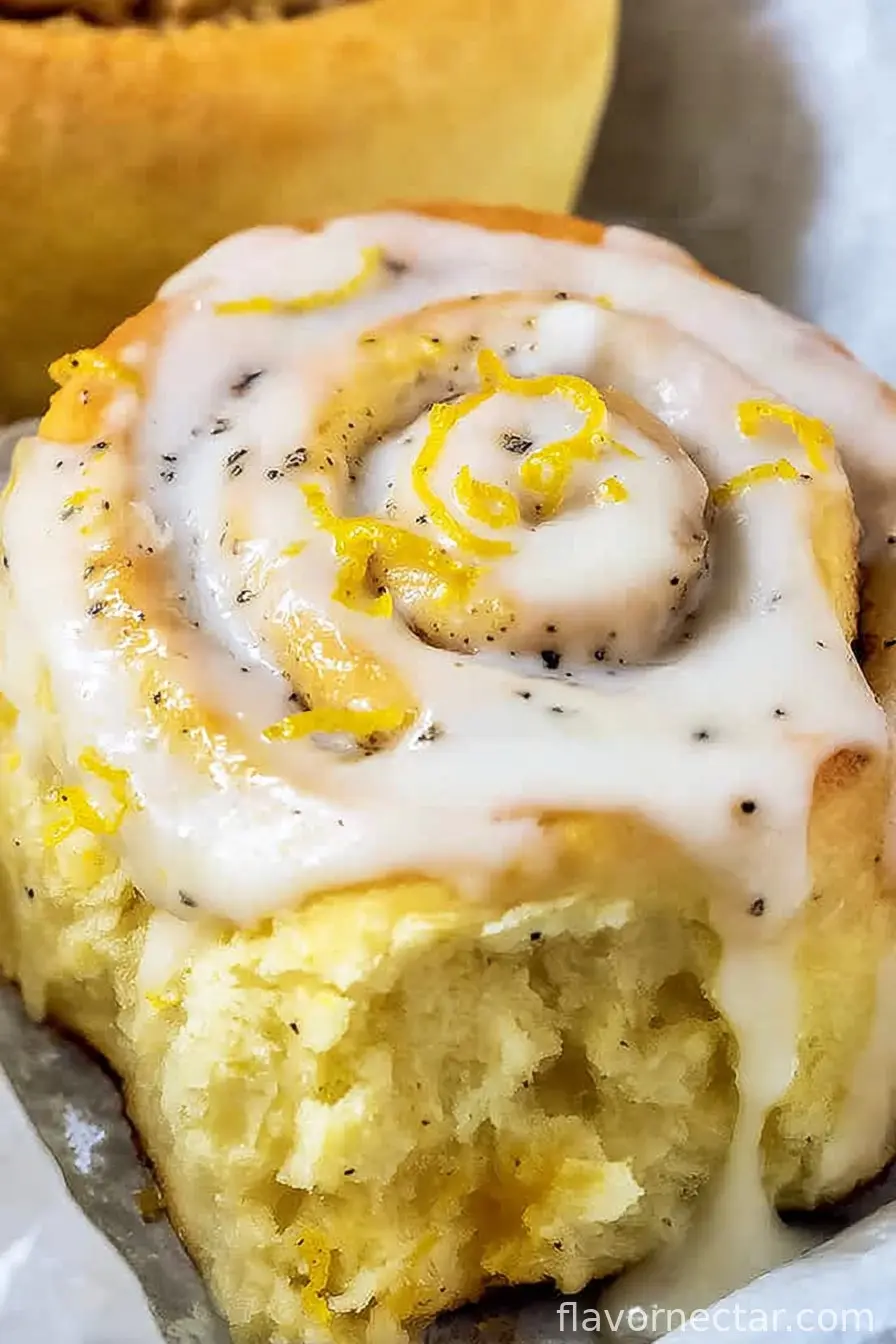
If you need a little sunshine in your kitchen, these Lemon Rolls are basically edible joy. The first time I made these was after a long week when I’d run out of cinnamon and thought, what’s the worst that could happen if I just used a pile of lemons instead? Turns out, the answer is: everyone will swarm your kitchen before you can even finish the glaze, and the dog might even beg for a corner. Even my notoriously picky Uncle Glenn (who thinks all desserts should taste like straight-up sugar) said, “Well, alright—these are good.” And that is basically a gold medal.

Why You’ll Love This lemon Roll Recipe
I bake these lemon rolls on those dragging Sundays, especially when I want something bright but don’t want to mess with a million steps. My family actually likes these more than regular cinnamon rolls (don’t tell Grandma). They’re soft and fluffy, but zingy in a way you don’t expect—like, you take a bite and realize you honestly want another. Also, the smell in my kitchen on lemon roll mornings should probably be bottled. I used to get annoyed by sticky dough on my hands, but honestly, it’s kind of fun when you remember there’s lemon sugar in your future. Or if you forget to zest the lemons before juicing…well, I’ve done that. Don’t do that.
The Not-too-Strict Ingredients List
- 2 and 3/4 cups (345g) all-purpose flour (or bread flour when I want extra fluffiness. Grandma swore by King Arthur, but honestly, whatever’s on hand)
- 1/4 cup (50g) granulated sugar
- 2 and 1/4 tsp (1 package) instant yeast (active dry is fine, just proof it first)
- 1/2 tsp salt
- 1/2 cup (120ml) milk—whole is best, but I’ve used oat milk when that’s all I had
- 1/4 cup (60g) unsalted butter, melted (salted works in a pinch, just skip the extra salt)
- 2 large eggs, room temp-ish (sometimes I forget and just roll with cold eggs)
- Zest of 2 lemons
- 3/4 cup (150g) granulated sugar (for lemon-sugar filling—you can use brown sugar if you’re feeling wild)
- 1/4 cup (60g) unsalted butter, softened (for spreading in the filling)
- 1/4 cup (60ml) fresh lemon juice (bottled works, but fresh is just… better)
- 1 cup (120g) powdered sugar (for the glaze)
How To Make Lemon Rolls (Or, My Meandering Approach)
- Mix the flour, sugar, yeast, and salt together in a big bowl. I just use a wooden spoon. If you’re using active dry yeast, proof it in warm milk first (you want it to look kind of bubbly, not just sad and floating).
- In another (preferably microwave-safe) bowl, combine the milk and melt in the butter. Let it cool slightly so you don’t scramble your eggs when adding them. Not speaking from experience, but…
- Add the eggs to the milk/butter mixture. Stir it all together, then add the wet stuff to the dry. Mix until you get a shaggy dough—it’ll look messy, don’t worry.
- Knead! Either on a floured surface or right in the bowl for about 5 minutes. I do a mix of both, especially if I can’t be bothered to clean extra flour off the counter. The dough should get smooth-ish and elastic (soft, not sticky like glue).
- Plop the dough into a greased bowl, cover with a tea towel (or cling film if you’re fancy), and let it rise in a warmish spot for about an hour. Ignore it—go read a book or, if you’re like me, get distracted by scrolling recipes you’ll never make.
- Meanwhile, mix your lemon zest into the 3/4 cup sugar with your fingers. This is when your kitchen starts to smell like a country garden, honestly.
- Once the dough is puffy (it probably won’t double, but close), flip it onto a floured counter and gently stretch or roll into a rectangle. Maybe 10 by 14 inches? I never measure.
- Spread the softened butter all over the dough, right up to the edges if you can. Then sprinkle over the lemon sugar, and pour the 1/4 cup lemon juice right over the lot. It’ll look puddly—don’t panic, that’s normal.
- Roll it up the long way, as tight as you can without squeezing out too much filling. Slice into about 12 rolls. (I use dental floss—unused, obviously—for neat cuts. Otherwise, a big knife and hope for the best!)
- Arrange the rolls in a greased baking dish. Cover with a towel and let them rise again, maybe 30–40 minutes—sometimes I rush this, but they’re fluffier if you wait.
- Bake at 350°F (180°C) for 22-27 minutes. The tops should look golden and puffed, maybe even a little wonky. That’s good!
- For the glaze, whisk the powdered sugar with a tablespoon or two of lemon juice—just until it gets pourable. Actually, I find it works better if you keep it on the thicker side; then it slowly oozes.
- Spoon the glaze over the warm rolls. This is where I usually sneak a bite because someone has to check if they’re, you know, edible.

Things I’ve Learned (Sometimes the Hard Way)
- If your dough feels too sticky, just add another sprinkle of flour. Every kitchen is different—I blame humidity or maybe ghosts.
- Don’t worry if your rolls unroll a little. Mine always do, and they still taste fantastic.
- I once forgot the glaze and nobody noticed, so I guess it’s optional? But really, the glaze is the best part.
- I think these taste even better the next day, but they almost never last that long around here.
Variations I’ve Tried (And Some I Probably Shouldn’t Have)
- A splash of orange zest (makes these like a summer holiday!)
- Swapping in honey for the lemon juice—turns out weirdly dense, don’t recommend, but maybe you’ll like it.
- Super tangy? Add a tablespoon of plain Greek yogurt to the dough. Trust me, it works.
- My friend adds poppy seeds to the filling—feels fancy, tastes great.
Equipment (But Improvise If You Need To!)
- Big mixing bowl — I’ve used a salad bowl in a pinch
- Wooden spoon (fork works if you don’t have one—just more effort)
- Rolling pin—though I’ve rolled dough with an empty wine bottle and survived
- Baking dish (9×13-ish); in an emergency, a roasting pan works too
- Zester or fine grater—box grater if that’s all you’ve got
How To Store Lemon Rolls (If You Even Need To)
Keep rolls covered at room temp for a day or two, or in the fridge for up to 5 days. Reheat in the microwave for that fresh-from-the-oven vibe. But honestly, in my house, they don’t last past breakfast. If I ever had leftovers, I imagine they’d freeze alright—just wrap ’em tight and thaw overnight.
Serving These Rolls – My Favorite Way
I love these with a cold glass of milk, though my sister insists on hot tea. Sometimes we take them out to the porch and pretend we’re at some fancy café. On birthdays, we stick a candle in one and call it a lemon birthday bun. Why not?
What I Wish I’d Known: Pro Tips
- I once tried skipping the second rise—big mistake. The rolls turned out flat and sad. So let them puff up again, even if you’re impatient.
- If your glaze is too runny, just add more powdered sugar—don’t pour it all over or you’ll end up with a lemon lake, trust me.
- Don’t roll the dough too thin or you’ll end up with dry spirals (been there, regretted it).
FAQs – Real Questions I’ve Been Asked
Can I make the dough ahead of time?
Yup! Make the rolls up to the second rise, stick ’em in the fridge overnight, and bake in the morning. Results in ultra-fluffy buns (might need an extra 10 minutes to warm up before baking).
What if I don’t have fresh lemons?
Go for bottled juice and a bit of extra zest if you have it. Or on second thought, even just bottled works if you’re in a pinch, though the flavor’s kinda muted.
Can I use gluten-free flour?
Honestly, I haven’t tried—my cousin brought over a GF mix once, and the rolls were edible but super crumbly. If you give it a go, let me know!
The dough feels sticky—what should I do?
Add a handful more flour, little by little. But don’t stress, dough is forgiving. Unless it isn’t (just kidding… mostly!).
Is a stand mixer essential?
Not at all. I use my hands almost every time. Good workout, too, and I never feel bad about snacking after kneading.
If you’ve got any other strange or burning questions, just ask—chances are, I’ve probably made the same mistake at least once.
Anyways, happy baking. Hope you find as much joy (and zest) in these lemon rolls as I do.
Ingredients
- 2 and 3/4 cups (345g) all-purpose flour (or bread flour when I want extra fluffiness. Grandma swore by King Arthur, but honestly, whatever’s on hand)
- 1/4 cup (50g) granulated sugar
- 2 and 1/4 tsp (1 package) instant yeast (active dry is fine, just proof it first)
- 1/2 tsp salt
- 1/2 cup (120ml) milk—whole is best, but I’ve used oat milk when that’s all I had
- 1/4 cup (60g) unsalted butter, melted (salted works in a pinch, just skip the extra salt)
- 2 large eggs, room temp-ish (sometimes I forget and just roll with cold eggs)
- Zest of 2 lemons
- 3/4 cup (150g) granulated sugar (for lemon-sugar filling—you can use brown sugar if you’re feeling wild)
- 1/4 cup (60g) unsalted butter, softened (for spreading in the filling)
- 1/4 cup (60ml) fresh lemon juice (bottled works, but fresh is just… better)
- 1 cup (120g) powdered sugar (for the glaze)
Instructions
-
1Mix the flour, sugar, yeast, and salt together in a big bowl. I just use a wooden spoon. If you’re using active dry yeast, proof it in warm milk first (you want it to look kind of bubbly, not just sad and floating).
-
2In another (preferably microwave-safe) bowl, combine the milk and melt in the butter. Let it cool slightly so you don’t scramble your eggs when adding them. Not speaking from experience, but…
-
3Add the eggs to the milk/butter mixture. Stir it all together, then add the wet stuff to the dry. Mix until you get a shaggy dough—it’ll look messy, don’t worry.
-
4Knead! Either on a floured surface or right in the bowl for about 5 minutes. I do a mix of both, especially if I can’t be bothered to clean extra flour off the counter. The dough should get smooth-ish and elastic (soft, not sticky like glue).
-
5Plop the dough into a greased bowl, cover with a tea towel (or cling film if you’re fancy), and let it rise in a warmish spot for about an hour. Ignore it—go read a book or, if you’re like me, get distracted by scrolling recipes you’ll never make.
-
6Meanwhile, mix your lemon zest into the 3/4 cup sugar with your fingers. This is when your kitchen starts to smell like a country garden, honestly.
-
7Once the dough is puffy (it probably won’t double, but close), flip it onto a floured counter and gently stretch or roll into a rectangle. Maybe 10 by 14 inches? I never measure.
-
8Spread the softened butter all over the dough, right up to the edges if you can. Then sprinkle over the lemon sugar, and pour the 1/4 cup lemon juice right over the lot. It’ll look puddly—don’t panic, that’s normal.
-
9Roll it up the long way, as tight as you can without squeezing out too much filling. Slice into about 12 rolls. (I use dental floss—unused, obviously—for neat cuts. Otherwise, a big knife and hope for the best!)
-
10Arrange the rolls in a greased baking dish. Cover with a towel and let them rise again, maybe 30–40 minutes—sometimes I rush this, but they’re fluffier if you wait.
-
11Bake at 350°F (180°C) for 22-27 minutes. The tops should look golden and puffed, maybe even a little wonky. That’s good!
-
12For the glaze, whisk the powdered sugar with a tablespoon or two of lemon juice—just until it gets pourable. Actually, I find it works better if you keep it on the thicker side; then it slowly oozes.
-
13Spoon the glaze over the warm rolls. This is where I usually sneak a bite because someone has to check if they’re, you know, edible.
CLICK FOR NUTRITION INFO
↑
Approximate Information for One Serving
Serving Size:
1 serving
Calories:
300cal
Protein:
6gg
Fat:
8gg
Saturated Fat:
0g
Trans Fat:
0g
Cholesterol:
0mg
Sodium:
0mg
Potassium:
0mg
Total Carbs:
51gg
Fiber:
0g
Sugar:
0g
Net Carbs:
0g
Vitamin A:
0
Vitamin C:
0mg
Calcium:
0mg
Iron:
0mg
Nutrition Disclaimers
Number of total servings shown is approximate. Actual number of servings will depend on your preferred portion sizes.
Nutritional values shown are general guidelines and reflect information for 1 serving using the ingredients listed, not including any optional ingredients. Actual macros may vary slightly depending on specific brands and types of ingredients used.
To determine the weight of one serving, prepare the recipe as instructed. Weigh the finished recipe, then divide the weight of the finished recipe (not including the weight of the container the food is in) by the desired number of servings. Result will be the weight of one serving.
Did you make this recipe?
Please consider Pinning it!