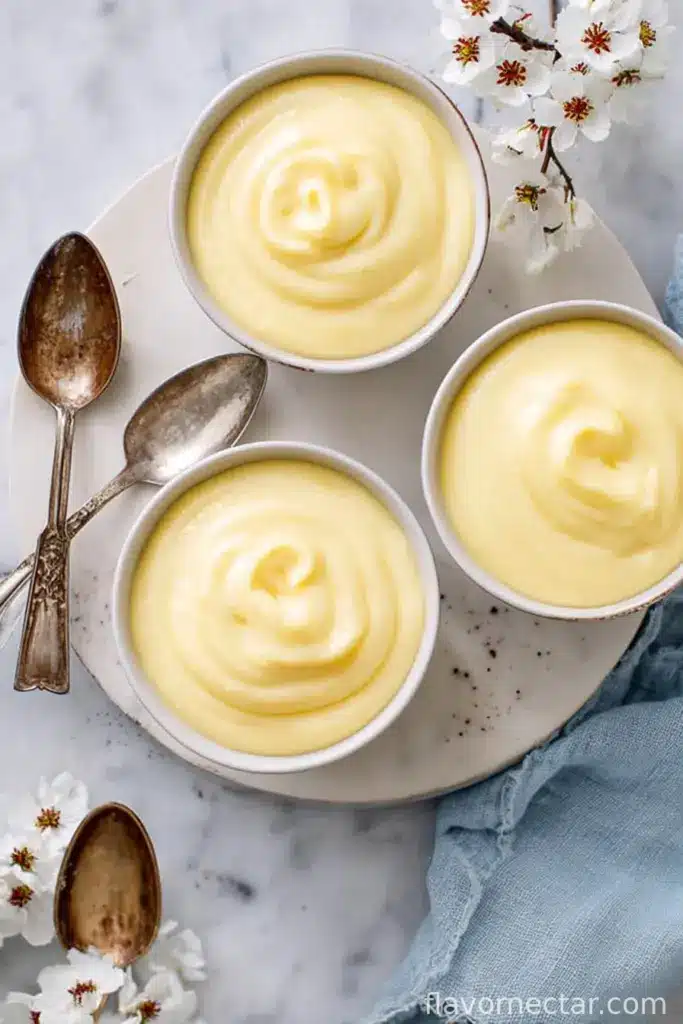
Let Me Tell You About My Vanilla Pudding Days…
First things first—if you’re looking for a picture-perfect, bakery-level pudding, you might wanna close this tab. Or stick around just for the chuckle. Homemade Vanilla pudding, at least how I make it, is more about warm kitchens, clumsy pours, and that moment when you realize you forgot to buy cornstarch (again), but you make it work anyway. I started making this pudding on rainy days, you know, the ones where the dog refuses to go outside and the only logical solution is to raid the pantry for comfort food? Yeah, those. Vanilla pudding always reminds me of my mum spooning extras into little glass custard cups—except she’d inevitably eat half before it set. Honestly, same, mum. Same.
Why You’ll Love This Pudding (Or At Least Why I Do)
I make this when I want something impossible to mess up (almost! I once forgot the sugar—don’t do that). My family goes a bit bonkers for it because it somehow tastes like a hug from Grandma, no matter how grown-up you pretend to be. It’s also kind of a kitchen lifesaver—when you’ve got eggs, milk, and a dodgy-looking bottle of vanilla in the back of the cupboard, you’re good to go. Even better: the whole place ends up smelling like a fancy patisserie, but you’re still in your slippers. Pretty much the dream, yeah? If you’re avoiding boxed mixes for any reason (I usually forget to buy them!), this is your recipe.
Pudding Ingredients (Agreed, Substitutions Keep Happening)
- 2 cups whole milk (I’ve used 2 percent in a pinch, and honestly, it’s fine. Almond milk? Nostalgic flavor goes missing, but works if that’s your jam.)
- 1/2 cup sugar (Granulated is what I grab—brown sugar gives a caramel vibe, though. Kinda fun.)
- Pinch of salt (I rarely measure a pinch. Is it a bad thing? Who knows.)
- 2 1/2 tablespoons cornstarch (Once, I swapped with flour. Longer cooking time, thicker result, not my best idea.)
- 2 large egg yolks (I’ve even used 1 whole egg + 1 yolk; works just fine, a bit richer.)
- 2 tablespoons butter (Salted or unsalted—my gran always said ‘whatever’s on hand’.)
- 2 teaspoons vanilla extract (Go big on this, or even split a vanilla bean if you’re feelin’ fancy. Paste is nice, too.)
Alright, Let’s Cook (Or, How I Once Burnt the Bottom…)
- Grab a medium pot and whisk together sugar, cornstarch, and salt—no need for perfection here, but fewer lumps = easier later. If you want minimal cleanup, use a nonstick one (I’ve regretted the stainless steel struggle more than once).
- Whisk in the milk gradually. Like, a little at a time. I used to just dump it all in, which—trust me—equals cornstarch clumps. Smooth is our friend.
- Pop the pot on medium heat. Stir constantly (not madly, but consistently—don’t wander off to check emails). When it starts to steam and thicken a bit, you’re in business. This is where I usually sneak a taste; yes, it’s not done and yes, I always do it anyway. What can I say?
- In a small bowl, whisk those egg yolks. Now, very slooowly drizzle in a bit of the hot milk mix while whisking (so the eggs don’t scramble—ask me how I know). Then, pour this back into your main pot, whisking all the while.
- Keep the heat on; 2-3 more minutes stirring and it’ll get pudding-y thick. If it looks a bit lumpy at first, don’t panic. Give it a couple more stirs.
- Remove form the heat. Stir in your butter and vanilla—it’ll smell like you want to eat it by the spoonful (and, well, do what you gotta do).
- Pour into serving bowls or one big dish (cover with wrap touching the surface unless you like pudding skin, which is weird but hey, some folks do).
- Let it cool at room temp, then pop it in the fridge for at least 2 hours. Or just eat it warm if you’re home alone and nobody’s looking. Not that I’ve done that. (I have.)
What I Wish I’d Known The First Few Rounds
- This sets up more as it chills—don’t panic if it’s slightly runny when warm.
- Skipping the butter seemed thrifty once, but um… don’t. It makes it creamy.
- If you use a whisk with a bent loop (guilty), you’ll get tiny lumps. Not the end of the world, but worth mentioning.
Pudding Experiments (Some Wins, a Notable Fail)
I’ve added a scoop of cocoa powder for a quick chocolate version—surprisingly rich. Swapping the vanilla for almond extract? Too strong, unless you really like marzipan. I once dumped in a bit of mashed banana, which turned out more like baby food than pudding. Would not repeat on purpose, but hey, you never know until you try. If you throw in a handful of berries at the end, the colors run—looks funky, still yummy.
Do You Really Need Fancy Kitchen Gadgets?
I always say a sturdy whisk is your best friend for pudding, but if all you’ve got is a big fork and a strong arm, that’ll do just fine! When I left my whisk at a friend’s house, I muddled through with a chopstick. Not ideal, but not a disaster. No fancy pots required, either.
How to Store It (But… Good Luck!)
If you do happen to have leftovers (wild, but possible), just cover the pudding and chuck it in the fridge. Lasts up to 3 days, but honestly, in my house it never makes it past breakfast the next day. Don’t freeze—tried it once, got something weirdly grainy out of the deal.
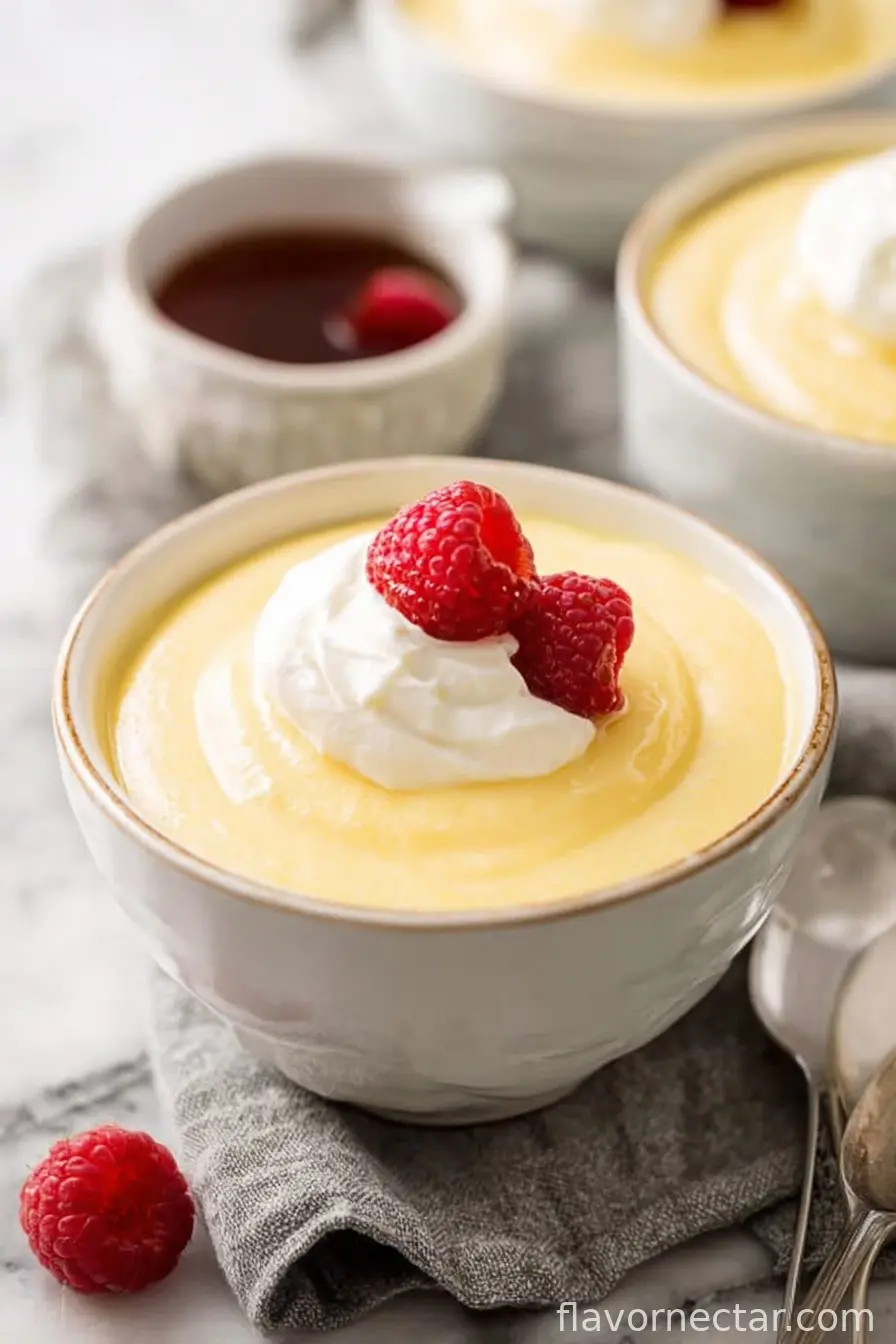
Best Way to Serve (Your Call!)
I’ll top it with whatever’s nearby—bit of whipped cream, a sprinkle of cinnamon, even those crushed chocolate cookies when we’re feeling wild. My cousin swears by a spoonful of jam dropped in the middle (raspberry’s her favorite). Sometimes we just eat it straight from the fridge, spoons at the ready, mid-afternoon on a lazy Sunday. It’s also oddly good with a warm oatmeal cookie on the side.
Pudding Pro Tips AKA Things I’ve Messed Up
- I once cranked the heat hoping for speed, and scraped burnt bits from the bottom for ages. Low and slow, always.
- If it looks weird right out of the pot, give it a brisk whisk (or blitz with an immersion blender); it’ll usually come together.
- Creamy pudding is all about patience—no need to sprint through this.
FAQ—Yes, Real Questions People Have Texted Me
- Can I use plant milk? Yes! Almond or oat works. It won’t be quite as rich, but tasty for sure.
- What if I want to make it dairy-free? Use plant milk and swap the butter for coconut oil. Texture’s a tad different, but still delish.
- How do I avoid the dreaded skin on top? Keep plastic wrap on the surface. Or, if you secretly love the skin (I won’t judge), skip that step.
- Can I double the recipe? Absolutely, but grab a bigger pot—it bubbles up quick and can make a mess (ask me how I know).
- Recommended vanilla? I’ve bought pricey beans here, but store-brand extract does the trick. Or check this guide if you’re up for making your own—never tried it, but looks easy enough!
- Why is my pudding lumpy? Usually the eggs went in too fast, or the cornstarch wasn’t whisked well. Some lumps add character, as my gran would say.
Now, if you’ve made it this far, you probably want pudding more than advice. Go for it! Or do what I do and make it while half-listening to the radio, spilling a little milk here and there. At the end of the day, homemade is always better, quirks and all.

Ingredients
- 2 cups whole milk
- 1/2 cup granulated sugar
- 1/4 cup cornstarch
- 1/4 teaspoon salt
- 2 large egg yolks
- 2 tablespoons unsalted butter
- 2 teaspoons pure vanilla extract
Instructions
-
1In a medium saucepan, whisk together the sugar, cornstarch, and salt.
-
2Gradually whisk in the milk until smooth, then cook over medium heat, stirring constantly, until the mixture thickens and comes to a gentle boil.
-
3In a separate bowl, whisk the egg yolks. Slowly pour about 1/2 cup of the hot milk mixture into the yolks, whisking constantly to temper them.
-
4Return the egg mixture to the saucepan and cook for 2-3 more minutes, stirring constantly, until thickened.
-
5Remove from heat and stir in the butter and vanilla extract until smooth. Pour pudding into serving dishes.
-
6Let cool slightly, then refrigerate until set, about 2 hours. Serve chilled.
CLICK FOR NUTRITION INFO
↑
Approximate Information for One Serving
Serving Size:
1 serving
Calories:
210 caloriescal
Protein:
5gg
Fat:
7gg
Saturated Fat:
0g
Trans Fat:
0g
Cholesterol:
0mg
Sodium:
0mg
Potassium:
0mg
Total Carbs:
33gg
Fiber:
0g
Sugar:
0g
Net Carbs:
0g
Vitamin A:
0
Vitamin C:
0mg
Calcium:
0mg
Iron:
0mg
Nutrition Disclaimers
Number of total servings shown is approximate. Actual number of servings will depend on your preferred portion sizes.
Nutritional values shown are general guidelines and reflect information for 1 serving using the ingredients listed, not including any optional ingredients. Actual macros may vary slightly depending on specific brands and types of ingredients used.
To determine the weight of one serving, prepare the recipe as instructed. Weigh the finished recipe, then divide the weight of the finished recipe (not including the weight of the container the food is in) by the desired number of servings. Result will be the weight of one serving.
Did you make this recipe?
Please consider Pinning it!!