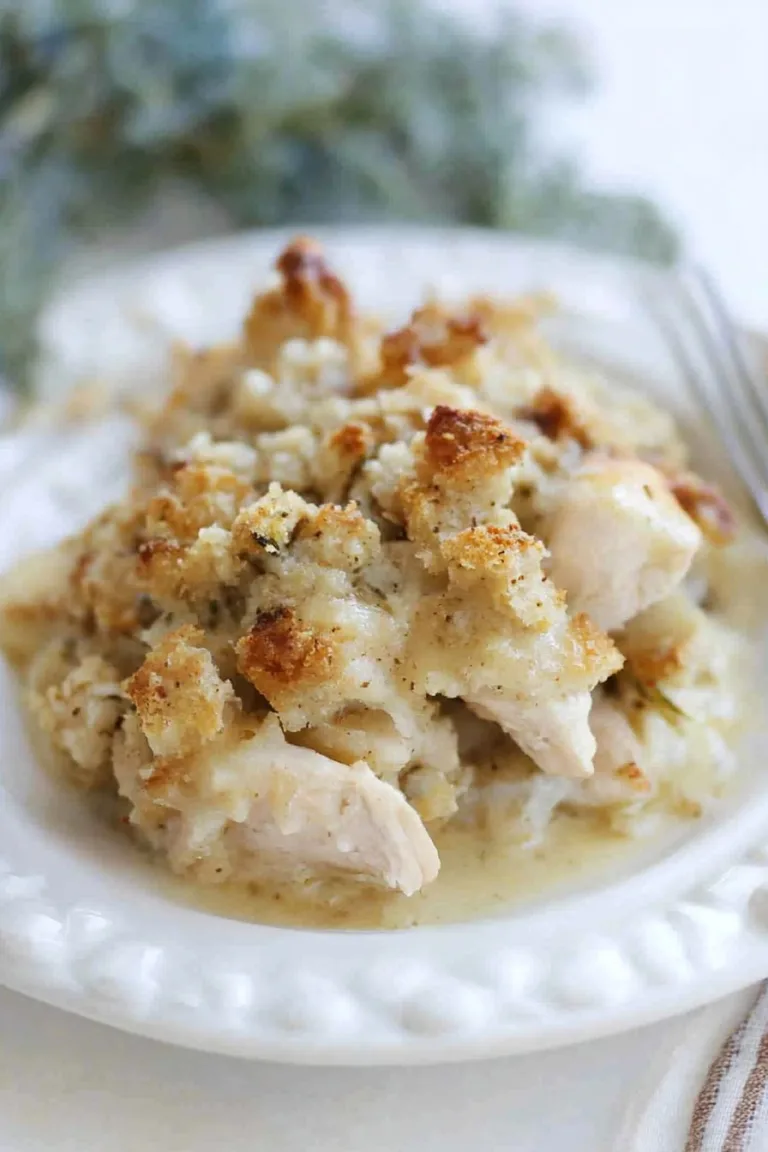
Let me tell ya—the first time I made these Holiday Herb-Cheese Rolls, I nearly set off the smoke alarm (side note: keep an eye on ’em near the end if your oven is as moody as mine). Anyway, fast forward a few chaotic-yet-joyful holidays, and now it’s basically tradition for someone to snag one when I’m not looking. A Christmas morning without these? Not on my watch. There’s just something about stuffing your face with a warm, pull-apart roll oozing with cheese and that unmistakable hit of herby goodness… ugh, I’m half tempted to bake a batch right now, even though it’s July.
Why Holiday Herb-Cheese Rolls Are Always On My Table
I make these whenever I want to actually see my family light up around the table (rather than stare at their phones for three hours straight). My brother once ate like half the batch in a single sitting—can’t blame him, though; they’re that good. Sometimes if I’m in a rush, I’ll cheat and use pre-chopped herbs (I know, I know—it’s not the same, but life happens). These Rolls just have that magic combo: the cheese pulls, soft bread, savory herbs… plus, my kitchen smells like an Italian bakery for hours (in the best way). And if you’ve ever tried to roll dough after your hands are covered in flour, you know it’s a battle, but hey—the mess is half the fun, right?
Here’s What You’ll Need (and How I Sometimes Swap Stuff In)
- 3 cups all-purpose flour (sometimes I sneak in a cup of whole wheat if I’m feeling virtuous)
- 1 tablespoon sugar (my aunt swears by brown sugar, but really, whatever’s handy)
- 2¼ teaspoons instant yeast (the little packets work fine—don’t fuss over brands)
- 1 teaspoon salt (I use flaky sea salt if I’m feeling fancy, but table salt’s totally okay)
- 2 tablespoons olive oil (vegetable oil works in a pinch—I’m not above it)
- 1 cup warm milk (whole milk is dreamy, but I’ve used oat milk for my vegan cousin and it didn’t, like, ruin everything)
- 1 large egg (or skip it and add another spoonful of milk; it’ll still work, promise)
- 1¼ cups shredded cheese (Gruyère makes it super ritzy, but cheddar or mozzarella gets the job done; I, uh, once tried the pre-shredded Mexican blend and it was decent)
- ½ cup finely chopped mixed herbs—think parsley, thyme, chives, rosemary (I’ll use dry in a pinch—just halve the amount)
- 2 tablespoons melted butter for brushing (sometimes I skip it entirely; no major tragedy)
So, Here’s How I Throw These Together
- Mix the dough. I dump the flour, sugar, yeast, and salt in a big bowl—don’t stress if the yeast hits the salt directly; it’s never made mine flop. Add in the olive oil, warm milk (not hot, or you’ll make the yeast mad), and egg. Stir until it resembles a shaggy mess. If you’re using a stand mixer, congrats, you win at life. If not, just get in there with a wooden spoon, then your hands, and mix until it comes together.
- Knead away. Turn it out onto your (floured) counter, and give it a knead for about 8 minutes—ten if you’ve got patience, but who does? It should be smooth-ish and a little sticky. I used to add more flour when it got sticky, but actually, I find it works better if you just push through.
- First rise. Plop it back in the bowl (oiled, but I usually just use a spritz of spray), cover with cling film or a tea towel, and let it rise in a warm-ish spot. Aim for about an hour—though if you forget about it and it goes for 90 minutes, no big drama. It won’t mutiny.
- Fill and roll. Punch the dough down (my favorite step). Roll it out to a rough rectangle, about 10×14 inches, but honestly, I barely measure. Sprinkle the shredded cheese and herbs evenly. Then, roll it up from the short end—at this stage, if it looks like a lumpy log, that’s perfect.
- Slice and arrange. I use dental floss (the unscented kind—learned that the hard way) to slice the log into roughly 12 pieces. If you only have a knife, just make sure to press straight down—don’t ‘saw.’ Arrange cut-side up in a parchment-lined or well-buttered baking dish. Squish them together; they like the company.
- Final rise. Cover again and let ’em puff up for 30-40 minutes. This is when I frantically clean flour off literally every surface I own.
- Bake! Heat up your oven to 180°C (350°F), brush the Rolls with melted butter (totally optional if you’re running late), and bake for 22-26 minutes, or until gorgeously golden. Don’t panic if the cheese oozes out; it gets all crispy along the edges and that might be my favorite part.
- Let cool (a little), then demolish. Good luck resisting till they’re cool. I usually fail. Rip ‘em apart and dig in.
Random Notes (Things I Learned the Hard Way)
- Don’t use herbes de Provence for this. It… just doesn’t work somehow. (Sorry, France.)
- If your dough is taking ages to rise, stick it in your (turned-off) oven with just the oven light on. Magic.
- Letting them cool for at least 10 minutes really helps the texture, but, look, no one’s judging you if you grab one hot and burn your tongue (I’ve done it every time).
- If you make it the night before, the flavor is somehow even deeper the next day—I mean, if it lasts that long.
Variations I’ve Actually Tested (Some Better Than Others)
- Cheddar and jalapeño: Swap in sharp cheddar and throw in some diced jarred jalapeños. Spicy and honestly, addictive.
- Sun-dried tomato & basil: Use mozzarella and toss chopped sun-drieds and fresh basil in. This one’s hit-or-miss; once, the tomatoes made the dough kinda soggy, so go easy.
- Full vegan: Plant-based cheese, oat milk, skip the egg. Tasted fine, though not as fluffy. (But it totally works for vegan pals!)
Do You Need Fancy Tools?
I use a stand mixer when I’m feeling posh (or my arms are sore), but you really just need a big bowl, a spoon, and a baking dish. If you don’t have parchment paper, I’ve gone without and just buttered the pan more. Want to try a different technique? King Arthur’s yeast bread guide is actually super helpful if you’re nervous about bread stuff. No fancy roll-cutter? Just use plain dental floss (clean, not, like, from your bathroom drawer).

How Long Do They Last? (Not That They’ll Stick Around)
In theory, these keep for 2 days at room temperature in an airtight tin. But honestly, in my house they never last more than a day; people have been caught sneaking in for ‘one more’ after midnight. Leftovers can be popped in the toaster oven for a mid-afternoon nibble—they’re still tasty. If you’re extra organized: freeze them (once cooled) and reheat in the oven, wrapped in foil.
Serving Ideas—The Way We Do It
My favorite way to serve these is straight-up with salted butter, but my cousin slathers his with garlic cream cheese (yeah, we don’t judge). Sometimes I plant them next to a bowl of homemade soup—like this Smitten Kitchen tomato soup. Also, they disappear fast as a brunch side; I try to save one for myself, and usually fail.
Pro Tips (AKA, Stuff I Screwed Up and Fixed)
- I once used hot milk instead of warm—yeast did not appreciate; the rolls were more like doorstops. Lesson learned.
- If you forget the butter on top pre-bake, just brush ’em afterwards. Good enough.
- Trying to speed up the rise by sticking the dough on top of a radiator? Turns out that’s how you get weird crusty bits. Don’t do it.
- Oh, and if you’re tempted to slice them super thin for more pieces—don’t. You’ll just end up with sad, flat spirals.
FAQ—Real Questions I’ve Heard (Or Asked…)
- Can I use pre-made dough? Yup! Honestly, I sometimes grab pizza dough from the store if I’m running behind. Texture’s a little different, but no one’s ever complained.
- What’s the best cheese? For me, Gruyère wins hands down, but any melty cheese (cheddar, provolone) is fine. Actually, skip hard cheeses like parmesan here, unless you just sprinkle some on top at the end for a bit of extra.
- Can I freeze them? Absolutely; bake, cool totally, then freeze in a Ziploc. Reheat in a low oven, wrapped in foil, till hot. They’re a bit denser after thawing, but still worth it.
- The dough’s sticky—is that normal? Oh yeah, all the best ones are! Don’t worry, just keep lightly flouring your hands and counter.
- Does it work gluten-free? Actually, I tried once with an all-purpose GF blend… It tasted kinda sandy. I’m still working on that one.
So, that’s the whole shebang on Holiday Herb-Cheese Rolls. If you’re after a cozier dinner, or just want your house to smell like an herb garden collided cheerfully with a cheese shop, give this a go. Just, uh, remember to set a timer—these have a talent for vanishing, both form the oven and the plate.

Ingredients
- 3 cups all-purpose flour
- 1 cup warm milk
- 2 1/4 teaspoons active dry yeast
- 2 tablespoons granulated sugar
- 1/4 cup unsalted butter, melted
- 1 cup shredded cheddar cheese
- 2 tablespoons chopped fresh parsley
- 2 teaspoons chopped fresh rosemary
- 1 teaspoon salt
- 1 egg
Instructions
-
1In a large bowl, combine the warm milk, sugar, and yeast. Let sit for 5 minutes, until foamy.
-
2Whisk in the melted butter, egg, salt, parsley, and rosemary. Gradually add the flour, mixing until a soft dough forms.
-
3Knead in the shredded cheddar cheese until evenly distributed. Continue to knead the dough for about 5 minutes, until smooth and elastic.
-
4Place the dough in a greased bowl, cover, and let rise in a warm place for 1 hour or until doubled in size.
-
5Punch down the dough and divide into 12 equal pieces. Shape each piece into a ball and arrange in a greased baking dish.
-
6Cover and let rise a second time for 20 minutes. Preheat oven to 375°F (190°C). Bake for 18-20 minutes or until golden brown. Serve warm.
CLICK FOR NUTRITION INFO
↑
Approximate Information for One Serving
Serving Size:
1 serving
Calories:
190 caloriescal
Protein:
6gg
Fat:
6gg
Saturated Fat:
0g
Trans Fat:
0g
Cholesterol:
0mg
Sodium:
0mg
Potassium:
0mg
Total Carbs:
27gg
Fiber:
0g
Sugar:
0g
Net Carbs:
0g
Vitamin A:
0
Vitamin C:
0mg
Calcium:
0mg
Iron:
0mg
Nutrition Disclaimers
Number of total servings shown is approximate. Actual number of servings will depend on your preferred portion sizes.
Nutritional values shown are general guidelines and reflect information for 1 serving using the ingredients listed, not including any optional ingredients. Actual macros may vary slightly depending on specific brands and types of ingredients used.
To determine the weight of one serving, prepare the recipe as instructed. Weigh the finished recipe, then divide the weight of the finished recipe (not including the weight of the container the food is in) by the desired number of servings. Result will be the weight of one serving.
Did you make this recipe?
Please consider Pinning it!!