Hey y’all! If you’re craving that sizzling, savory flavor from your favorite Japanese steakhouse, this Hibachi Chicken with Fried Rice and Vegetables recipe brings the magic right to your kitchen. It’s packed with juicy chicken, fluffy fried rice, and crisp-tender veggies, making it a perfect weeknight dinner, family gathering, or even a fun date-night meal. Let’s get cooking!
Why You’ll Love This Hibachi Chicken with Fried Rice and Vegetables
- Quick and easy — ready in under 45 minutes for busy weeknights.
- Budget-friendly and healthier than restaurant takeout.
- Customizable with your favorite veggies or proteins.
- Perfect balance of savory, garlicky, and slightly sweet flavors.
- Fun to cook and even more fun to eat!
Ingredients for Hibachi Chicken with Fried Rice and Vegetables
- 1 1/2 lbs boneless, skinless chicken breasts, cut into 1-inch cubes
- 3 cups cooked and chilled jasmine or long-grain white rice
- 2 tablespoons vegetable oil (divided)
- 1 tablespoon unsalted butter
- 2 large eggs, lightly beaten
- 1 small onion, diced
- 2 cloves garlic, minced
- 1 cup carrots, peeled and diced
- 1 cup zucchini, halved and sliced
- 1 cup broccoli florets
- 1 cup mushrooms, sliced
- 2 tablespoons soy sauce
- 2 tablespoons low-sodium soy sauce (for rice)
- 1 tablespoon sesame oil
- 1 tablespoon mirin or dry sherry (optional)
- Salt and black pepper, to taste
- 2 tablespoons chopped green onions (for garnish)
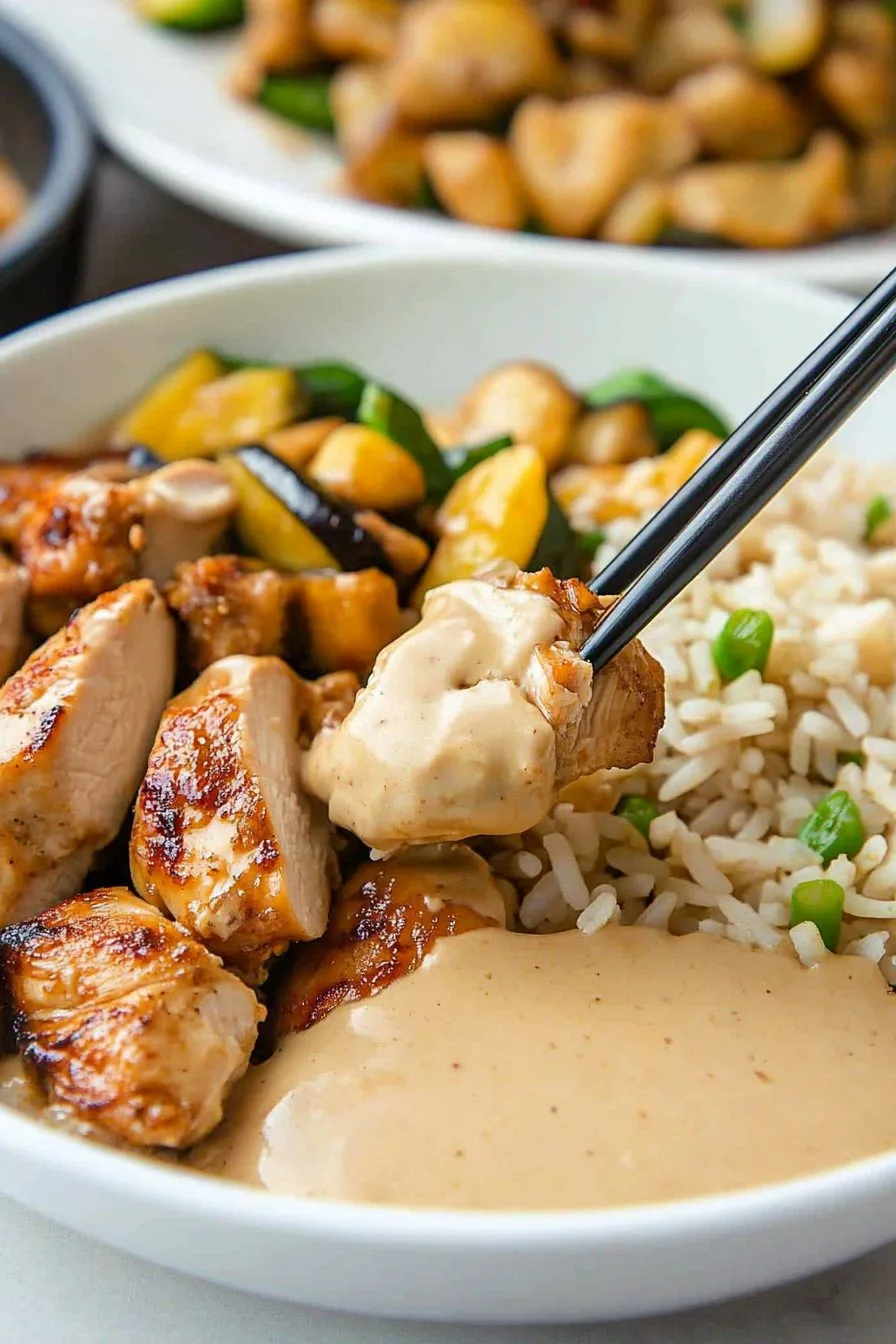
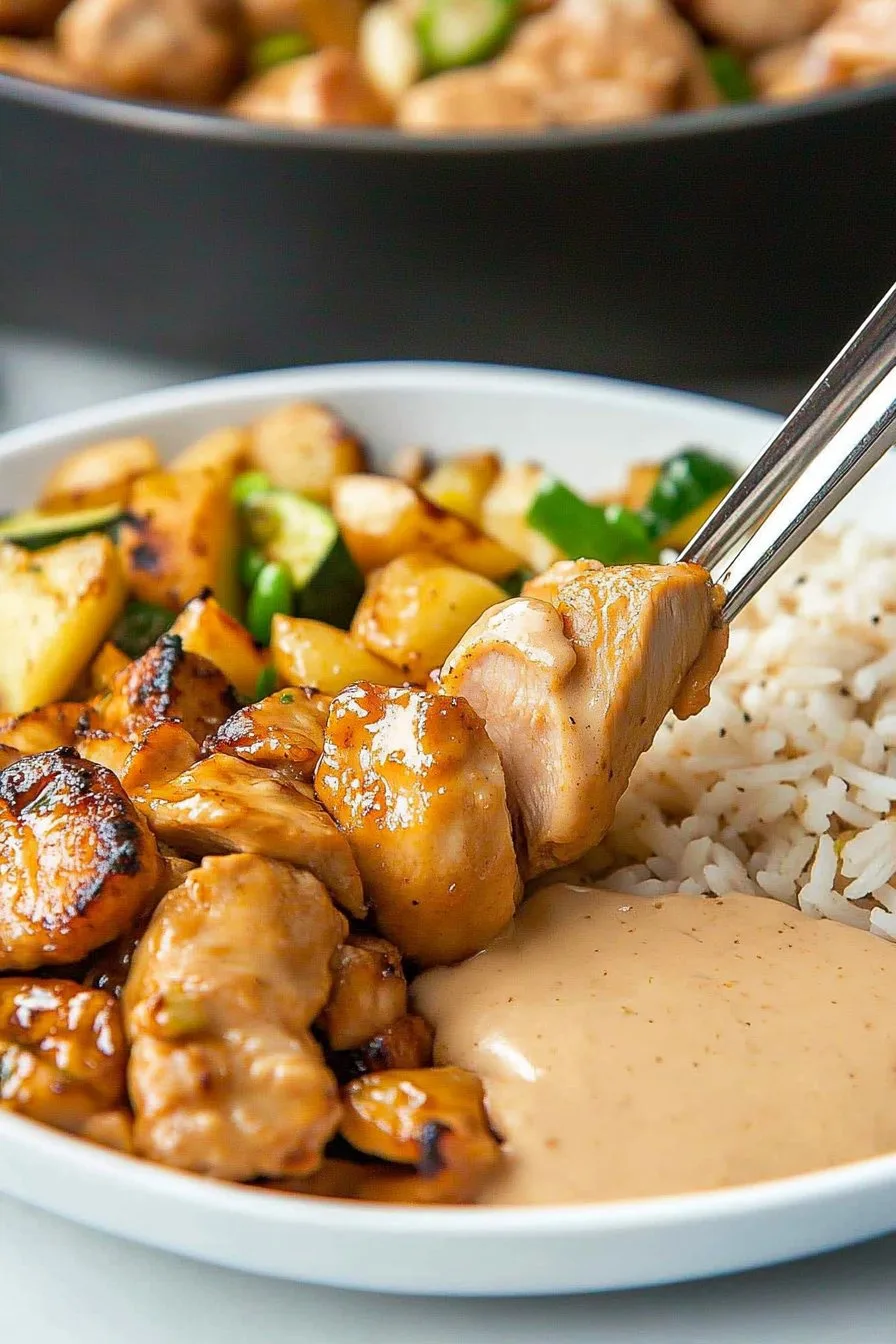
- Hibachi white sauce or yum yum sauce, for serving (optional)
How to Make Hibachi Chicken with Fried Rice and Vegetables
Step 1: Prepare the Ingredients
Start by prepping all your veggies, chopping the chicken into bite-sized cubes, and whisking the eggs. For authentic fried rice texture, use day-old, chilled rice.
Step 2: Cook the Hibachi Chicken
Heat 1 tablespoon vegetable oil in a large skillet or griddle over medium-high heat. Add the chicken cubes, season with salt and pepper, and cook for 6-8 minutes until golden and cooked through. Stir in 1 tablespoon soy sauce, half the garlic, and mirin (if using). Sauté for 1-2 more minutes until fragrant. Remove chicken from pan and set aside.
Step 3: Sauté the Fried Rice
In the same pan, add another tablespoon of oil and the butter. Sauté onions and carrots for 2-3 minutes until softened. Push to one side, add eggs, and scramble until just set. Add the cold rice, drizzle with 2 tablespoons of low-sodium soy sauce and sesame oil, then stir-fry for 4-5 minutes, breaking up clumps. Incorporate green onions at the end for freshness.
Step 4: Cook the Hibachi Vegetables
Add zucchini, broccoli, mushrooms, and remaining garlic to the pan. Stir-fry for 4-5 minutes until the veggies are brightly colored and just tender but still crisp. Season with salt and pepper.
Step 5: Combine and Serve
Return the chicken to the pan, toss everything together, and taste for seasoning. Serve hot, drizzled with hibachi white sauce or yum yum sauce if desired, and garnish with extra green onions.

Notes for the Best Hibachi Chicken with Fried Rice and Vegetables
- Use cold, day-old rice for the fried rice to prevent mushiness (learn why here).
- For extra flavor, marinate your chicken in soy sauce and garlic for 30 minutes before cooking.
- Swap in any veggies you love—snow peas, bell pepper, or edamame work great!
Variations on Hibachi Chicken with Fried Rice and Vegetables
- Steak Hibachi: Substitute chicken with sirloin steak, cut into bite-sized pieces.
- Shrimp Hibachi: Use peeled, deveined shrimp and cook until pink, about 3 minutes per side.
- Vegetarian Hibachi: Omit chicken and double up on mushrooms and broccoli for a hearty, meat-free meal.
Required Equipment for Hibachi Chicken with Fried Rice and Vegetables
- Large nonstick skillet, wok, or griddle
- Cutting board and sharp knife
- Spatula or wooden spoon
- Mixing bowl (for eggs)
Storage Instructions
Store leftover Hibachi Chicken with Fried Rice and Vegetables in an airtight container in the refrigerator for up to 4 days. Reheat gently in a skillet over medium heat for best texture. Avoid freezing, as the veggies may become mushy.
Serving Suggestions and Pairings
Serve your Hibachi Chicken with Fried Rice and Vegetables with a side of miso soup or a crisp Asian slaw. Pair with a light Japanese beer or cold green tea for a restaurant-style experience at home.
Pro Tips for Perfect Hibachi Chicken with Fried Rice and Vegetables
- Don’t overcrowd your pan—cook in batches if needed for the best sear and texture (more stir-fry tips).
- Use high heat to get that signature hibachi char and flavor.
- Chill your rice ahead of time for the perfect, non-sticky fried rice texture.
FAQ About Hibachi Chicken with Fried Rice and Vegetables
-
Can I use brown rice instead of white rice?
Yes! Brown rice works well—just make sure it’s fully cooked and chilled before frying. -
Is this dish gluten-free?
It can be—simply use gluten-free soy sauce or tamari for all the sauces. -
Can I meal prep Hibachi Chicken with Fried Rice and Vegetables?
Absolutely! Prepare and portion into meal prep containers for quick lunches or dinners throughout the week.

Ingredients
- 1 lb boneless, skinless chicken breast, cut into bite-sized pieces
- 3 cups cooked jasmine rice (preferably day-old)
- 2 tablespoons soy sauce
- 2 tablespoons vegetable oil, divided
- 1 tablespoon butter
- 1 cup broccoli florets
- 1 cup sliced carrots
- 1 cup zucchini, sliced
- 2 large eggs, beaten
- 2 cloves garlic, minced
- Salt and black pepper, to taste
- 2 tablespoons chopped green onions (for garnish)
Instructions
-
1Heat 1 tablespoon of vegetable oil in a large skillet or hibachi grill over medium-high heat. Add the chicken pieces, season with salt and black pepper, and cook until golden and cooked through, about 6-8 minutes. Remove chicken and set aside.
-
2In the same skillet, add the remaining oil and butter. Add broccoli, carrots, and zucchini. Stir-fry for 4-5 minutes until vegetables are tender-crisp. Add garlic and cook for 1 more minute.
-
3Push the vegetables to one side of the skillet. Pour the beaten eggs onto the empty side and scramble until just set.
-
4Add the cooked rice to the skillet. Drizzle soy sauce over the rice and mix everything together, stir-frying for 3-4 minutes until heated through.
-
5Return the cooked chicken to the skillet and toss to combine with the rice and vegetables. Adjust seasoning with additional soy sauce, salt, or pepper if desired.
-
6Garnish with chopped green onions and serve hot.
CLICK FOR NUTRITION INFO
↑
Approximate Information for One Serving
Serving Size:
1 serving
Calories:
520cal
Protein:
34 gg
Fat:
16 gg
Saturated Fat:
0g
Trans Fat:
0g
Cholesterol:
0mg
Sodium:
0mg
Potassium:
0mg
Total Carbs:
58 gg
Fiber:
0g
Sugar:
0g
Net Carbs:
0g
Vitamin A:
0
Vitamin C:
0mg
Calcium:
0mg
Iron:
0mg
Nutrition Disclaimers
Number of total servings shown is approximate. Actual number of servings will depend on your preferred portion sizes.
Nutritional values shown are general guidelines and reflect information for 1 serving using the ingredients listed, not including any optional ingredients. Actual macros may vary slightly depending on specific brands and types of ingredients used.
To determine the weight of one serving, prepare the recipe as instructed. Weigh the finished recipe, then divide the weight of the finished recipe (not including the weight of the container the food is in) by the desired number of servings. Result will be the weight of one serving.
Did you make this recipe?
Please consider Pinning it!!