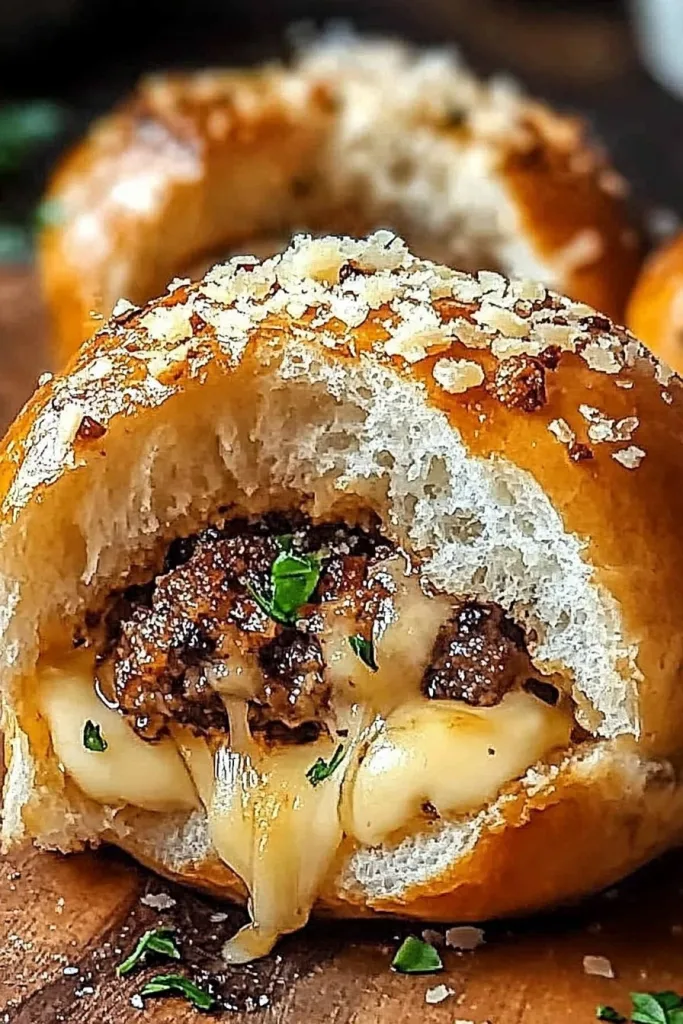
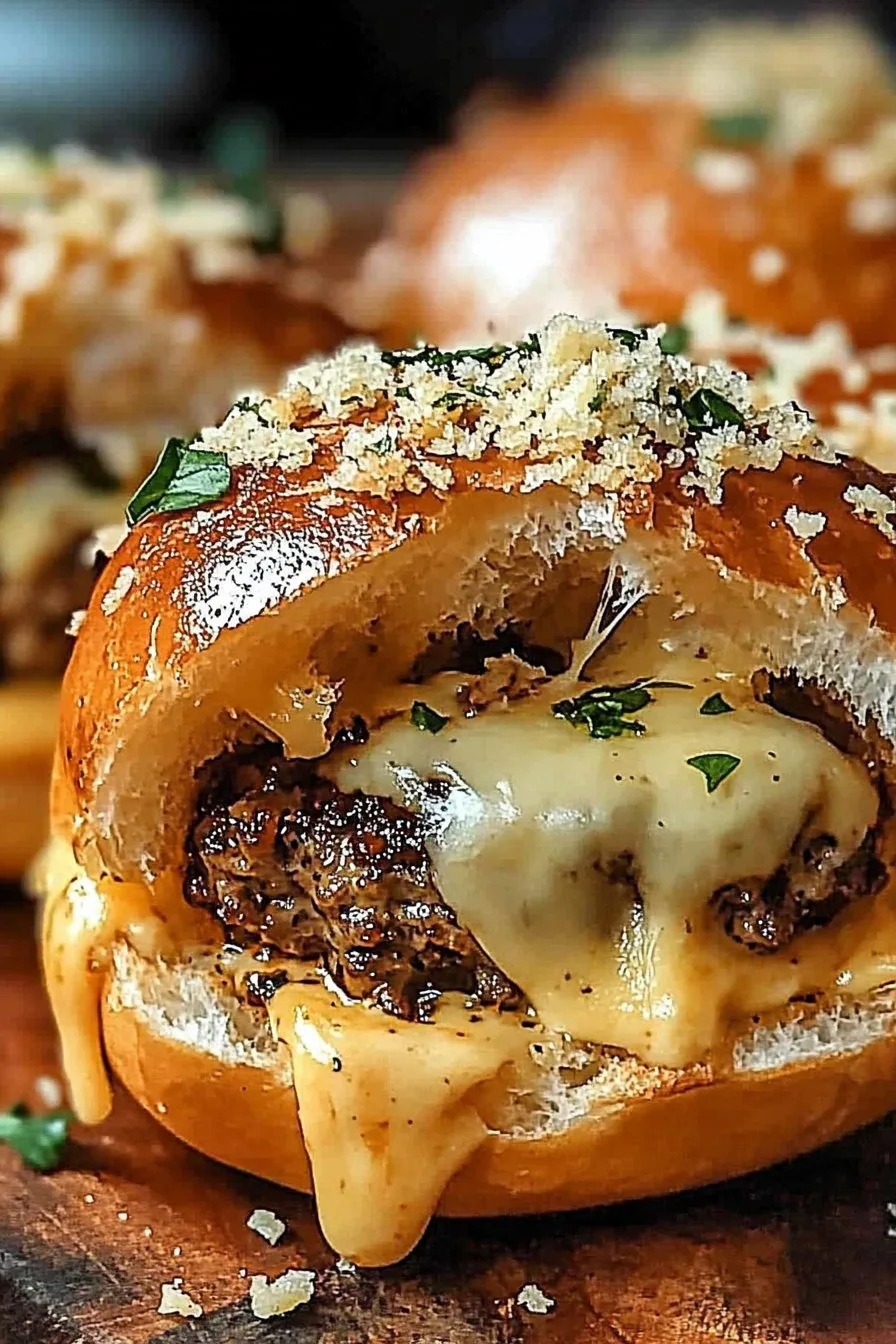
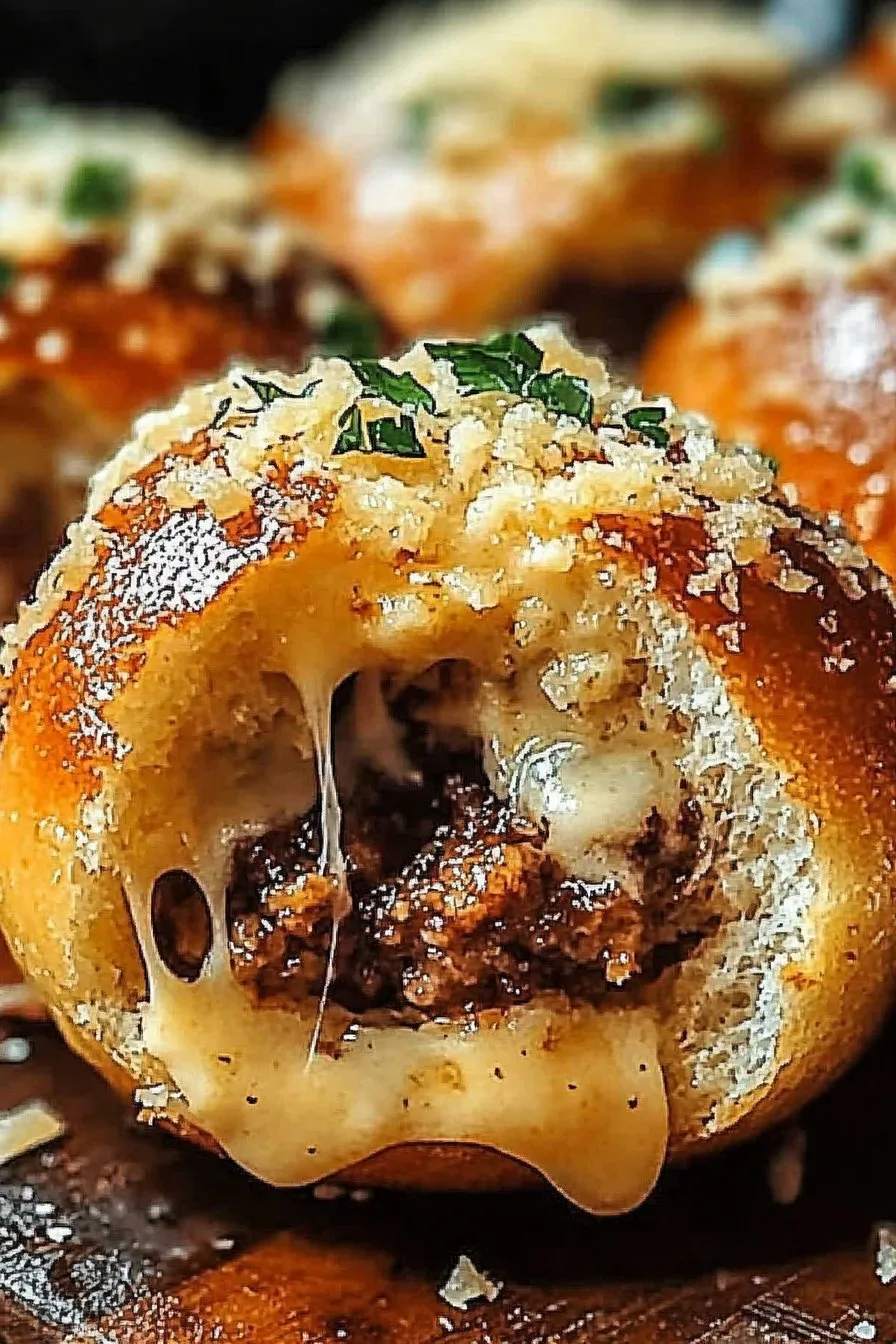
Hey there, fellow food enthusiast! So, let me tell you about the time I stumbled upon this delightful little recipe for Garlic Parmesan Cheeseburger Bombs. It all started at a backyard BBQ, where I realized my usual burgers needed a little something extra—something that says, ‘I love you, but let’s spice things up a bit!’ Well, these cheesy, garlicky, exploding wonders (okay, not literally exploding… but you get the idea) were born from that very thought.
Why You’ll Love This
I whip up these little bombs when I’m craving something indulgent yet easy to make. My family goes absolutely bananas for them (I’ve even caught my brother-in-law sneaking seconds). And if I’m being honest, they’re a lifesaver for those nights when I just can’t with complicated recipes. Plus, they’re a great way to sneak in some veggies—just don’t tell the kids!
What You’ll Need
- 1 lb ground beef (or turkey, if you prefer)
- 1 cup shredded mozzarella (sometimes I use cheddar when I’m out)
- 1/2 cup grated Parmesan cheese
- 1 clove garlic, minced (or a teaspoon of garlic powder in a pinch)
- 1 can refrigerated biscuit dough (my grandma swore by Brand X, but any will do)
- Salt and pepper to taste
- 2 tbsp butter, melted
- 1 tbsp dried parsley
Let’s Get Cooking!
- Preheat your oven to 375°F (190°C). This is the perfect time for a dance break—kitchen boogie, anyone?
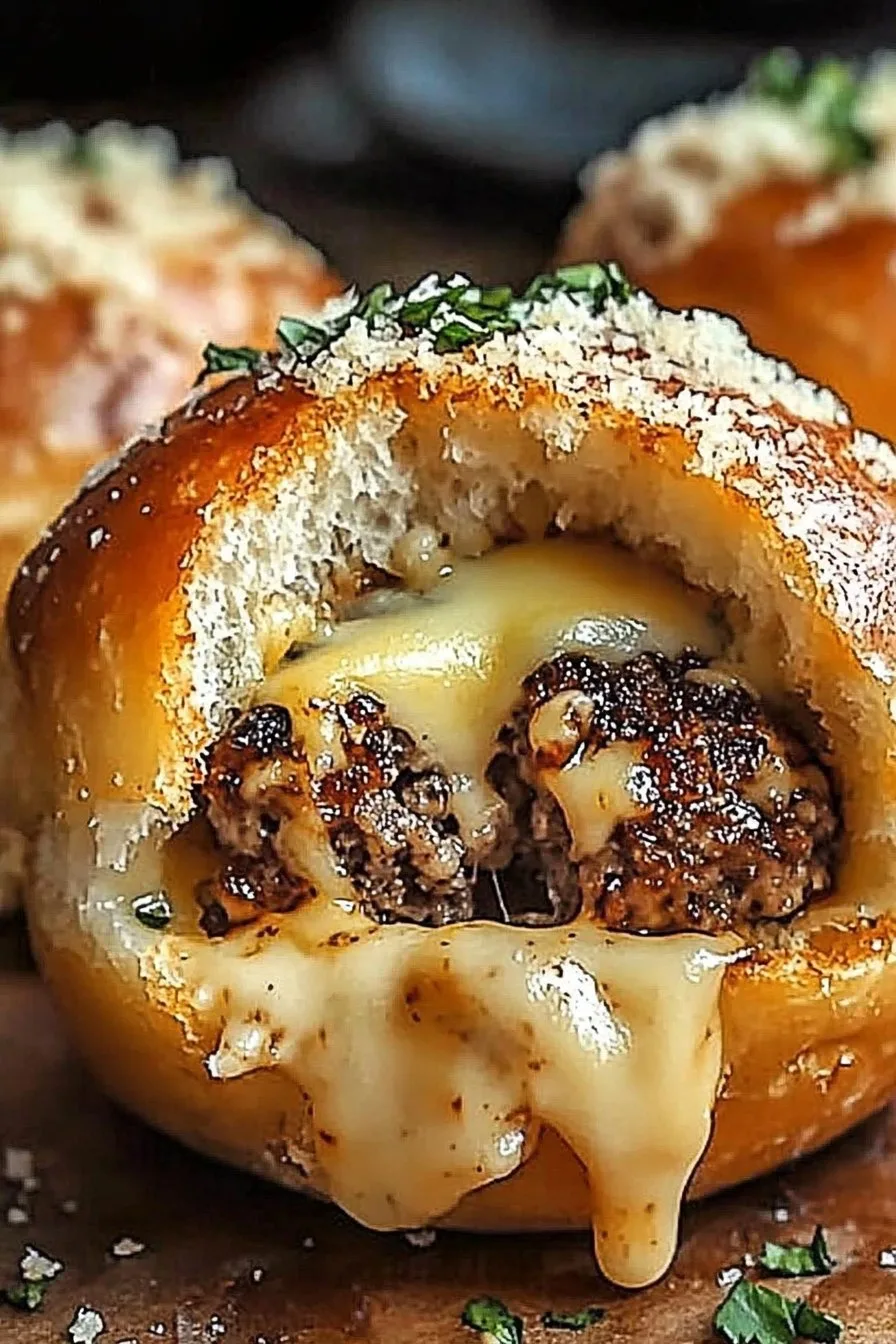
- Cook the ground beef over medium heat until browned; drain the excess fat. Stir in the garlic, mozzarella, and half the Parmesan cheese. Tasting is mandatory at this stage (chef’s privilege).
- Flatten each biscuit dough piece and add a spoonful of the beef mixture. Wrap the dough around and seal it like a cute little package.
- Place seam side down on a baking sheet. You might notice they look a bit odd, but trust me, they’ll beautify in the oven.
- Brush with melted butter, sprinkle the remaining Parmesan and parsley. Pop them in the oven for about 15 minutes or until golden brown.
Notes (or, what I’ve learned)
Don’t worry if the cheese oozes out a bit during baking; it adds character! And if your bombs don’t seal perfectly, they’ll still taste fantastic. Trust me.
Fun Variations
Once, I tried adding jalapeños for a spicy kick, which was a hit! But the time I threw in pickles—well, let’s just say it wasn’t my family’s favorite experiment.
What If I Don’t Have the Right Gear?
No rolling pin? No problem. A sturdy glass works just fine to flatten the dough. Who needs fancy gadgets anyway?
Keeping Them Fresh (If They Last)
Store these beauties in an airtight container in the fridge for up to 3 days—though honestly, in my house, they never last more than a day!
What to Pair Them With
I love serving these with a simple green salad. Or, when I’m feeling fancy, I’ll whip up a quick dipping sauce with mayo and ketchup (more sophisticated than it sounds, I promise).
Pro Tips (Learned the Hard Way)
Once, I rushed the sealing part and regretted it because the filling all but escaped. Take your time sealing those edges!
FAQs from My Kitchen
Q: Can I make these ahead of time?
A: Absolutely! They reheat nicely in the oven. Just don’t microwave them—trust me, it’s not the same.
Q: What if I don’t like garlic?
A: Well, that’s a bit of a conundrum for this recipe, but you could skip it or replace it with a milder onion.
So there you have it, my friend. If you give these a try, let me know how it goes! Remember, cooking is all about experimenting and having fun, even if things sometimes go a bit awry.