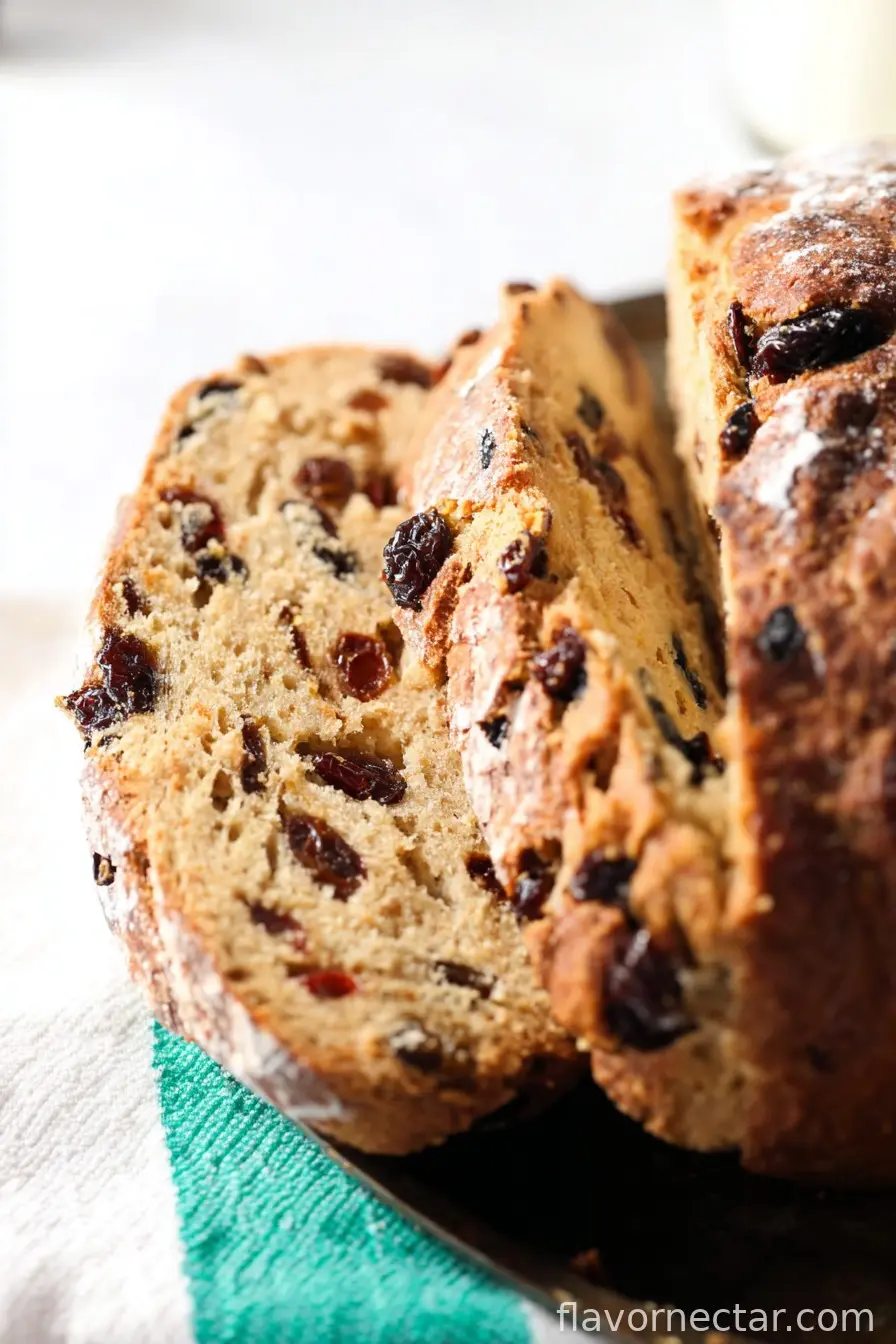
Oh, The Nostalgia of Holiday Baking
You know how some recipes just smell like memories? That’s what this Fruit-Studded Holiday Bread does for me. Every winter as a kid, I’d find my nan elbows deep in dough, muttering about raisins that tried to escape the bowl. Now, it’s my kitchen, my clutter, and (to be fair) my dog begging for a taste he’s never getting. Once, I tried to double the fruit and the bread turned into a sort of fruity brick—live and learn, right? Anyway, let’s chat about how to make it your own (sans fruity brick, hopefully!).
Why I Always Make This (& So Should You, Maybe)
I make this bread when I want the house to smell like joy and, frankly, to trick my family into eating something with actual fruit. My partner says it reminds her of winter mornings back home, though she eats most of the crust before it cools. Also, it’s the only bread my teenage nephew will eat without suspicious side-eye—well, unless I burn it, which only happened once because I got distracted watching The Great British Bake Off. You know how it is. I’ll say: if you need a sweet treat that feels festive but not fussy, this is it. (Plus, kneading dough is cheaper than therapy.)
What You’ll Need (But Honestly, Sub Away!)
- 3 cups all-purpose flour (I’ve swapped in 1 cup whole wheat in a pinch; it’s a bit denser, just saying)
- 1/3 cup granulated sugar (brown sugar works too, but it’s a little richer)
- 1 packet (about 2 1/4 tsp) active dry yeast — instant is fine, my grandma would never know
- 1/2 cup whole milk, warmed (sometimes I use oat milk but it’s not quite as rich)
- 1/4 cup unsalted butter, melted — salted is okay, just skip adding extra salt below
- 2 large eggs
- 1/2 tsp fine sea salt (or just a small handful if you don’t have a measuring spoon at arm’s reach)
- 1 tsp vanilla extract (I once forgot it; would not recommend, but not a tragedy)
- 1 cup mixed dried fruit (raisins, cranberries, apricots, cherries—I sometimes just use what’s lurking in the back of the cupboard)
- Zest of 1 orange (or lemon; use whatever’s rolling around your produce drawer)
- 1/2 cup chopped walnuts or pecans (optional, or skip if you’ve got picky eaters)
- 1 egg, beaten with 1 tbsp water (for glaze – or just a splash of milk if you’re out of eggs)
- Powdered sugar to dust—totally optional, but it looks fancy
How I Throw This Together (With Only Occasional Swearing)
- First off, warm your milk just a tad—think cozy bath, not hot tub—then dump in the sugar and yeast. Stir and let it sit for 5-10 minutes. It’ll get all bubbly and foamy. If it doesn’t, your yeast is either on strike or expired. Or the milk was too hot. Anyway, start again if nothing happens.
- In a big bowl, toss in the flour and salt. I just mix it around with my hand (I’m not fancy with whisks here).
- Add melted butter, the 2 eggs, vanilla, and citrus zest to the bubbly milk concoction. Pour it into the flour mix. Stir with a spoon—okay, or just use your hand—until it forms a sort of shaggy dough. Don’t worry, it always looks weird here.
- Knead on a floured surface for about 8 minutes (or until it feels smooth and kind of bouncy). Or, if you’re like me and your stand mixer has a mysterious rattle, just knead by hand and get your arm workout in. Actually, the mess is part of the fun.
- Flatten the dough a bit and scatter over your dried fruit and nuts (if using). Fold and knead just until the goodies are everywhere, but don’t get obsessive—it’s fine if a few escape.
- Now, oil a bowl (I’ve used olive oil, butter, or just straight-up nonstick spray). Plop your dough in, cover with a kitchen towel or a shower cap—I mean it, they work!—and set somewhere warmish. Let it rise for about 1 to 1.5 hours, until doubled. Go read a book or scroll your phone, it’ll be fine.
- Punch it down—that bit is fun—and shape into a pretty loaf or a round boule. Plop it on a baking sheet lined with parchment. Let it rest (again, sorry!) for about 30 more minutes. Sometimes I just preheat the oven during this so I don’t forget.
- Brush the top with your egg wash (or milk). Add a few decorative slashes if you’re feeling arty; if not, who cares?
- Bake at 350°F (175°C) for 30–35 minutes—or until golden and it sounds a bit hollow when tapped. Mine always seems to need the full 35, but ovens are all weirdly individual. And yes, the smell is a bonus.
- Cool on a rack (or a windowsill like I do—just don’t leave it out where the neighbor’s cat can reach, long story). Dust with powdered sugar if you’re feeling extra.
Notes From My Bread-Baking Blunders
- Once, I left the dough rising in a room that was too cold. Took forever. Now, I just tuck it in the (switched-off!) oven with the light on.
- If your fruit keeps sinking, toss it with a spoonful of flour first. I read that somewhere. It sort of works—sometimes.
- I usually eat an end slice while it’s still warm. Sorry, not sorry. It’s best that way.
Variations I’ve Tried (Not All Winners!)
- If you want it boozier: Soak the dried fruit in rum or brandy for half an hour. Delicious (though one time I got a bit heavy-handed and, let’s just say, the bread had a stronger personality than I’d planned).
- Swap nuts for chocolate chips. Not traditional, but chocolate makes almost anything better, right?
- Once I tried honey instead of sugar. We all voted no; too sticky. Just stick (ha!) with sugar here, trust me.

If You’re Short on Gear…
You don’t really need a stand mixer—even though I always say it’s essential, I usually just use my hands. Got no parchment? A greased baking sheet will do just fine. And if your bread pan’s gone missing (mine migrated to my neighbor’s house last Christmas, never to return)—just bake it free-form. Works as well.
Keeping It Fresh… In Theory Anyway
This bread stays soft in an airtight tin for a couple days—though honestly, in my house it never lasts more than a day! Refresh it up in the toaster if you do have leftovers. Or freeze sliced pieces for a later treat (I rarely get that far).
How We Serve It (Or How It Just Disappears)
My favorite? Sliced thick and spread with a slap of salted butter, with a mug of milky tea (preferably while watching the rain). The kids like it toasted, but we all agree it’s best shared while the holiday lights are twinkling. Sometimes we put out jars of jam, but honestly, the bread’s sweet enough solo.
Lessons Learned the Hard Way
- I once rushed the second rise—big mistake. Bread was dense as a brick. Now I set a timer and force myself to do something else for 30 minutes, even if it means just folding laundry.
- Opening the oven to peek every five minutes? It makes it lose heat and takes longer. Just be patient (I know, easier said than done). Actually, it probably bakes faster if you just trust your nose and timing.
Fruit-Studded Holiday Bread FAQ From My Kitchen Table
- Can I use gluten-free flour? – Sort of, but the texture is more crumbly. My friend with celiac says it’s doable if you add an extra egg. Never tried myself, though.
- What’s the best dried fruit mix? – Whatever’s lurking in your pantry. I like raisins and cranberries (sometimes a rogue date sneaks in). Be wild.
- Do I really need the orange zest? – No, but trust me, it’s so much brighter with it. In a pinch, just toss in cinnamon.
- How do I get a glossy top? – That egg wash is your friend. Or milk will do the trick if you’re out of eggs, but the finish is less shiny.
- Why did my bread flatten? – Probably over-proofed (that’s dough-speak for “sat around too long”). Or maybe it’s just having a dramatic day, honestly.
Now go make a mess and bake something delicious. Bread-making’s partly science, mostly love, and (if you play your cards right) ends up covered in powdered sugar anyway. Happy holidays!
Ingredients
- 3 cups all-purpose flour (I’ve swapped in 1 cup whole wheat in a pinch; it’s a bit denser, just saying)
- 1/3 cup granulated sugar (brown sugar works too, but it’s a little richer)
- 1 packet (about 2 1/4 tsp) active dry yeast — instant is fine, my grandma would never know
- 1/2 cup whole milk, warmed (sometimes I use oat milk but it’s not quite as rich)
- 1/4 cup unsalted butter, melted — salted is okay, just skip adding extra salt below
- 2 large eggs
- 1/2 tsp fine sea salt (or just a small handful if you don’t have a measuring spoon at arm’s reach)
- 1 tsp vanilla extract (I once forgot it; would not recommend, but not a tragedy)
- 1 cup mixed dried fruit (raisins, cranberries, apricots, cherries—I sometimes just use what’s lurking in the back of the cupboard)
- Zest of 1 orange (or lemon; use whatever’s rolling around your produce drawer)
- 1/2 cup chopped walnuts or pecans (optional, or skip if you’ve got picky eaters)
- 1 egg, beaten with 1 tbsp water (for glaze – or just a splash of milk if you’re out of eggs)
- Powdered sugar to dust—totally optional, but it looks fancy
Instructions
-
1First off, warm your milk just a tad—think cozy bath, not hot tub—then dump in the sugar and yeast. Stir and let it sit for 5-10 minutes. It’ll get all bubbly and foamy. If it doesn’t, your yeast is either on strike or expired. Or the milk was too hot. Anyway, start again if nothing happens.
-
2In a big bowl, toss in the flour and salt. I just mix it around with my hand (I’m not fancy with whisks here).
-
3Add melted butter, the 2 eggs, vanilla, and citrus zest to the bubbly milk concoction. Pour it into the flour mix. Stir with a spoon—okay, or just use your hand—until it forms a sort of shaggy dough. Don’t worry, it always looks weird here.
-
4Knead on a floured surface for about 8 minutes (or until it feels smooth and kind of bouncy). Or, if you’re like me and your stand mixer has a mysterious rattle, just knead by hand and get your arm workout in. Actually, the mess is part of the fun.
-
5Flatten the dough a bit and scatter over your dried fruit and nuts (if using). Fold and knead just until the goodies are everywhere, but don’t get obsessive—it’s fine if a few escape.
-
6Now, oil a bowl (I’ve used olive oil, butter, or just straight-up nonstick spray). Plop your dough in, cover with a kitchen towel or a shower cap—I mean it, they work!—and set somewhere warmish. Let it rise for about 1 to 1.5 hours, until doubled. Go read a book or scroll your phone, it’ll be fine.
-
7Punch it down—that bit is fun—and shape into a pretty loaf or a round boule. Plop it on a baking sheet lined with parchment. Let it rest (again, sorry!) for about 30 more minutes. Sometimes I just preheat the oven during this so I don’t forget.
-
8Brush the top with your egg wash (or milk). Add a few decorative slashes if you’re feeling arty; if not, who cares?
-
9Bake at 350°F (175°C) for 30–35 minutes—or until golden and it sounds a bit hollow when tapped. Mine always seems to need the full 35, but ovens are all weirdly individual. And yes, the smell is a bonus.
-
10Cool on a rack (or a windowsill like I do—just don’t leave it out where the neighbor’s cat can reach, long story). Dust with powdered sugar if you’re feeling extra.
CLICK FOR NUTRITION INFO
↑
Approximate Information for One Serving
Serving Size:
1 serving
Calories:
220 caloriescal
Protein:
5gg
Fat:
6gg
Saturated Fat:
0g
Trans Fat:
0g
Cholesterol:
0mg
Sodium:
0mg
Potassium:
0mg
Total Carbs:
38gg
Fiber:
0g
Sugar:
0g
Net Carbs:
0g
Vitamin A:
0
Vitamin C:
0mg
Calcium:
0mg
Iron:
0mg
Nutrition Disclaimers
Number of total servings shown is approximate. Actual number of servings will depend on your preferred portion sizes.
Nutritional values shown are general guidelines and reflect information for 1 serving using the ingredients listed, not including any optional ingredients. Actual macros may vary slightly depending on specific brands and types of ingredients used.
To determine the weight of one serving, prepare the recipe as instructed. Weigh the finished recipe, then divide the weight of the finished recipe (not including the weight of the container the food is in) by the desired number of servings. Result will be the weight of one serving.
Did you make this recipe?
Please consider Pinning it!