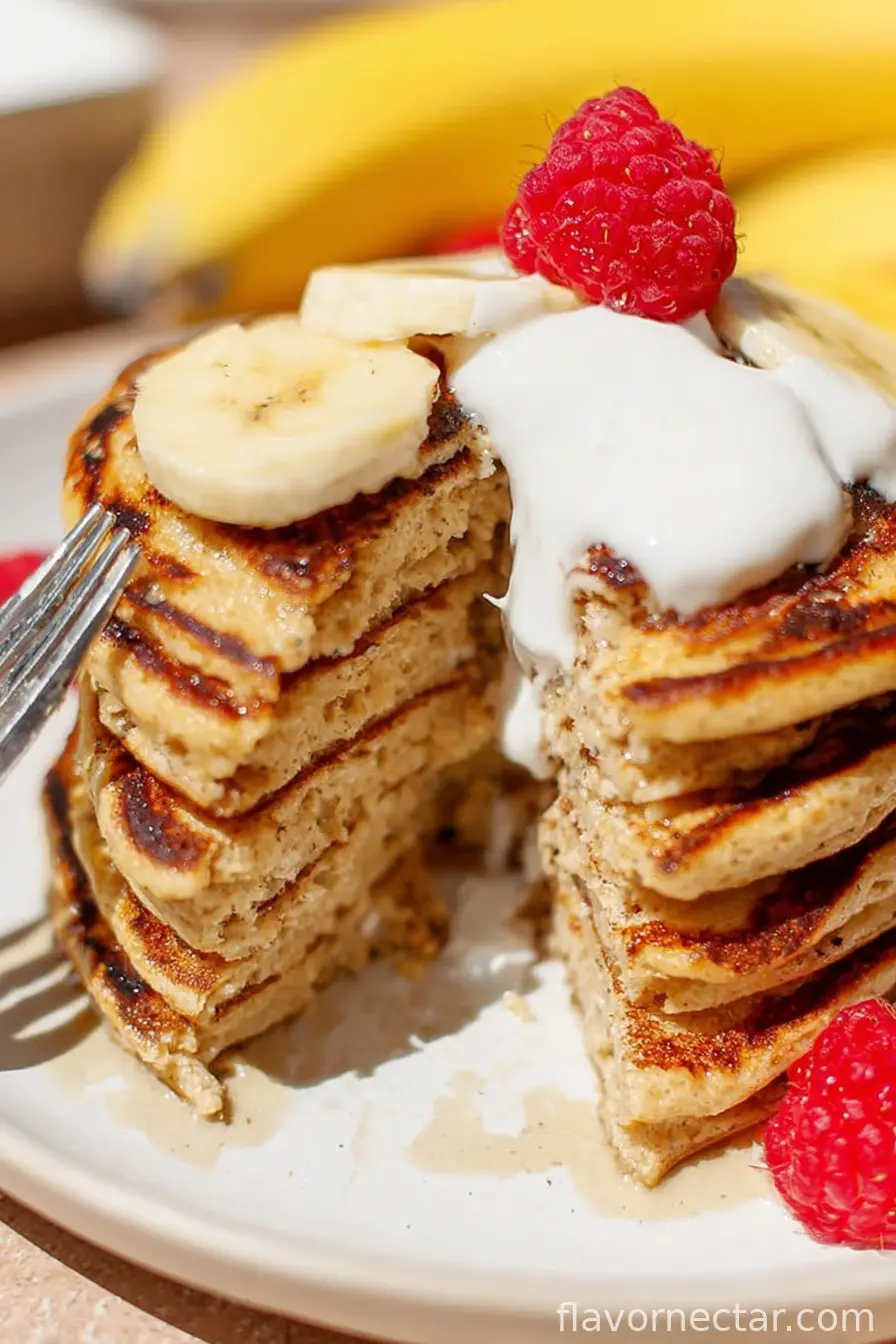
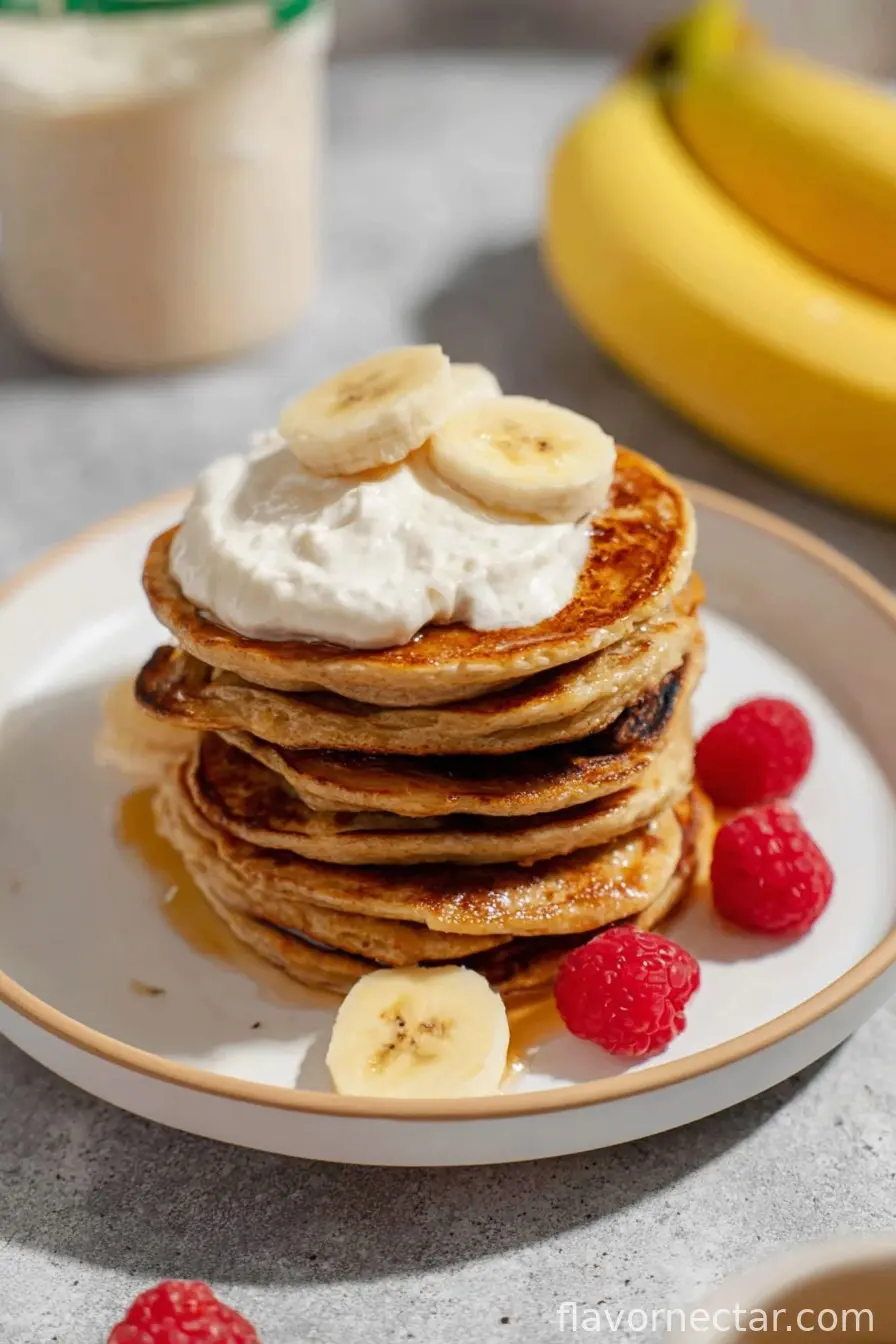
If You Like Pancakes, You’re in for a Treat (I Swear by These)
Alright, let’s just get it out in the open: I’m one of those people who keeps an almost embarrassing number of bananas in the house… just in case. One morning I got up, saw a sad, spotty banana eyeing me from the counter, and decided, “You’re about to make yourself useful, buddy.” That was the day I first made these Fluffy Cottage Cheese Banana Pancakes. No joke, I remember trying to keep the first batch to myself but immediately got found out by the smell. My partner called dibs on the second pancake before it was even cooked through. Moral of the story? These pancakes do not go unnoticed. Also, you might want to double the batch if you live with snack bandits.
Why You’ll Love This (Honestly, I Make This When I Need a Win)
I whip these up when I want something that feels special but doesn’t take forever—like, when weekend brunch is calling but pajamas are still winning. My family loses their minds over these because they’re super fluffy and actually kind of healthy (secretly—don’t tell the kids!). Also, no one ever guesses there’s cottage cheese hiding in them. I used to loathe making pancakes since flipping them was a mess. With these, it just works; they hold together and you get that golden edge. I still wince if I get distracted and flip too soon, though, but that’s another story.
What You’ll Need—Plus My Favorite Swaps
- 3/4 cup cottage cheese (full-fat is my go-to, but my grandmother insisted on low-fat; honestly, I’ve used both and didn’t notice a big diff)
- 1 large ripe banana (the spottier the better—sometimes I just mash two tiny ones instead)
- 2 eggs
- 1/2 cup all-purpose flour (oat flour works fairly well for a gluten-free vibe)
- 1/2 tsp baking powder
- 1/4 tsp salt (just a pinch, but don’t skip it)
- 1-2 tsp sugar (sometimes I use honey or maple syrup if there’s a bottle open already)
- 1/2 tsp vanilla extract
- A small knob of butter or a glug of oil for the pan (or honestly, nonstick spray in a pinch)
Alright, Here’s How I Do It (Give or Take a Step)
- Grab a big(ish) bowl and toss in the banana. Mash it wildly with a fork—lumps are totally fine. Don’t overthink it.
- Add the cottage cheese, eggs, and vanilla to that same bowl. Mix everything together until, well, it looks kind of weird but unified. It’s supposed to be a little chunky.
- Stir in the flour, baking powder, salt, and sugar. Mix just until it’s come together. (This is where I usually sneak a little taste – chef’s tax!)
- Heat a skillet or nonstick frying pan over medium heat. Add a sliver of butter or just enough oil to lightly coat the pan.
- Spoon about a quarter cup of batter per pancake into the pan; don’t crowd them unless you’re feeling risky. Flatten gently with the back of the spoon—maybe not necessary, but I tend to like the look.
- Let them cook about 2-3 minutes, until you see bubbles and the edges look set. Then flip (I always hold my breath for some reason!). Cook another 1-2 minutes until golden and fluffy.
- Move to a plate, keep warm under a clean tea towel—or serve right away if you’ve got hungry folks hovering around.
Some Notes from the Trenches
- If your batter seems really thick, add a splash of milk (I learned this form a very frustrating dry batch—truly, don’t suffer through it like I did).
- Low-fat cottage cheese works, but be prepared for slightly less creamy insides.
- I once tried these with sour cream instead of cottage cheese. Don’t.
Variations I’ve Messed With
- Blueberry version: Gently fold in a handful of blueberries after mixing the batter. Turns out, small wild blueberries are best—they don’t explode as much.
- Chocolate chip experiment: Mini chips, definitely. Big ones made the pancakes all lumpy and weird. Live and learn, yeah?
- Once I tried peanut butter swirled in. Honestly, I wanted to love it, but it just made everything weirdly dense. (Maybe it’s just me!)

Do You Need Special Equipment? Maybe… But Not Always
I always reach for my nonstick skillet—it makes flipping so much less stressful, you know? But if all you’ve got is an old frying pan with battle scars, just make sure to butter it well and work in smaller batches. I muddled through with a basic spoon for years; you don’t need fancy pancake rings or anything like that.
How to Store Them (In Theory)
Stick any leftovers in an airtight container and they’ll keep in the fridge for up to 2 days, probably longer, but—let’s be honest—they sometimes disappear right off the cooling rack in my place. The next day, they reheat well in the toaster or oven (and maybe taste even better? I think so, anyway).
My Favorite Serving Traditions
Maple syrup is classic, but sometimes I go rogue and top these with dollops of Greek yogurt and berries. My sister likes a sprinkle of cinnamon sugar—she claims “it’s like dessert for breakfast.” Also: a hot cuppa tea just takes it over the top, if you ask me.
What I Wish I’d Known (AKA, My Pro Tips)
- Don’t crank the heat up too high. I tried to rush it once; ended up with outside-burned, inside-gooey disasters. Slow and steady wins.
- Don’t overmix after adding flour or your pancakes might come out rubbery. I got impatient once and truly regretted it.
People Have Asked…
-
Can I make these dairy-free?
Probably, though I’ve yet to find a plant cottage cheese that really works the same—but if you try it, holler at me! -
Do I have to use super ripe bananas?
Not mandatory, but less-ripe ones just don’t mash as easily and they’re kind of bland, if I’m honest. Wait until they’re good and spotty. -
Can I freeze these?
Sure, stack them with parchment between and freeze. Thaw in the toaster or pan—although, in this house, nobody leaves any for the freezer… -
Is cottage cheese gross in pancakes?
Nope! It just melts away and makes the inside tender. And no one ever guesses it’s in there (unless you tell them, but why spoil the magic?).
Quick digression: one time my neighbor borrowed my last egg and I tried these with just cottage cheese and banana—don’t bother, it’s just not the same! Anyway, make these fluffy pancakes and let me know which tweaks you try—they’re kind of irresistible, warts and all.
Ingredients
- 3/4 cup cottage cheese (full-fat is my go-to, but my grandmother insisted on low-fat; honestly, I’ve used both and didn’t notice a big diff)
- 1 large ripe banana (the spottier the better—sometimes I just mash two tiny ones instead)
- 2 eggs
- 1/2 cup all-purpose flour (oat flour works fairly well for a gluten-free vibe)
- 1/2 tsp baking powder
- 1/4 tsp salt (just a pinch, but don’t skip it)
- 1-2 tsp sugar (sometimes I use honey or maple syrup if there’s a bottle open already)
- 1/2 tsp vanilla extract
- A small knob of butter or a glug of oil for the pan (or honestly, nonstick spray in a pinch)
Instructions
-
1Grab a big(ish) bowl and toss in the banana. Mash it wildly with a fork—lumps are totally fine. Don’t overthink it.
-
2Add the cottage cheese, eggs, and vanilla to that same bowl. Mix everything together until, well, it looks kind of weird but unified. It’s supposed to be a little chunky.
-
3Stir in the flour, baking powder, salt, and sugar. Mix just until it’s come together. (This is where I usually sneak a little taste – chef’s tax!)
-
4Heat a skillet or nonstick frying pan over medium heat. Add a sliver of butter or just enough oil to lightly coat the pan.
-
5Spoon about a quarter cup of batter per pancake into the pan; don’t crowd them unless you’re feeling risky. Flatten gently with the back of the spoon—maybe not necessary, but I tend to like the look.
-
6Let them cook about 2-3 minutes, until you see bubbles and the edges look set. Then flip (I always hold my breath for some reason!). Cook another 1-2 minutes until golden and fluffy.
-
7Move to a plate, keep warm under a clean tea towel—or serve right away if you’ve got hungry folks hovering around.
CLICK FOR NUTRITION INFO
↑
Approximate Information for One Serving
Serving Size:
1 serving
Calories:
180 caloriescal
Protein:
8gg
Fat:
6gg
Saturated Fat:
0g
Trans Fat:
0g
Cholesterol:
0mg
Sodium:
0mg
Potassium:
0mg
Total Carbs:
24gg
Fiber:
0g
Sugar:
0g
Net Carbs:
0g
Vitamin A:
0
Vitamin C:
0mg
Calcium:
0mg
Iron:
0mg
Nutrition Disclaimers
Number of total servings shown is approximate. Actual number of servings will depend on your preferred portion sizes.
Nutritional values shown are general guidelines and reflect information for 1 serving using the ingredients listed, not including any optional ingredients. Actual macros may vary slightly depending on specific brands and types of ingredients used.
To determine the weight of one serving, prepare the recipe as instructed. Weigh the finished recipe, then divide the weight of the finished recipe (not including the weight of the container the food is in) by the desired number of servings. Result will be the weight of one serving.
Did you make this recipe?
Please consider Pinning it!