Well Hello, Sugar Cookies (And a Quick Memory Lane Trip)
If you’d told me ten years ago that I’d be the person who bakes Sugar Cookies just because it’s Tuesday, I would’ve laughed so hard I might’ve dropped my mixing bowl. Yet here I am, happily covered in flour, waiting for the smell of buttery Sugar Cookies to fill my kitchen—usually with at least one impatient kiddo circling the oven. Seriously, I think the anticipation is half the fun (unless you’re cleaning; then it’s just crumbs for days). My first try at these was a bit of a disaster—think crunchy hockey pucks rather than cookies—but after, I dunno, approximately a zillion batches, these Easy Sugar Cookies are now my never-fail, everyone’s-smiling treat. Plus, let’s be honest, making something sweet when you really should be folding laundry feels like a tiny victory.
Why You’ll Love This Little Recipe
I make this when I just want something classic and simple. My brother once ate seven in one sitting (I don’t judge, promise) and honestly, the dough is just as fun to play with as it is to eat. Whenever I’m too lazy to bother with fancy shapes—because who has time for unicorns on a Tuesday?—this dough knows how to behave. It rolls out like a dream (most days), doesn’t stick to absolutely everything, and if you forget it in the fridge for a bit too long, well, it forgives you. If you’ve ever been burned by dry—weirdly crumbly—inexplicably bland cookies, this is your redemption. I once tried making them with half the sugar when I was short—don’t do it.
Gather Up the Ingredients (With Some Wiggle Room)
- 2 and 3/4 cups all-purpose flour (sometimes, I swap 1/4 cup for whole wheat, but let’s not pretend they’re health food)
- 1 teaspoon baking powder (okay to use a tad less if you want flatter cookies)
- 1/2 teaspoon salt (my friend Liz skips this, but I think it makes a difference)
- 1 cup unsalted butter, softened (my grandmother was a diehard salted butter fan; honestly, it works either way)
- 1 and 1/2 cups white sugar (sometimes I toss in a spoonful of brown sugar for giggles)
- 1 large egg (the fresher, the better, but store-bought is all I’ve ever used)
- 2 teaspoons vanilla extract (imitation vanilla works in a pinch – couldn’t tell last Christmas, to be honest)
- Optional: 1/2 teaspoon almond extract (if you like that retro bakery vibe)
- Sprinkles or colored sugar, for topping (entirely optional, but my kids revolt without them)
Let’s Get Baking: How I Actually Do It
- Cream that butter and sugar: In a big bowl, beat the softened butter and sugar together—electric mixer is fastest, but a whisk works in a pinch and builds character. Don’t skimp on this step; the fluffier, the better. This is when I inevitably sneak a spoonful. (Quality control, right?)
- Add your egg and vanilla: Crack in the egg, pour in the vanilla (and almond, if you’re fancy). Beat until everything’s looking pale and smooth. Don’t stress if it looks a bit separated; it’ll come together, promise.
- Mix dry stuff: In another bowl, stir flour, baking powder, and salt together—sometimes I skip this extra bowl, just tossing it all in and hoping for the best, but technically, you should combine first so there aren’t any sneaky lumps.
- Combine and get doughy: Slowly add the dry ingredients to the wet. I do this by thirds-ish, to avoid flour clouds all over the kitchen (ask me how I know). If the dough’s still sticky after a minute, add another small spoonful of flour—sometimes humidity messes with it.
- Chill (the dough, not you): Cover and pop the dough in the fridge for 30 minutes at least. Sometimes I forget it for a couple hours (or overnight); just let it warm up a bit before rolling.
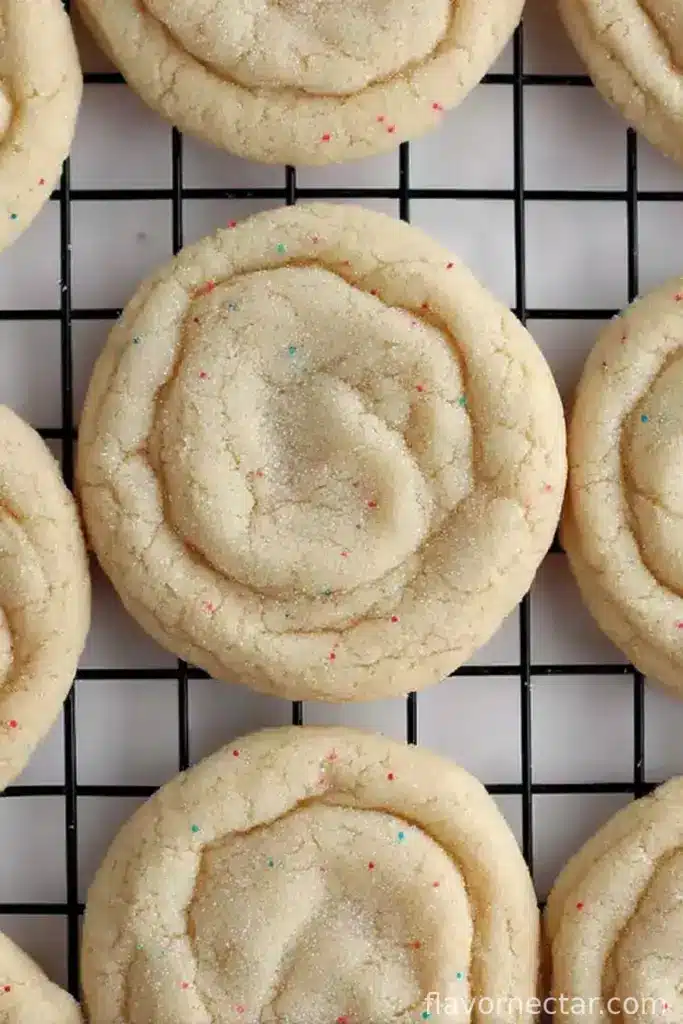
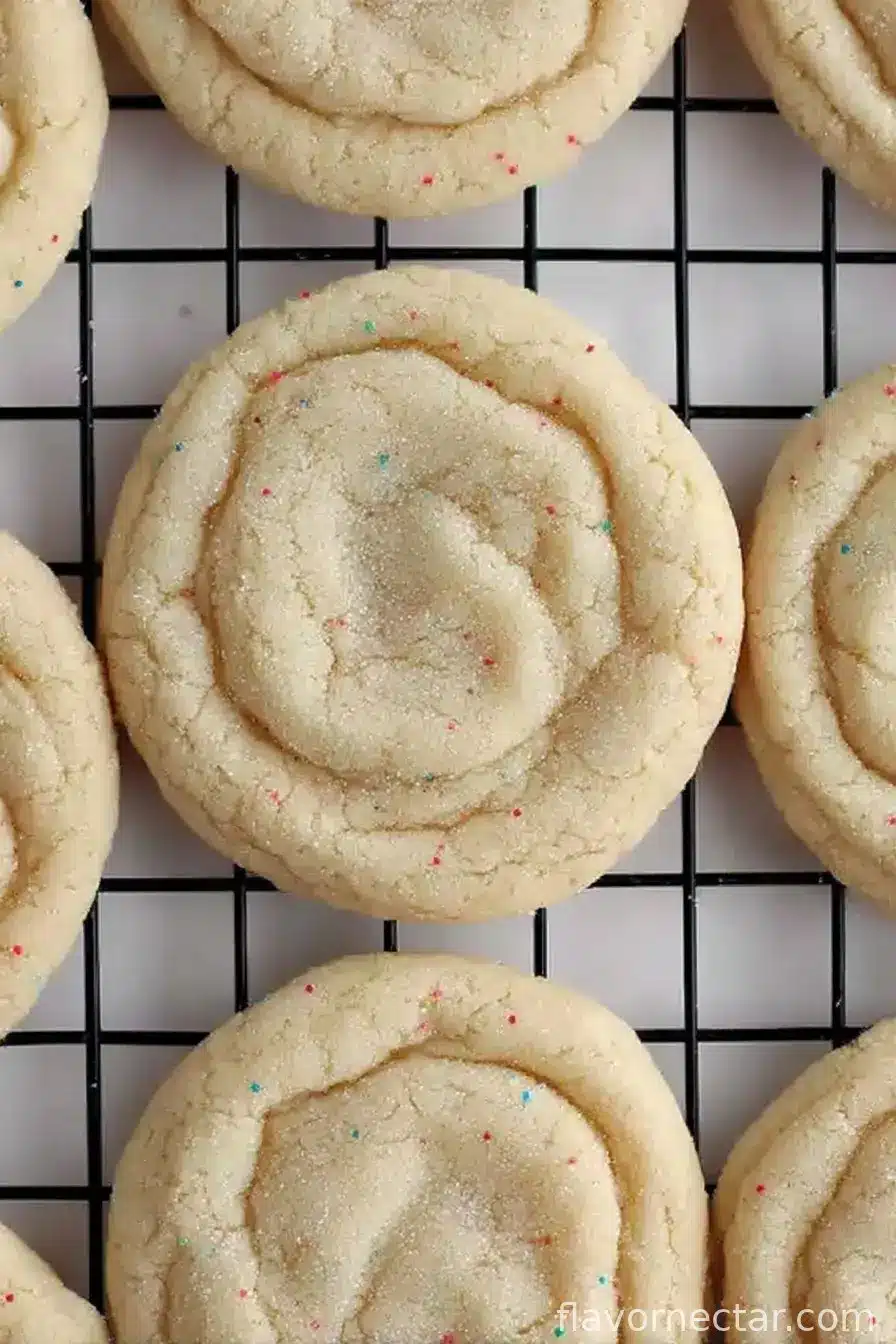
- Roll and cut: Preheat your oven to 350°F (175°C). On a floured surface, roll dough to about 1/4 inch thick. Cut into whatever shapes you fancy—my family goes for basic circles or hearts, unless it’s Christmas, then it’s reindeer galore. Don’t stress about perfect edges; rustic’s in, right?
- Bake till just right: Place cookies on a lined baking sheet. Add sprinkles now if you want them baked in. Bake 8-ish minutes, til bottoms are just turning gold. Any longer and they’ll go crispy (unless crunchy is your jam).
- Cool (and try to resist): Let ‘em sit on the pan a few minutes before moving to a rack. If they fall apart, they probably needed another minute, or maybe you used too much flour—no biggie, just call them “rustic crumbles.”
Notes from My Cookie Experiments (Real Talk)
- Don’t melt the butter unless you want totally different cookies—it’ll still taste good, but you’ll get super flat ones. I learned that the hard way during a heatwave.
- If the dough feels too sticky, the weather might be plotting against you. A handful more flour usually does the trick.
- I once forgot the baking powder. The cookies looked sad but still tasted OK, so all is not lost if you mess up.
- If you want extra flavor, a pinch of nutmeg or lemon zest is weirdly good, though my kids claimed it was “too fancy.”
Cookie Variations I’ve Tried (And a Fail…)
- Chocolate chip twist: Stir in a handful of mini chips, but not too many or they’ll overpower.
- Lemon poppy seed: Zest one lemon and add a teaspoon poppy seeds. Actually, this one tastes better the next day, go figure.
- Sprinkle-insanity: My daughter went crazy with rainbow jimmies once—looked wild but honestly tasted fine.
- Complete disaster: Tried replacing all the flour with oat flour. Dry as the Sahara. Would not recommend (unless you really love oats for some reason).

A Quick Note on Equipment
I use a stand mixer when I’m feeling posh, but honestly a wooden spoon works. Lost my rolling pin once and just used a wine bottle—worked a treat (just don’t tell my mum). Oh, and parchment paper saves your sanity.
Storage Stuff (But Does Anyone Really Need This?)
Technically, these keep in a sealed tin for up to a week, but honestly, in my house they never last more than a day! If you do manage leftovers, I like to pop a slice of bread in the tin—helps keep them soft. Cookies will freeze, too, stacked with baking paper between layers, but I always forget I’ve got them in the freezer.
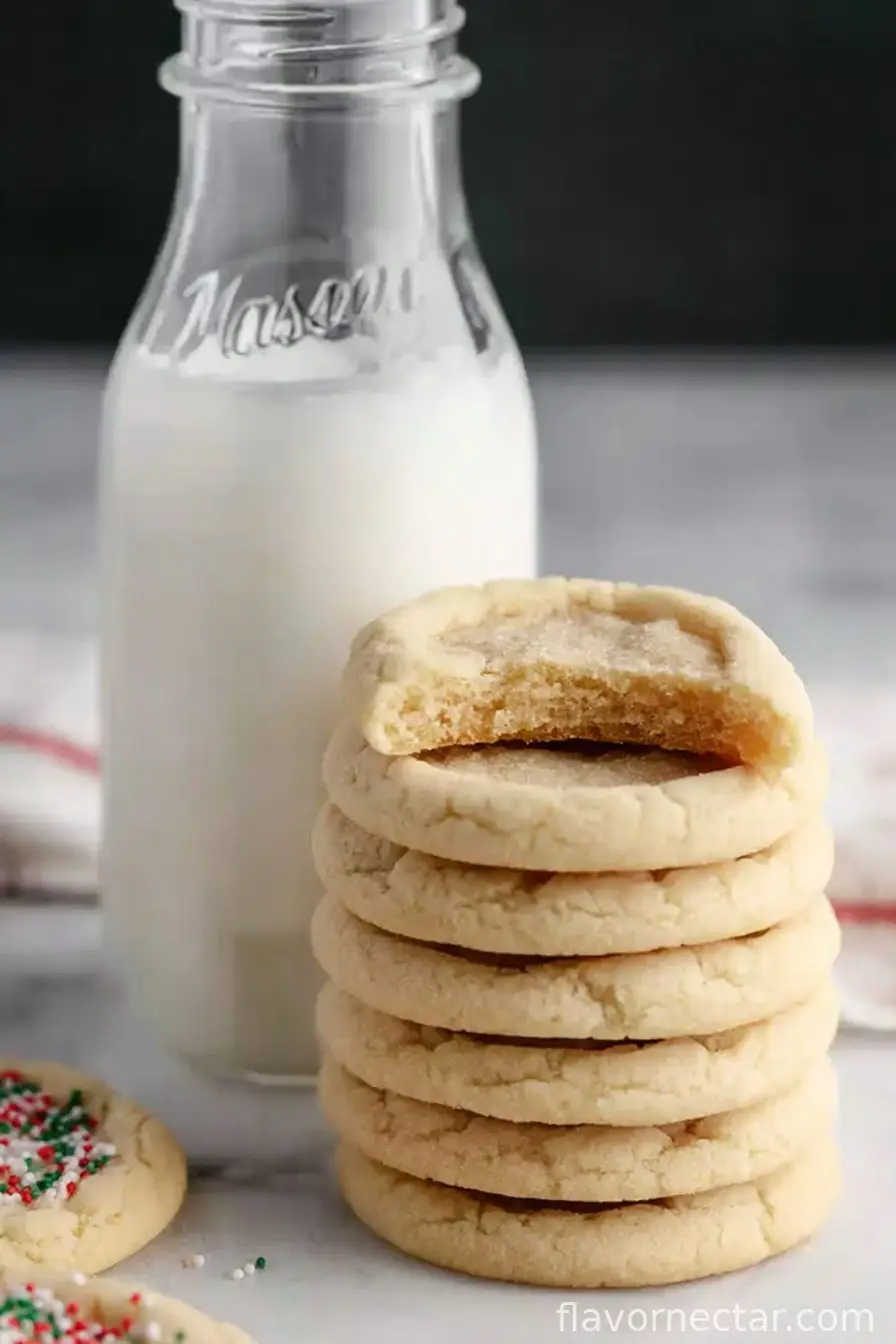
How I Like to Serve Them
I’m all for classic style—just cookies and maybe a glass of cold milk or, if I’m feeling fancy, a cup of Earl Grey. My cousin likes to sandwich two cookies with Nutella, which is borderline indulgent, if you ask me. At Christmas, we plonk them on a platter with a tangle of tinsel for effect. Very high effort (not really).
Pro Tips (From My Many Cookie Misadventures)
- I once tried skipping the chill step—big mistake; the dough just stuck to everything and the shapes ended up as vague blobs.
- Rolling too thin? You’ll have crispy crackers instead of cookies. Too thick? The middles won’t cook. I reckon about 1/4 inch is your sweet spot, though on second thought, nobody’s measuring.
- Be patient when creaming the butter and sugar. I rushed it once, and ended up with dense weird cookies. It’s worth taking an extra minute to beat it all fluffy.
FAQ (Questions From Actual People)
- Can I make the dough ahead? Absolutely—sometimes I make it the day before and just wrap it tight in plastic. Actually, I think the flavor gets even better overnight.
- Can I freeze the finished cookies? Yep! Just pop them between bits of baking paper, but eat within a couple months. They do get a tiny bit drier but dunking solves that.
- What if I don’t have vanilla extract? I’ve used maple syrup once (ran out mid-bake) and it was surprisingly tasty. Almond extract alone works too, though it’s a bit stronger—careful!
- Do I have to roll and cut them? Nah, you can totally scoop and flatten them with a glass if you can’t be bothered. They’ll look different but still taste ace.
- Why do mine sometimes spread too much? Usually too-soft butter or not enough chilling. Or you know, gremlins. Seriously though, chill your dough and you’ll be fine!
Oh, before I forget: If you make these and they disappear before you even get the tin out, you’re not alone. Drop me a line if you ever figure out how to make them last more than a day!
Ingredients
- 2 and 3/4 cups all-purpose flour (sometimes, I swap 1/4 cup for whole wheat, but let’s not pretend they’re health food)
- 1 teaspoon baking powder (okay to use a tad less if you want flatter cookies)
- 1/2 teaspoon salt (my friend Liz skips this, but I think it makes a difference)
- 1 cup unsalted butter, softened (my grandmother was a diehard salted butter fan; honestly, it works either way)
- 1 and 1/2 cups white sugar (sometimes I toss in a spoonful of brown sugar for giggles)
- 1 large egg (the fresher, the better, but store-bought is all I’ve ever used)
- 2 teaspoons vanilla extract (imitation vanilla works in a pinch – couldn’t tell last Christmas, to be honest)
- Optional: 1/2 teaspoon almond extract (if you like that retro bakery vibe)
- Sprinkles or colored sugar, for topping (entirely optional, but my kids revolt without them)
Instructions
-
1Cream that butter and sugar: In a big bowl, beat the softened butter and sugar together—electric mixer is fastest, but a whisk works in a pinch and builds character. Don’t skimp on this step; the fluffier, the better. This is when I inevitably sneak a spoonful. (Quality control, right?)
-
2Add your egg and vanilla: Crack in the egg, pour in the vanilla (and almond, if you’re fancy). Beat until everything’s looking pale and smooth. Don’t stress if it looks a bit separated; it’ll come together, promise.
-
3Mix dry stuff: In another bowl, stir flour, baking powder, and salt together—sometimes I skip this extra bowl, just tossing it all in and hoping for the best, but technically, you should combine first so there aren’t any sneaky lumps.
-
4Combine and get doughy: Slowly add the dry ingredients to the wet. I do this by thirds-ish, to avoid flour clouds all over the kitchen (ask me how I know). If the dough’s still sticky after a minute, add another small spoonful of flour—sometimes humidity messes with it.
-
5Chill (the dough, not you): Cover and pop the dough in the fridge for 30 minutes at least. Sometimes I forget it for a couple hours (or overnight); just let it warm up a bit before rolling.
-
6Roll and cut: Preheat your oven to 350°F (175°C). On a floured surface, roll dough to about 1/4 inch thick. Cut into whatever shapes you fancy—my family goes for basic circles or hearts, unless it’s Christmas, then it’s reindeer galore. Don’t stress about perfect edges; rustic’s in, right?
-
7Bake till just right: Place cookies on a lined baking sheet. Add sprinkles now if you want them baked in. Bake 8-ish minutes, til bottoms are just turning gold. Any longer and they’ll go crispy (unless crunchy is your jam).
-
8Cool (and try to resist): Let ‘em sit on the pan a few minutes before moving to a rack. If they fall apart, they probably needed another minute, or maybe you used too much flour—no biggie, just call them “rustic crumbles.”
CLICK FOR NUTRITION INFO
↑
Approximate Information for One Serving
Serving Size:
1 serving
Calories:
150cal
Protein:
2 gg
Fat:
7 gg
Saturated Fat:
0g
Trans Fat:
0g
Cholesterol:
0mg
Sodium:
0mg
Potassium:
0mg
Total Carbs:
20 gg
Fiber:
0g
Sugar:
0g
Net Carbs:
0g
Vitamin A:
0
Vitamin C:
0mg
Calcium:
0mg
Iron:
0mg
Nutrition Disclaimers
Number of total servings shown is approximate. Actual number of servings will depend on your preferred portion sizes.
Nutritional values shown are general guidelines and reflect information for 1 serving using the ingredients listed, not including any optional ingredients. Actual macros may vary slightly depending on specific brands and types of ingredients used.
To determine the weight of one serving, prepare the recipe as instructed. Weigh the finished recipe, then divide the weight of the finished recipe (not including the weight of the container the food is in) by the desired number of servings. Result will be the weight of one serving.
Did you make this recipe?
Please consider Pinning it!