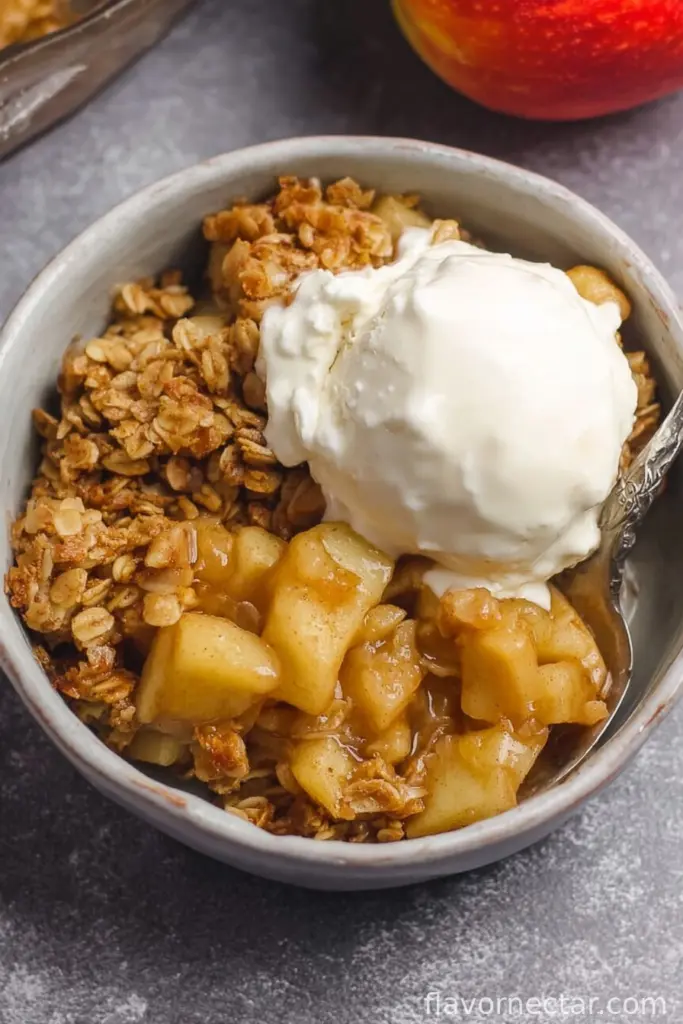
How This Apple Crisp Became My Rainy Day Ritual
Okay, real talk: whenever the weather is doing that awkward drizzle thing and I can’t really go outside, I end up in the kitchen making this easy Apple crisp. My mum used to make something like it, though hers was, I swear, 80% topping (not a complaint!). Honestly? I’ve burnt it a couple times, gotten distracted by some daft TV show, but it’s still always rescued by a scoop of vanilla ice cream. My sister once claimed you can smell when it’s done, but, well, she’s been wrong before (love you, Jess). And for me, making this is less about dessert perfection and more about the sweet, cinnamony smell drifting through the house. If you hear humming—it’s probably me waiting for it to bake.

Why You’ll Love This (Promise—It’s a Keeper)
I make this when I can’t be fussed with rolling out pie crust (or when my pantry’s looking a bit barebones, you know?). My family goes a bit mad for this, particularly my nephew who “doesn’t like fruit” (until dessert, then somehow it’s fine). And sometimes, frankly, I just can’t be bothered peeling every single Apple, so I leave some skins on—nobody’s complained yet. If you’re craving something sweet but low lift, this is your jam. Or… crisp. Also, it’s so forgiving! Dropped too much cinnamon in? It just tastes more ‘cozy autumn candle’—happened to me last week, actually.
What You’ll Need (And What I Sub In Sometimes)
- 6-7 medium apples (I grab Granny Smith if I’m feeling fancy, or literally whatever’s left in the fridge—Fuji is lovely too)
- 3/4 cup old-fashioned oats (quick oats work if that’s what’s on hand—texture’s a bit different but no biggie)
- 2/3 cup packed light brown sugar (dark brown if you want it super caramelly—sometimes I mix the two!)
- 1/2 cup all-purpose flour (I’ve used whole wheat in a pinch, honestly—it’s fine)
- 1/2 cup cold unsalted butter, cubed (I’ve melted it once when I was impatient; makes the topping denser but you do you)
- 1 teaspoon ground cinnamon (if you love spice, sneak in a tiny pinch of nutmeg—my grandma swore by it)
- 1/4 teaspoon salt (kosher, table, whatever, just a little to make the flavors pop)
- 1 tablespoon lemon juice (bottled or fresh, who’s judging?)
- Optional: 1/3 cup chopped pecans or walnuts (I go nutless when serving nut-averse friends)
How To Throw This Together (Don’t Blink—It’s Quick)
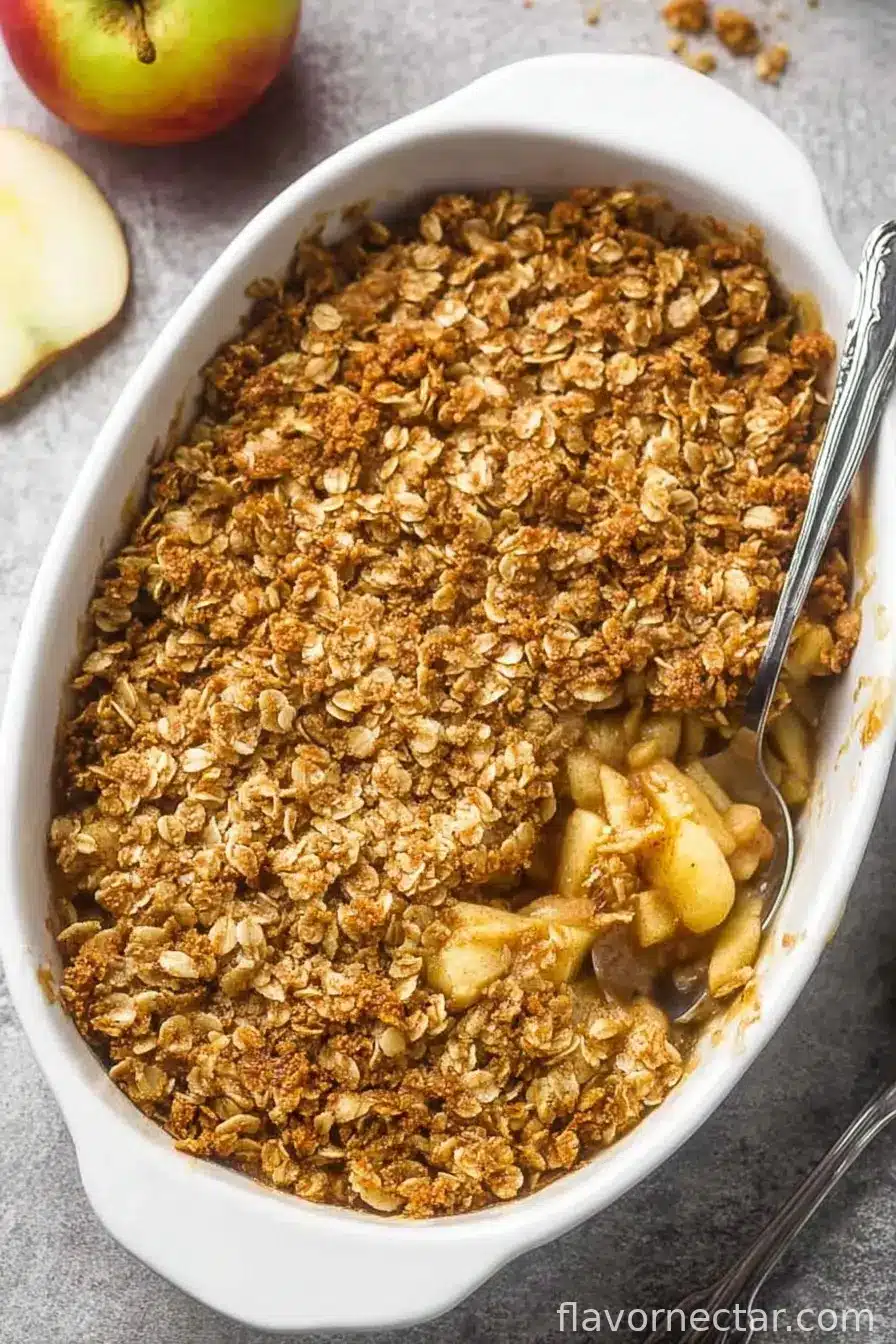
- Heat your oven to 180°C (that’s 350°F). Lightly butter a 22 cm (9-inch) square baking dish—mine’s slightly chipped but works fine.
- Peel, core, and slice the apples. Or don’t peel, up to you (I peel about half, get bored, move on). Toss in a big bowl with the lemon juice and a spoonful of the brown sugar—just to get them a bit juicy.
- In another bowl, mix oats, 2/3 cup brown sugar, flour, cinnamon, and salt. Add the cubed cold butter. Now, roll up your sleeves and rub it all together with your fingers till it’s crumbly—some pea-sized bits are perfect. Add nuts if using (I sometimes forget and sprinkle them on top halfway through—no disasters yet).
- Scatter the apples in the dish. Pour or kind of smoosh the crumble topping over—make sure it’s pretty even, but hey, rustic is good.
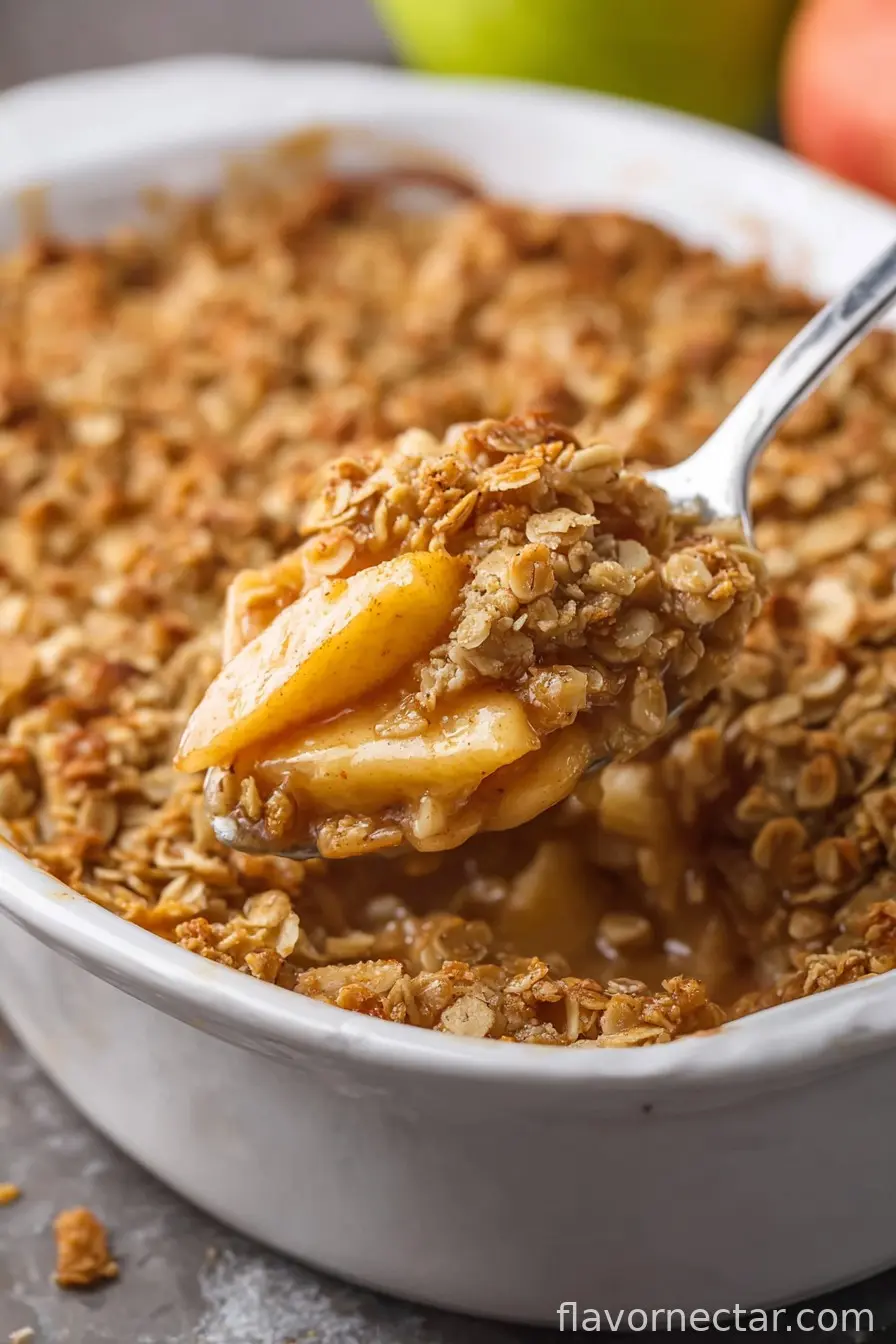
- Bake for 40-45 minutes, or until the topping is golden and you can see a bit of Apple bubbling around the edge. (This is where I usually sneak a whiff and try not to touch it too soon—learned that lesson the hard way. Ouch.)
- Let it cool a few minutes so you don’t torch your tongue. Serve while it’s still sending up that glorious aroma.
Messy Notes From My Kitchen
- If your crisp looks a bit dry halfway through, I’ve drizzled on a tablespoon or two of cream. Works a treat!
- I once tried microwaving leftovers, but the topping went sort of sad and soft—so oven or toaster oven is best for reheating.
- I’d say it tastes even better the next day, but honestly, it never makes it that long here.
Twists and Turns I’ve Tried (With Mixed Results)
- Thrown in a handful of cranberries—so festive, but the tartness surprised my dad. I sort of love it.
- Pears instead of apples? Yes, but they bake down softer, more mush than crisp, which is okay if you’re into that pudding consistency.
- Once tried adding honey to the topping—made it almost too sticky. Stick with sugar, in my humble opinion.
What If You Don’t Have Fancy Gear?
Honestly, any old baking dish works. I’ve used a Pyrex rectangle, ceramic, even an old enamel tin. No pastry cutter? Just use your clean hands to rub the butter in—I think it’s more fun anyway, though a fork does in a pinch. No judgments.
Keeping Leftovers (If You Have Any…)
Okay, truth: it’s rare this makes it to leftovers in my house. But, you can cover and keep it at room temp for 1 day—beyond that, I pop it in the fridge (up to 3 days). Tastes fab cold with yogurt for breakfast, but who am I to judge?
Makeshift Serving Suggestions
My people seem to expect vanilla ice cream on top; sometimes I rebel and serve it with a glug of cold pouring cream or live out my English roots with a spoonful of custard. Ever tried it with cheddar? It’s a thing, I promise. Anyway, you do you—it’s great straight from the pan, too.
Real-World Pro Tips (Learn From My Goofs)
- Once, I rushed the crumble step and ended up with big buttery clumps—actually, that tasted pretty good, but smaller crumbs give better crispiness. Just don’t totally overmix it into mush.
- Letting it sit a few minutes is important—if you scoop too fast, it’s lava central. Trust me on this.
- Try not to pack the apples too tightly—they need a bit of room, or they turn to Apple jam at the bottom (not the goal!)
Juicy Questions People Actually Ask Me
- Can I use pears or peaches instead?
- Oh, sure! Pears go softer, but if that’s your thing, go ahead. Peaches are lovely—maybe skip the cinnamon and go with ginger for a twist?
- Do I have to peel the apples?
- Nope! I often leave some skins on. “Rustic,” as I tell the kids.
- Can I freeze apple crisp?
- I have, but defrosting turns the topping a bit meh. Not my favorite mood for desserts, but it’ll do in a pinch.
- What if I don’t have oats?
- I’ve used extra flour instead. It’s a tiny bit less crunchy, but tastes fine—sometimes all you need is sugar, butter, and fruit, right?
- Why did my crisp turn out soggy?
- Maybe too many apples crammed in, or the topping was too thick (or you covered it while cooling—don’t do that!). Actually, some juices are normal, but if it’s a soup… probably overstuffed.
- Any way to make it less sweet?
- Just cut the sugar down a little, or use tarter apples—Granny Smith all the way! I’ve also tossed in a handful of raspberries to tart things up.
And if you’re reading this and thinking, “I could never make dessert that looks fancy,” well—neither can I. But this one? Even a bit wonky, it’s always delicious. So give it a whirl next rainy afternoon. (Or sunny one, whatever. I’m not the weather police.)
Ingredients
- 6-7 medium apples (Granny Smith or any variety)
- 3/4 cup old-fashioned oats
- 2/3 cup packed light brown sugar
- 1/2 cup all-purpose flour
- 1/2 cup cold unsalted butter, cubed
- 1 teaspoon ground cinnamon
- 1/4 teaspoon salt
- 1 tablespoon lemon juice
- Optional: 1/3 cup chopped pecans or walnuts
Instructions
-
1Heat your oven to 180°C (350°F). Lightly butter a 22 cm (9-inch) square baking dish.
-
2Peel, core, and slice the apples. Or leave some skins on—up to you! Toss apples in a bowl with lemon juice and a spoonful of the brown sugar.
-
3In another bowl, mix the oats, 2/3 cup brown sugar, flour, cinnamon, and salt. Add the cubed cold butter. Rub it all together with your fingers until crumbly. Add nuts if using.
-
4Scatter the apples in the baking dish. Top with the crumble mixture, ensuring it’s fairly even.
-
5Bake for 40-45 minutes, until the topping is golden and the apples bubble at the edges.
-
6Let cool a few minutes before serving (I know, it smells amazing, but don’t burn your tongue!).
CLICK FOR NUTRITION INFO
↑
Approximate Information for One Serving
Serving Size:
1 serving
Calories:
320cal
Protein:
3 gg
Fat:
13 gg
Saturated Fat:
0g
Trans Fat:
0g
Cholesterol:
0mg
Sodium:
0mg
Potassium:
0mg
Total Carbs:
52 gg
Fiber:
0g
Sugar:
0g
Net Carbs:
0g
Vitamin A:
0
Vitamin C:
0mg
Calcium:
0mg
Iron:
0mg
Nutrition Disclaimers
Number of total servings shown is approximate. Actual number of servings will depend on your preferred portion sizes.
Nutritional values shown are general guidelines and reflect information for 1 serving using the ingredients listed, not including any optional ingredients. Actual macros may vary slightly depending on specific brands and types of ingredients used.
To determine the weight of one serving, prepare the recipe as instructed. Weigh the finished recipe, then divide the weight of the finished recipe (not including the weight of the container the food is in) by the desired number of servings. Result will be the weight of one serving.
Did you make this recipe?
Please consider Pinning it!