This Recipe Totally Takes Me Back
Okay, first things first—if you grew up lovingly guarding your bowl of sugary cereal so you could slurp up the leftover milk (no shame), then these Cereal Milk Overnight Oats will hit you right in the childhood. Seriously, the first time I made these, it was mostly because I accidentally spilled half a box of Froot Loops while searching for my phone (classic me), and I figured why not try to capture that magical, Saturday-morning taste? Well, let’s just say: success. Now my family requests this more than pancakes, and honestly, that takes some cereal-ous effort to achieve. (Sorry, had to.)

Why You’ll Love This (Or At Least My Family Does)
I make this when I’m way too tired to do anything fancy in the morning, and need something that’ll actually motivate me to get out of bed. My partner says it’s “dessert for breakfast“—which, honestly, is the only way to go sometimes. And when I’ve run out of ideas for breakfast (which happens more often than I’d like to admit), this always gets cheers—even from my overly critical preteen, who told me once, “It’s like eating Saturday with a spoon.” Oh, and I used to always worry the oats would stay too chewy but, spoiler, they don’t. Just trust the process.
What You Need to Make These (Substitute Like a Rebel)
- 2/3 cup old-fashioned rolled oats (sometimes I use quick oats if that’s all I’ve got; steel-cut doesn’t really work unless you like chewing forever)
- 1 cup milk (dairy or whatever fancy nut milk you have—my grandmother swears by whole milk but I’m not picky)
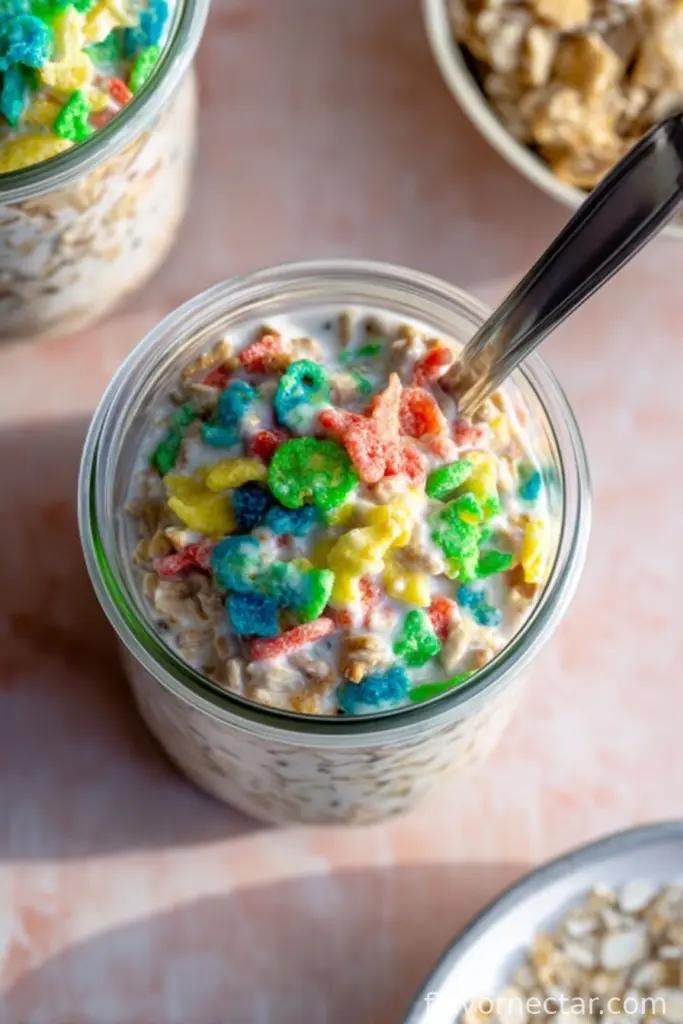
- 1/2 cup kid’s cereal (I usually grab Froot Loops, Lucky Charms, or Frosted Flakes, but any sweet-ish cereal will do)
- 1 tablespoon chia seeds (optional—I sometimes forget these, still tastes good)
- 1 tablespoon honey or maple syrup (I go for maple, but you do you)
- Pinch of salt (don’t skip this! Makes a big difference, says my taste buds)
- 1/2 teaspoon vanilla extract (optional but so good)
How To Make It (Don’t Overthink This Bit)
- Pour your cereal into the milk and let it soak for 10 minutes or so. Stir it once or twice. The longer it sits, the stronger the cereal milk vibes. (Yes, it’ll look a little mushy. Good!)
- Strain the milk into a jar or bowl, pressing the cereal to get all that sweet goodness out. I actually nibble a few soggy pieces at this point—no regrets. Toss or eat the cereal bits, up to you.
- Add the oats, chia seeds, honey/maple, vanilla, and salt to the milk. Stir it all up—if it looks a bit runny, don’t worry, oats slurp it up overnight.
- Cover and chill in the fridge, minimum 4 hours but overnight is better (I mean, it’s in the name). I almost always forget and leave mine for 10 hours. Works fine!
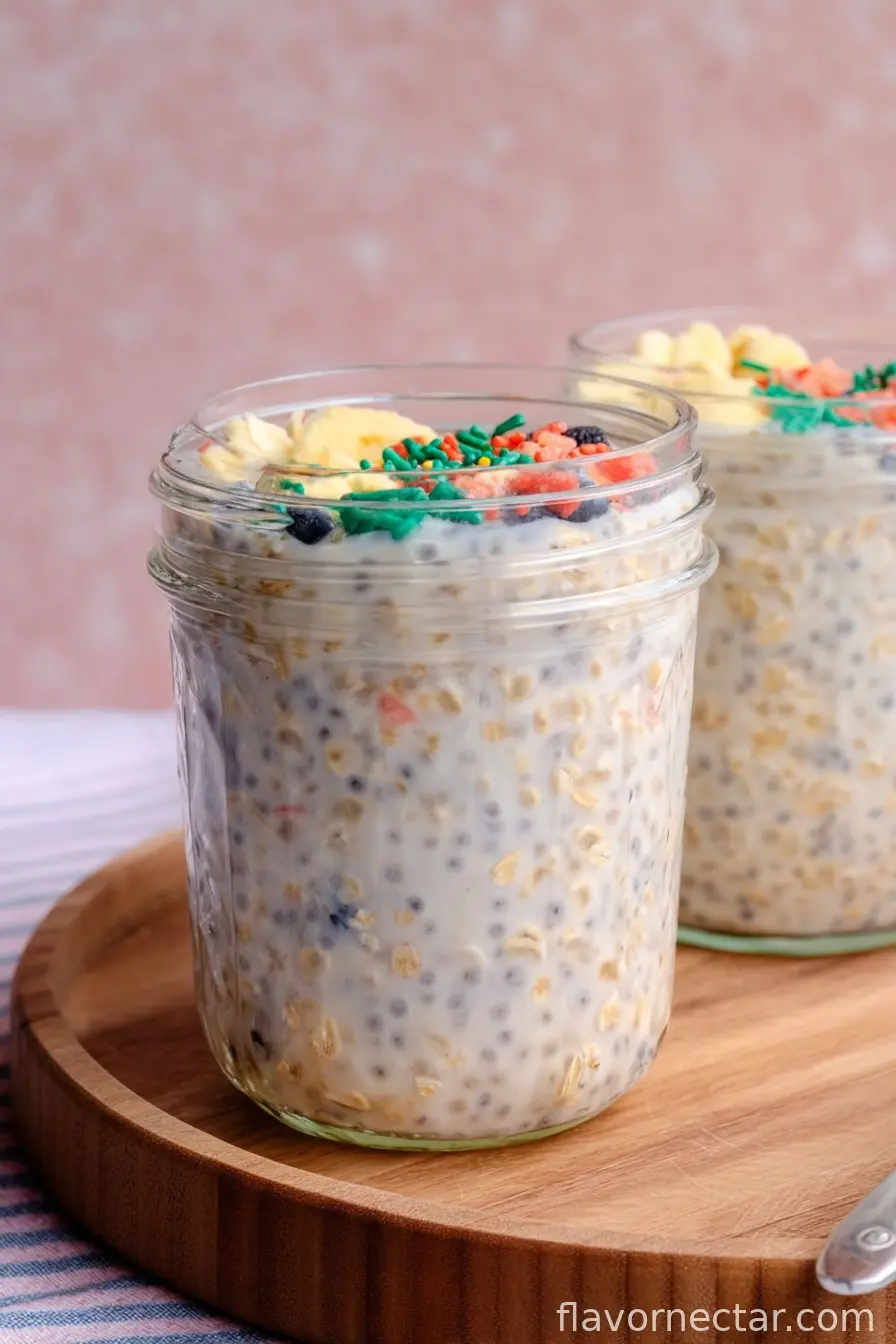
- In the morning, give it a stir (some oats always stick to the sides). Top with an extra sprinkle of cereal for crunch, or, if you’re like my dad, a handful of mini marshmallows. Enjoy cold straight from the jar—morning speed run!
A Few Notes (Learned the Hard Way)
- Bigger flake cereals (like Crunchy Nut Cornflakes)—they kind of get weirdly soggy and stringy. Not my fave, but maybe you’ll be into it?
- If you find it too thick, splash in more milk in the morning. Too runny? Next time, a hair more oats. It’s not rocket science.
- Once, I tried blending the whole thing before letting it sit. It tasted fine but honestly, it looked dreadful. Just don’t.
Variations (Experiments—A Few Regrets)
- Chocolate Milk: Use chocolate cereal and swap in chocolate milk. Tastes like breakfast at grandma’s when she’d “run out” of regular (pretty sure it was intentional).
- Fruit Swirl: Layer in some strawberry jam or sliced bananas. Almost like a parfait, though a messy one.
- High-Protein: Throw in a scoop of vanilla protein powder. This works but, warning, it does make things a little chalky if you’re heavy handed. Not my brightest batch.
- Once I tried with granola instead of cereal and yeah… super chewy. Would not recommend unless you have jaws of steel.

Equipment (Jars Are Handy, But…)
I use a mason jar out of habit, but honestly, any old Tupperware or even a big mug does the job. Only thing that actually matters is a strainer for the cereal milk—if you don’t have one, a slotted spoon over your cup kind of works in a pinch (just don’t press too hard or you’ll have a mess, trust me).
Storing Your Oats (Not That They’ll Survive)
Cereal Milk Overnight Oats will technically keep 2 days in the fridge. I’ve never managed longer than that (someone always “taste tests” them first), but if you keep airtight, should be golden for breakfast tomorrow or the next day.
Serving Ideas (Family Traditions and Other Shenanigans)
I like to top with extra cereal (for texture, you know), but my sister sometimes crumbles a cookie in there—strangely good. If it’s a special morning or just an absurdly hard Tuesday, add whipped cream and sprinkles like you’re at a kids’ party. My dad, who refuses to eat anything “weird,” will only have these if there are fresh berries on top. To each their own.
Pro Tips (Mistakes May Have Happened)
- Don’t skip the overnight soak—I once tried to microwave it to “speed things up” and ended up with a sad bowl of gluey gloop. Not worth the cleanup.
- Press those cereal bits when straining! All the flavor lives there (but on second thought, don’t squeeze so hard that you get mush in your milk…kinda defeats the purpose).
- Also, don’t over-sweeten until after it’s sat a while—cereal milk gets sweeter just sitting around, which I learned after one unfortunate sugar overload at 7am.
Frequently Asked & Slightly Quirky Questions
- Can I make these vegan?
- Absolutely! Any plant milk you like—oat, almond, whatever. Just check your cereal for sneaky gelatin if you want totally plant-based.
- Do they get soggy?
- Yep, in the best way. If you love a crunchy bite, just toss more cereal on top before serving. Or leave out the topping if you hate that idea; no one’s watching.
- Can I heat them up?
- You can, but honestly, they lose their cereal-milk magic warm. That said, sometimes I zap a bowl on a cold morning (covers face in shame), and it’s still tasty.
- Can I use flavored oat milk?
- Shoot, yes. In fact, vanilla oat milk is delicious here. Whatever gets you through the week!
- Is there a gluten-free version?
- Just pick gluten-free oats and a gluten-free cereal. Easy peasy.
Not that you need to, but if you find yourself wandering the kitchen at 1am, these oats make a fantastic midnight snack. Ask me how I know. Anyway, happy cereal-ing!
Ingredients
- 2/3 cup old-fashioned rolled oats (sometimes I use quick oats if that’s all I’ve got; steel-cut doesn’t really work unless you like chewing forever)
- 1 cup milk (dairy or whatever fancy nut milk you have—my grandmother swears by whole milk but I’m not picky)
- 1/2 cup kid’s cereal (I usually grab Froot Loops, Lucky Charms, or Frosted Flakes, but any sweet-ish cereal will do)
- 1 tablespoon chia seeds (optional—I sometimes forget these, still tastes good)
- 1 tablespoon honey or maple syrup (I go for maple, but you do you)
- Pinch of salt (don’t skip this! Makes a big difference, says my taste buds)
- 1/2 teaspoon vanilla extract (optional but so good)
Instructions
-
1Pour your cereal into the milk and let it soak for 10 minutes or so. Stir it once or twice. The longer it sits, the stronger the cereal milk vibes. (Yes, it’ll look a little mushy. Good!)
-
2Strain the milk into a jar or bowl, pressing the cereal to get all that sweet goodness out. I actually nibble a few soggy pieces at this point—no regrets. Toss or eat the cereal bits, up to you.
-
3Add the oats, chia seeds, honey/maple, vanilla, and salt to the milk. Stir it all up—if it looks a bit runny, don’t worry, oats slurp it up overnight.
-
4Cover and chill in the fridge, minimum 4 hours but overnight is better (I mean, it’s in the name). I almost always forget and leave mine for 10 hours. Works fine!
-
5In the morning, give it a stir (some oats always stick to the sides). Top with an extra sprinkle of cereal for crunch, or, if you’re like my dad, a handful of mini marshmallows. Enjoy cold straight from the jar—morning speed run!
CLICK FOR NUTRITION INFO
↑
Approximate Information for One Serving
Serving Size:
1 serving
Calories:
310cal
Protein:
10 gg
Fat:
7 gg
Saturated Fat:
0g
Trans Fat:
0g
Cholesterol:
0mg
Sodium:
0mg
Potassium:
0mg
Total Carbs:
56 gg
Fiber:
0g
Sugar:
0g
Net Carbs:
0g
Vitamin A:
0
Vitamin C:
0mg
Calcium:
0mg
Iron:
0mg
Nutrition Disclaimers
Number of total servings shown is approximate. Actual number of servings will depend on your preferred portion sizes.
Nutritional values shown are general guidelines and reflect information for 1 serving using the ingredients listed, not including any optional ingredients. Actual macros may vary slightly depending on specific brands and types of ingredients used.
To determine the weight of one serving, prepare the recipe as instructed. Weigh the finished recipe, then divide the weight of the finished recipe (not including the weight of the container the food is in) by the desired number of servings. Result will be the weight of one serving.
Did you make this recipe?
Please consider Pinning it!