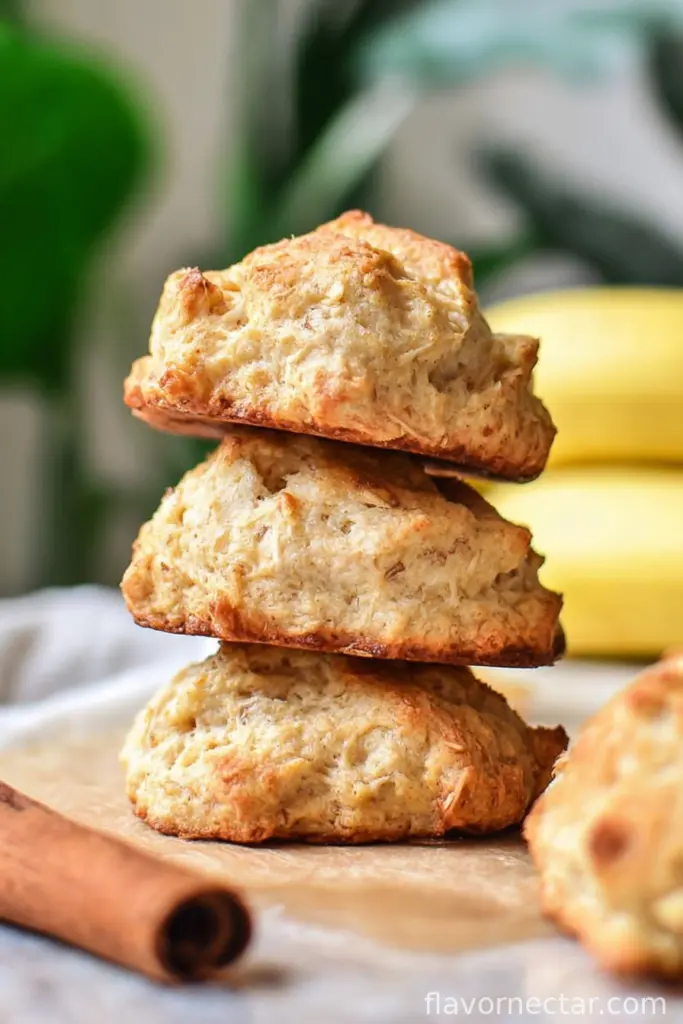
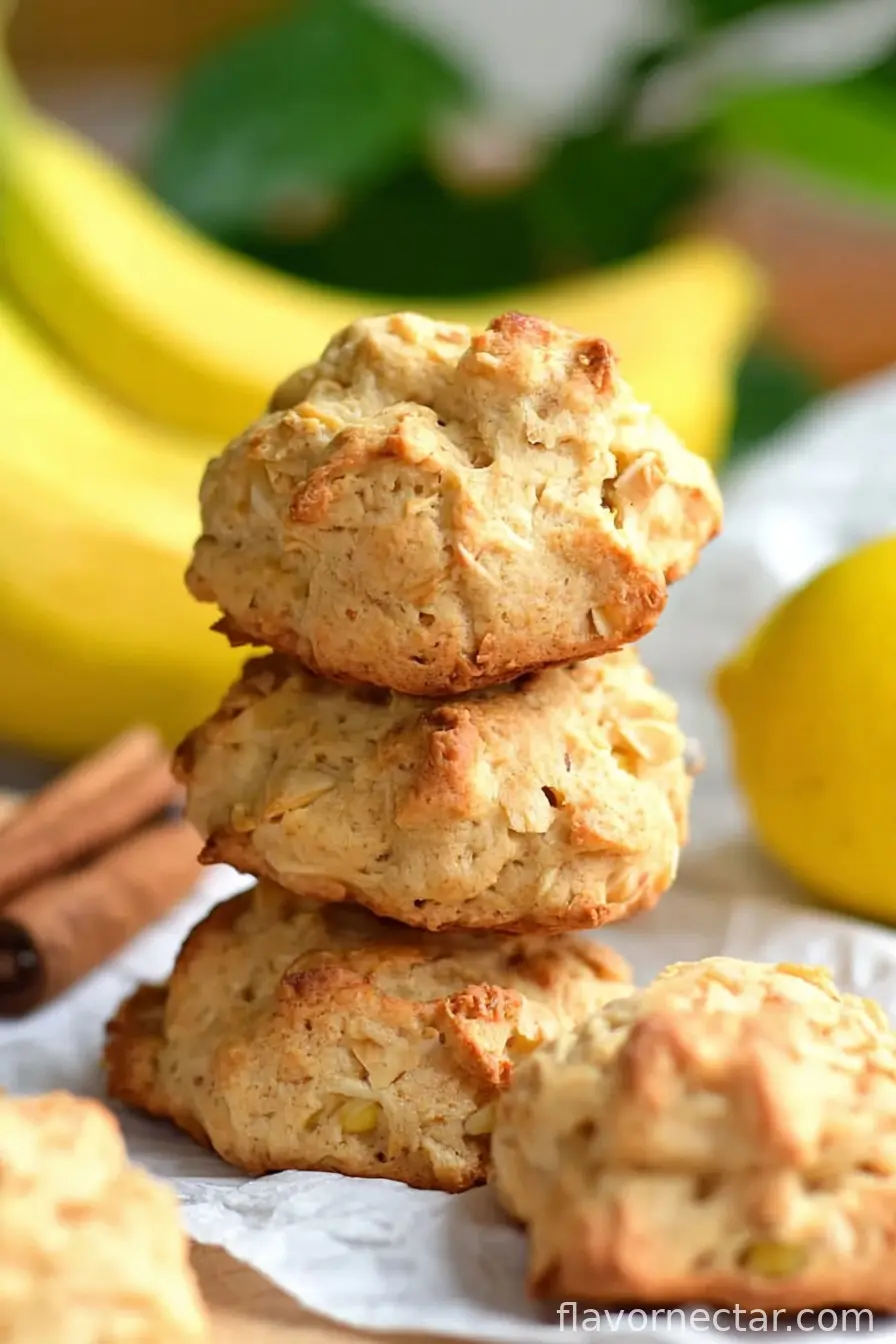
Can I just say: these 3-ingredient banana cookies (vegan, too!) have bailed me out of more snack emergencies than I care to admit. There was that rainy afternoon when the only ripe thing in my kitchen was a pair of neglected bananas and, honestly, I was too lazy to (literally) dig out my mixer. But that’s the magic here: no fancy gear, hardly any mess—just gooey, homemade cookies in under half an hour. Oh, and once I tried tossing in cinnamon because why not? My sister claimed they tasted like banana bread met a cookie at a vegan potluck… I’ll take it!

Why You’ll Love This Little Recipe
I make these banana cookies when I’m asked for “something sweet but not too sweet” (which, in my house, is basically daily). My family goes a bit bananas for them, especially when I throw in some dairy-free chocolate chips. They take all of ten-ish minutes to prep—if you can stop yourself from eating half the dough in the process. Plus, they’re kind of forgiving; I once mis-measured the flour and they still turned out more or less edible. That’s a win in my book.
Here’s What You’ll Need
- 2 medium Bananas (about 1 cup mashed) – I use those borderline brown ones lurking in the fruit bowl; they mash up easiest. My gran swears by Chiquita, but I’m not brand-loyal, to be honest.
- ¼ cup Maple Syrup – If I’m out, I’ve cheated with agave—it works but tastes a touch different. Honey’s not vegan, so I skip that.
- 1 cup Self-Rising Flour – Occasionally, I just mix 1 cup all-purpose flour with 1½ tsp baking powder and a pinch of salt when I’m out of the self-rising stuff.
- Add-ons (optional, but let’s be real, always recommended):
- ⅓ cup Dairy-Free Dark Chocolate Chips – Any type will do. Sometimes I go wild with chopped nuts too.
- ½ teaspoon Cinnamon – It makes the kitchen smell like autumn even when it’s July.
- ¼ teaspoon Salt – Not always necessary, but it brings the flavors together.
- 1 teaspoon Vanilla Extract – The fake stuff works in a pinch, promise I won’t tell anyone.
How To Make ‘Em (My Way)
- First off, get your oven nice and toasty—preheat it to 350°F (about 180°C). I line a baking tray with parchment (otherwise things get sticky), then swipe a little oil across it. No parchment? Foil works—but oil is even more vital here.
- Grab a bowl, medium-ish is fine. Toss in your peeled bananas and mash away with a fork; they don’t need to be totally smooth—some lumps make for tasty surprises. You’ll want to be sure you’ve got about a cup’s worth once mashed (don’t fuss: eyeballing is okay, but err on the side of more banana for softer cookies).
- Now pour in the maple syrup and give it a quick stir. Add your self-rising flour next. Mix until it comes together in a sticky, goopy dough. This is the “wait, is this actually working?” stage. It’ll look a little odd if you’ve never made banana bread batter before—but just keep mixing. If you’re adding in chocolate chips, cinnamon, vanilla, or salt, now’s the time.
- Using two spoons or a cookie scoop (if you’re feeling fancy—I’m usually not), plop little heaps of the dough onto your lined tray. Leave about a thumb’s width between each one. They won’t spread much, so don’t worry about perfect spacing.
- If you want prettier, round cookies, gently flatten and shape each heap with the back of your spoon. No need for perfection—rustic is charming! (This is where I snag a chocolate chip or two… totally optional.)
- Bake for about 12-15 minutes. Peek at 12—look for light golden tops. If you like things extra-soft, the earlier end is fine, but I tend to go for 14 so they’re barely crisp on the edges. Let them cool a bit before moving, or they might break. (I learned this the hard way, honestly.)
Some Odd Little Notes
- If your bananas aren’t ripe, microwave them (peeled!) for 15-20 seconds. Softer bananas mash easier, which saves serious arm workout time.
- I once microwaved the maple syrup with the banana for a warmer dough, and, well, in retrospect—probably not needed.
- Don’t stress if the cookie dough feels too sticky—self-rising flour thickens it up in the oven. You could add a tablespoon more if it’s still runny, but beware dry cookies!
Variations I’ve Actually Tried
- Pepitas instead of chocolate chips? Good crunch! Chopped dates also work if you want sticky-sweet bites.
- Coconut flakes are fun, but once I added too many and ended up with whatever the opposite of chewy is. So maybe don’t go wild.
- I thought peanut butter would be epic in the mix – it looked promising, but honestly, it made things a bit too dense. Maybe swirl it just on top?
Do You Need Fancy Gear?
I use a good old fork for mashing bananas and a tablespoon for scooping. If you have a cookie scoop, go for it. And if your cookie sheet is missing in action, I’ve baked these right on a pizza pan lined with parchment in a pinch. Anything that’s flatish, really.
How to Store (But Seriously, How Long Will They Even Last?)
In an airtight container, these keep well on the counter for 2 days—though honestly, they rarely make it past day one in my house. For longer storage, toss ’em in the fridge. Funny enough, I think they taste even better the next day, chewier somehow!
When and How to Serve
I like them best with a mug of coffee in the afternoon. But my nephew dips them in oat milk and insists that’s the “correct” way. For breakfast, stack a couple and add a smear of almond butter. Or scatter them in a lunchbox—guaranteed hero move.
Learned the Hard Way (Pro Tips)
- I once tried to rush baking time because I was impatient. Ended up with mush in the middle. Patience pays (but peeking’s fine!).
- Don’t skip oiling the paper—otherwise, you’ll be prying cookies off with a spatula and some colorful language.
- Resist the urge to overbake; these firm up as they cool.
FAQ – You Actually Asked!
- Can I freeze these? Sure! Let them cool, freeze in a single layer, then bag up. Not that I’ve ever had leftovers to test that thoroughly.
- What if I don’t have self-rising flour? Just use plain flour plus a small pinch (about 1 ½ tsp) baking powder and a bit (say, 1/8 tsp) salt. Or, to be perfectly honest, I just guess and they’re always edible.
- Are they gluten-free? Not as written, but I did try with some 1-to-1 GF blend once. They came out a bit more crumbly, but still tasty!
- Why aren’t my cookies spreading? That’s normal—they stay pretty much the same size as when you dollop them onto the tray, so shape as you wish pre-baking.
- Can kids make these? Absolutely! My niece makes them (with a little oven supervision, of course). Less mess than slime, too.
Seriously, once you make these, you’ll find yourself making them whenever that browning banana starts calling your name. Or when you just want soft, cozy cookies that feel like a hug—without destroying your kitchen. Cheers, mate!
Ingredients
- 2 medium Banana – (note 1)
- ¼ cup Maple Syrup – (note 2)
- 1 cup Self-Rising Flour – (note 3)
- Add-ons – optional but recommended for flavors
- ⅓ cup Dairy-Free Dark Chocolate Chips
- ½ teaspoon Cinnamon
- ¼ teaspoon Salt
- 1 teaspoon Vanilla Extract
Instructions
-
1First off, get your oven nice and toasty—preheat it to 350°F (about 180°C). I line a baking tray with parchment (otherwise things get sticky), then swipe a little oil across it. No parchment? Foil works—but oil is even more vital here.
-
2Grab a bowl, medium-ish is fine. Toss in your peeled bananas and mash away with a fork; they don’t need to be totally smooth—some lumps make for tasty surprises. You’ll want to be sure you’ve got about a cup’s worth once mashed (don’t fuss: eyeballing is okay, but err on the side of more banana for softer cookies).
-
3Now pour in the maple syrup and give it a quick stir. Add your self-rising flour next. Mix until it comes together in a sticky, goopy dough. This is the “wait, is this actually working?” stage. It’ll look a little odd if you’ve never made banana bread batter before—but just keep mixing. If you’re adding in chocolate chips, cinnamon, vanilla, or salt, now’s the time.
-
4Using two spoons or a cookie scoop (if you’re feeling fancy—I’m usually not), plop little heaps of the dough onto your lined tray. Leave about a thumb’s width between each one. They won’t spread much, so don’t worry about perfect spacing.
-
5If you want prettier, round cookies, gently flatten and shape each heap with the back of your spoon. No need for perfection—rustic is charming! (This is where I snag a chocolate chip or two… totally optional.)
-
6Bake for about 12-15 minutes. Peek at 12—look for light golden tops. If you like things extra-soft, the earlier end is fine, but I tend to go for 14 so they’re barely crisp on the edges. Let them cool a bit before moving, or they might break. (I learned this the hard way, honestly.)
CLICK FOR NUTRITION INFO
↑
Approximate Information for One Serving
Serving Size:
1 serving
Calories:
95cal
Protein:
1.8 gg
Fat:
2.5 gg
Saturated Fat:
0g
Trans Fat:
0g
Cholesterol:
0mg
Sodium:
0mg
Potassium:
0mg
Total Carbs:
18 gg
Fiber:
0g
Sugar:
0g
Net Carbs:
0g
Vitamin A:
0
Vitamin C:
0mg
Calcium:
0mg
Iron:
0mg
Nutrition Disclaimers
Number of total servings shown is approximate. Actual number of servings will depend on your preferred portion sizes.
Nutritional values shown are general guidelines and reflect information for 1 serving using the ingredients listed, not including any optional ingredients. Actual macros may vary slightly depending on specific brands and types of ingredients used.
To determine the weight of one serving, prepare the recipe as instructed. Weigh the finished recipe, then divide the weight of the finished recipe (not including the weight of the container the food is in) by the desired number of servings. Result will be the weight of one serving.
Did you make this recipe?
Please consider Pinning it!